Skip to Content

Christmas Picture frames with wreaths The Lazy Way

Sharing is caring!

We are officially into Christmas season!  And that means I get to share my decorating with you. Let’s start things off with my upcycled Christmas picture frames with wreaths the lazy way.

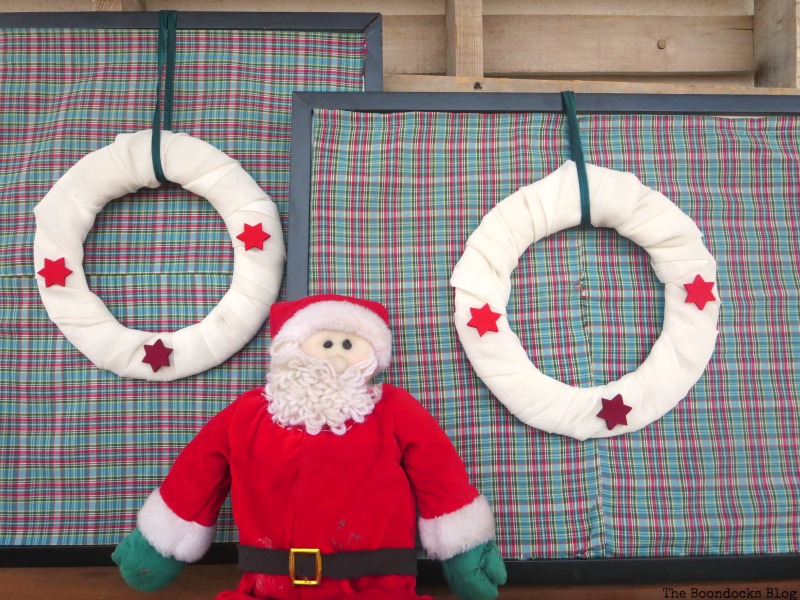
Today I’m going to show you just how sneaky I can be.  I had this lovely set of Ikea picture frames over the sofa.  For the past year they had housed Georgia O’ Keefe, but when I had the Halloween party I wanted to add something frightful in them and so I opened them up and that is when this happened.  I broke the glass in one of them. 

The Picture frames for Halloween, Christmas Picture Frames with Wreaths the Lazy Way www.theboondocksblog.com

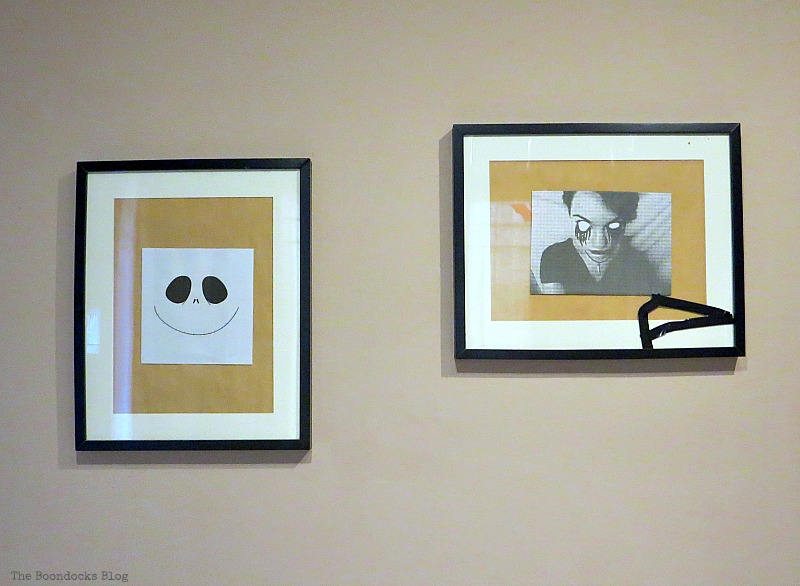
​Well  you know me, I wasn’t going to do anything about it.  Too busy, too lazy, too cheap, you pick my excuse.  The truth is I was in a rush to decorate and I wanted to stretch myself a bit and not do what I had done last year, which was add two vintagy looking Christmas cards in the frames.  

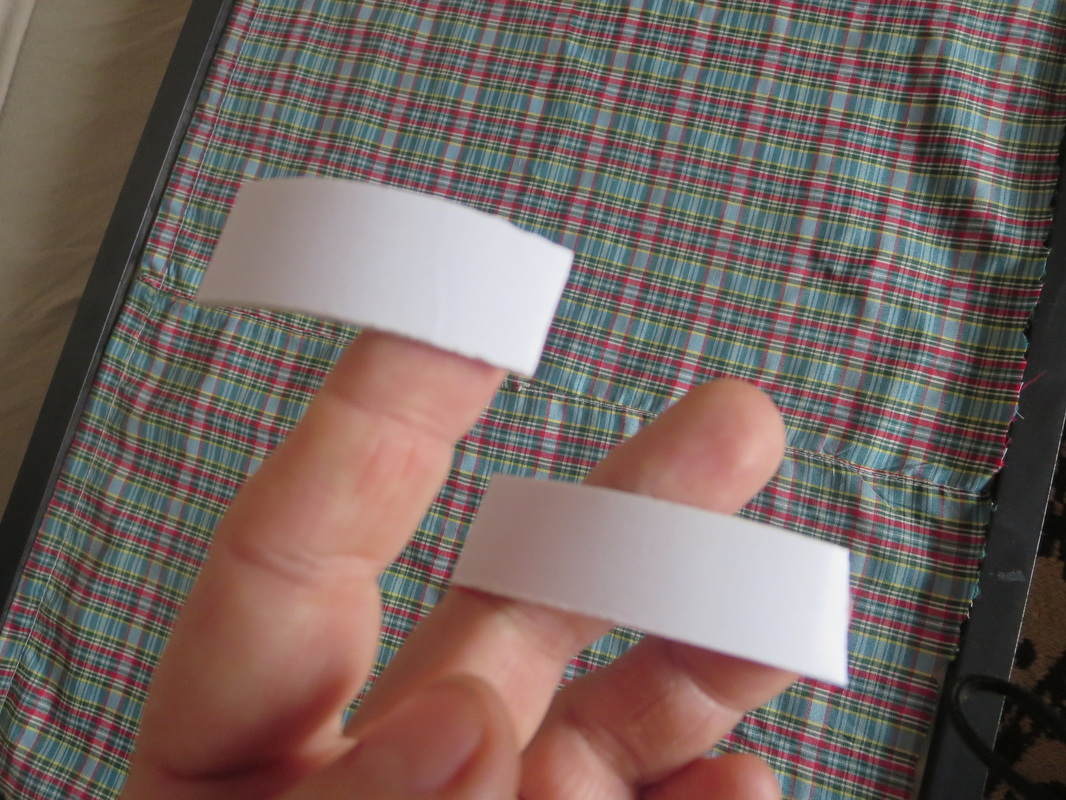
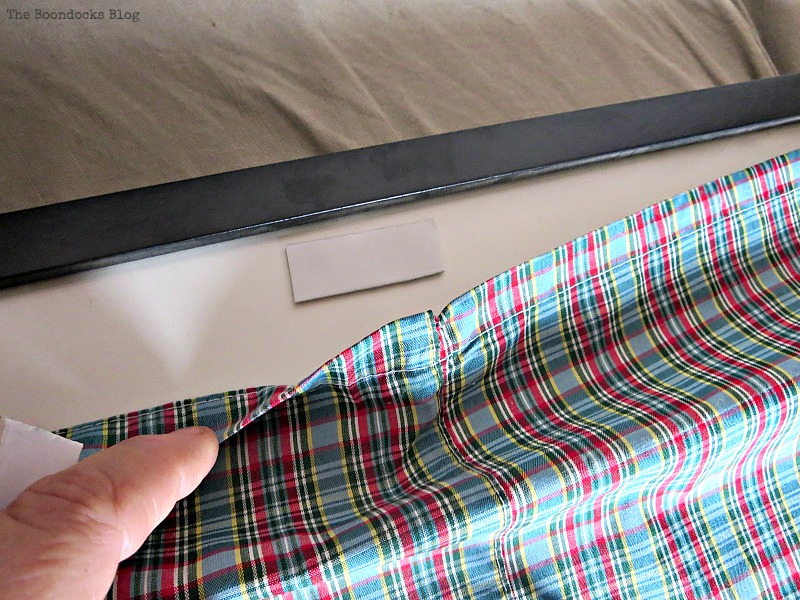
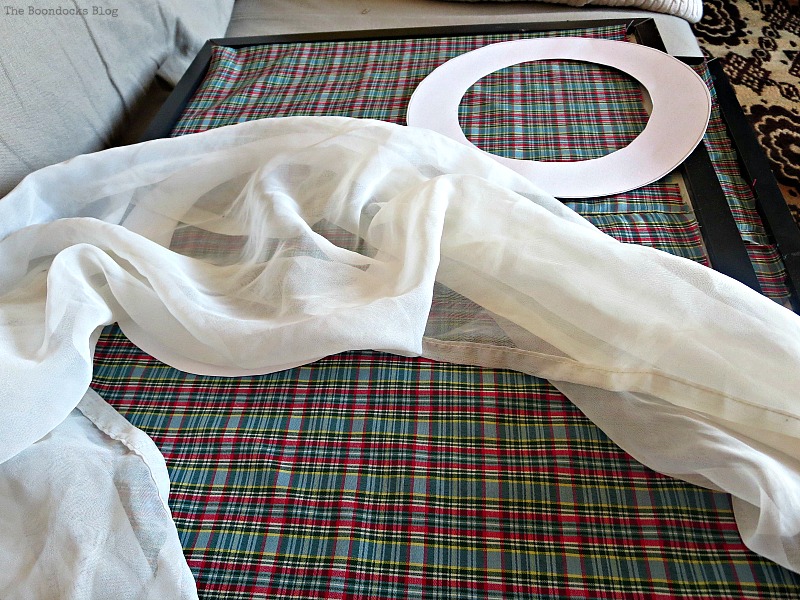
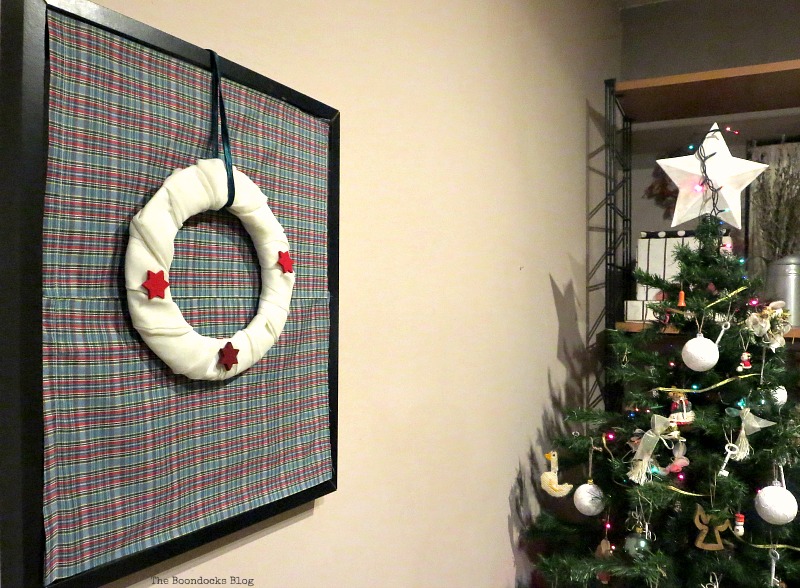
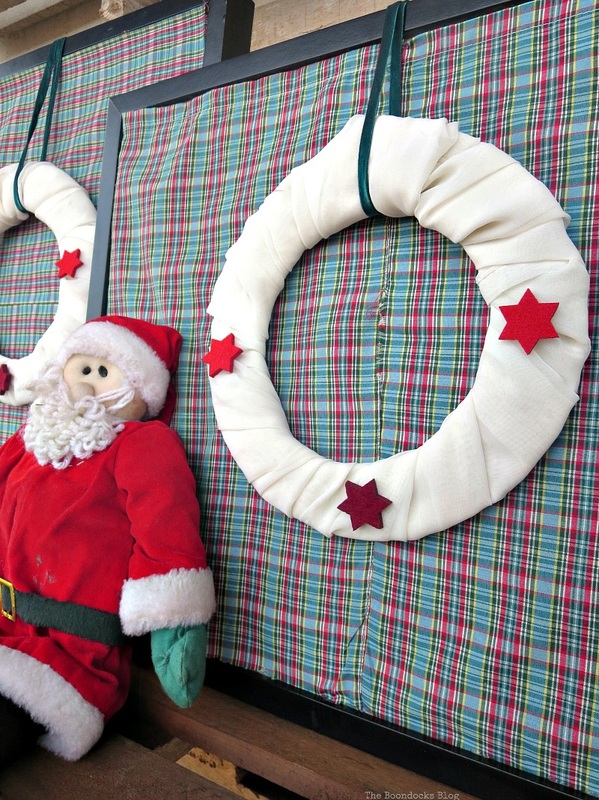
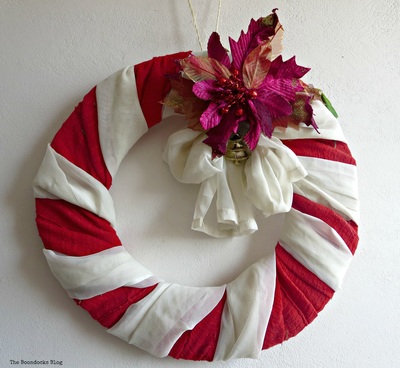
I am working on toning down the red for this year’s Christmas theme and I really liked this plaid fabric. It had once been a pair of shorts but no one ever wore them so…. I cut it into rectangles fitting over the frames, and using some sticky tape, taped the fabric over the glass. This was a new idea for me because usually I add paper or cards to frames but I had never added fabric in this way before.  It is a simple and temporary solution. I promise to get the glass changed, but after the holidays!

Adding fabric with sticky tape to the glass, Christmas Picture Frames with Wreaths the Lazy Way www.theboondocksblog.com
On the edges and in the middle. 
Sticky tape all over the glass, Christmas Picture Frames with Wreaths the Lazy Way www.theboondocksblog.com
I then cut out a donut shaped cardboard.  I used two bowls of varying sizes to get the shape. Scientific percision and all!
Making a wreath by cutting out a donut shaped cardboard, Christmas Picture Frames with Wreaths the Lazy Way www.theboondocksblog.com

​I also had this long piece of chiffon-like fabric.  This was a piece left over from a curtain I had made years ago. 
Chiffon fabric from a curtain repurposed, Christmas Picture Frames with Wreaths the Lazy Way www.theboondocksblog.com
I was able to reuse the fabric by cutting it in two and wrapped it around each donut.  I then secured it in the back with a stapler. 
Wrapping the chiffon fabric around the donut shapes to make wreaths, Christmas Picture Frames with Wreaths the Lazy Way www.theboondocksblog.com
Using a pretty green ribbon I was able to hang the donut shapes, or wreaths because that is what they’ve been turned into, from the back of the frames. 
Adding ribbon to the top of the wreaths to secure them on the frame, Christmas Picture Frames with Wreaths the Lazy Way www.theboondocksblog.com
But as pretty as that was, it was too bare.  I added three felt stars to each of the wreaths with some glue. This was a direct contradiction to my plan of eliminating red!
Adding red stars to the wreaths, Christmas Picture Frames with Wreaths the Lazy Way www.theboondocksblog.com

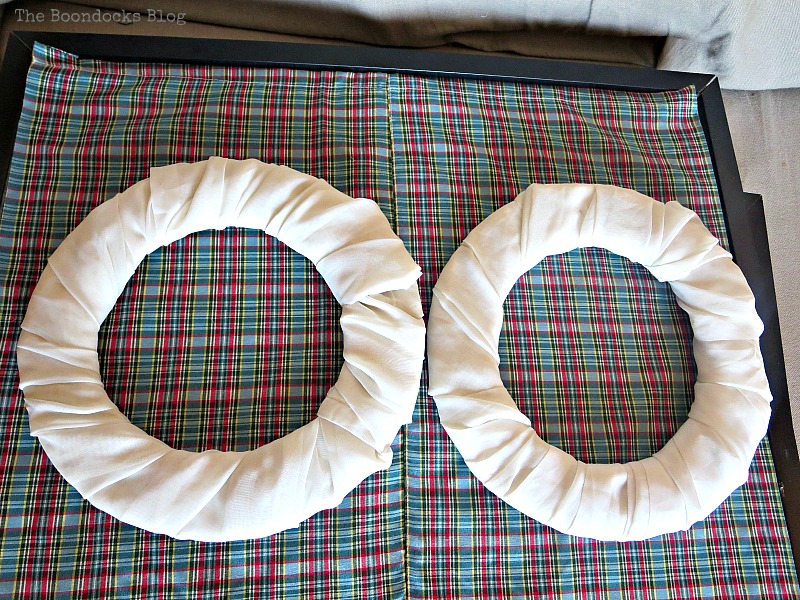
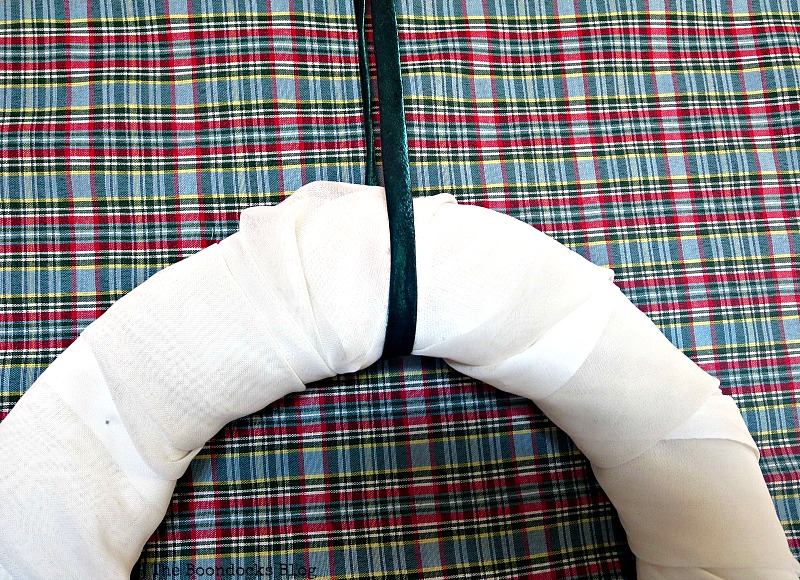
​These are my Christmas picture frames with wreaths. 
Finished wreaths and frames with Santa, Christmas Picture Frames with Wreaths the Lazy Way www.theboondocksblog.com
I think it is just enough color since I am not going to go crazy this year. Just a small pop of red…well, except for Santa.  But he can’t help it. He gets lots of red, because he’s Santa! No changing that!!
Close up of wreath, Christmas Picture Frames with Wreaths the Lazy Way www.theboondocksblog.com
Here they are on the wall.  I was able to use what I had at home and only ended up buying the red stars – the one thing I said I would not be using. I guess my decorating plans are going out the window! Haha !!
Hanging on the wall, Christmas Picture Frames with Wreaths the Lazy Way www.theboondocksblog.com
And next to the tree.  I’m not done with it yet. But I will show it soon. 
Next to the tree, Christmas Picture Frames with Wreaths the Lazy Way www.theboondocksblog.com
Santa with the picture frames, Christmas Picture Frames with Wreaths the Lazy Way www.theboondocksblog.com
Do you think I’m being lazy?  Well, maybe I am but this crack in the glass certainly made me think outside the box and come up with this new idea for me, to hide the glass with the fabric.  I like this new subdued look to my walls.
​ 
Covering the glass with fabric, Christmas Picture Frames with Wreaths the Lazy Way www.theboondocksblog.com

Do you ever stumble upon new ideas out of sheer laziness? I hope my Christmas picture frames with wreaths inspires you to think outside your comfort zone and try new things.  And remember to try and reuse what you have at home. 

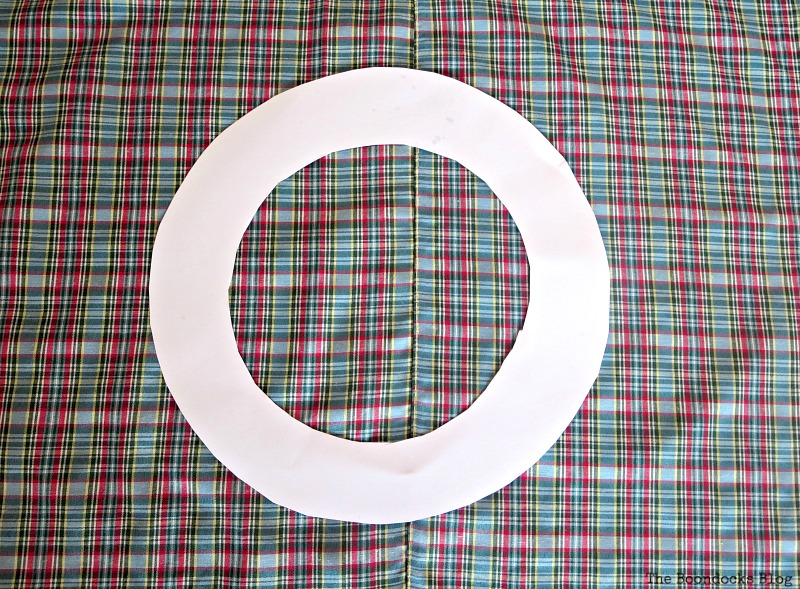
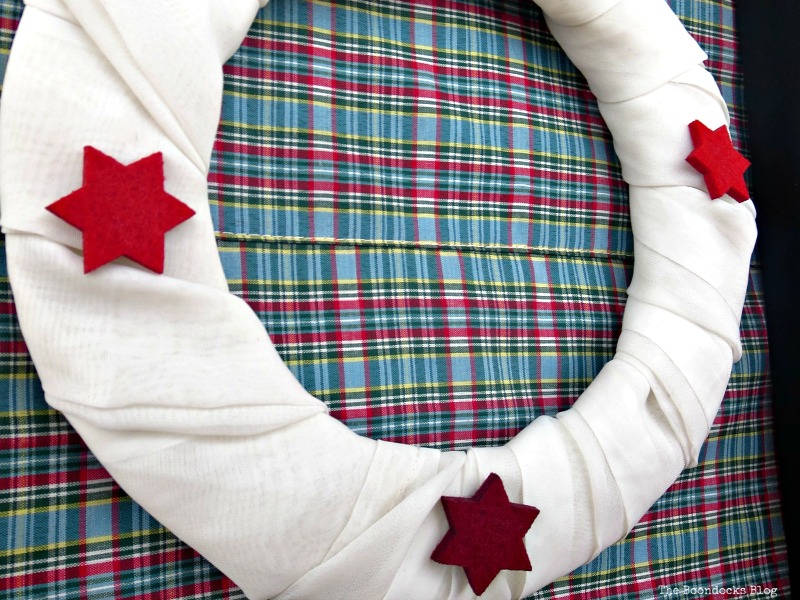
​And now for the big question which I’ve been obsessing over.  In my quest to eliminate the red I ended up adding 3 red stars to the wreaths. This was not the plan at all but they look pretty good.  Should I remove them and just leave the wreaths all white or do you like the red stars?

How to upcycle your Picture frames for Christmas the lazy way by adding wreaths and fabric, Christmas Picture Frames with Wreaths the Lazy Way www.theboondocksblog.com
If you like what you see, share it with your friends, or save it on Pinterest.  Above is a Pinterest worthy image!

​If you really like what you see subscribe to my blog and get my adventures twice a week in your mailbox. The form is on the sidebar and your e-mail will never be shared with a third party.

Picture
Disclosure: The items below are affiliate links and link to Amazon.com. If you purchase any of these products through the links, I receive a small commission, that way I can continue to provide you with lovely content.  There is no extra charge to you for purchasing through my affiliate links.
Holiday related:
<<  Sweet Inspiration #34    HOME      Display for Christmas Cards and Ornaments>>                
This blog is for entertainment purposes only; my DIY tutorials are not professional advice. Read my full disclaimer here.

I love it when I get your comments and I will try reply to them or visit you on your blog. ​Please do not add a hyperlink to your comment, otherwise we cannot publish it.

This site uses Akismet to reduce spam. Learn how your comment data is processed.

botanic bleu

Sunday 11th of December 2016

Mary, Love your scientific way of creating the cardboard circles. Works for me, and I was a high school geometry teacher for too many years to remember. Judith

Carol@blueskykitchen

Monday 28th of November 2016

Mary, that's one of the most resourceful DIY projects I've ever seen. And it turned out really cute. Great job.

Michelle

Monday 28th of November 2016

Bwahaaahahaha I can't believe for a moment that you're lazy Mary. That beautifully creative mind of yours always works overtime and this just proves it. Your lazy-way wreaths are perfect and the stars aren't really red, they're more of a very light maroon. P.S. I have some pajamas that have that same plaid pattern and it's about time for them to be re-purposed. You've just given me a stunning idea. Thank you ;-)

Mary

Saturday 28th of January 2017

Michelle I will be waiting to see what you do with the pajamas!!

Keri

Monday 28th of November 2016

Mary, I like this idea of simply covering the glass with fabric. I don't think it's lazy but clever. The wreaths look great and I think you should keep the red stars; they pull the fabric and the wreaths together. Can't wait to see the tree, looks great so far from what I can see.

Linda at Mixed Kreations

Monday 28th of November 2016

Looks great Mary! Simple yet pretty with just the right amount of color. I like the added touch of the stars giving it just a pop of red. You are right about Santa, nothing you can do about that. He's just red,LOL. I don't think you are lazy at all, I think you just think outside the box on most things, and that is a good thing. Your creativity is always unique, and amazing!

This site uses Akismet to reduce spam. Learn how your comment data is processed.