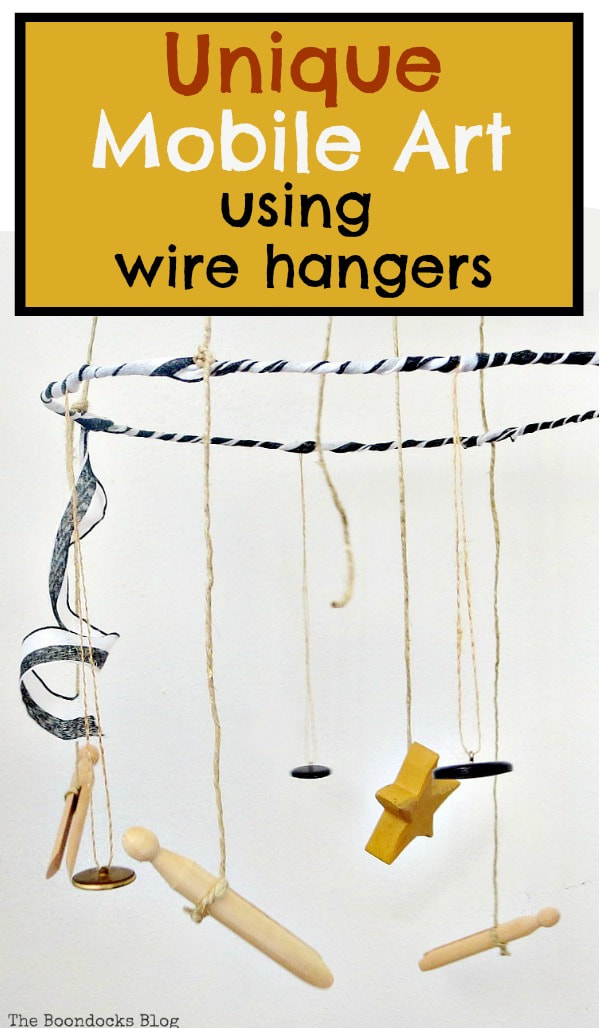
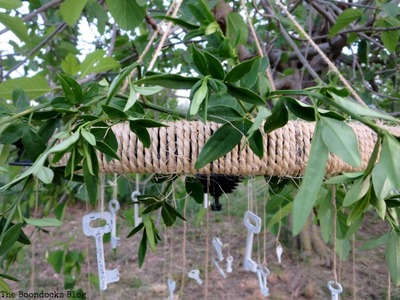
Create a unique art project for your home by making a DIY mobile hanger using metal wire hangers and leftover art materials from your home.
It is my favorite time of the month, the International Bloggers Club Challenge. We are a group of friends from all over the world who get together every month to share our projects and discuss how things are done in our countries. Last time we shared projects for gardening. And the month before it was projects with fabrics. To see what my friends have made this month scroll down to the bottom of this post.
This month we are going to work with wire. I always like a challenge and this one certainly had me in a whimsical kind of mood. I chose to make a unique art mobile with re-purposed wire clothes hangers.

I honestly had no idea what I was going to do for this challenge, till one day my son asked me to pickup his dry cleaning and that was when I spotted the white wire clothes hangers. I decided they would be my starting point for this project.
Disclosure: This post contains affiliate links for your shopping convenience. If you purchase any of these products through the links, we receive a small commission at no extra charge to you. You can find our full disclosure here.
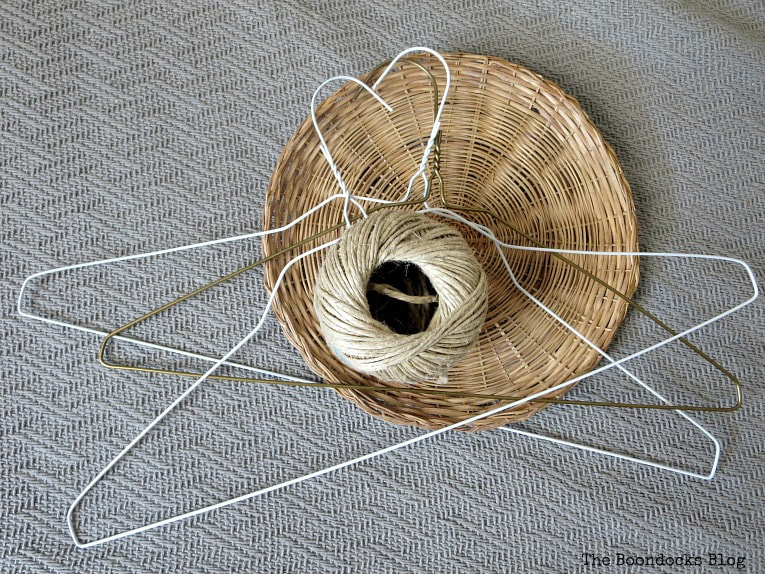
What I Used to Make a Wire Hanger Mobile:
- 2 white wire metal clothing hangers
- pliers
- twine
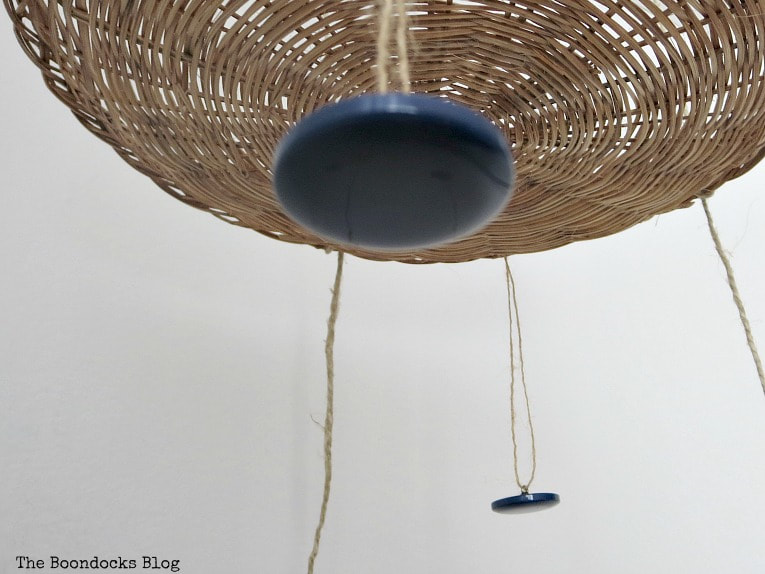
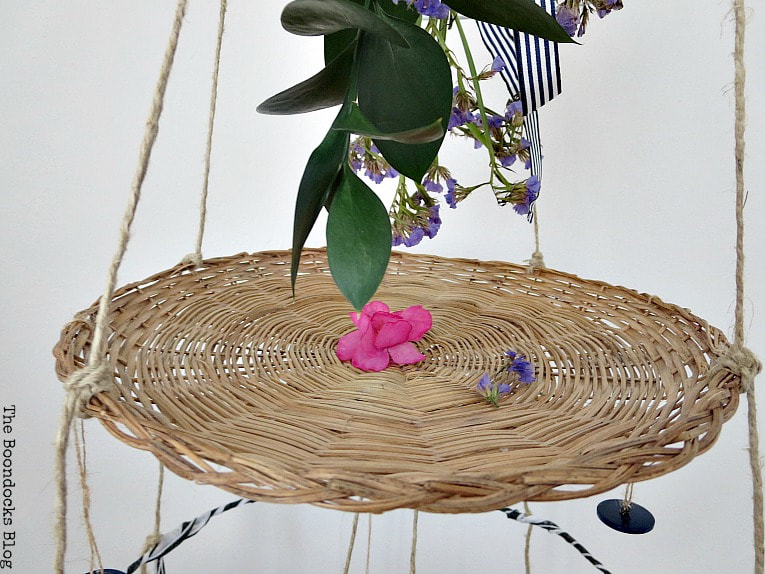
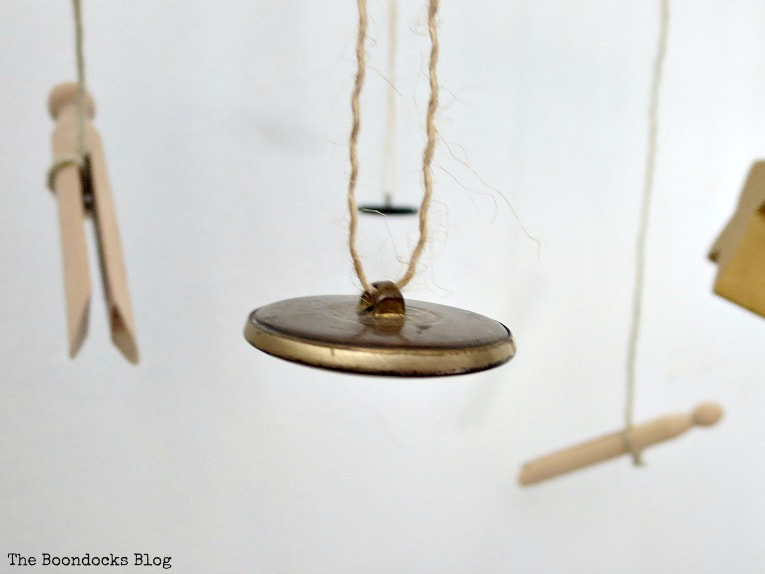
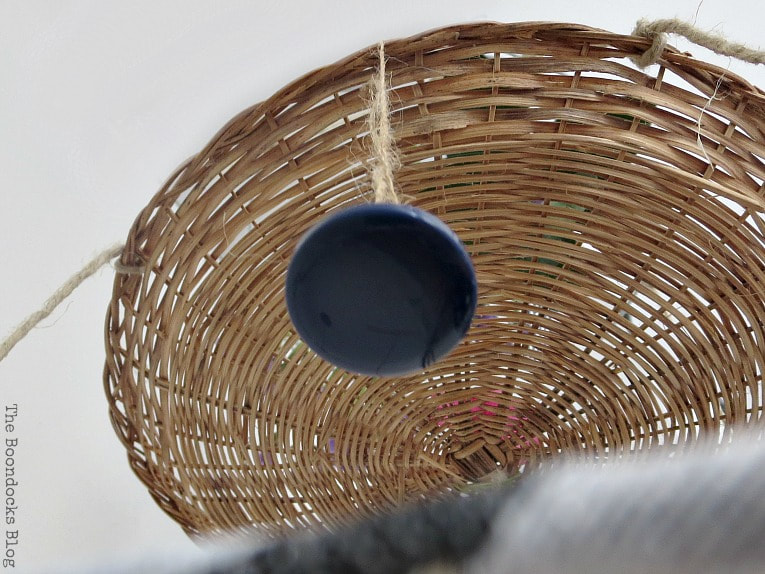
- wicker plate charger
- various buttons
- ribbon
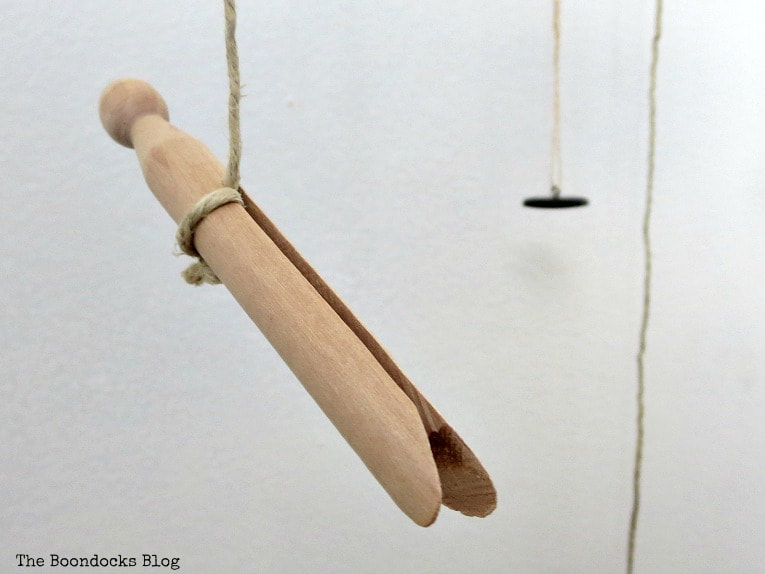
- old fashioned clothes pins
- flowers and leaves
The How To Make a Wire Hanger Mobile:
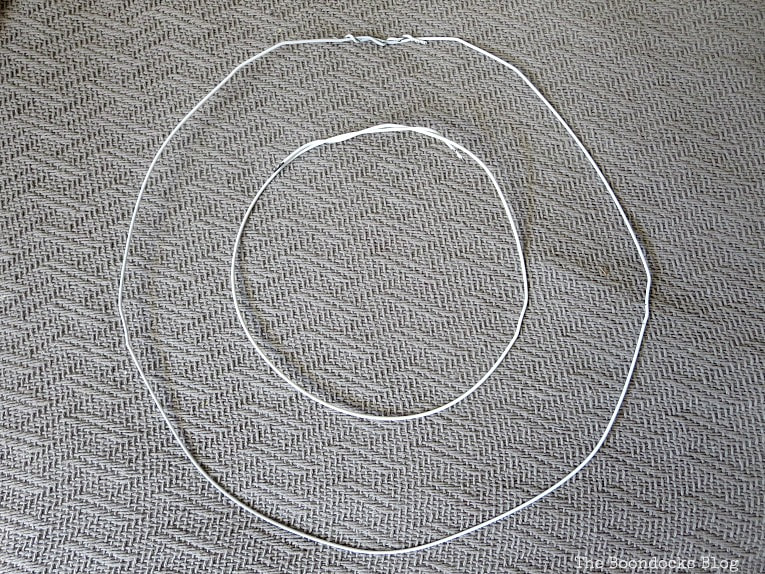
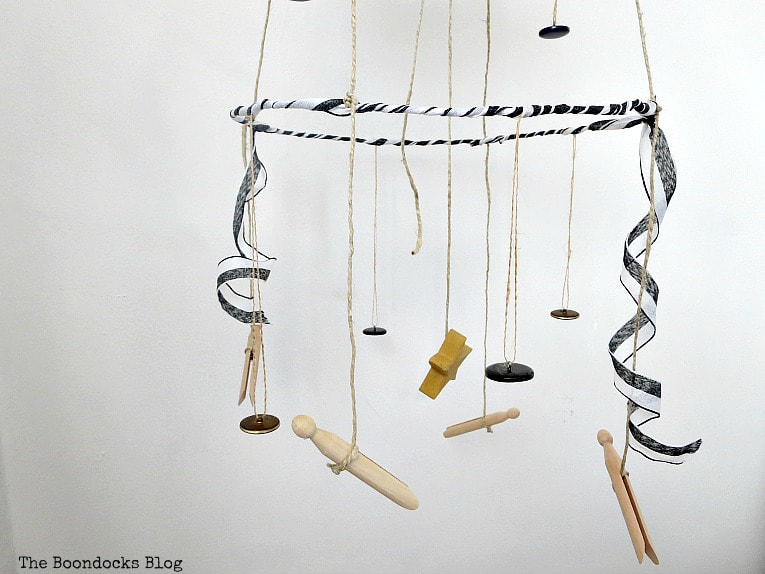
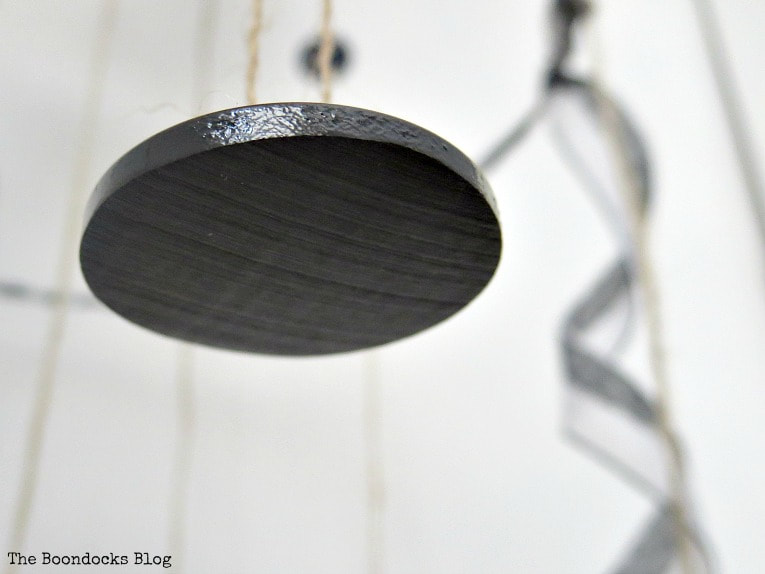
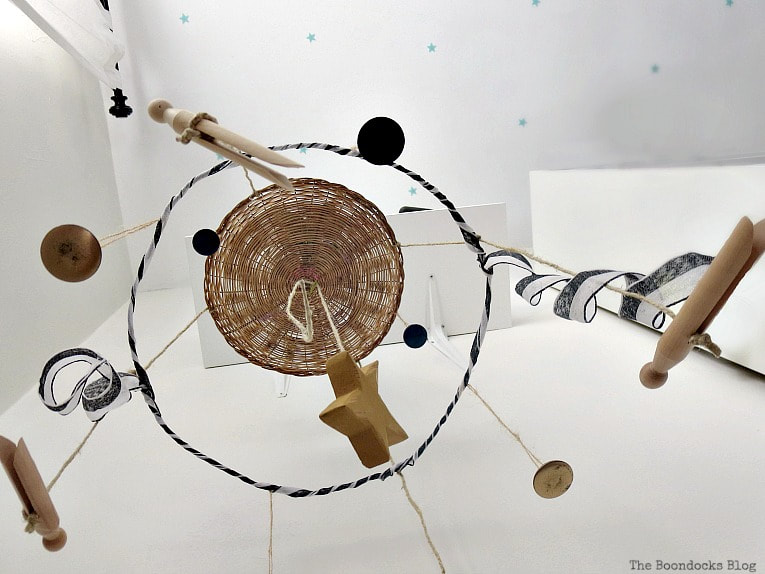
I took the two metal wire hangers (I ended up not using the third one) and opened them up, then using the pliers, shaped them into these circles you see below. I also made sure to make one larger and one smaller than the wicker plate charger.
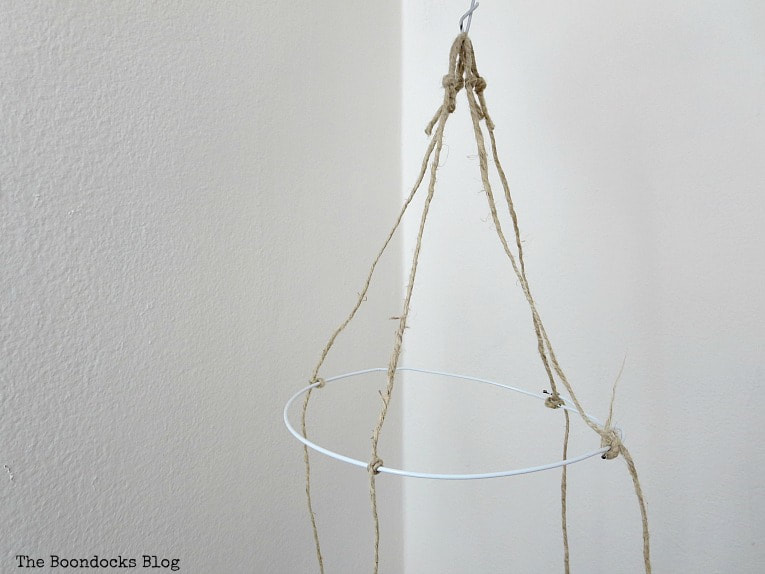
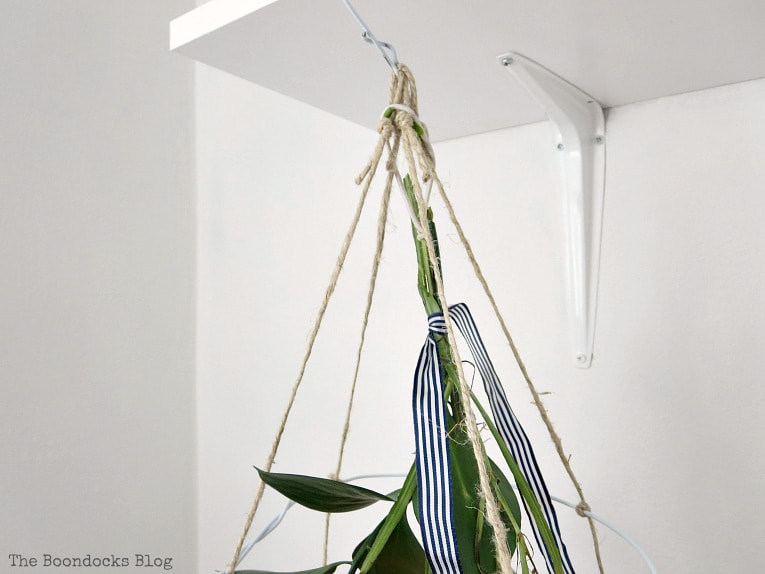
I then cut the twine into four long pieces and made loop holes for them for the top. I then passed the loops inside the hook of the hanger that had been cut off.

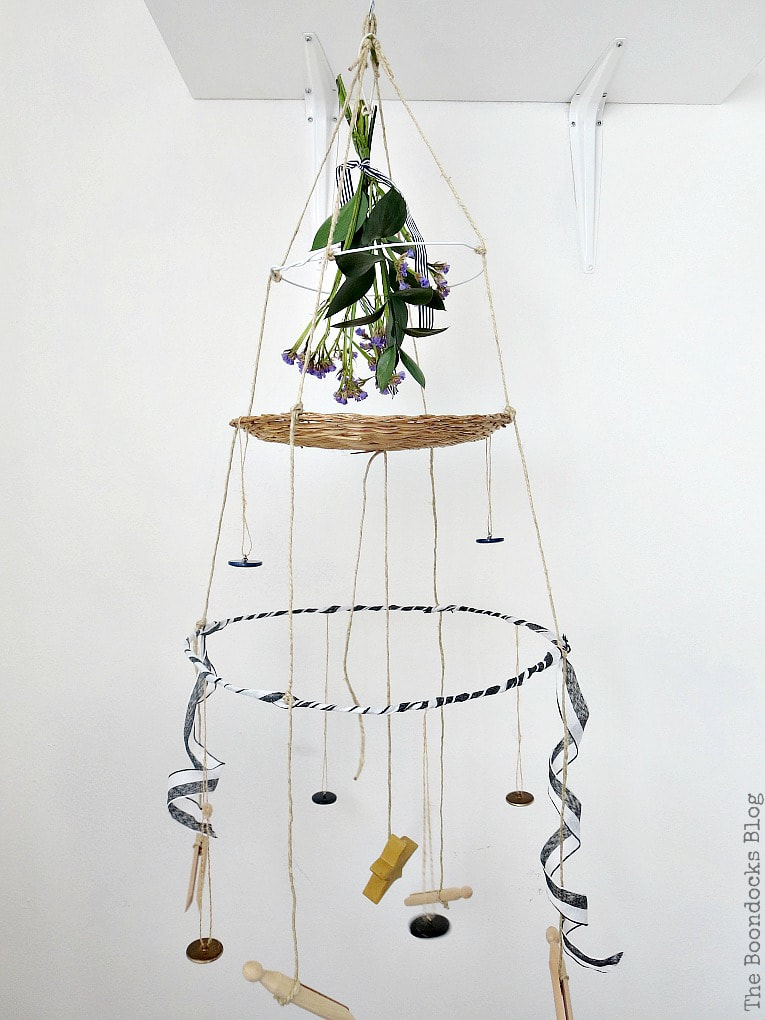
I tied the twine onto four areas on the smaller wire circle. Further down I tied the twine onto four areas of the wicker plate charger, and finally again tied them onto the larger wire circle. So I would now have three tiers.
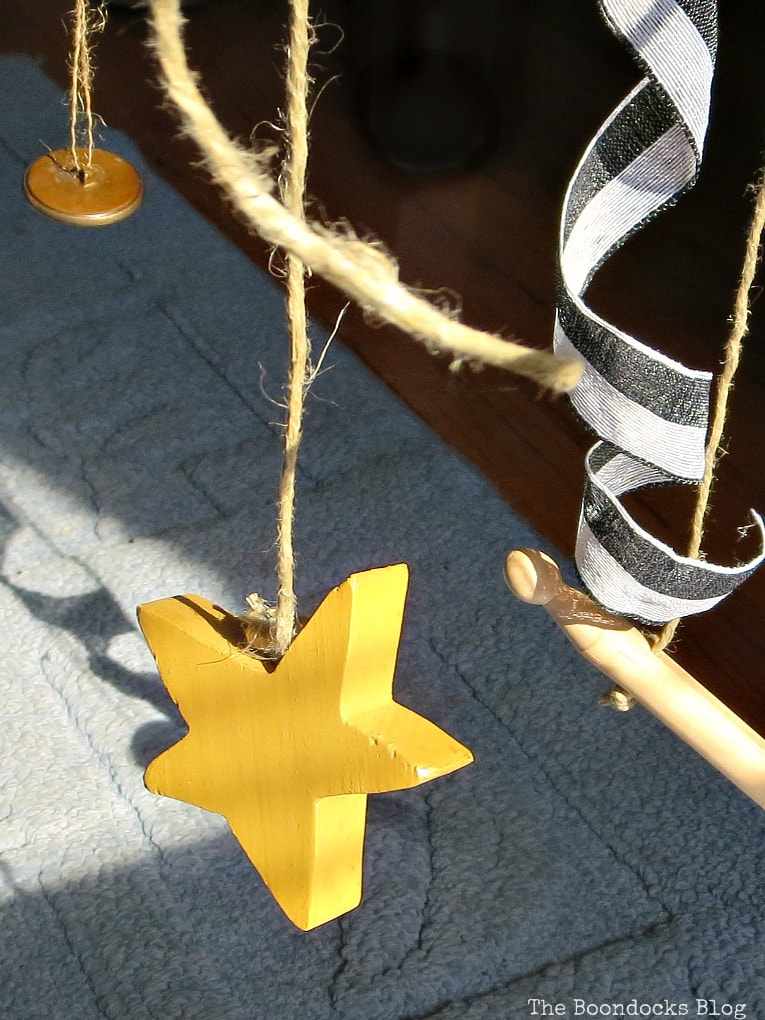
I left the remainder of the twine to hang and attached the old fashioned clothespins. You may recall I used these once before on a wreath project. I like the way they add a rustic feel to any project I’m working on.
I then took thin pieces of twine and looped various large sized buttons through them. They were hung from the wicker plate charger like this.
At this point you may be wondering why I chose to use buttons when something else could have been so much prettier, and my answer is “it’s all about the upcycling folks”. I had just cleaned out my sewing box and had way too many buttons then a person has a right to have! It was time to use some of them up.
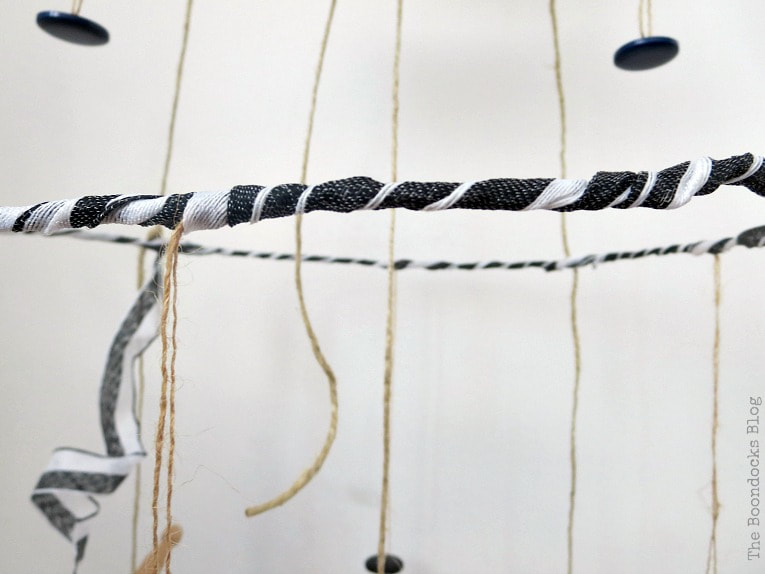
The next step was to add a ribbon all around the large wire circle. This serves two purposes. First, it adds interest, and secondly it keeps the buttons hanging from the thin twine in one place so they don’t slide all over the place. No one wants sliding buttons!
Finally on the top I took a flower and leaves, tied them together and hung this bouquet from the top of the mobile.
I worked primarily with two colors the black of the buttons and the gold or natural color of the twine and these buttons you see below. I think they have a rustic feel to them.
I even added a bit of blue, since I had them I might as well use ’em!
Here is the ribbon which was loosely wrapped around the lower wire circle. The ends were allowed to hang down, like tendrils.
The bouquet was tied together with a ribbon and then hung from the top where the loops where attached to the hook.
And here it is, my one of a kind mobile.
I even added a small wood star in the center just to spice things up a bit.
There are so many different elements in this wire hangers mobile, but I’d like to think they come together beautifully to form something unique.
One other challenge I placed on myself was to create this wire hanger mobile art without spending a dime! And I did manage to achieve this thanks to my fun journey into the sewing box.
Go ahead, take a look at yours and see what you can up-cycle and re-purpose into art!

And when the sun shines on it, well that is the best part. The shadows get to play with the light in the room.
I am really enjoying these forays into projects with different materials with the International Bloggers Club. This certainly was a first for me, because I have never made mobile art before. It was fun and freeing especially since I was able to unload a lot of items that I do not really need. I hope you enjoyed my unique mobile art using wire hangers.
Have you ever made mobile art, and with what?

If you really like what you see subscribe to my blog and get my adventures in your mailbox. The form is on the sidebar and on top. To see my privacy policy click here.
More re-purposing projects:
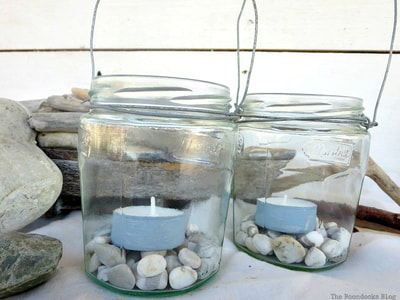
Simple Lanterns with Repurposed Jars
Wind Chime from a Tire Rim
This blog is for entertainment purposes only; my DIY tutorials are not professional advice. Read my full disclaimer here.
Alicia Hursley
Monday 8th of August 2022
Thanks for the awesome ideas! My oldest son just moved out to start college so we are going to redo his room, starting with his closet. I'm kind of sentimental, even about things like hangers, so I would much rather repurpose them than throw them away. This project seems like the perfect way to do that and then use them as decor throughout our home. I'm having a hardwood floor refinishing done in there right now so once that's over I'll head in there and actually remove the old hangers. Thanks again!
Using Upcycled Items to Create a Beachy Vignette - The Boondocks Blog
Friday 10th of July 2020
[…] and discuss how things are done in our countries. Last time we shared projects that were made using wire. And the month before it was projects for […]
Pili
Wednesday 30th of May 2018
That's a great use for those cloth hangers we all have laying around. It would look great under a pergola and I'd add some metal scraps so it could be used as a wind chime too. You are so creative.
Mary
Friday 1st of June 2018
That is a great idea Pili. I was thinking about that too adding metal scraps, but I had to get rid of the buttons first.
Katerina Konstantinou
Wednesday 30th of May 2018
I really love hanger-projects! There are so many of them in my house haha. This turned out so beautiful and inspirational!
Mary
Friday 1st of June 2018
I hope that you can come up with your own version. Really the sky is the limit. Just look inside your junk drawer.
Kim
Wednesday 30th of May 2018
What a fun and whimsical idea, Mary! You could go so many ways with this.
Mary
Saturday 2nd of June 2018
That's right Kim, just look through your junk drawer and I'm sure you'll find plenty of things.