Skip to Content

How to Make Shutter Art With A Stencil the Wrong Way

Sharing is caring!

Sometimes good things come to those when they least expect it.  I had been wanting to make a wall art decoration piece for ages but had never found anything that was right.  Until the day I parked somewhere to wait for my dad and lo and behold…this!

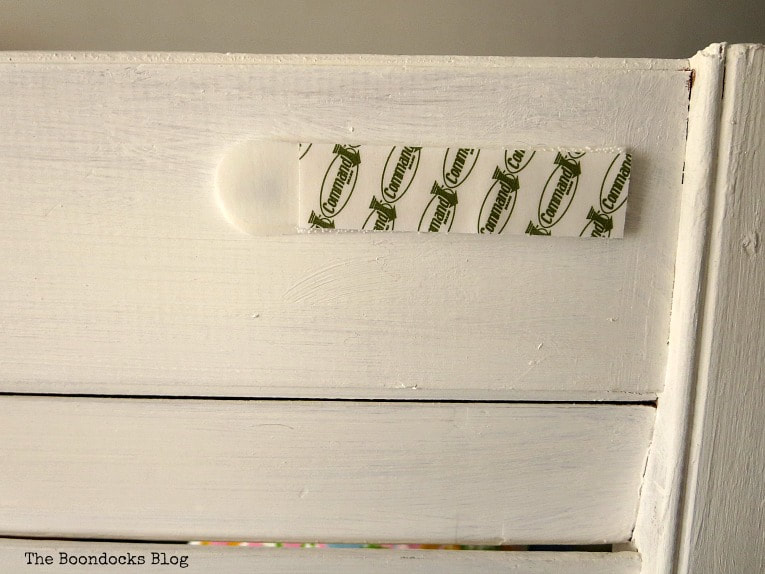
I’m going to share how I made shutter art with a stencil the wrong way so that you can do it the right way!

shutter, before, How to Make Shutter Art with a Stencil the Wrong Way www.theboondocksblog.com
Disclosure: I was compensated for doing this post with product.  However, all the opinions stated here are my own. I only use products I love and would recommend to my viewers. 
​​​​​

But first the back story.  One day I drove my dad to the hospital to visit someone and I had to park the car a few blocks away because this is New York. 

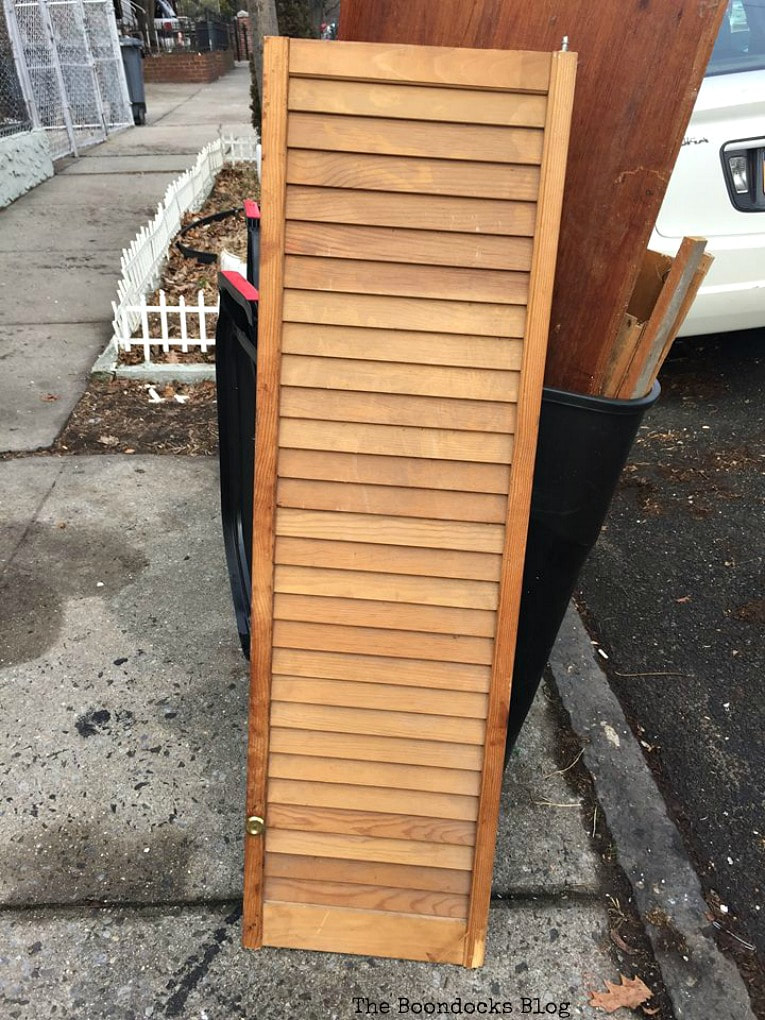
​Imagine my luck when while sitting there a man walked up to the curb and put this beauty outside. I couldn’t believe my eyes.  I waited patiently till he was a few blocks away because you never know, he might of changed his mind and come back for it, and then I jumped out of the car and grabbed this shutter.  I had to literally jam it into the back of the car because it was pretty big.  But you know where there’s a will there will be a way. 

Disclosure: This website contains affiliate links. If you purchase any of these products through the links, I receive a small commission, that way I can continue to provide you with lovely content.  There is no extra charge to you for purchasing through my affiliate links.

What I Used:

The How to:

The project started out simple enough.  After thoroughly wiping down the shutter, I painted it with the chalky finish paint.  This is a favorite and is my go to chalky type paint. 
Painting the shutter with chalky finish paint, How to Make Shutter Art with a Stencil the Wrong Way www.theboondocksblog.com
Two coats did the trick and all it took was about half an hour.  The paint dries really fast but those slats took a while to paint.
Shutter painted white, How to Make Shutter Art with a Stencil the Wrong Way www.theboondocksblog.com
The inspiration for this project came about because of this vintage TV cabinet in my living room.  You can see that it has this beautiful detailing on it.  I would be placing the shutter on a wall opposite   this wall and I wanted to carry over that theme of the swirls. 
Inspiration for stencil from tv cabinet with scrolls, How to Make Shutter Art with a Stencil the Wrong Way www.theboondocksblog.com
I had originally ordered a Fleur di Lis but then decided against it and instead found this stencil at Michael’s that more closely resembled the look I was going for. Here is a similar one.
Stencil with scrolls, How to Make Shutter Art with a Stencil the Wrong Way www.theboondocksblog.com
AntiqueFarmHouse

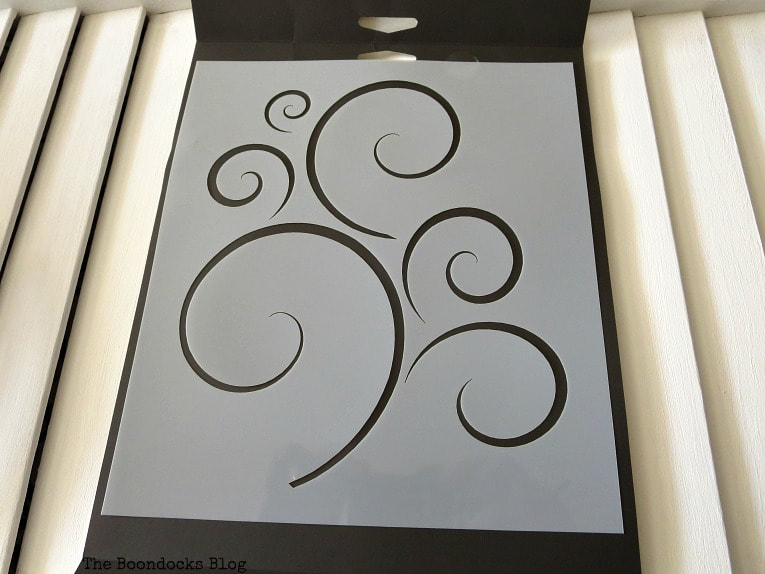
​Now I had done stenciling before so I felt confident that I would be able to knock this one out in a matter of minutes.  After all it was simpler than the Fleur De Lis I had nixed. Haha!  

A lesson I have yet to learn is that one should never be overconfident in their skills. EVER!  Case in point, this project which defeated me because I was too smug for my own good!

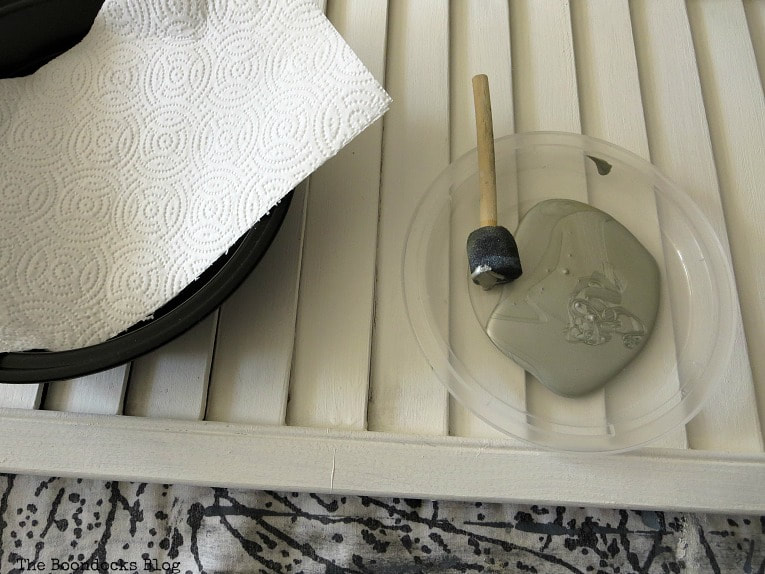
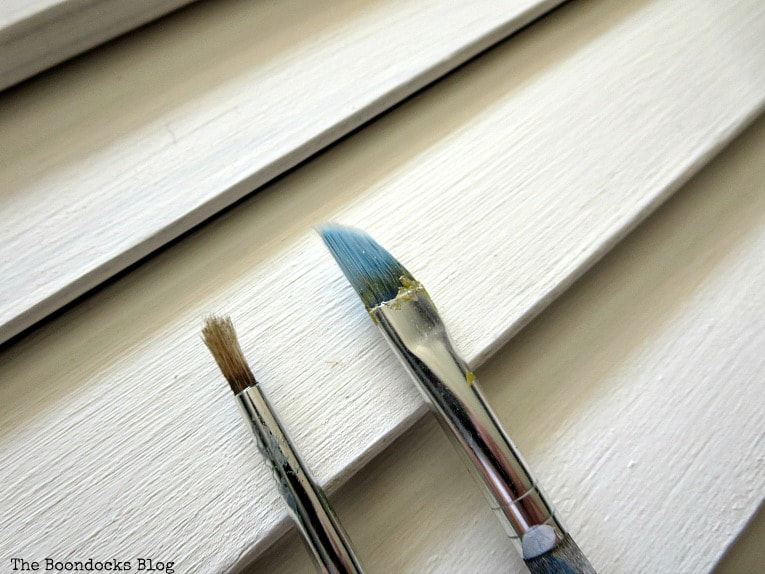
I had intended to use my pounce sponger.  It had worked before for this project so I was sure it would work now. Besides everyone raved about it. How it was the best for stenciling. So it would be a breeze with this project.  Or so I thought!

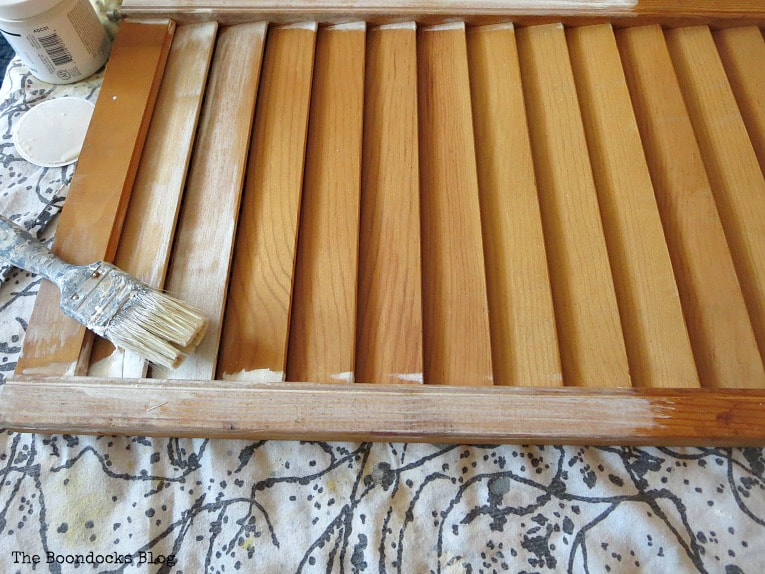
I set up my things, including a plastic dish with a paper towel to dab off the excess paint.

paint with pouncer, How to Make Shutter Art with a Stencil the Wrong Way www.theboondocksblog.com
The paint I used was a soft metallic in silver.  I wanted the shutter to stand out and the stencil design to be secondary that is why I  chose this color.  You’ll see why later on. 

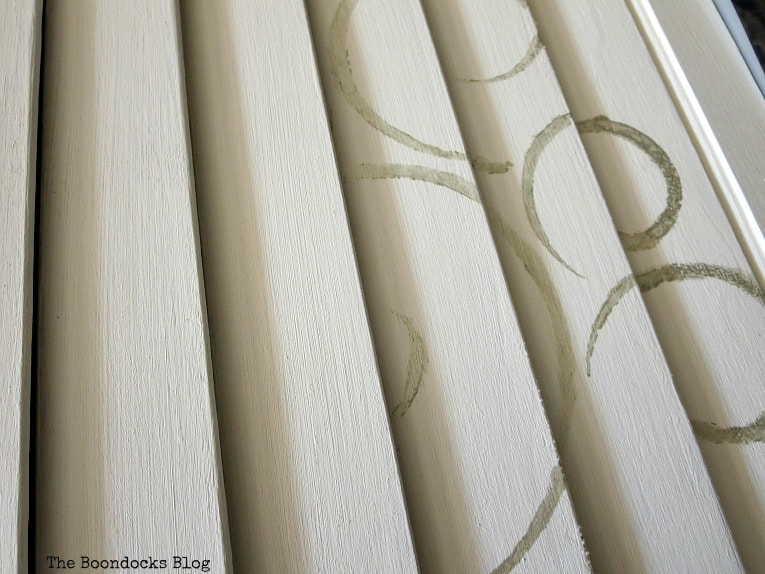
​I started out by taping the stencil along one end of the shutter and then pressed it down to paint.  I used masking tape to keep it in place.

Attempting to stencil, How to Make Shutter Art with a Stencil the Wrong Way www.theboondocksblog.com
But, as you may have guessed things did not work out as I had planned!  Again!!  

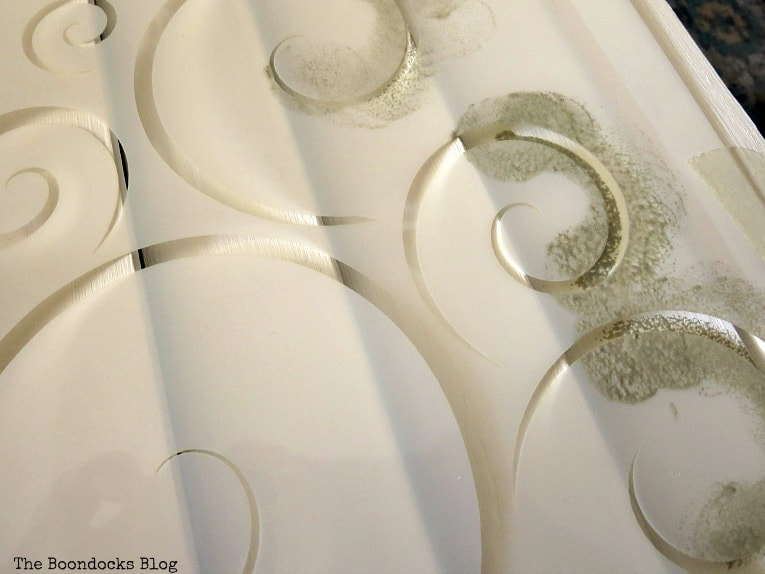
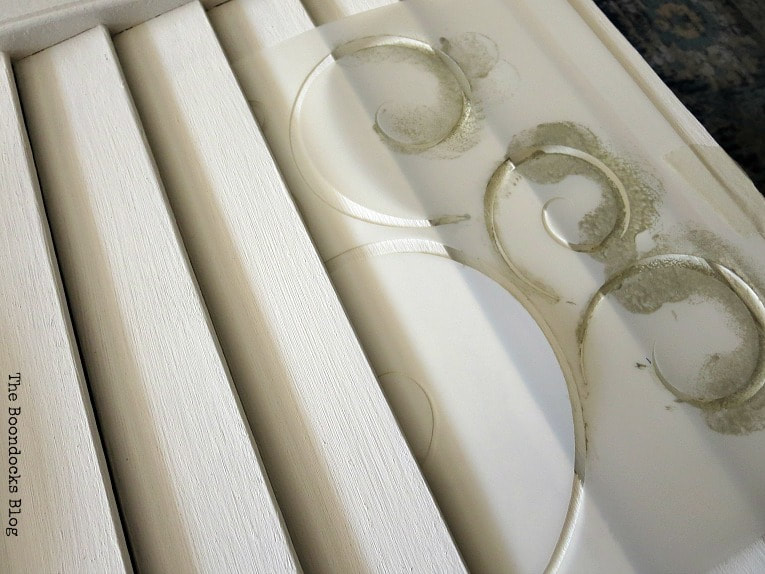
I had absolutely neglected to take into account the slats of the shutter. How was this even possible.

​They were right there, staring at me!  Laughing at me even!

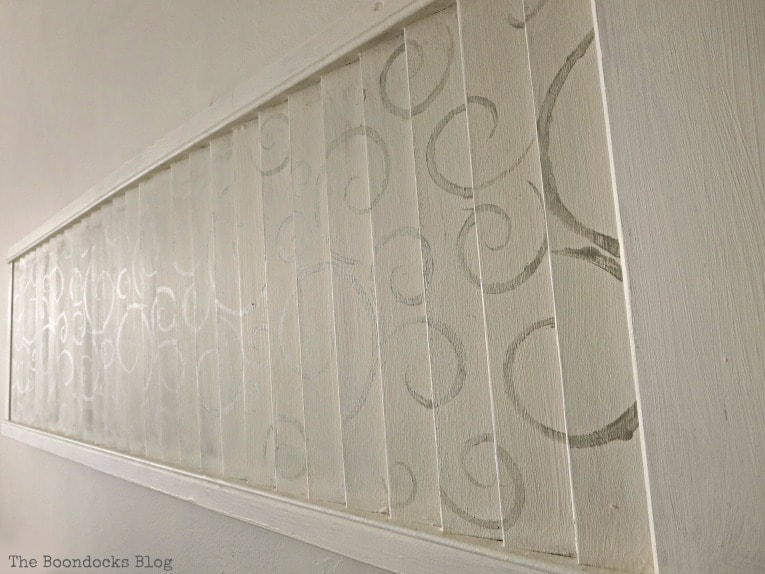
The stencil did not lay flat on the surface and the paint went on super thick even though I had dabbed most of it off.

the result of the attempt to stencil a shutter, How to Make Shutter Art with a Stencil the Wrong Way www.theboondocksblog.com
I tried again, this time using much thinner brushes that would let me control the paint, or at least that’s what I thought!
thin brushes used for stenciling, How to Make Shutter Art with a Stencil the Wrong Way www.theboondocksblog.com

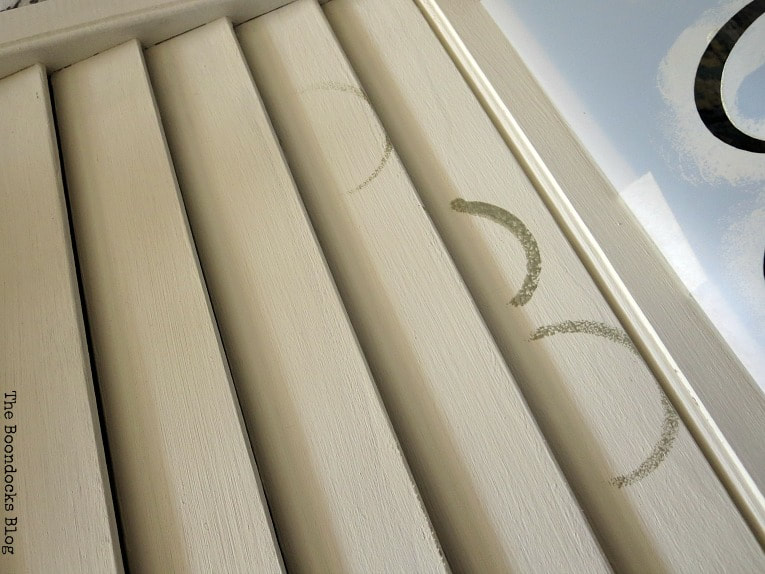
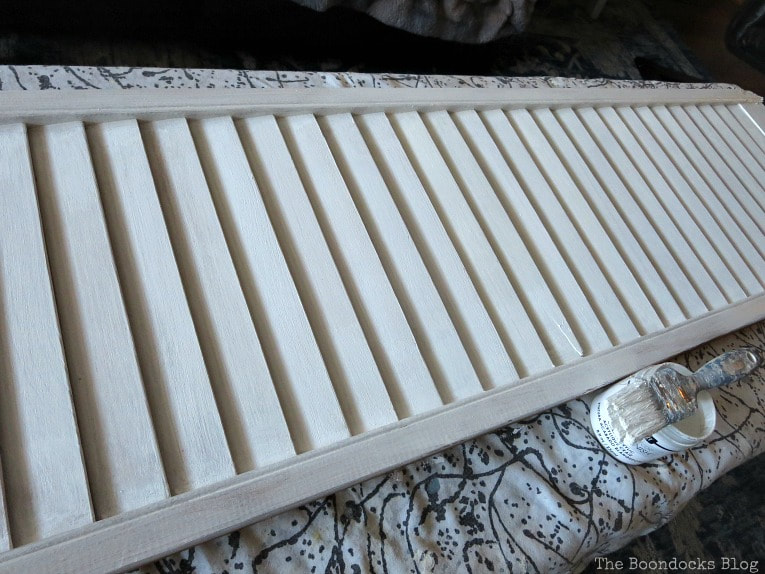
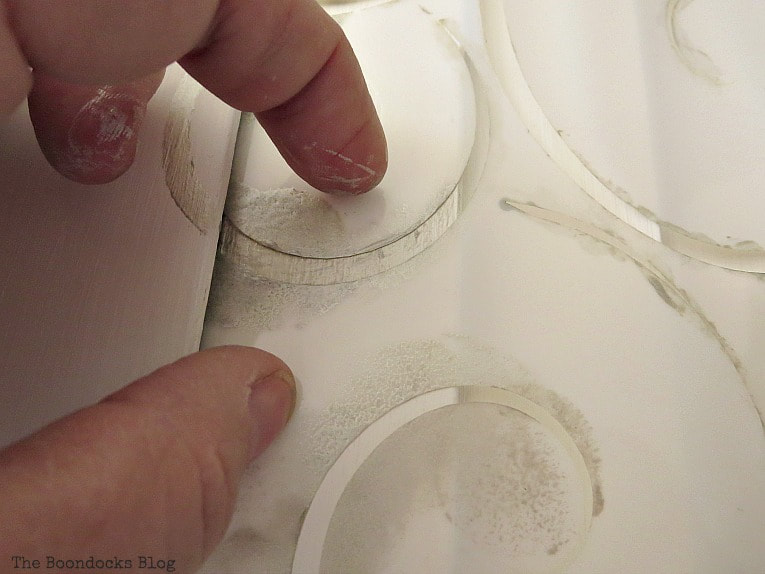
​Here is the next attempt.  It looks better right?

progress on the stenciling of the slats, How to Make Shutter Art with a Stencil the Wrong Way www.theboondocksblog.com
Yes, except for the fact that it does not get all of the design on the slat. Another fail!

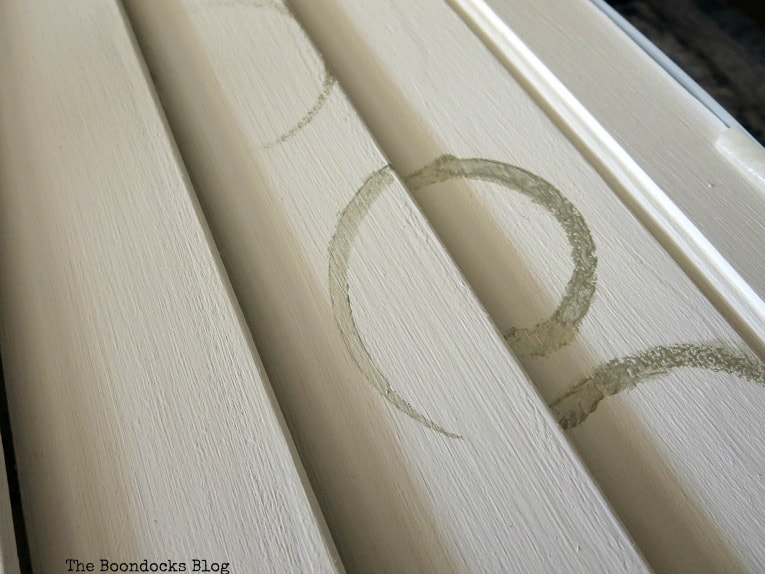
I realized that I had to insert the stencil inside the slat in order to get the design to lay flat on each slat. 

inserting stencil between slats to get good coverage, How to Make Shutter Art with a Stencil the Wrong Way www.theboondocksblog.com
At this point I could feel the steam coming out of my ears in frustration! 

What was meant to be a 10 minute project was obviously going to take me much, much longer.

results of stenciling when stencil is inserted between slats, How to Make Shutter Art with a Stencil the Wrong Way www.theboondocksblog.com
In order to make sure the stencil stayed put, I pressed on it with my fingers or even used an extra brush to hold it in place.
holding onto stencil when stenciling, How to Make Shutter Art with a Stencil the Wrong Way www.theboondocksblog.com
all products up to 60% off
Finally after much frustration I had done the center.  You can see here how subtle the paint is.

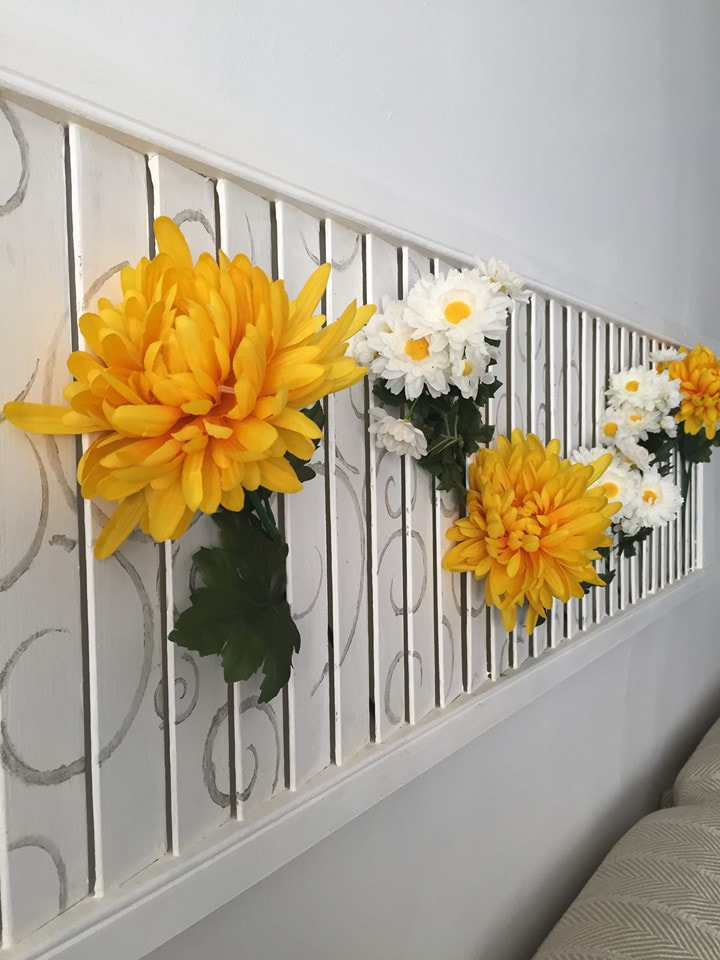
​But it looked unfinished.  

Stencil painted down the middle of the shutter, How to Make Shutter Art with a Stencil the Wrong Way www.theboondocksblog.com
Yes, because it had not taken me long enough to stencil the individual slats down the center of the shutter (insert sarcasm here), I went back and cut off pieces of swirl patterns and stenciled them all along the two sides of the original design. 

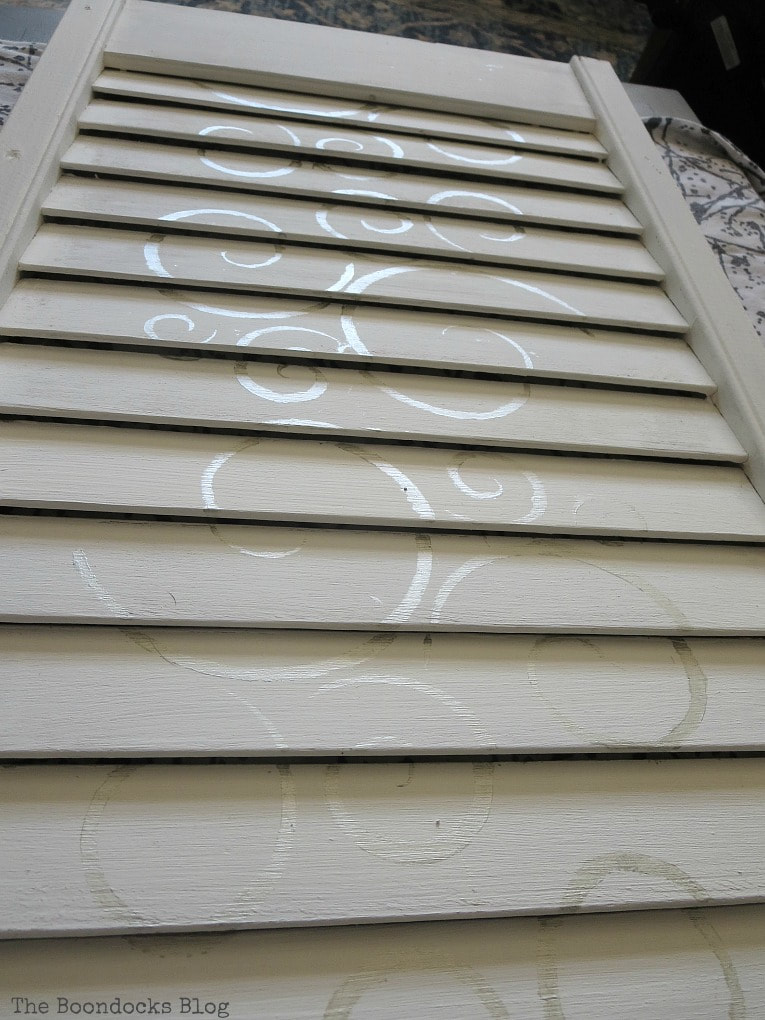
To give the overall look more balance and less sparsity. And of course to add another half an hour to my ten minute project!

adding more swirls after cutting stencil into small pieces, How to Make Shutter Art with a Stencil the Wrong Way www.theboondocksblog.com
I finished it off with a top coat of creme wax.  And to hang it up I used a bunch of command strips.
adding command strips to back of shutter, How to Make Shutter Art with a Stencil the Wrong Way www.theboondocksblog.com
And finally!

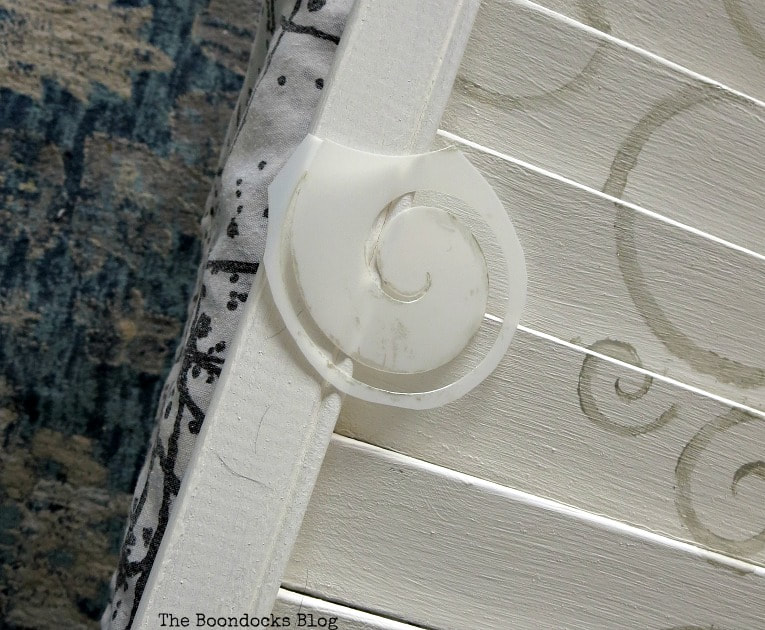
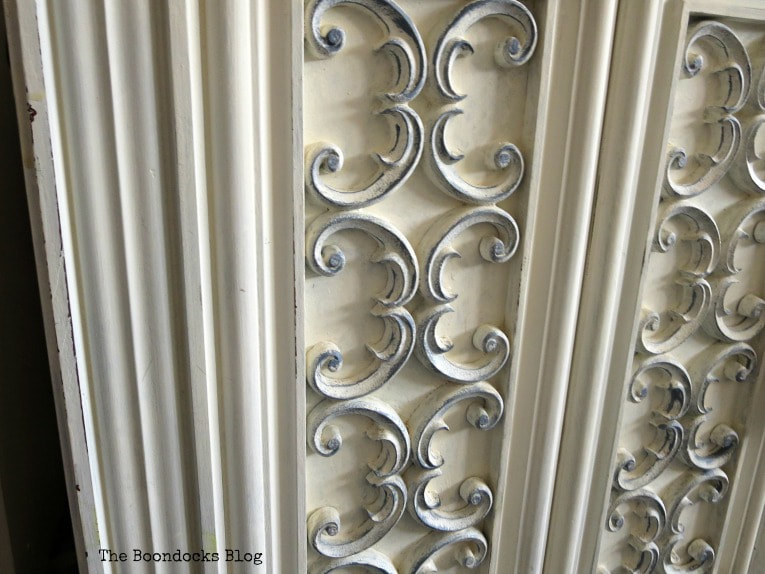
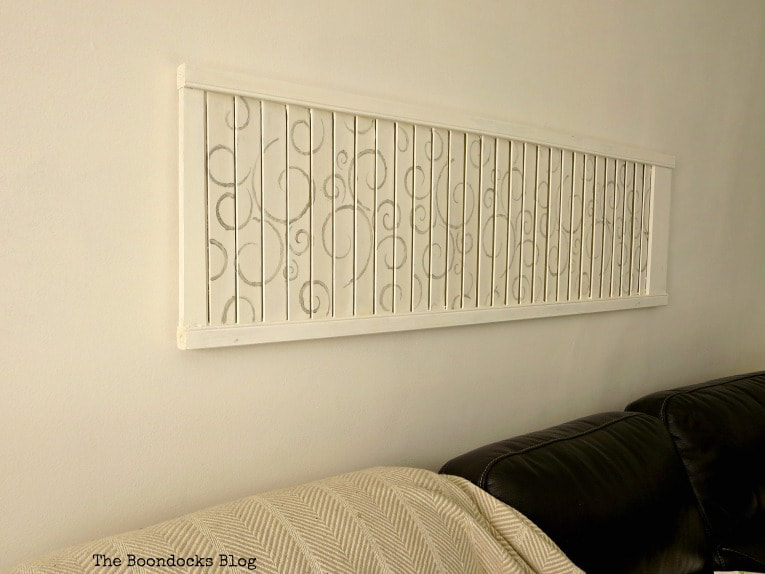
Finally, on what was to be a ten minute stenciling project, I was done!

Was it worth it?  I could have gone out and just bought some type of artwork, hung it on the wall and called it a day!

But, no!

I needed to make my life difficult by doing all these DIY projects.

There is no joy in shopping when you can waste hours of your life DIYing!  Am I right?

Have you ever seen that meme on Facebook about how we spend $90 making a project that we could have bought for $10.  Well, that was me but replace the money for time.

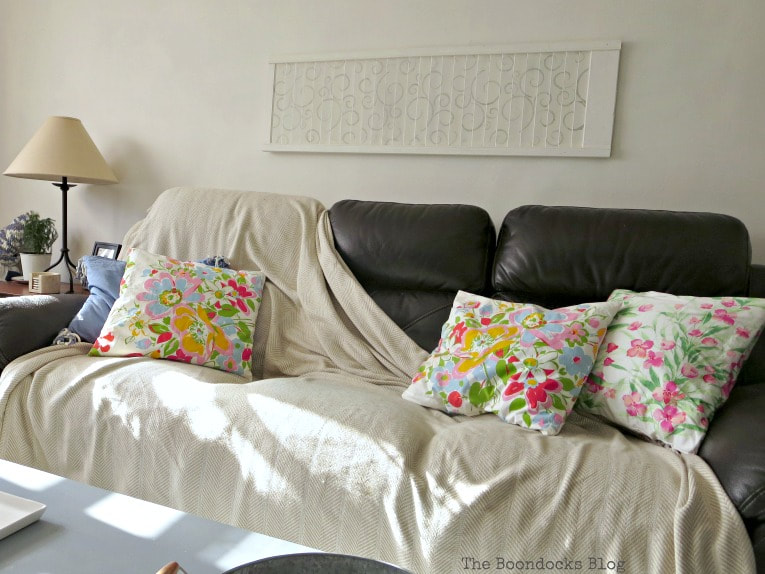
Plus, I needed something horizontal to go behind the sofa.

Stenciled shutter above sofa, #shutterart #stenciledshutter #chalkyfinishpaint #DecoArtMedia #DIYArt #Stenciledswirls How to Make Shutter Art with a Stencil the Wrong Way www.theboondocksblog.com
Below you can see how I used them with my Easter decor.  I got the inspiration from Lisa of The Purple Hydragnea.  It’s such an easy way to add any decor to them.
Stenciled shutter art with bunny cutouts, #shutterart #stenciledshutter #chalkyfinishpaint #DecoArtMedia #DIYArt #Stenciledswirls How to Make Shutter Art with a Stencil the Wrong Way www.theboondocksblog.com

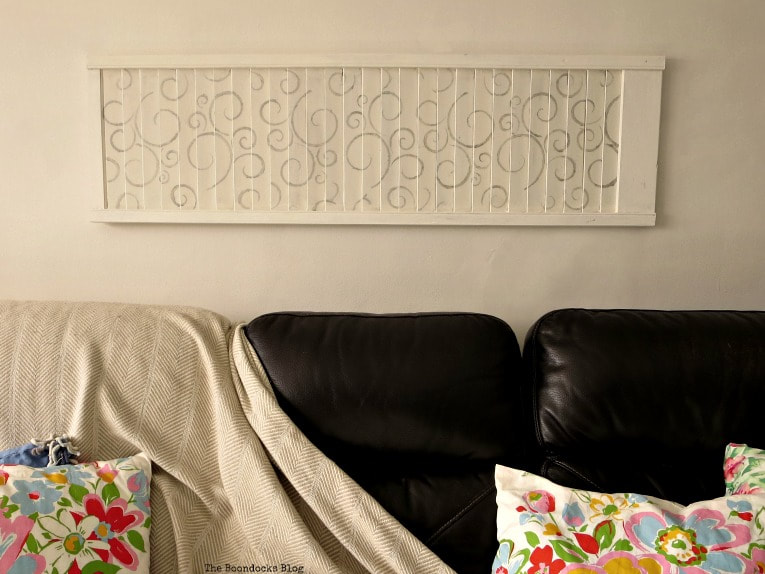
​Now to explain my reasoning for this particular look.  I wanted something that had presence but not too much.  After all we still have that accent wall on the opposite side of the room. Too much on this wall would have been overpowering.

I needed to fill this wall but in a subtle kind of way.  Are you following me?

Stenciled shutter art above sofa, #shutterart #stenciledshutter #chalkyfinishpaint #DecoArtMedia #DIYArt #Stenciledswirls How to Make Shutter Art with a Stencil the Wrong Way www.theboondocksblog.com
In fact, if you look at this shutter from one end facing the windows, the design shimmers and almost disappears because of the metallic finish.  Like I said, real subtle. 

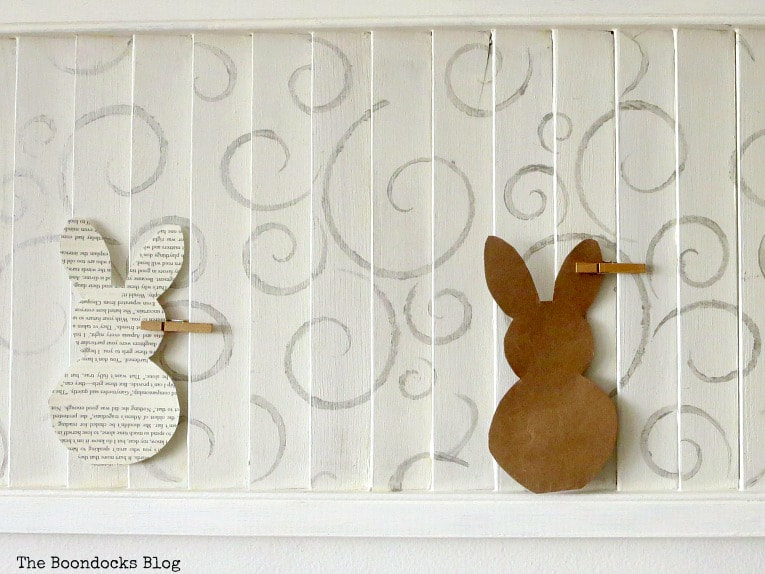
I think of the slats as doing the real work, and the swirls are a bonus.

Looking at metallic finish of the stenciled shutter, How to Make Shutter Art with a Stencil the Wrong Way www.theboondocksblog.com
All kidding aside, I really love my shutter art decor.  It is a focal point, but not in an in-your-face kind of way. 

And what have I learned from this episode of how to make things harder than they need to be?

Pouncers are to be feared?  Absolutely not.  They have their place but not on shutters!

Ultimately, I have learned that I don’t always learn from my previous mistakes and I need to make them more than once in order to feel the red on my cheeks.

​Or is three times the (un)lucky number?  In that case I have one more mistake to make!

stenciled shutter art above sofa, #shutterart #stenciledshutter #chalkyfinishpaint #DecoArtMedia #DIYArt #Stenciledswirls How to Make Shutter Art with a Stencil the Wrong Way www.theboondocksblog.com
Here is an update on how I used it after Easter.  You can really add anything to it depending on the season!
Stenciling shutters and how to avoid making mistakes, #shutterart #stenciledshutter #chalkyfinishpaint #DecoArtMedia #Upcycle #repurposed #DIYArt #Stenciledswirls How to Make Shutter Art with a Stencil the Wrong Way www.theboondocksblog.com
In the end I got exactly what I wanted/deserved and then some!

This tutorial on how to make shutter art the wrong way took a long time (much longer than it should have) but I’m happy with my art.  In fact I couldn’t find another like this anywhere and believe me I scoured Pinterest for inspiration!

​How many times do you need to make a mistake before you learn a lesson?

Picture
Stenciling shutters and how to avoid making mistakes, #shutterart #stenciledshutter #chalkyfinishpaint #DecoArtMedia #Upcycle #repurposed #DIYArt #Stenciledswirls How to Make Shutter Art with a Stencil the Wrong Way www.theboondocksblog.com
If you really like what you see subscribe to my blog and get my adventures in your mailbox. The form is on the sidebar and on top.  To see my privacy policy click here.
Picture
More wall projects:
 << Looking up in Manhattan                  HOME       

Linking up to these Link Parties

This blog is for entertainment purposes only; my DIY tutorials are not professional advice. Read my full disclaimer here.

I love it when I get your comments and I will try to reply to every one of them. ​Please do not add a hyperlink to your comment, otherwise it cannot be published.

This site uses Akismet to reduce spam. Learn how your comment data is processed.

SHUTTER IDEAS YOU WILL LOVE TO MAKE IN 15 CREATIVE WAYS

Thursday 29th of July 2021

[…] Shutter Art: Boondocks Blog […]

Rachel

Monday 22nd of April 2019

That's lovely, Mary. My husband and i joke that we think we can get all our projects done in mere minutes!! Why does our always have to take longer? Awesome job though!

Mary

Wednesday 24th of April 2019

It always takes much longer than we think Rachel and sometimes even just thinking about it can take months on my part.

Patti

Monday 22nd of April 2019

What a pretty project. I often have a rough time with stencils even when I'm working on a flat surface. For me it's a patience issue. I'll have to pin this for future reference.

Mary

Wednesday 24th of April 2019

I usually have a lot of patience but this one really tested me!

Debra

Monday 22nd of April 2019

I know what you mean by our desire for a unique piece of artwork. It is well worth it! It is a lovely piece.

Mary

Wednesday 24th of April 2019

Thank you Debra, sometimes it comes with a cost of driving you crazy, but that's okay!

Gail

Monday 22nd of April 2019

Your wall accent looks amazing, Mary! What a great idea - but you should know there's no such thing as a ten minute diy project! Lol! Glad it turned out so lovely!

Mary

Wednesday 24th of April 2019

You are so so right Gail. No such thing. I should have learned that by now.

This site uses Akismet to reduce spam. Learn how your comment data is processed.