• Skip to primary navigation
  • Skip to main content
  • Skip to primary sidebar
  • Skip to footer

The Boondocks Blog

  • Home
  • Re Purpose
  • Furniture
  • Seasonal
  • About Us
    • Privacy Policy

Adding Metallic Lustre to a Painted Wood Shelf

June 20, 2020 by boondocks 13 Comments

Sharing is caring!

2 shares
  • Share
  • Tweet
  • Email

A lifetime ago I started working on the bedroom makeover.  And I know it is taking forever and I know that I’ve been working on other rooms as well but it seems I am finally seeing a light at the end of the tunnel. 

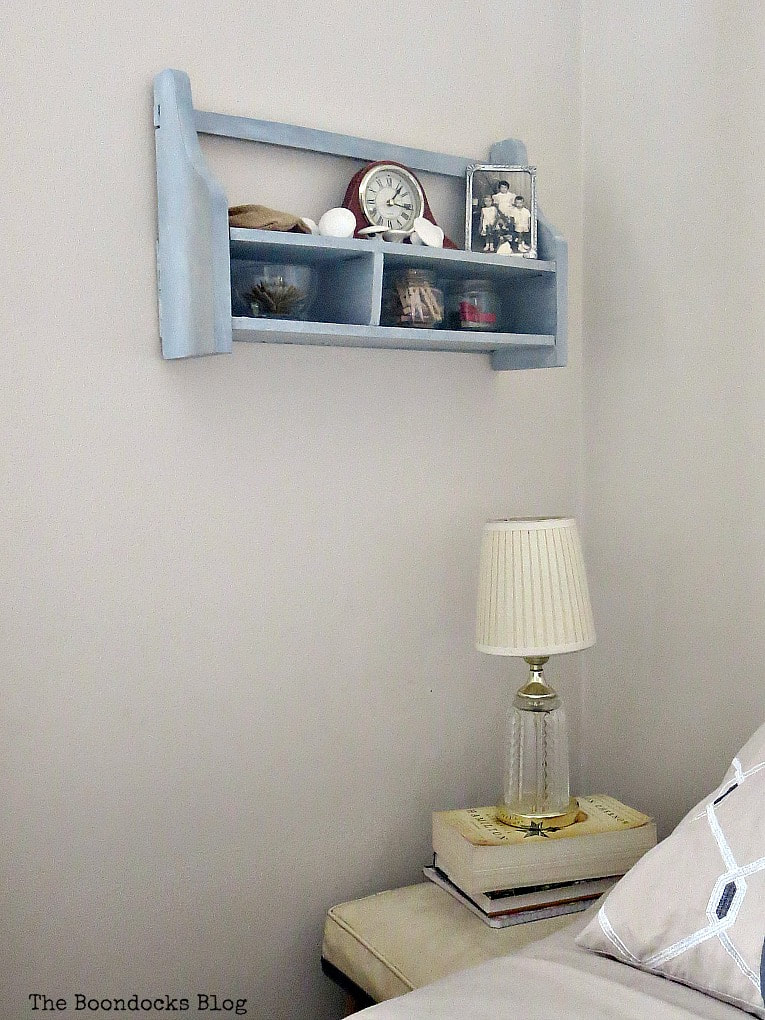
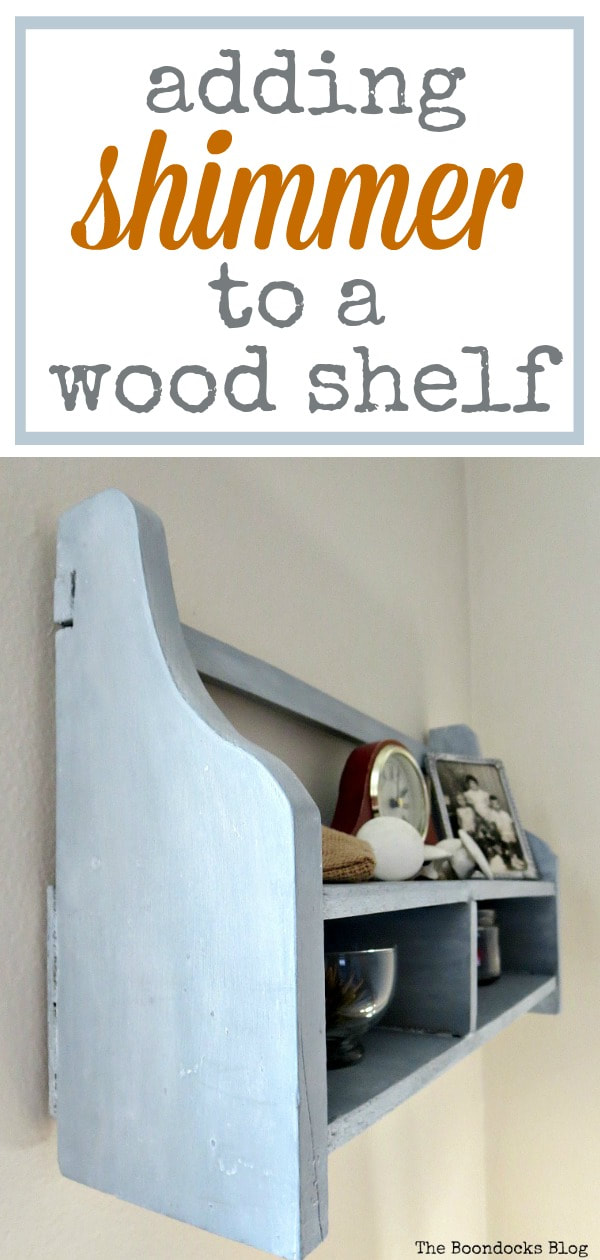
This shelf you see below is the last of the projects for the bedroom (all projects are listed on the bottom) before the small reveal… because it really is a small room – New York living folks! Today I’m sharing with you a simple makeover of a wall mounted shelf and a super easy way to add shimmer to that shelf. 

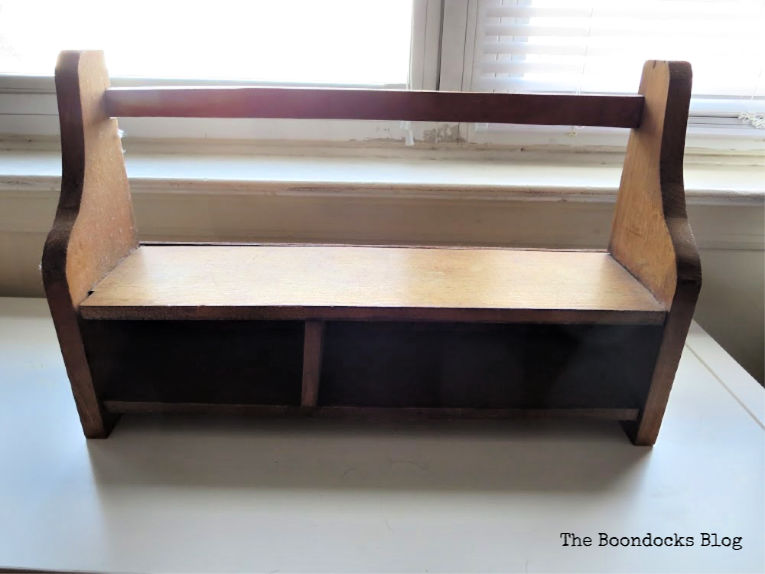
I honestly don’t remember where this came from but I have a stash of things that needed to be taken care of and this one looked like it could be a pretty addition to the bedroom.  With a little help of course.   

What I Used:

  • Old Fashioned Milk Paint in Slate
  • Olf Fashioned Milk Paint in Snow White
  • Sandpaper
  • ​Brush
  • Daddy Van’s Decorative Wax in Farmhouse White (similar)
  • DecoArt Metallic Lustre in White Frost
  • Rag
  • Round brush​​ for waxing

The How To:

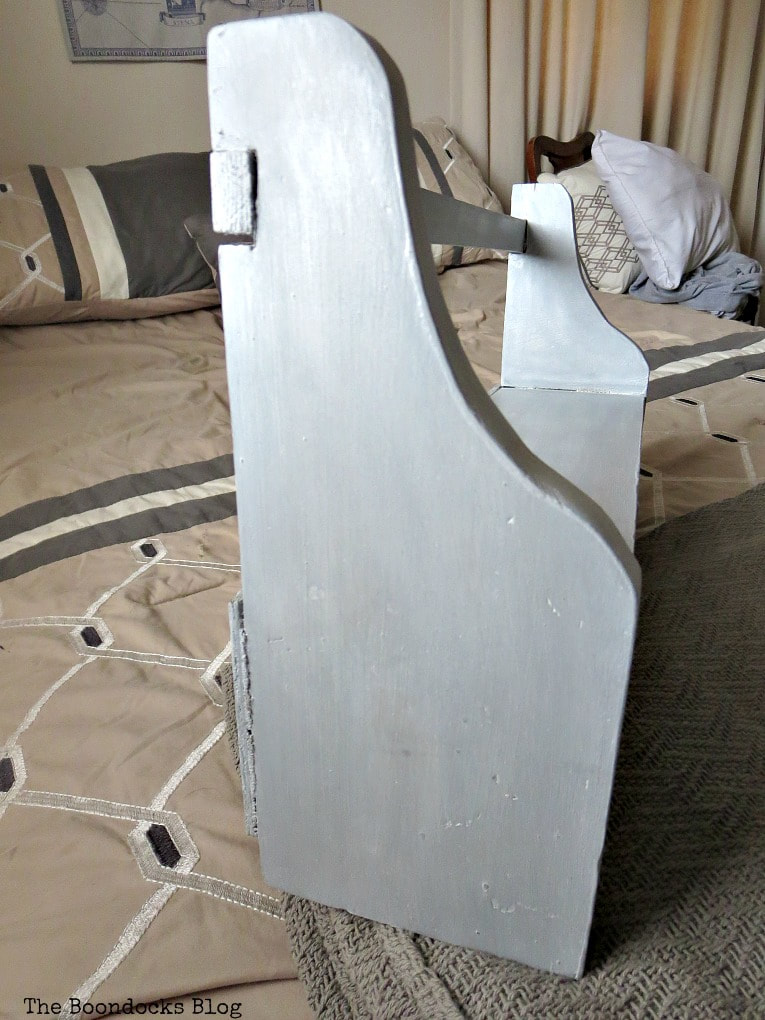
I had already mixed the Old Fashioned Milk Paint in Slate and Snow White together to create this soft grayish blue color from a few days ago when I had painted the accent wall in the living room.  Keeping it in the fridge helps extend its life. 

So when it came time to paint this wall mounted cubby shelf I thought I’d use up the rest of the paint.  It took me three coats to cover up the wood. 
​

painted shelf with Old Fashioned Milk Paint, A Super Easy Way to Add Shimmer to a Shelf, theboondocksblog

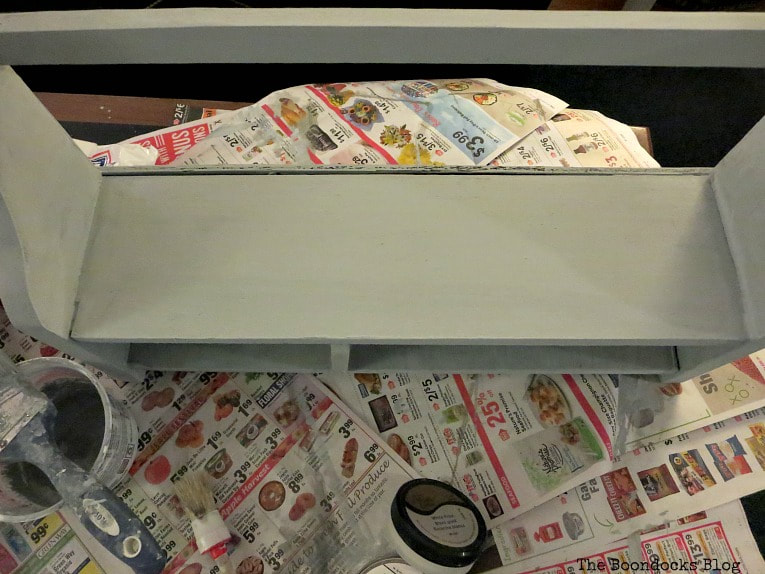
    Once I finished with the painting I sanded it down a tiny bit to give it a smooth finish.  And then it was time to decide on the finish.  Now I had two white decorative waxes.  

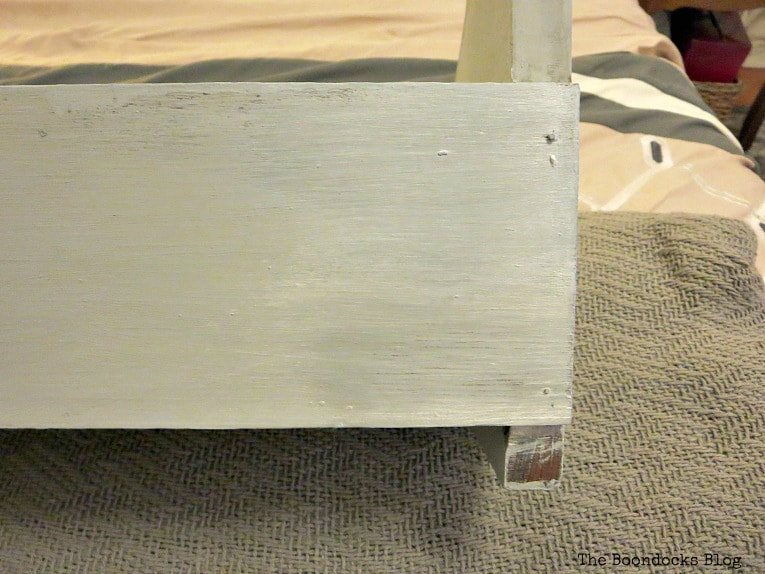
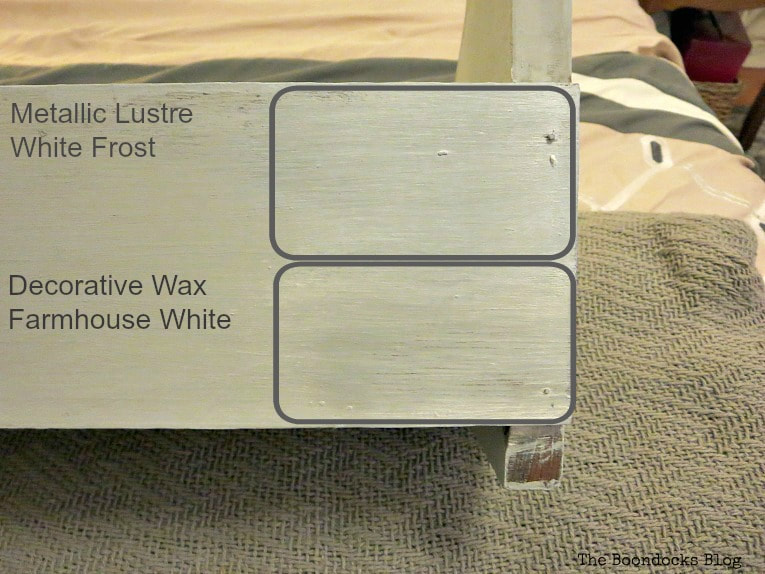
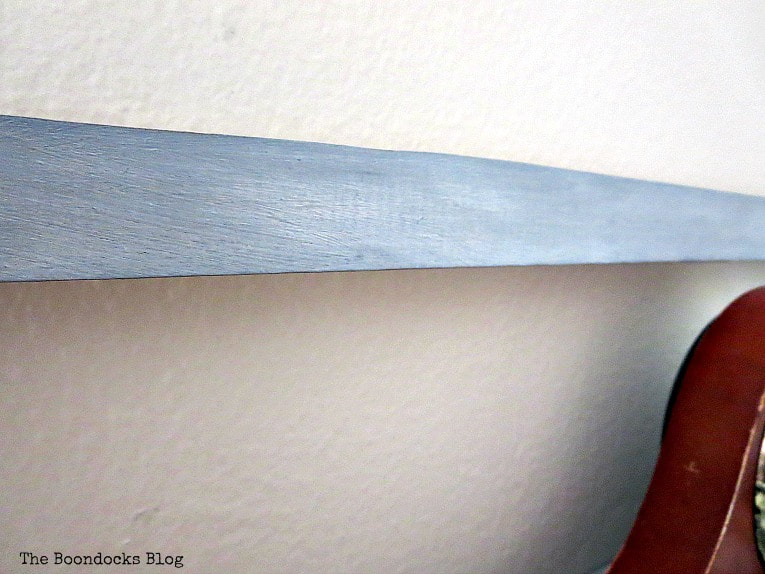
If you look carefully on the right hand side of the photo you can see that the upper part is more subtle than the bottom.  I used the DecoArt Metallic Lustre on the top and the Daddy Van’s Decorative Wax on the bottom.
​

Two decorative waxes on the wood, A Super Easy Way to Add Shimmer to a Shelf, theboondocksblog

      And what is the difference?  Why should I bother with two if they are barely noticeable?

Side view of the wood shelf, A Super Easy Way to Add Shimmer to a Shelf, theboondocksblog

    By looking at the photo below we can see that there is a shine to the whole shelf.  In fact the whole thing was waxed over using the Daddy Van’s Farmhouse white.  This makes the grey color shine. It also makes sure the milk paint stays put!  

​But on top of the shine there are areas of pure shimmer.  White light shimmer.  
​

Top view of wood shelf with strips of shimmer, A Super Easy Way to Add Shimmer to a Shelf, theboondocksblog

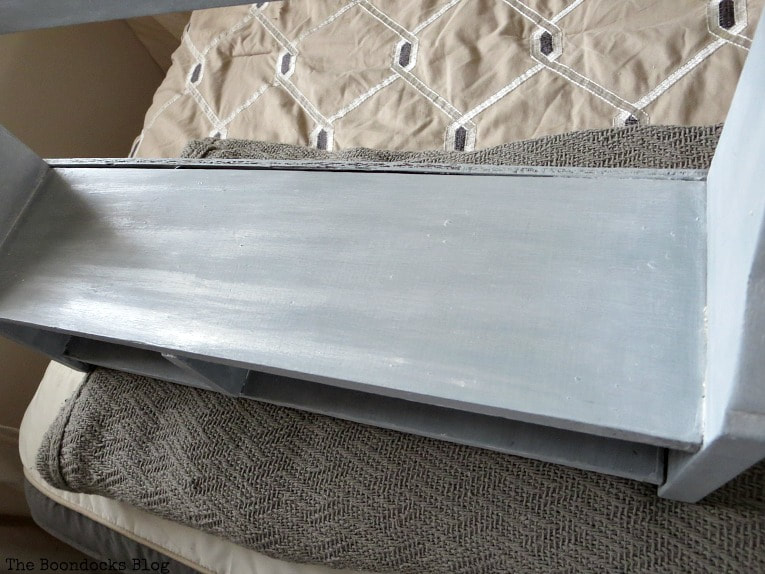
  ​Those are the areas that I have gone over with the DecoArt Metallic Lustre.  It gives the piece an extra bit of oomph!  You can see how I used it on this project I did last year!

Of course they only show up when the light hits them. 
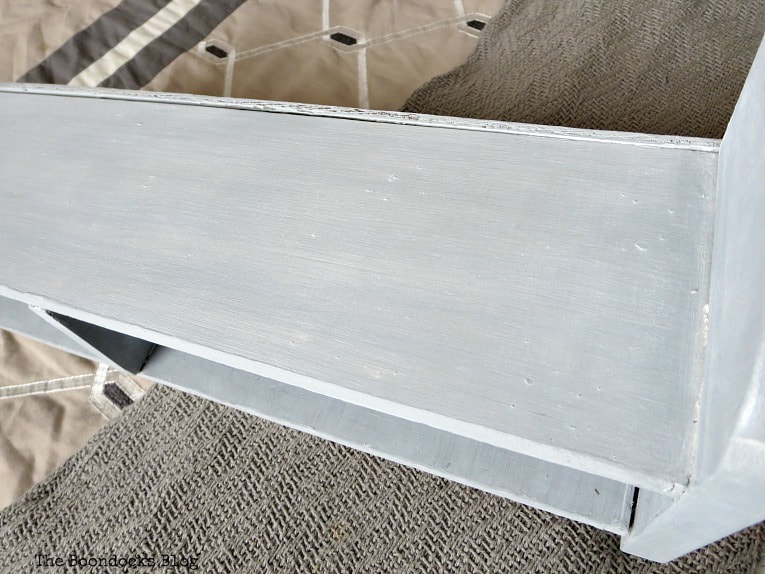
​

Top view of shelf, A Super Easy Way to Add Shimmer to a Shelf, theboondocksblog

  Like here…
​

Side view of shelf and shimmering details, A Super Easy Way to Add Shimmer to a Shelf, theboondocksblog

  ​…and here!
​

Handle of shelf details, A Super Easy Way to Add Shimmer to a Shelf, theboondocksblog

    It’s all in the details. 
​

Objects on shelf, A Super Easy Way to Add Shimmer to a Shelf, theboondocksblog

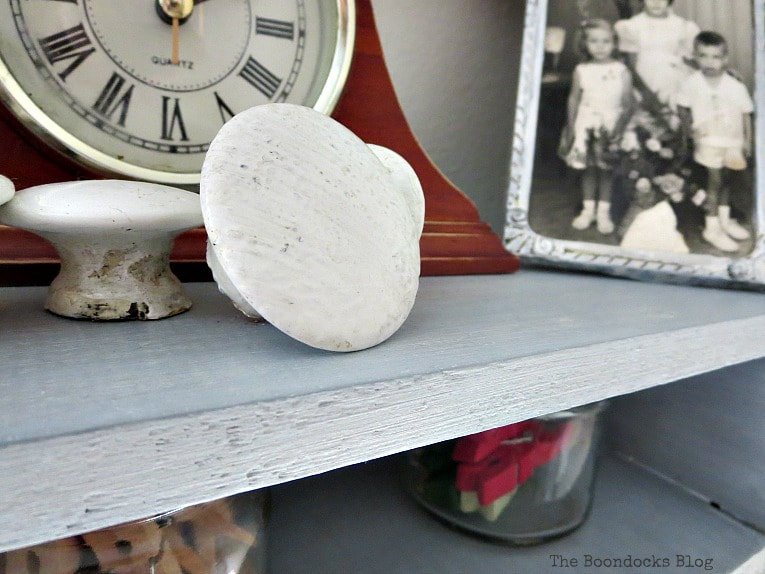
        The beauty of the milk paint is that you never know what surprises it has in store for you.  With the addition of the wax you can see more of the paint details. 

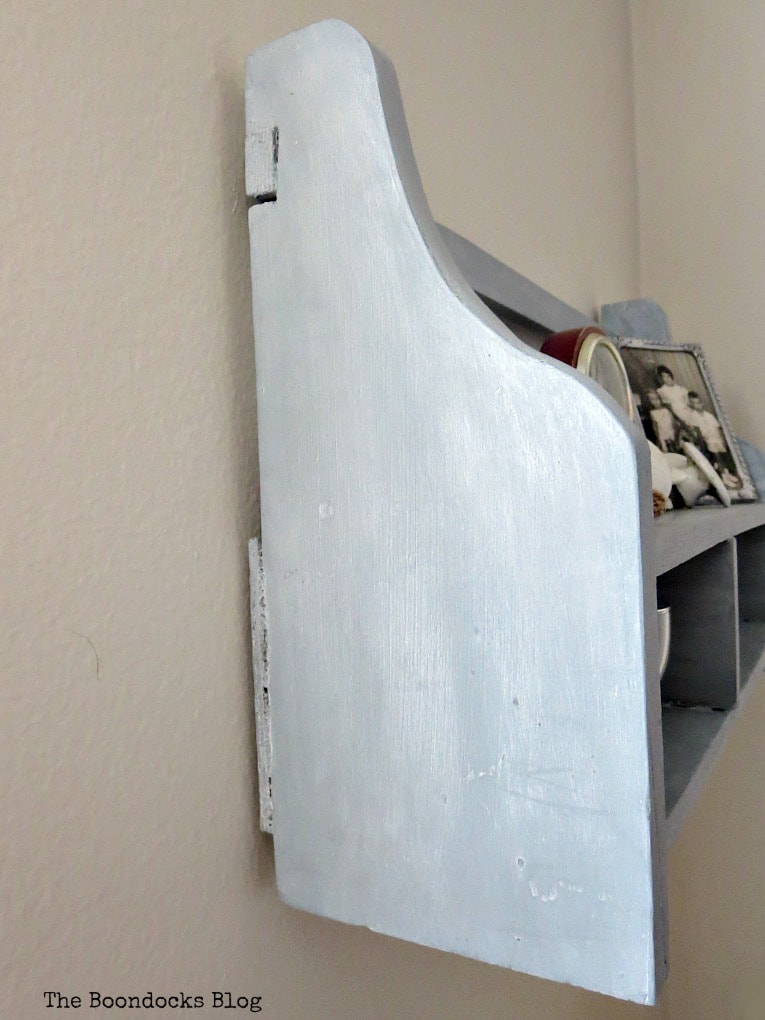
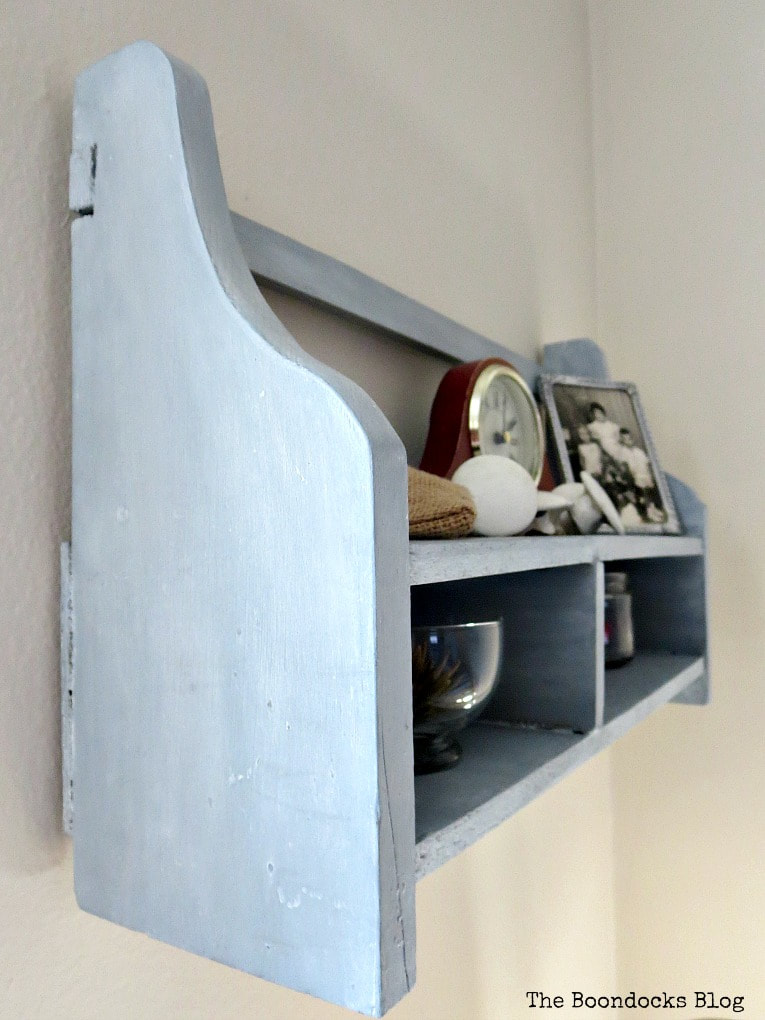
It is beautiful and imperfect just like the crooked partition in my shelf. 
​

Wall mounted wood cubby shelf, #decorativewax #shineandshimmer #paintedwood #shelfmakeover #OFMP #DecoArtMedia #upcycle A Super Easy Way to Add Shimmer to a Shelf, theboondocksblog

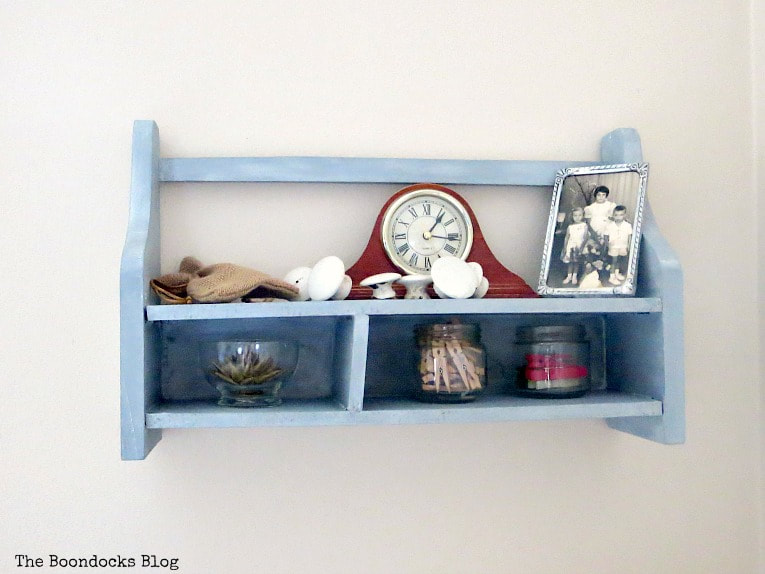
    The shelf is hanging on the wall now.  But which wall?
​

Wall mounted wood cubby shelf, #decorativewax #shineandshimmer #paintedwood #shelfmakeover #OFMP #DecoArtMedia #upcycle A Super Easy Way to Add Shimmer to a Shelf, theboondocksblog

      And how does it relate to the rest of the room?  The answer to this and much more is in the room reveal which will be next week.   Because repurposing and upcycling is great but you also want a room that looks at least a bit coherent!
​

Wall mounted wood cubby shelf, #decorativewax #shineandshimmer #paintedwood #shelfmakeover #OFMP #DecoArtMedia #upcycle A Super Easy Way to Add Shimmer to a Shelf, theboondocksblog

  Now if that isn’t a super easy way to add shimmer to a shelf I don’t know what is!  Join me next week as we finally put this room to bed! (pun intended)

Do you ever become nerdy like me and obsess over the meaning of words?  And really we cannot be technical and worry about the true meaning here, just the essence should be enough!
​
Below are all the other projects from the bedroom makeover. 

Picture
Wall mounted wood cubby shelf, painted with milk paint and metallic lustre paint #decorativewax #shineandshimmer #paintedwood #shelfmakeover #OFMP #DecoArtMedia #upcycle A Super Easy Way to Add Shimmer to a Shelf, theboondocksblog

Filed Under: DecoArt Paints, Furniture, Old Fashioned Milk Paint, Up Cycle, Wall Tagged With: decoart, home decor, upcycled

Previous Post: « How to Make Easy Pillows out of Fabric Remnants 5 ways
Next Post: How to Make an Awesome Cloudy Effect Accent Wall »

Reader Interactions

Comments

  1. Marjan Hoebeke-Pfaff

    October 26, 2018 at 1:11 am

    Guess we all have the odd piece standing around, we cannot part with, but which are in no state to use them, the way they are looking right now. Ever since I follow your blog I’ve started looking at things from a different angle. Cannot say I’ve saved much, but I tend to give a lot of things a second/third/fourth chance (truth be told: the chairs the hubby threw out were really ugly things – no paint and no crochet would have made them prettier nor comfortable).

    Reply
  2. [email protected]

    October 26, 2018 at 8:31 am

    It’s funny you mentioned the meaning of things. We had this conversation the other day and I learned the phrase ‘cut your nose off to spite your face’ was started when nuns did just that to avoid getting raped by the Vikings. Don’t know if it worked but can you imagine!? (I think maybe you meant cohesive not coherent?)
    Have a great weekend and keep busy 🙂

    Reply
  3. Laura Ingalls Gunn

    October 27, 2018 at 12:13 pm

    What a fabulous transformation. I adore the soft shimmer.

    Reply
  4. Leanna

    October 27, 2018 at 5:41 pm

    This is a wonderful little shelf, that I expect will be well loved and used for all sort of decorating ideas. I like the shimmer you added to it. Subtle is often the best finish, and makes so much difference.

    Reply
  5. Linda at Mixed Kreations

    October 28, 2018 at 6:19 am

    What a lovely little shelf! The colors perfect with just the right amount of shimmer.
    I have a couple small shelves in my stash of thrifted items waiting for a makeover.

    Reply
  6. Debrashoppeno5

    October 28, 2018 at 10:28 pm

    The soft shimmer is so pretty. It is a sweet little shelf. I bet you will have a lot of fun decorating it.

    Reply
  7. Michelle Leslie

    October 29, 2018 at 7:37 am

    Oh yay, I’ve been so keen to see your whole bedroom makeover Mary. With all the blues you’ve been adding it must feel a little like waking up in Greece and seeing the sunlight dance over the waves on a beautiful summer’s day. Your little shelf is so wacky and odd and absolutely perfect in all it’s imperfections. I bet the photos don’t do justice to that shimmer.

    Reply
  8. Christina Makri

    October 29, 2018 at 10:51 am

    I love the way you repurpose every small or big item. You have this ability to take something to the next level. Can’t wait to see where you put your gorgeous shelf. Hugs & kisses 🙂

    Reply
  9. Runningonempty

    October 29, 2018 at 3:42 pm

    It looks lovely, Mary! I’m a fan of that blue colour but wouldn’t have thought of putting the shimmer on it. Great choices all round! Looking forward to the big reveal.
    Regards Cath
    http://anaussieintheworld.blogspot.com.au

    Reply
  10. Julie

    October 29, 2018 at 7:43 pm

    Oooo I love that little touch of shimmer – subtle and classy!

    Reply
  11. The Freshman Cook

    October 30, 2018 at 8:58 pm

    Such a cute shelf! Love the shimmer! Thank you for sharing at Celebrate It!

    Reply
  12. Kim

    October 31, 2018 at 10:06 am

    I love this! What a pretty color, Mary. And super useful.

    Reply
  13. Kippi

    November 4, 2018 at 9:11 am

    The shelf turned out great and it provided a place to display treasures too.

    Reply

Leave a Reply Cancel reply

Your email address will not be published. Required fields are marked *

Recipe Rating


This site uses Akismet to reduce spam. Learn how your comment data is processed.

Primary Sidebar

Let’s Connect!

  • Email
  • Facebook
  • Instagram
  • Pinterest
  • Twitter

Recent Posts

  • DIY Pallet Table with Reclaimed Wood Legs
  • 20 Creative DIY Pallet Projects to Make!
  • Shabby Chic Wicker Basket Upcycle
  • 20 Household Items Re-Purposed For Halloween Decor

Explore Our Top Posts

IKEA Malm Dresser Makeover
How to Stain a Laminate Table

DIY Pallet Couch

Footer

Disclosure

We are a participant in the Amazon Services LLC Associates Program, an affiliate advertising program designed to provide a means for us to earn fees by linking to Amazon.com and affiliated sites.

Disclaimer

While every effort has been made to ensure the accuracy & effectiveness of the information displayed on this website, The Boondocks Blog makes no guarantee as to the procedures & information contained here. The publisher will not be liable for direct, indirect, incidental, or consequential damages in connection with or arising from the use of the information displayed on TheBoondocksBlog.com. This website is not intended to substitute the advice of a professional. Find our Privacy Policy here.

Copyright

©The Boondocks Blog, 2015-2021. Unauthorized use and/or duplication of this material without express and written permission from this blog’s owners is strictly prohibited. One photo, excerpts and links may be used, provided that full and clear credit is given to TheBoondocksBlog.com with appropriate and specific direction to the original content.

Copyright © 2022 The Boondocks Blog on the Foodie Pro Theme

2 shares