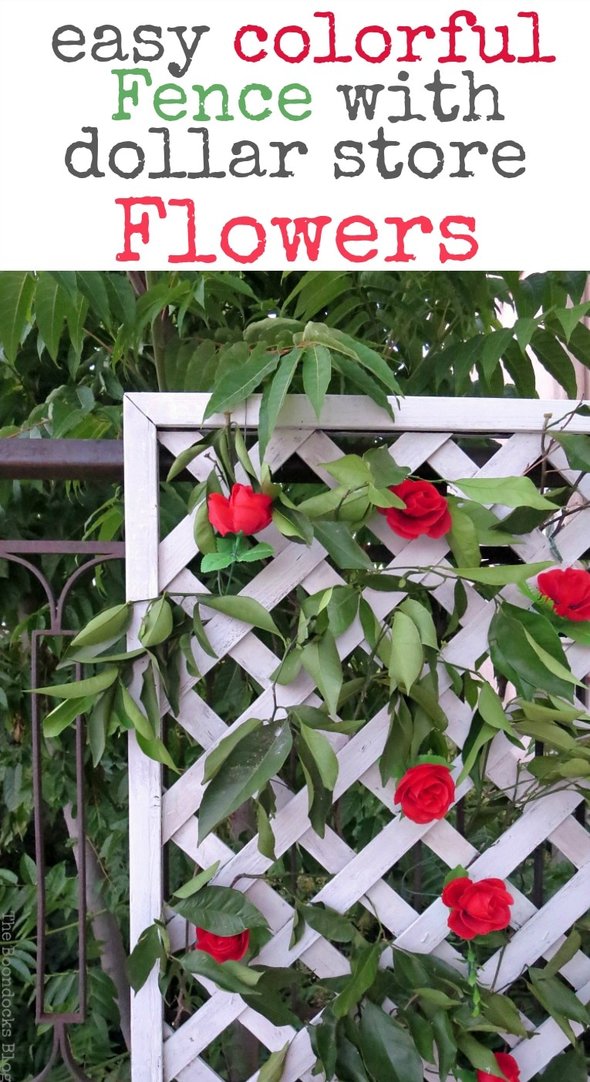
This month I was challenged by some blogger friends to come up with a project using dollar store items. Now our Dollar Store is pretty limited so I went there with a closed mind. But believe it or not I was able to come up with some pretty basic items to make an easy lattice flower wall with dollar store flowers.
In my town we have one little Dollar Store. Actually it’s called the Spanish Store. Because there are no dollars here in Greece. But everything sells for one Euro. So I would say it is the equivalent.
At the end of this project you’ll be able to see what my friends did with their dollar store finds.
What I Used to Make a Lattice Flower Wall:
Disclosure: I was compensated for doing this post with product. However, all the opinions stated here are my own. I only use products I love and would recommend to my viewers.
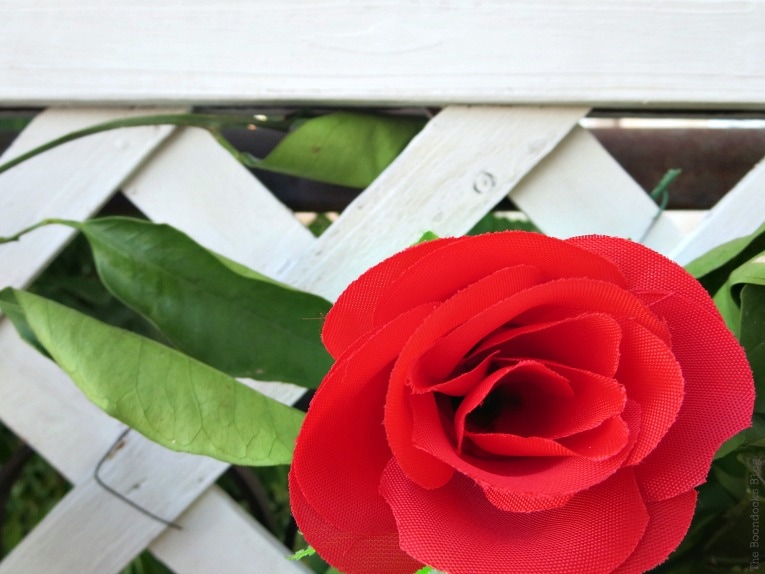
- 2 bouquets of faux red roses from the dollar store
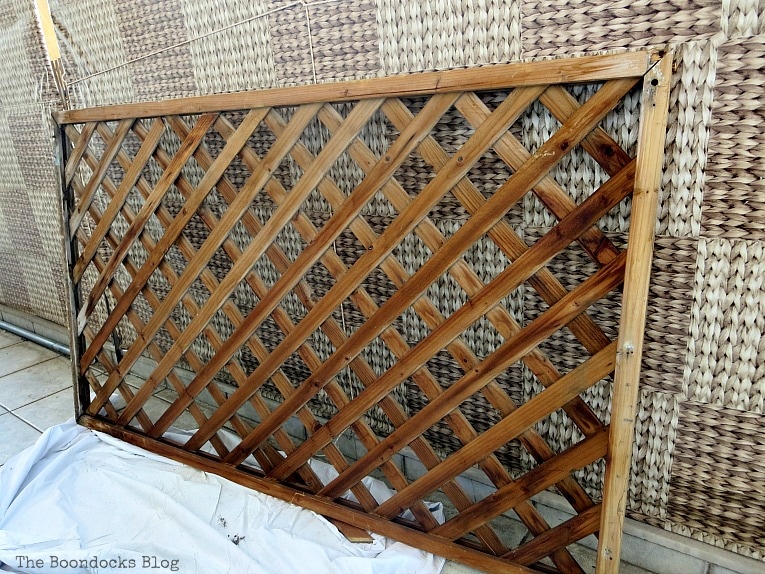
- An old lattice fence panel
- Old Fashioned Milk Paint in Oyster White
- Thin wire
- Branches cut from a lemon tree
- Pair of pliers or thick scissors
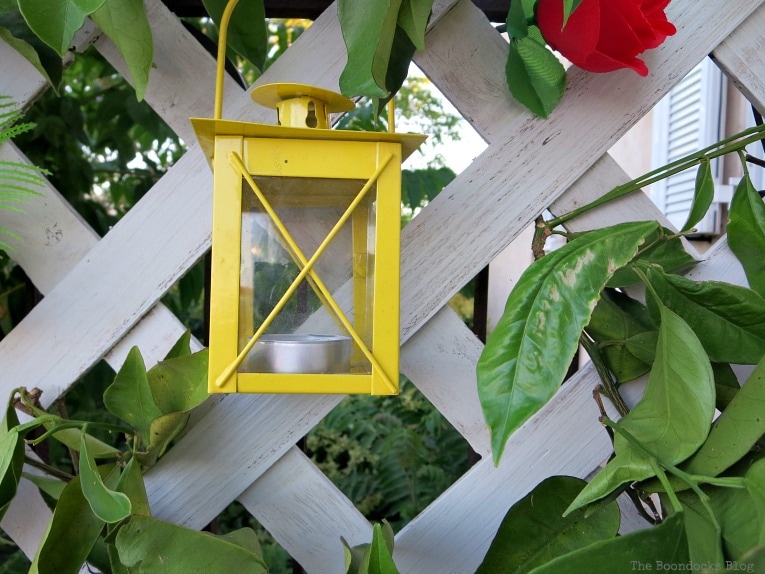
- Small tea light lantern also from the dollar store
Here is one of the most basic items you can find at the dollar store. A bouquet of 12 flowers. I was feeling rich so I bought 2 bunches.

How to Make a Lattice Flower Wall
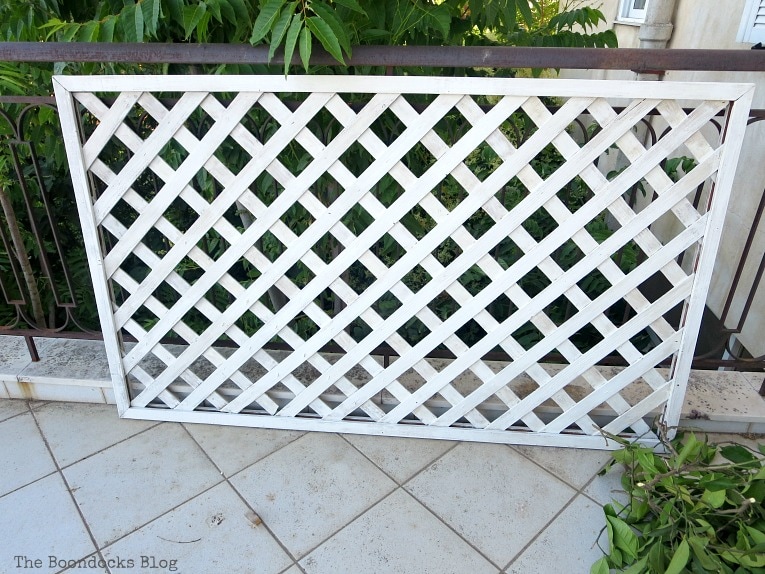
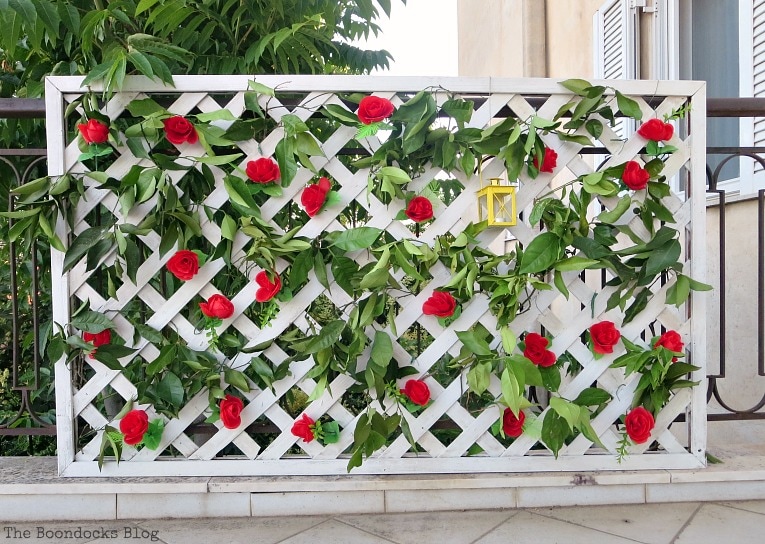
This old lattice fence panel was left behind when my tenant left and neglected to pay the rent. Instead of rent I got this! As you know, I am a positive person so I took a bad situation and turned it around. I would use this in my lattice flower project and make it awesome!
I found it outside and it had been out there for a few years. A good cleaning was in order. And I also needed to replace some of the wood because it had disintegrated. But all in all, it would work well for my project!
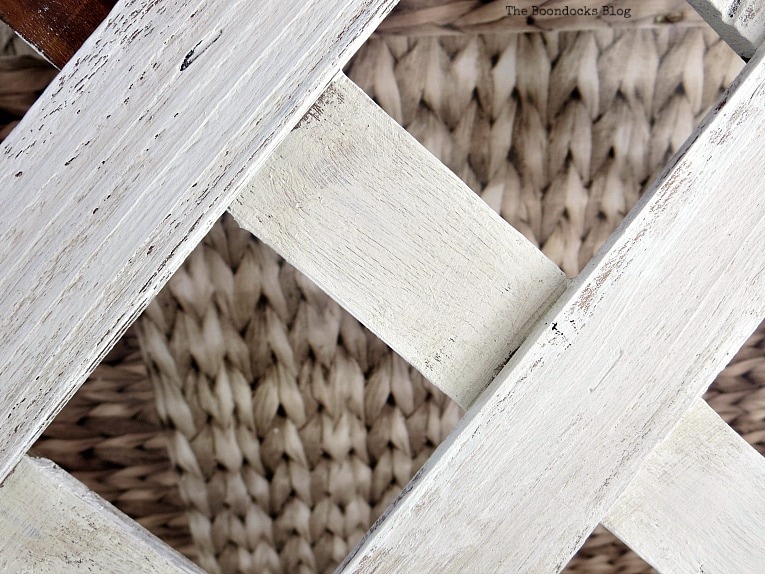
Because the wood was in very bad shape, I painted it using Old Fashioned Milk Paint in Oyster White. I always use the Safe Paint version which does not chip. Maybe one day I’ll be brave and try the regular milk paint! 😉
I knew this fence would be placed outdoors so I wanted to know if this was a good paint to use. Would I need to spend more money? Did I need a protective coat? Because lets be honest, I may love my projects but I’m also super thrifty. I didn’t want to have to shell out any more money for this project except for what I bought at the dollar store.
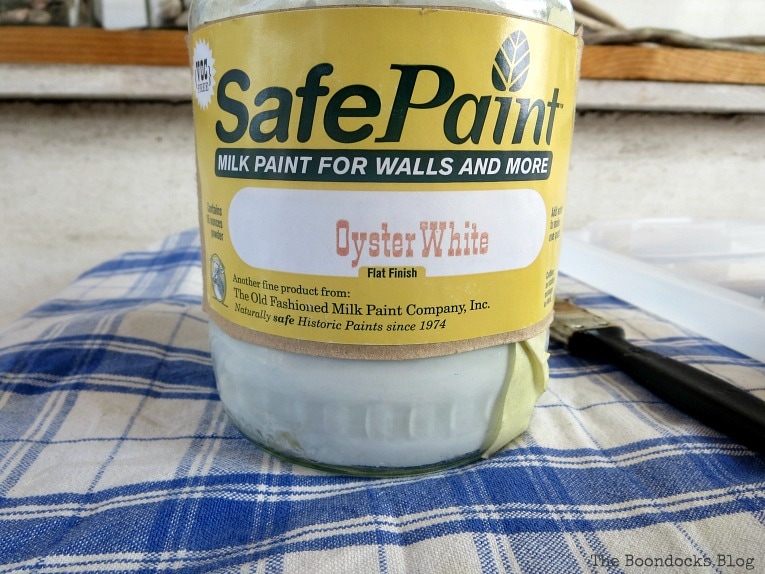
It turns out the Safe Paint is wonderful for outdoors. The wonderful folks at the Old Fashioned Milk Paint Company were a big help in answering my questions. This light color once painted onto the porous wood was able to cure and bond like concrete! And because it’s white I don’t have to worry about water spots when it rains. That’s just what I wanted to hear!
I painted one coat of it and then went over it lightly to get this weathered look you see below! I’ve also used oyster white on a mirror makeover project.
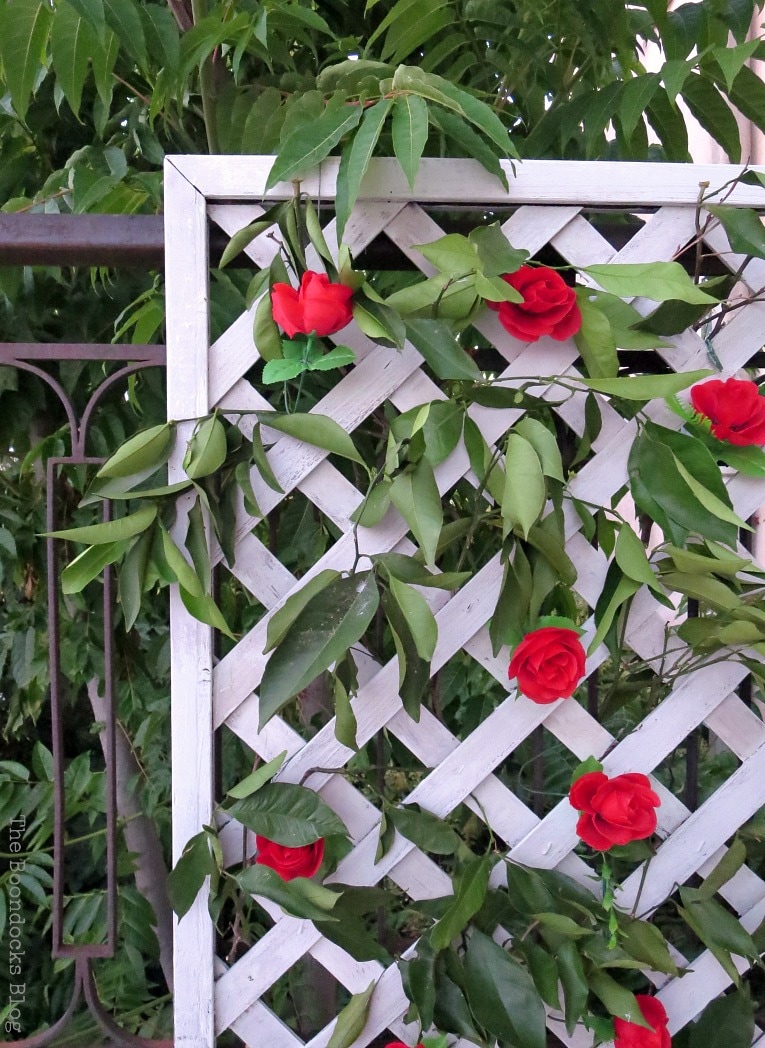
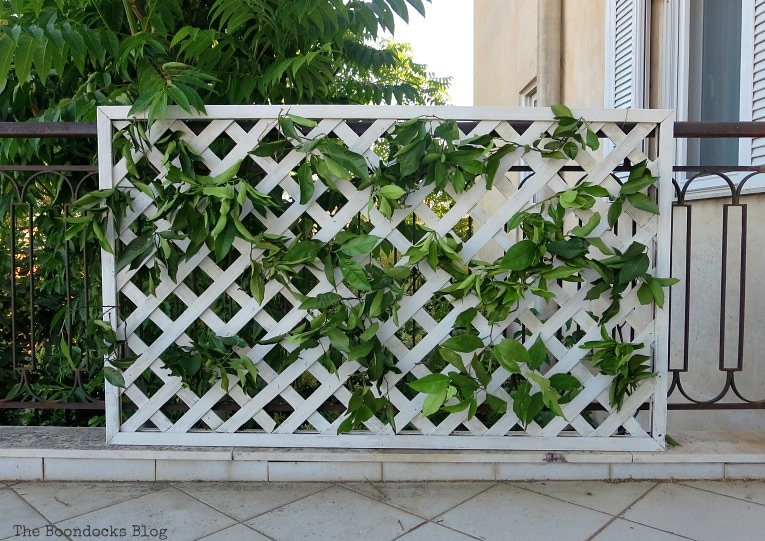
Here it is the lattice all painted! Next to it are lemon tree branches that I picked up on my recent visit to the farm.
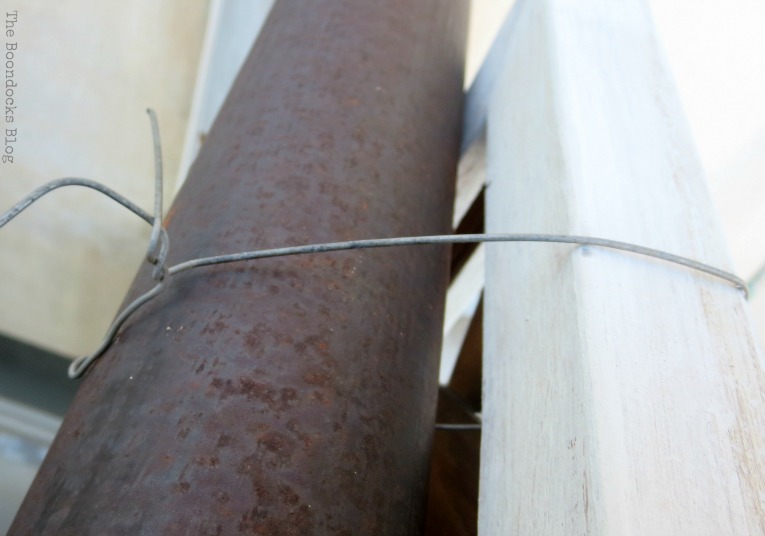
Using some thin wire I attached the top of the lattice flower panel to the top of the balcony rail.
Then I cut the branches into clumps and randomly inserted them into the lattice flower panel slots.
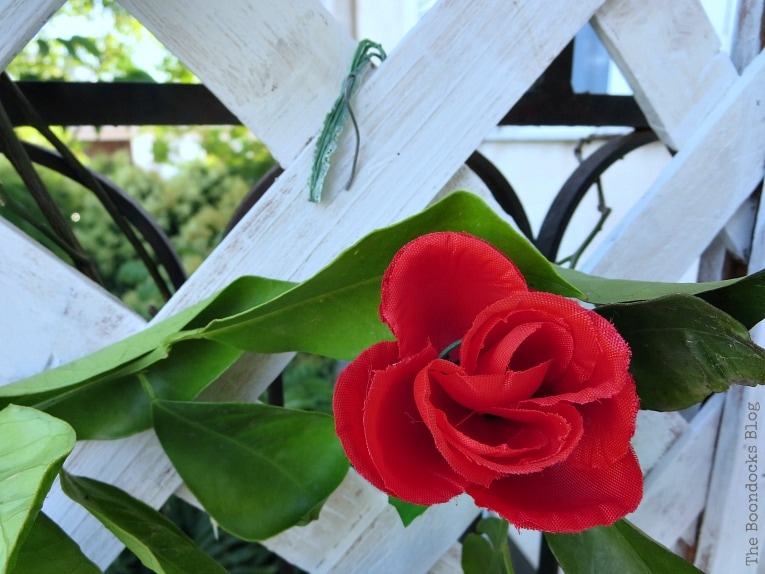
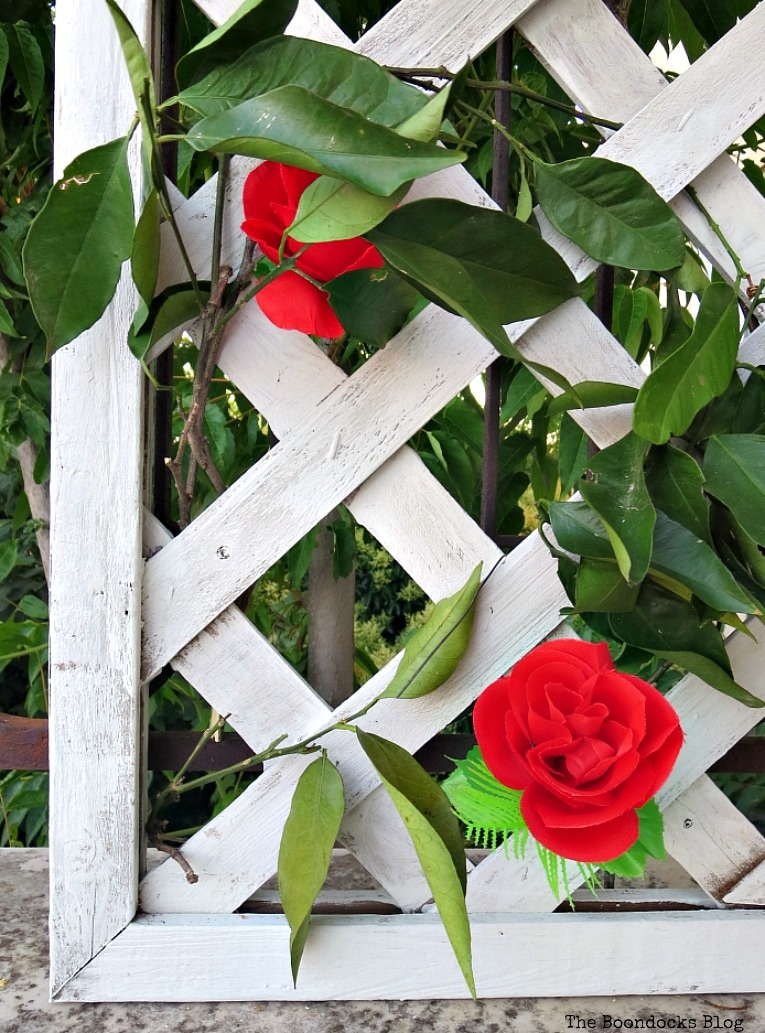
So now because you know I’m a big spender I took out my faux flowers and pulled them apart. I used pliers because they were stubborn but you can also cut them off. And yes, I’m showing you a scissor in the photo, but it didn’t work for me. The plastic holding the wire stems together was really tough.

The stem of the flowers is made of wire which I just bent into the shape of a hook and hung them up. Sort of like a backwards “C”.
And for the final touch! A yellow tea light lantern that I had bought from the same dollar store last year! I hung it to the lattice flower wall with a piece of wire.
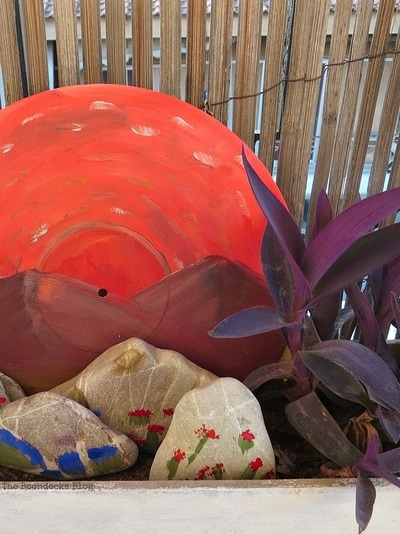
This is the entire lattice flower wall! Isn’t it beautiful?
Now you’re probably scratching your heads wondering why not put real flowers in there or have them grow from a pot and climb up? This is where I have to hang my head in shame.
I cannot be that renaissance lady who does it all. I am totally incompetent when it comes to flowers and gardening. In fact I have a huge brown thumb… slowly inching its way to black! That’s why this lattice flower wall is the perfect compromise.
In fact the only things that grows on my balcony are succulents and aloe vera plants. Oh and those weird pointy plants, the yuccas. You can see all of that here. They have all managed to survive despite my best efforts to do away with them. Oh yes, I know my limitations!
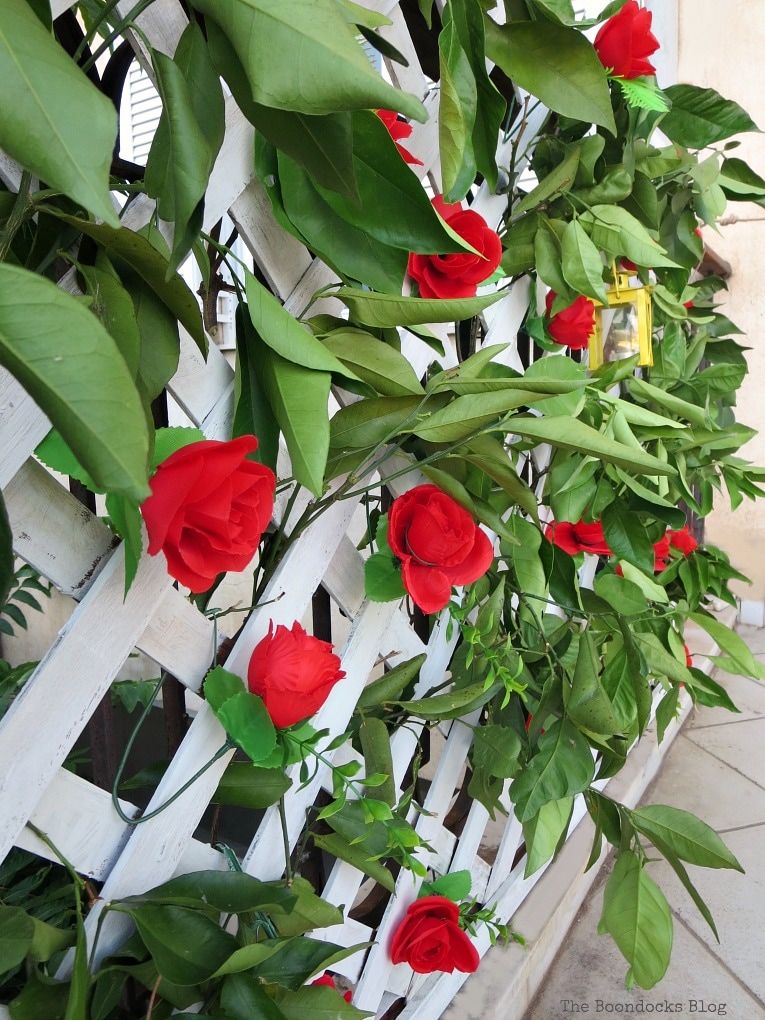
Sadly this is as good as it’s gonna get for my balcony! But you have to admit those pops of red look pretty fantastic against the white and green! And they’ll last all summer and maybe more which real roses don’t do!
Here is a shot of my rose fence with the tea light lit.
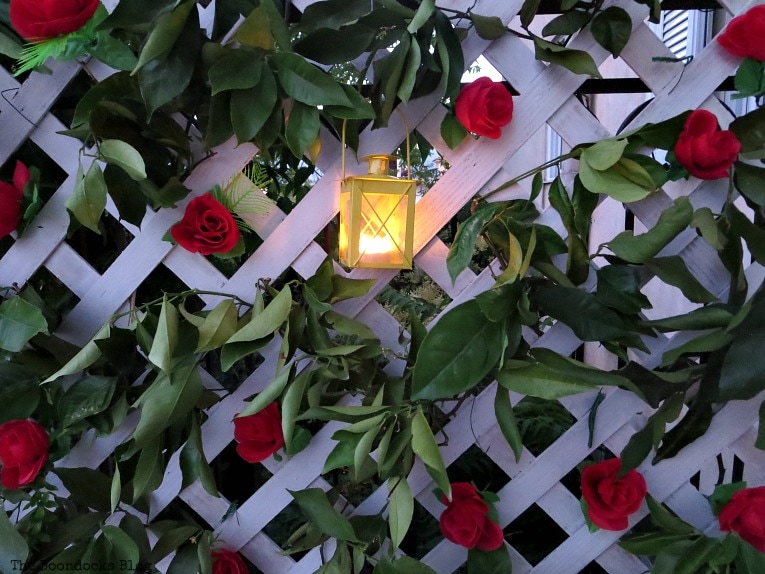
I believe if you are not paying close attention that you might actually be fooled into thinking they are not fake. For a dollar I’m pretty impressed with them myself!
And that was my easy colorful lattice flower wall made with dollar store flowers. I hope I have inspired and given you ideas for your summer outdoor space. And remember, aside from the dollar store, Old Fashioned Milk Paint is my best friend.
How is your green thumb? Would you consider coming over to give me some lessons?
Scroll down some more and visit with my blogger friends for more dollar store craft ideas.


Make sure to hop on over and visit my blogging friends to see what they have come up with for this dollar store craft challenge.
Across The Boulevard
My Husband Has Too Many Hobbies
Purple Hues and Me
Stone Cottage Adventures
More Balcony ideas
Lesya
Wednesday 16th of August 2023
Wow, I am sure that this is pretty old but good decor is just like wine, the older it gets the better it looks(tastes).
Well, I got inspired by you and plan on doing something similar. The only problem I see is that branches will start to dry up in a matter of days and I don't like to do all this work for the sake of few days. Instead of using real plant branches I will use artificial ivy https://designerplants.com/products/artificial-boston-ivy-green-wall-11sq-ft-uv-resistant and the cheapest artificial flowers I can find online.
Will report next week how it turned out!
Eileen
Wednesday 8th of June 2022
Wow! I should go shop at the dollar store too! Thank you for your inspiration! I should definitely try this out some day.
Upcycled DIY Fall Wreath with Dollar Store Vine - The Boondocks Blog
Saturday 10th of October 2020
[…] Today I am back again with my dollar store crafting buddies. You may remember we did this a while back and I made an easy colorful fence with dollar store flowers. […]
Quickly Make a Super Easy Pallet Couch - The Boondocks Blog
Sunday 12th of January 2020
[…] few uncomfortable chairs out there. I really wanted to add some kind of furniture aside from the colorful fence with the dollar store flowers that I was planning to add. […]
Michelle Leslie
Monday 12th of June 2017
Ahhhh Mary it does look beautiful on your balcony. So bright and cheerful. The perfect way to capture a bit of nature all year around and you don't have to remember to water them either, which means more time to create something awesome ;-)
Mary
Monday 12th of June 2017
That's the best part Michelle. the not watering them. Because I am capable of either drowning them or starving them. There is no in between!