Sharing is caring!
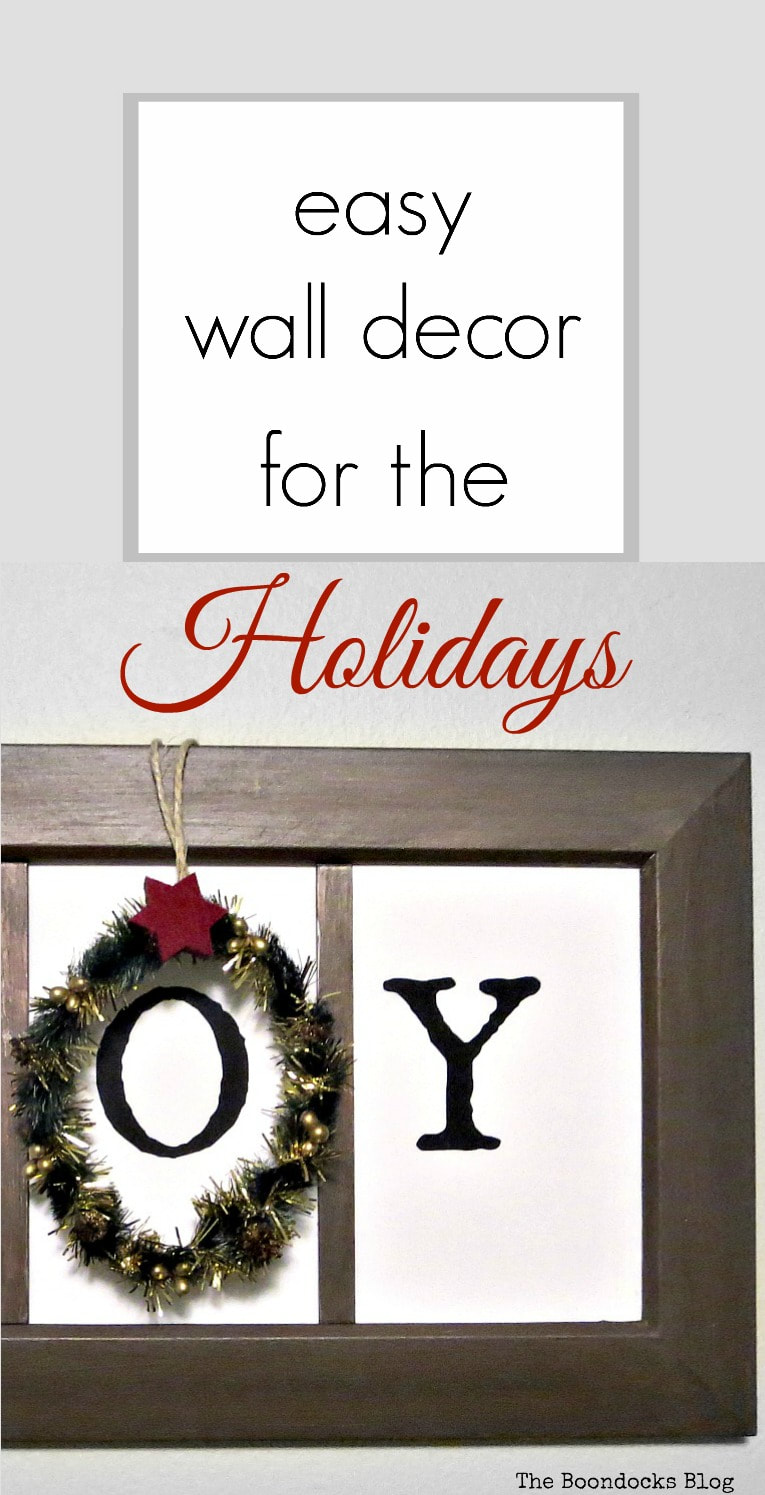
Today I am sharing with you another repurpose of a picture frame that I made into easy wall decor for the holidays.
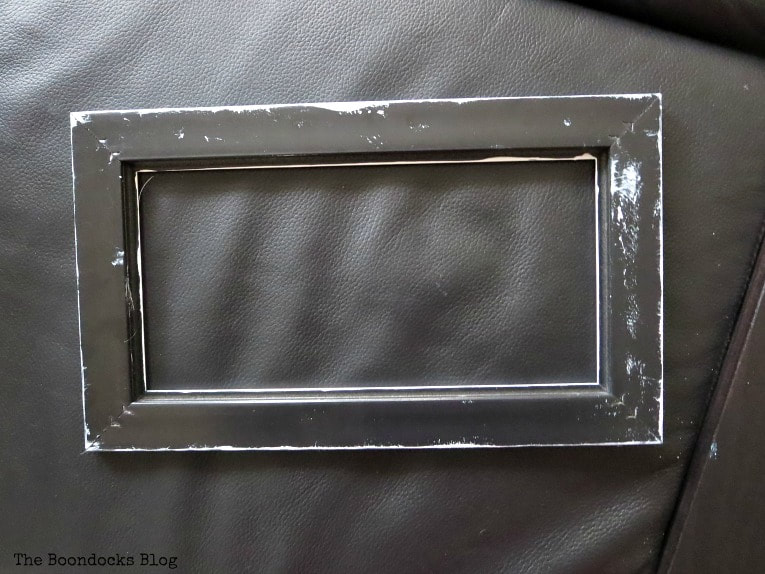
I started out with this simple plastic frame. It was cheap plastic but I was determined to make it something special – something gift worthy.
I would also like to invite you to visit my friends at the Creative Christmas Link Party below.
What I Used:
Disclosure: I was compensated for doing this post with product. However, all the opinions stated here are my own. I only use products I love and would recommend to my viewers.
- A cheap plastic picture frame. Mine had a divider creating the illusion that there were three separate picture frames
- Americana Chalky Type paint in Everlasting
- Decoart Americana Acrylic Paints in red and yellow
- Decoart Dazzeling Metallics in Black Pearl
- PicMonkey to create the graphic
-
Mini Christmas wreath
The How To:
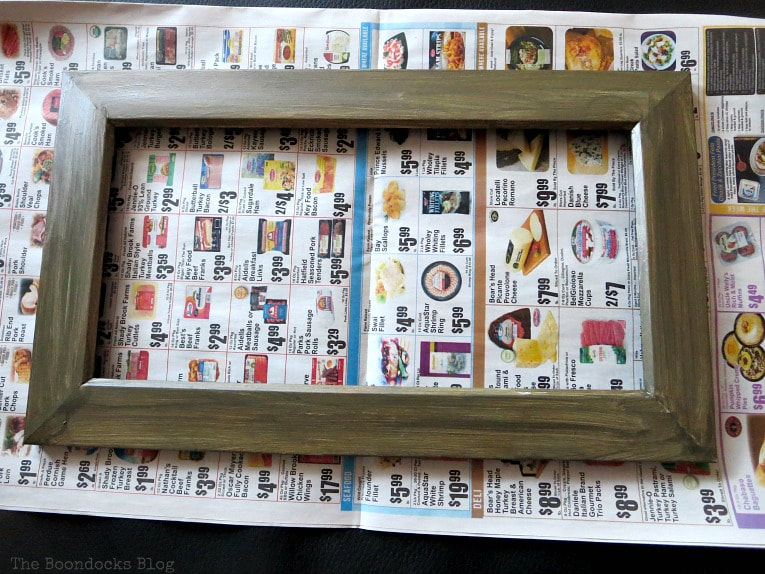
I started out by painting the front of the plastic frame with two coats of the chalky type paint. As I’ve said many times before I use it as a primer. It covers the black and it is a great way to prepare the slick surface for whatever you are going to add after. In fact I have done the same exact thing for a dresser makeover.
Below you can see the back of it. I was so excited to start I didn’t get a shot of the front. It is cheap black plastic. They seem to show up like weeds in my house.
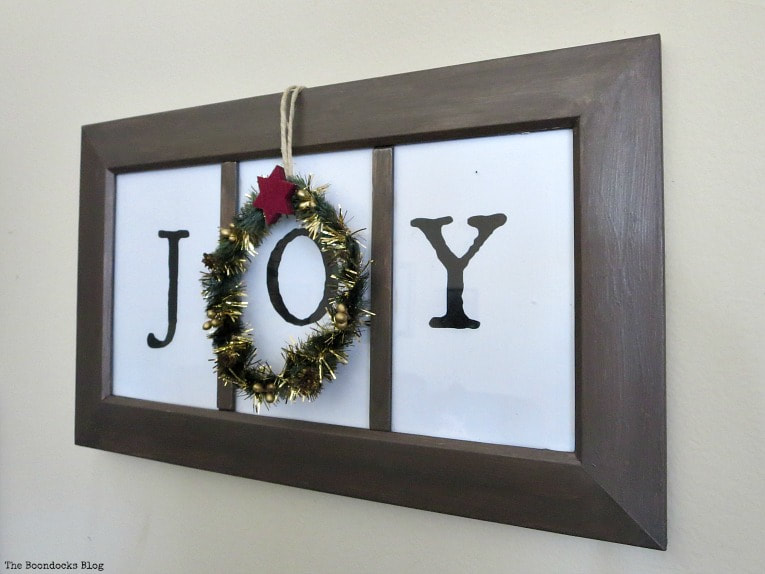
The next step was to create a warm color. I wanted the look of the frame to be rustic, warm and woodsy. I took red and yellow acrylic paints and mixed them together along with the black metallic paint. This gave me the brown you see below. I brushed on two coats in long brushstrokes. The paint dries really fast so it is not a difficult or time consuming project.
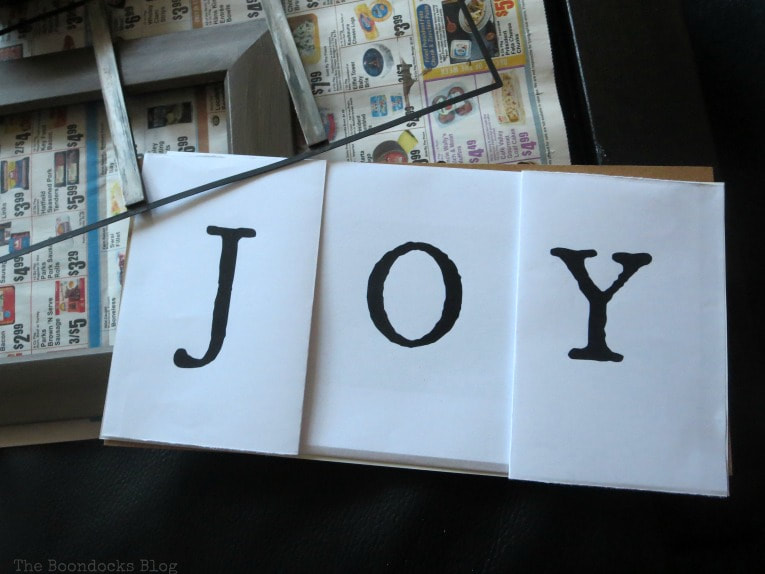
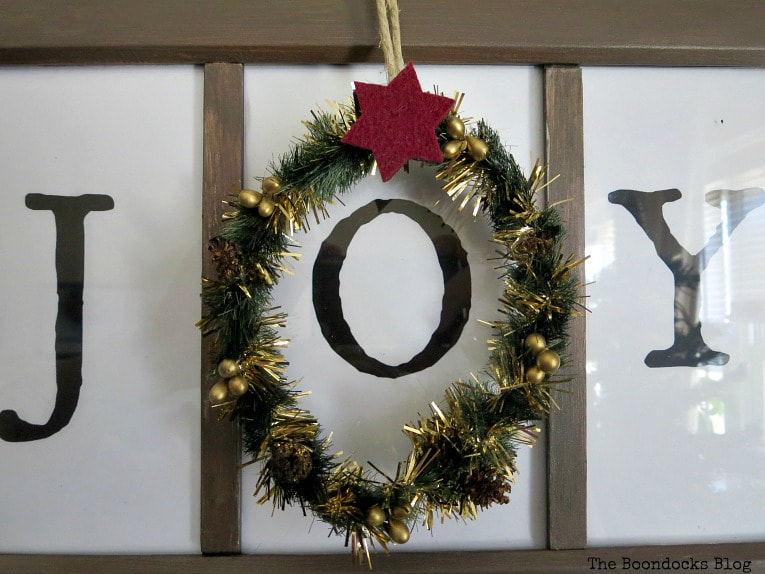
The next step was to create the “JOY” printable. That was easily accomplished in the PicMonkey app. (I have not been compensated by Pic Monkey in any way, I just really like using them.) Just go and pick out the font you like, create your printable and then print it out.
In fact you can download this one that I made. I chose the De Walpergen Pica font for this project. And no the J is not a mistake, it was designed to look that way. Here is a tutorial on how to use the fonts.
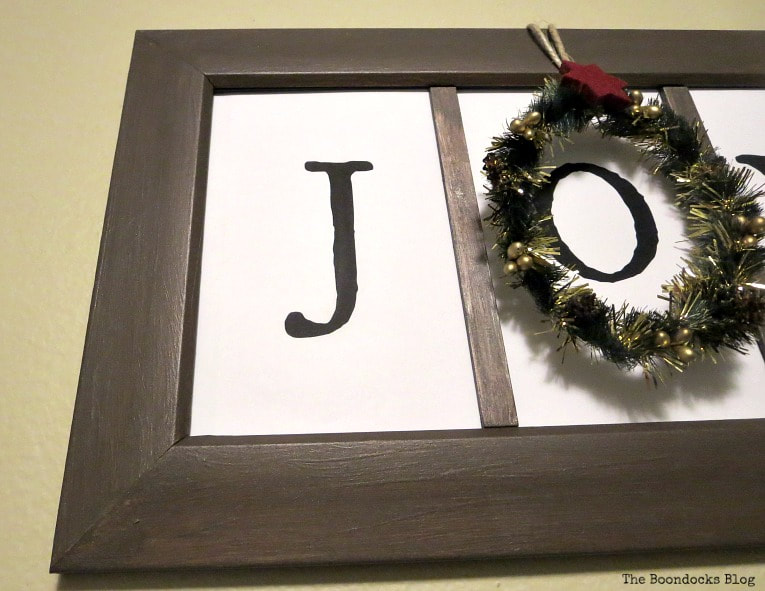
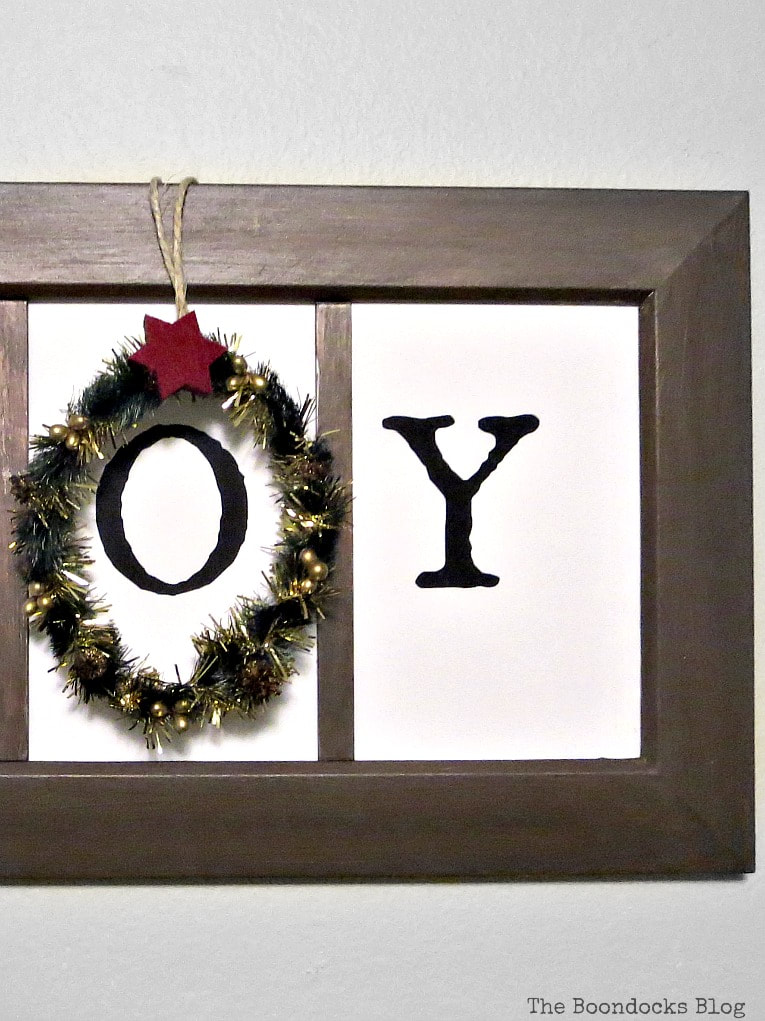
Here is where I ran into a problem. You see the frame was longer than the paper size. So what I did was to print out my “Joy” sign twice and then cut it out the way you see below. The first sheet of paper was placed on the bottom and the “O” was exposed. The second sheet of paper was cut in half and the “J” and “Y” were cut large enough so it would fill the whole width of the frame.
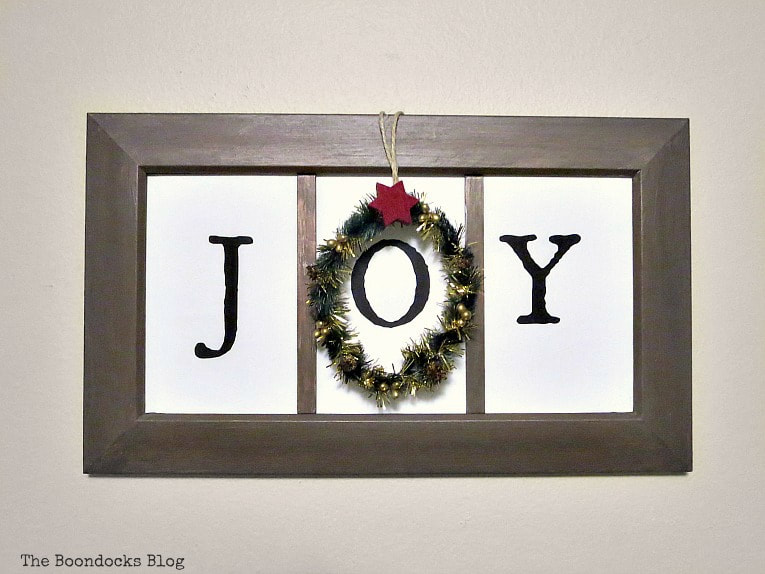
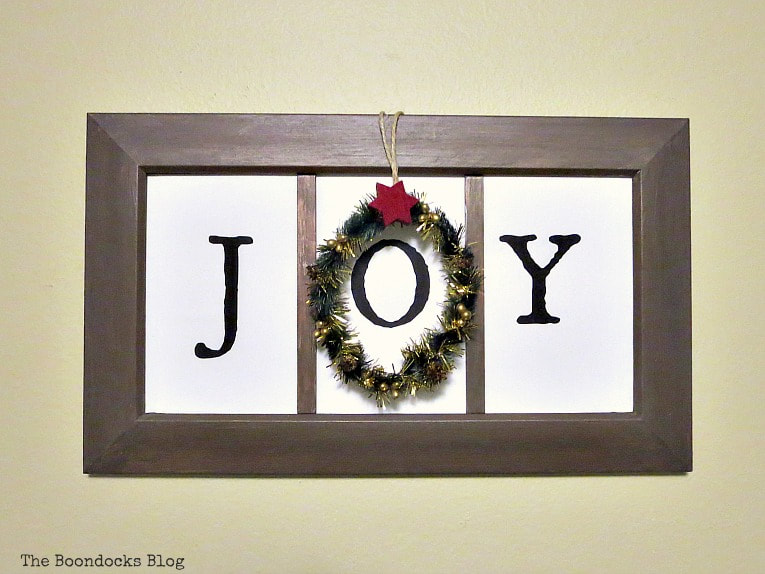
I also should mention that the frame came with a divider creating the illusion of three photos. And now you know why I chose the word “JOY”.
The final step was to add a Christmas embellishment over the center and I was done.
Disclosure: The items below are affiliate links and link to Amazon.com. If you purchase any of these products through the links, I receive a small commission, that way I can continue to provide you with lovely content. There is no extra charge to you for purchasing through my affiliate links.
I was going for an understated look, something a bit traditional but we could also easily say it looks like rustic farmhouse depending on the embellishment added.
Can you see that nice sheen on the plastic frame? It doesn’t look plastic anymore. It has texture and depth. And even some imperfections which only add to the charm.
This would actually make a great gift! And in fact that is exactly what I did! It now hangs on the wall of my friend’s house.
You see how easy it can be to create personalized Christmas wall decor with just a little time and very few materials? In this case the addition of the Dazzling Metallics paint made all the difference!
I hope this project inspires you to take a second look at your old abandoned picture frames. This was super easy to update and it is perfect as a Christmas gift.
Below is a link party that I am participating in with my Blogging Fifty friends and we are all sharing … you guessed it, all things Christmas.
If you really like what you see subscribe to my blog and get my adventures twice a week in your mailbox. The form is on the sidebar and your e-mail will never be shared with a third party.
The Creative Christmas Link Party is hosted by Janet of Shabbyfufu and the bloggers of Blogging 50. Please visit all of the talented bloggers below!
More Holiday Ideas:


The Freshman Cook
Thursday 20th of December 2018
I love this! So pretty and well done, and the frame is awesome too! You do such nice work. Thank you for sharing at Celebrate It!
Katrin
Monday 20th of November 2017
Mary you would never believe that it was a plastic frame, it looks so rustic and wooden and just cozy and perfect! What a wonderful idea and lovely sign for the holidays! I too love picmonkey for my printables!
Mary
Saturday 25th of November 2017
Katrin my friends home is so warm and cozy full of lots of wood and that is the look I was going for .
Barbara Chapman ~ French Ethereal
Monday 20th of November 2017
Happy Holidays, Mary! I love this idea! I pinned out to my Crafts to Make and Decorating boards for you. I also used Tailwind, so pins will go out later, too. Great idea and THANK-YOU for the tip about creating two "Joy" prints ~ very good to know! Glad to be with you on the Christmas Creatives linky tour. <3 Hope you are having a lovely Thanksgiving week ~ happiest of Thanksgivings to you and your family, xoxo Barb
Mary
Saturday 25th of November 2017
I am so looking forward to the holidays this year Barbara. It is a fresh start for us with lots of new things to make.
LInda at Mixed Kreations
Monday 20th of November 2017
Your sign turned out beautiful! I really love how you did the paint. I'm going to have to try that some time. I love the additional touch of adding the wreath. <3
Mary
Saturday 25th of November 2017
We needed to have a little something extra for Christmas! ;)
Doreen@foxdenrd
Monday 20th of November 2017
What a pretty and thoughtful gift Mary! Wishing you and yours a Happy Thanksgiving 🍁 xxx
Mary
Saturday 25th of November 2017
And the best part, it was tailored to the recipients taste.