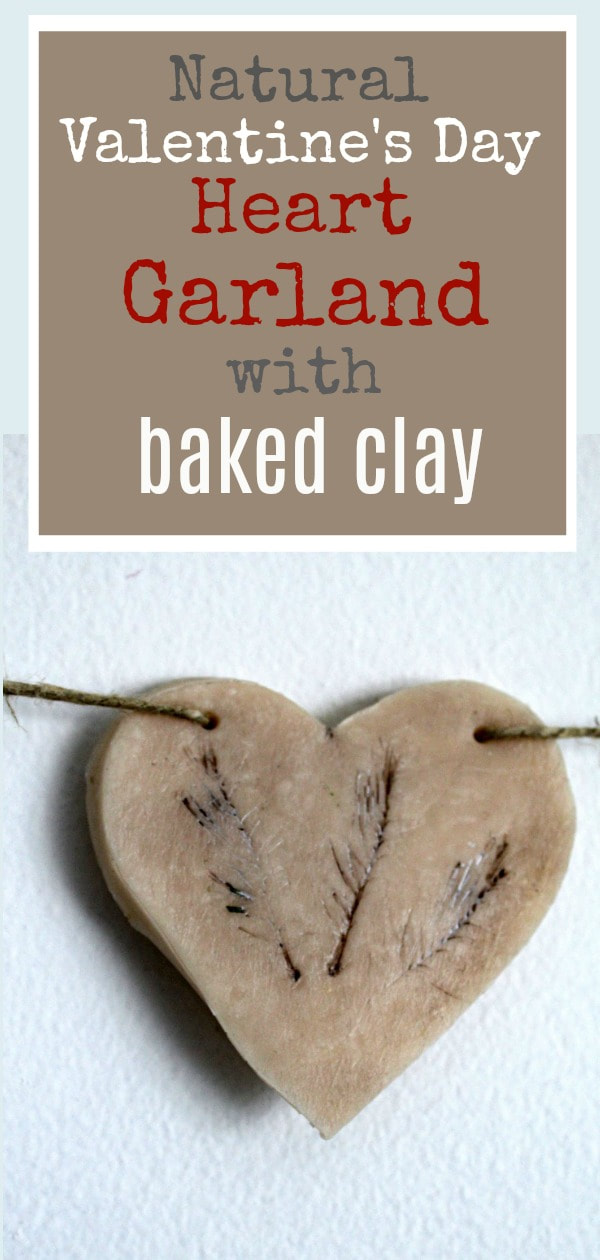
How to Make a Natural Clay Valentine’s Heart Garland
It is that time of the month again when I join my friends from all…
A few months ago we started a new theme that involves using the Anniversary years as our guideline. We featured projects with paper and projects with cotton. The last time we did Christmas And now we I am going to show you how to make a natural clay Valentine’s heart garland.
Make sure to scroll all the way down to the bottom of this post to see what my friends have made this month.
What We Used:
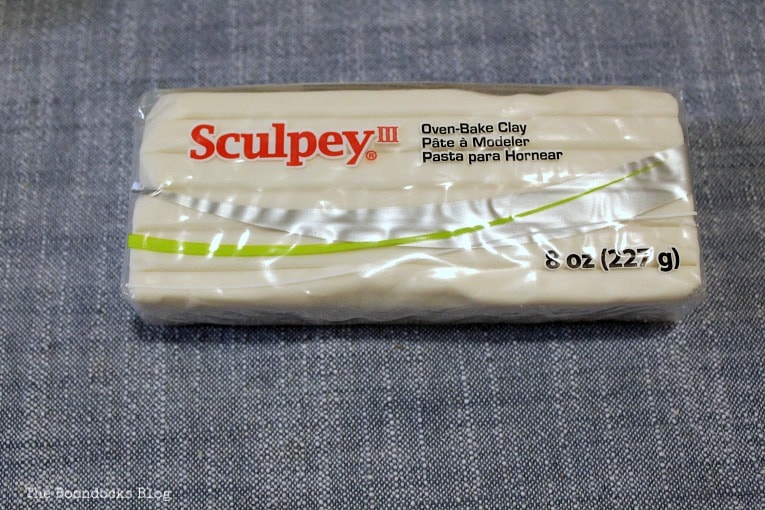
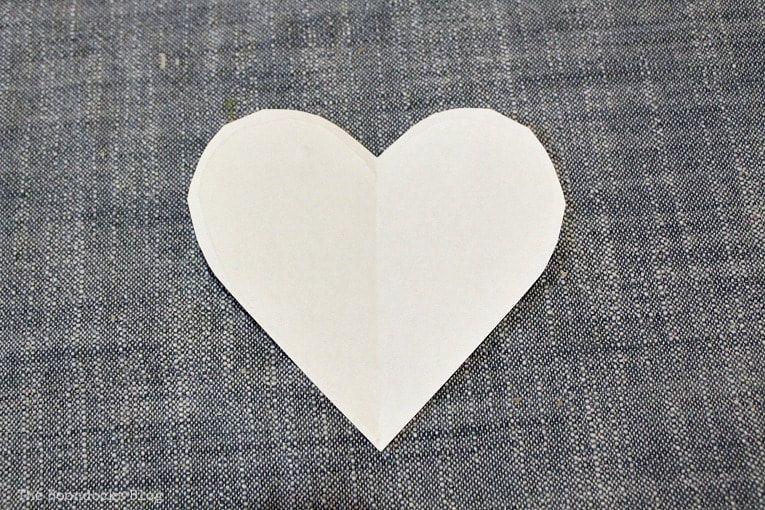
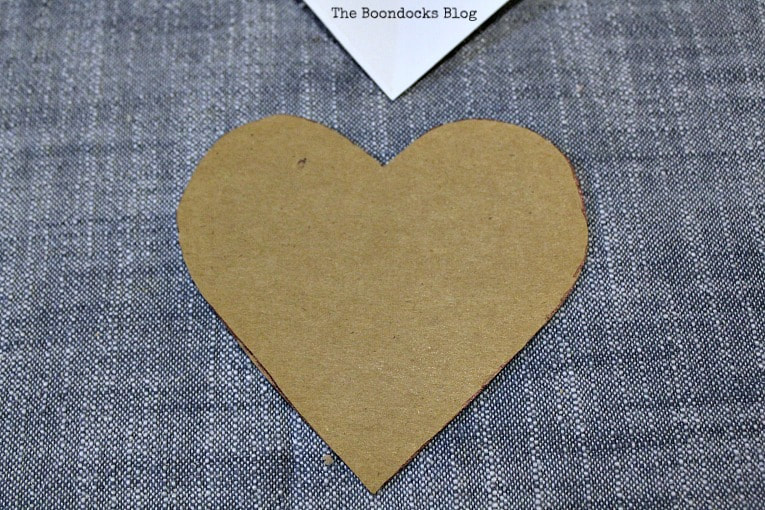
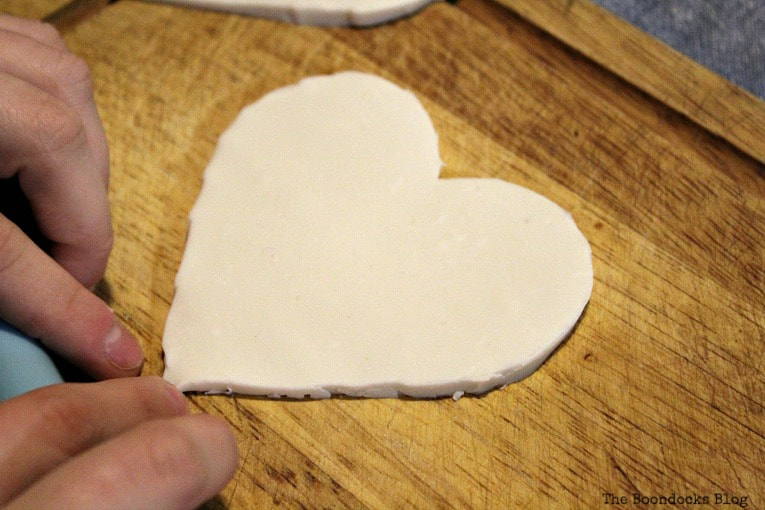
The How To:
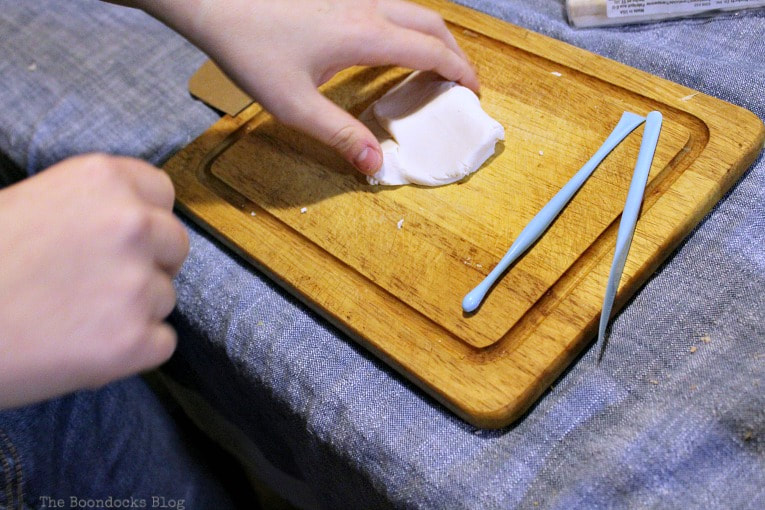

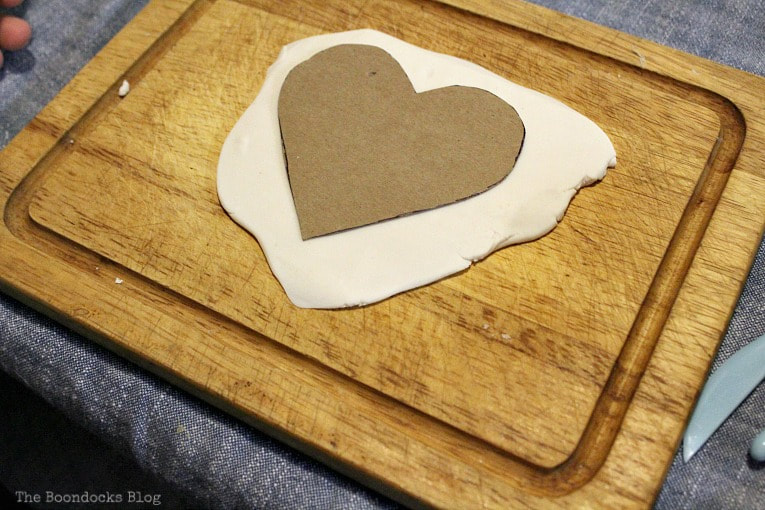
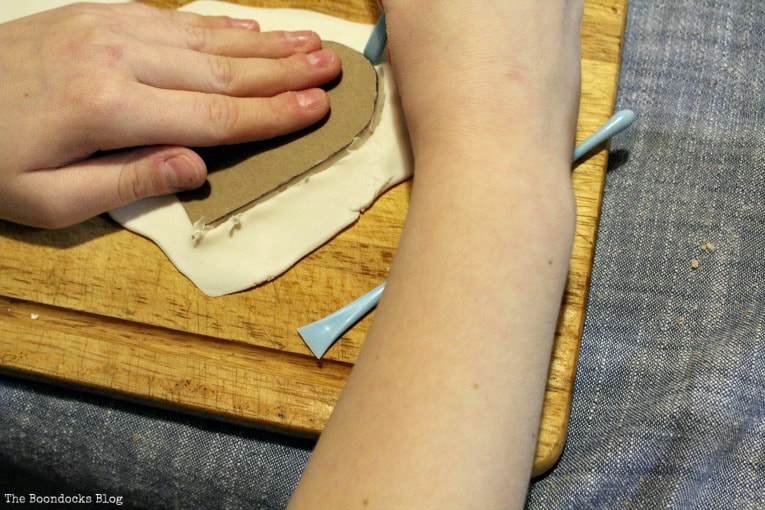

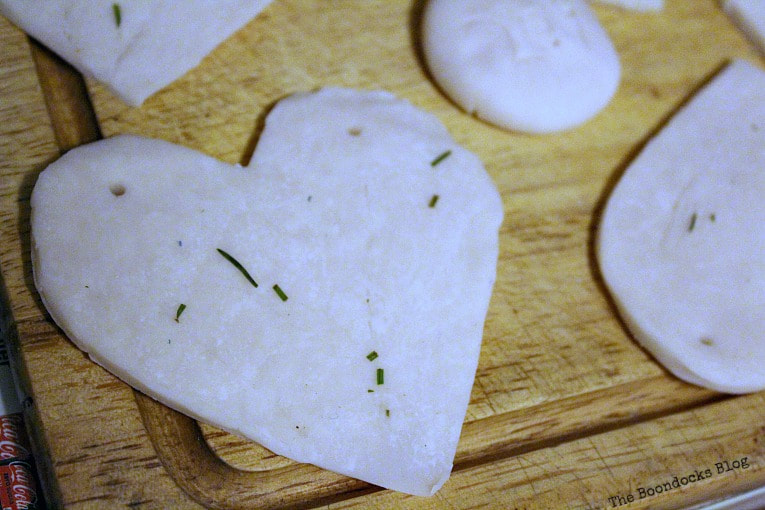
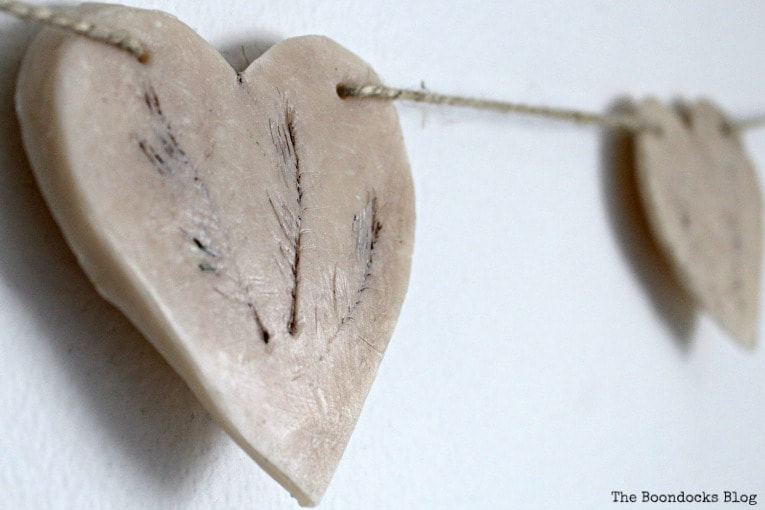
We didn’t worry about the rough edges since we were going for a rustic look, but this would be the time to smooth them out if you want a more finished look.
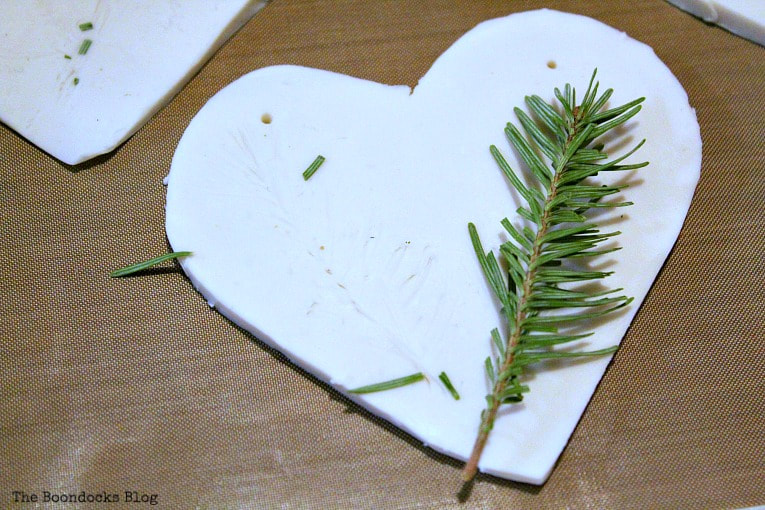
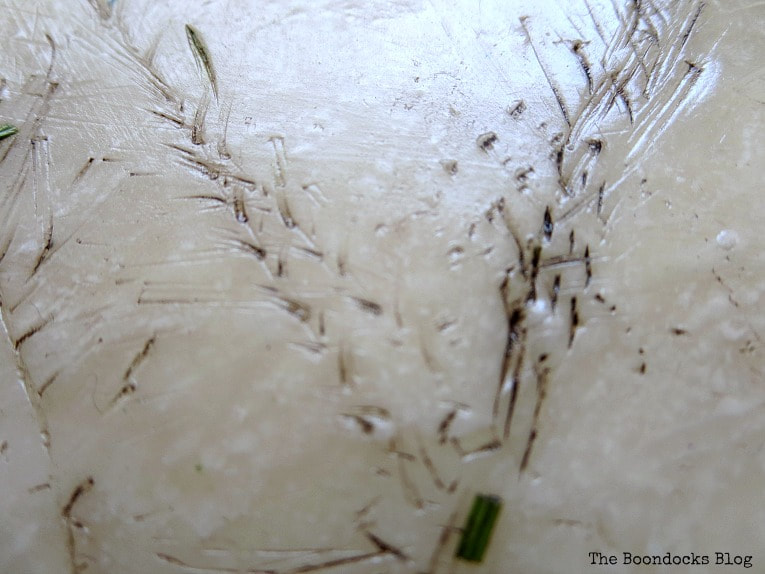
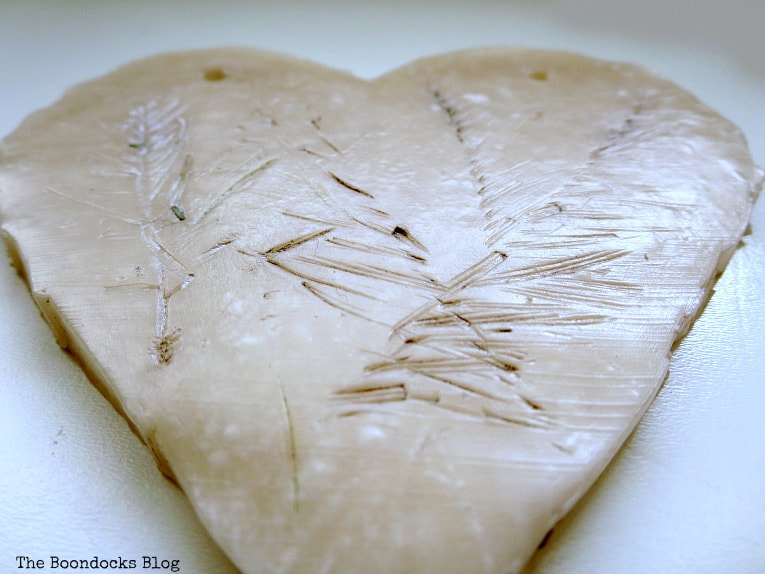
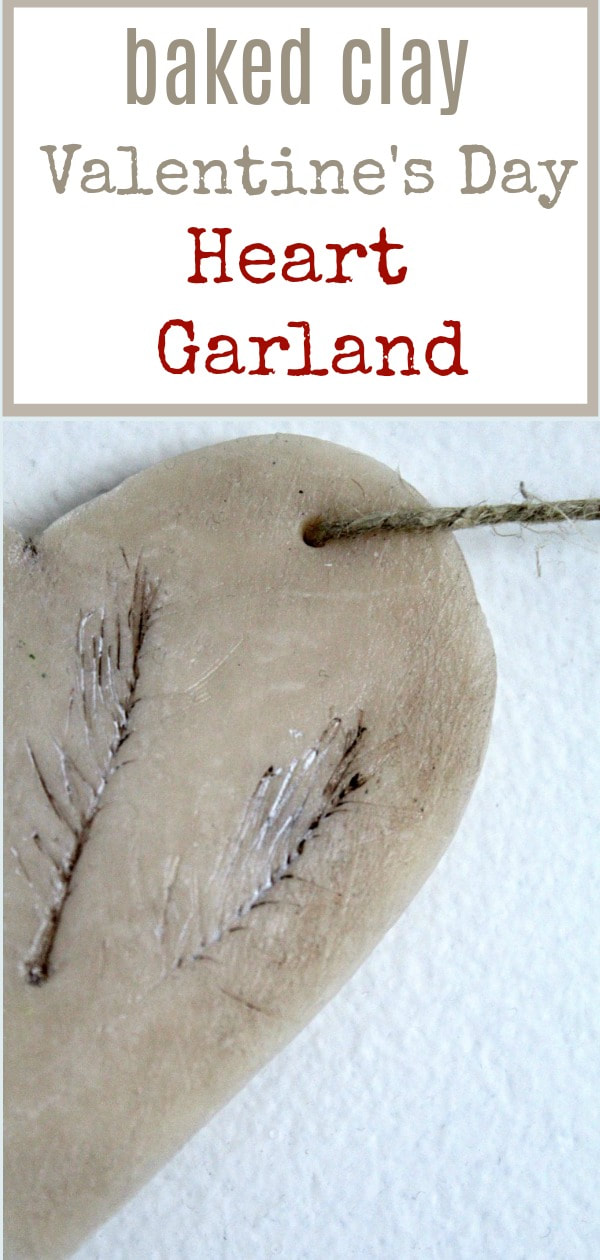
We also poked holes near the tops of the years for the twine to go through.

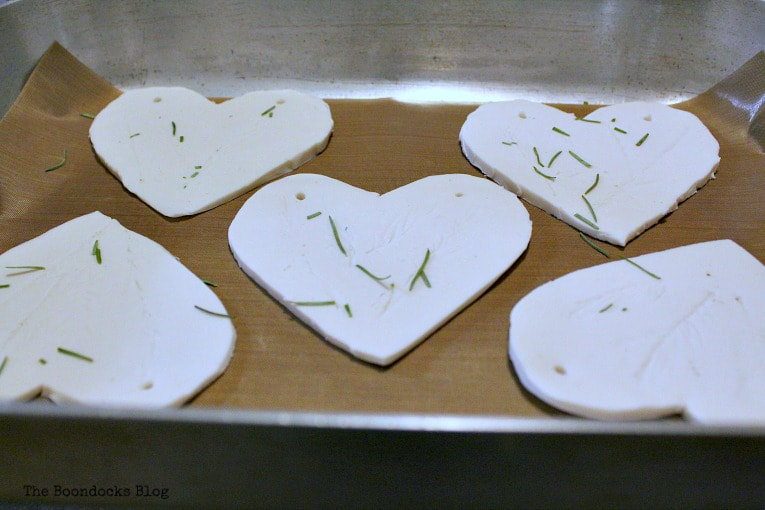
We placed them on a non-stick sheet made for baking clay. And baked them in the oven for about 15 minutes.

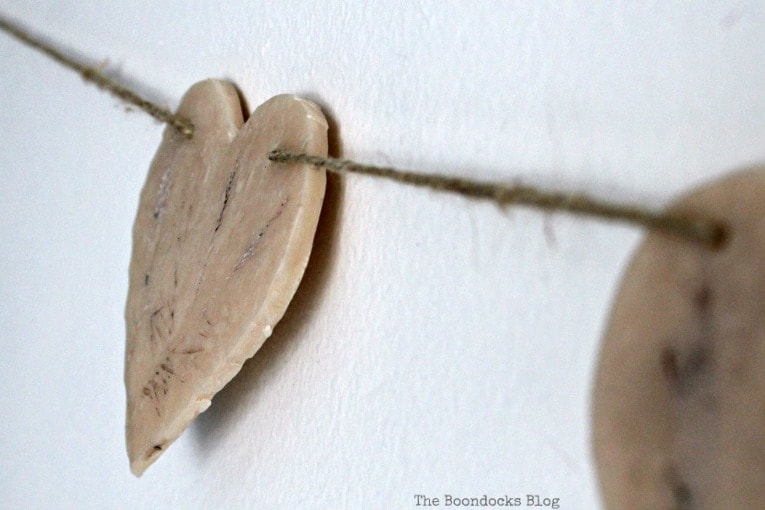
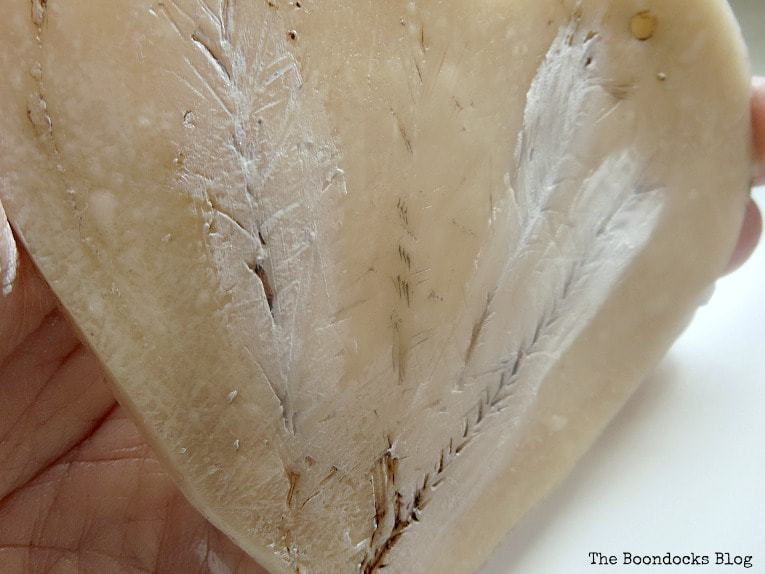
And here is where the fun begins. I had three different waxes to choose from. I wanted to experiment so using the furniture polish (that’s the one in the center which is really clear) I went over all of the hearts. and wiped them with a clear cloth.

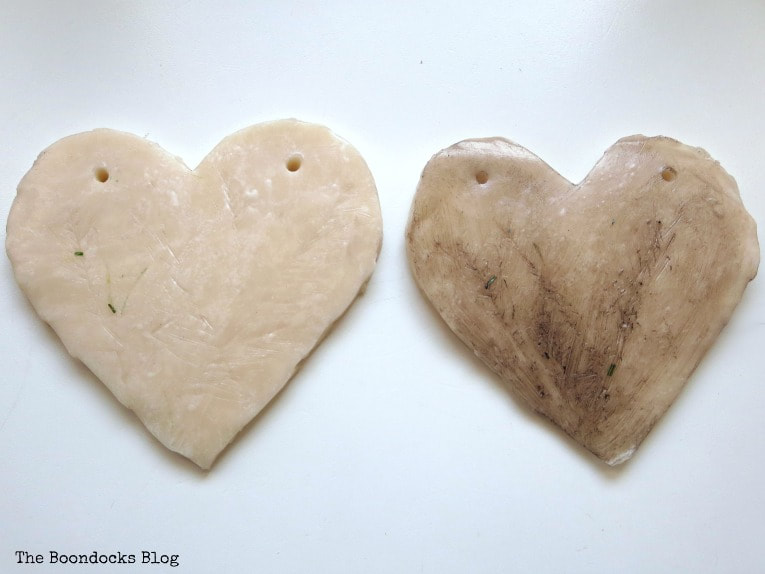

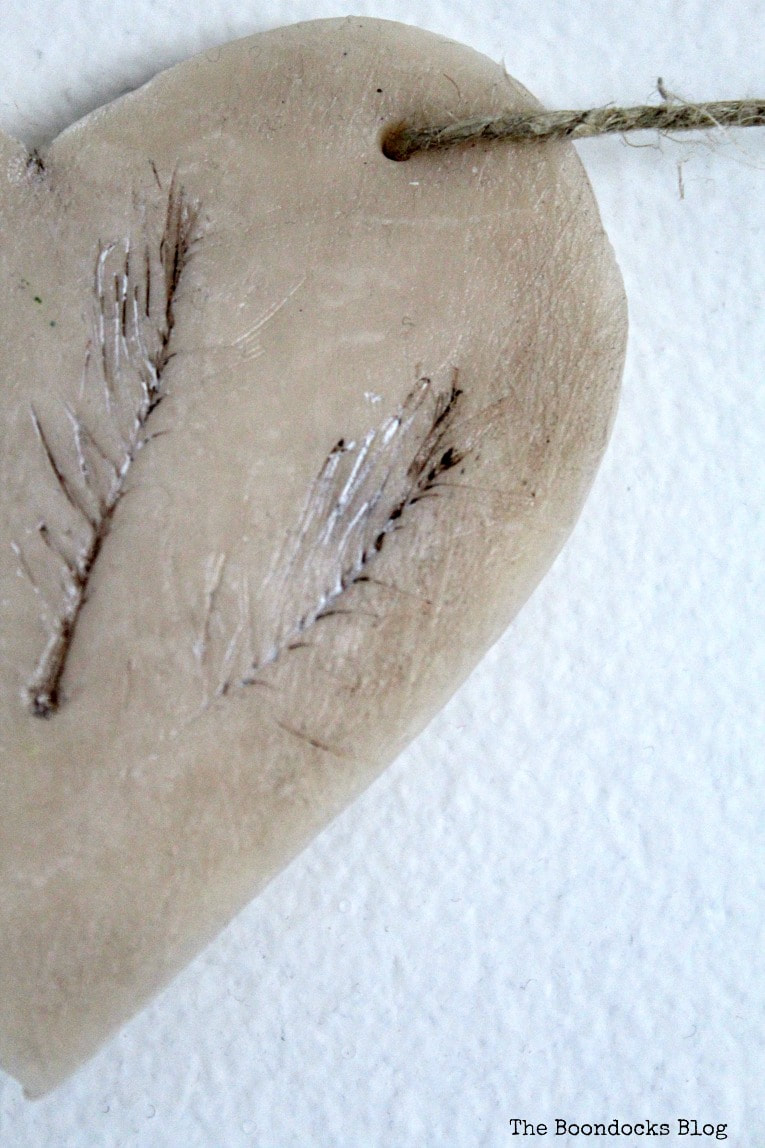
Once the dark wax is wiped back you can clearly see all the markings on the heart.
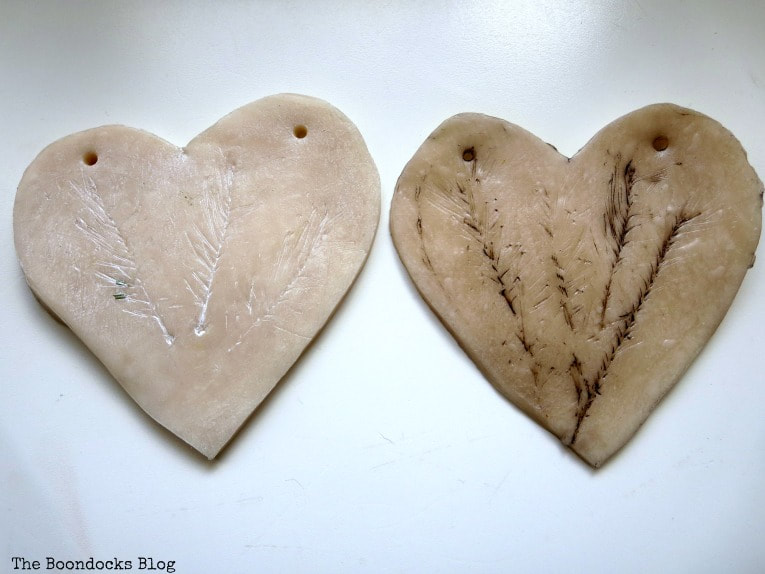

But I was not happy with either one. The one was too bland and the other too dark. To soften up the darker one I added white on top. This process was trial and error but that’s how you figure out what you like.

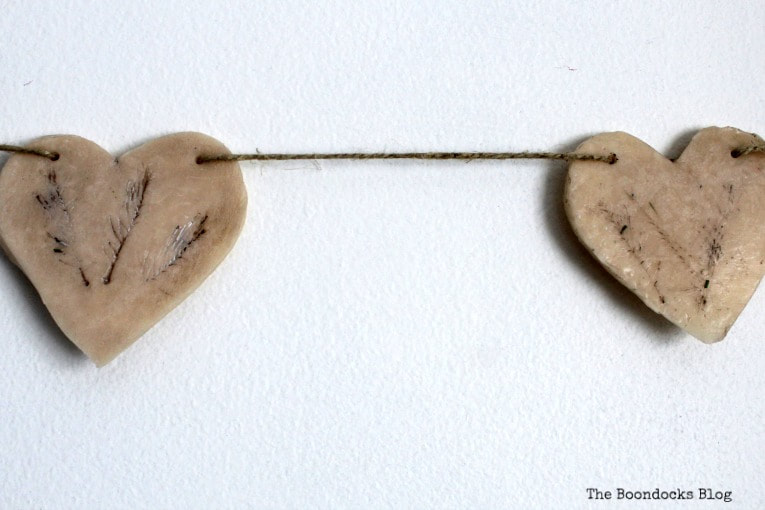
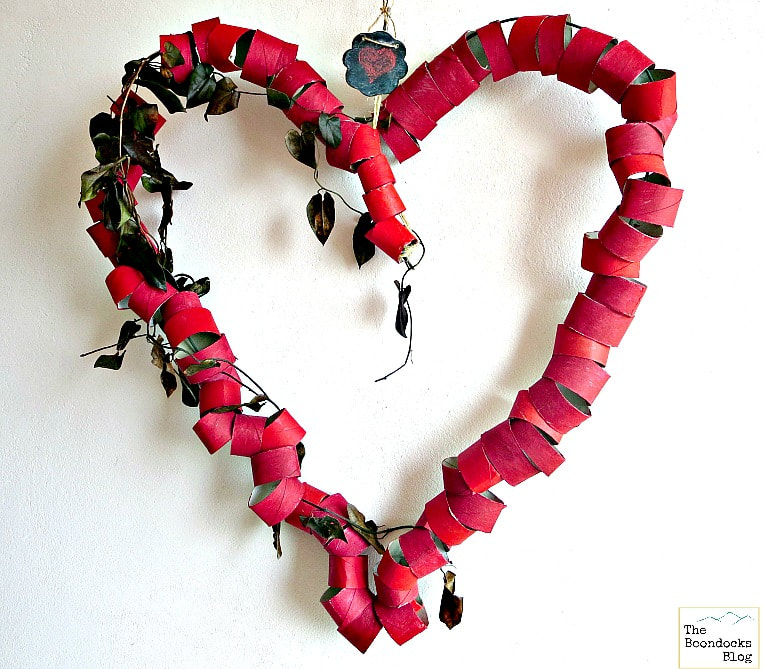
You may have noticed that I had made holes in the hearts before baking them. My intent was to create a garland with the hearts.
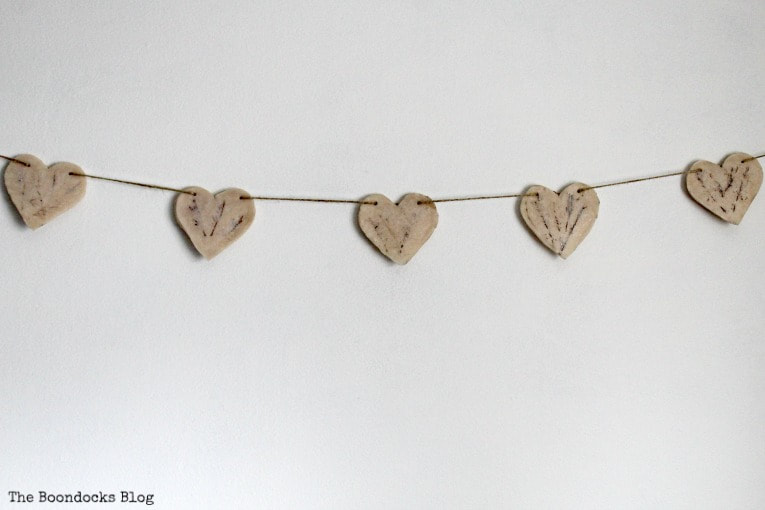
I think it turned out just right!
And not too dark!
I hope you’ve enjoyed our how to make a natural clay Valentine’s heart garland. I got to spend a wonderful afternoon with my daughter and we made a heart garland which can pretty much stay up all year round. That is definitely a win-win in my book! How do you decorate for Valentine’s Day? Do you go all out or are you like me?
And now scroll below to see what my pals from the International Bloggers Club are up to. If you’d like to see more past challenges click here
.


Linking up tothese Link Parties
This blog is for entertainment purposes only; my DIY tutorials are not professional advice. Read my full disclaimer here.
I love it when I get your comments and I will try to reply to every one of them.


They look beautiful Mary, I think you achieved the perfect look for them and you’re true, they seem stones with fossils on them. You can have them hanging up not only for Valentine’s, I am sure they would look awesome on a bookshelf or a mantel.
You are so right Pili. They would look great anywhere in the house because I didn’t go all red on them. We have them in the girls’ bedroom and the whole vibe is so calming.
Oh wow yes, the rosemary leaf imprints do look like they’ve been fossilized into the hearts. That’s so neat. My son has quite the collection of fossils. He’s been collecting them since he was little, and he would so appreciate a little heart like this, even if it’s not the real thing. I wonder if I can make one in time to ship to Canada. It’s such a cool idea.
Michelle I’m sure you can make some in time to send to your son. They only take 15 minutes to bake and once they are cool, a few hours you can go ahead and decorate them. I left them a few days because I didn’t know what I wanted to do with them.
I really like the look of the clay hearts. Well done! Pinned and shared
Thanks so much Carol. I wanted a different look for this year.
Those hearts look like they’re PINING for someone!!
Haha! Thanks so much Cath!!
This is so pretty and fits in with all of the Hygge during winter. LOVE.
Exactly Kari, that is the word that fits it to a T!
I love it! And I agree… I get tired of just red or even red and pink. I love your neutral heart garland.
🙂 gwingal
Thanks Nikki, it was time for a change!
At first glance I thought your hearts were carved stones. Great idea, Mary and well done! They could be displayed beyond valentines day.
Ha! That is exactly what I said to myself when they were done. They polished up nice and shiny just like stone.
This is just adorable!
Thanks Roxanne, I am admiring it right now on the wall.
I love the look of the hearts. I like the natural look you achieved with the waxes. This is something I would keep up well after Valentine’s Day.
I am planning to do just that Debra, it is so much more than just Valentine’s Day.
Very inspiring post, Mary! Gives me lots of ideas to implement using the clay! 😉
Julie I am always happy when I hear that I can inspire. Looking forward to seeing what you create.
Thanks for sharing your garland at Homestyle Gathering!
Mary I also thought it was stone, they look so natural and I love the minimal look! Beautiful project!
The power of the wax Katrin. I am really happy with this minimal look!
Really cute Mary and I like how they look like wax!
And they feel like soft stone. I couldn’t be happier.
I like the neutral, natural look of these, Mary. They feel warm and loving.
Yes that is exactly how they feel Jeanie, and they are so soft to the touch.
So cute, Mary! Love how your hearts turned out and the wax looks really good in the imprints!! Pinned to several boards and will post to FB for you. <3
Happy decorating,
Barb 🙂
Thanks so much Barbara. I am really glad I went the natural route.
These are so beautiful and unique! I love the texture and the use of furniture wax.
Thanks Kay, I think the wax makes all the difference.
Mary, thanks so much for stopping by the Homestyle Gathering link party today and sharing this great project with us. I’ve never worked with clay before, but I’ve always been fascinated with the projects…and I love how you did the finish on the tops. Thanks for showing us the process!
This was my first time using clay too Rita and it was so easy I was surprised. I hope you have a chance to try it out sometime.
Hi Mary! These are the cutest. I like how you used the pine sprigs to get the added texture. Thanks so much for sharing this project over at Homestyle Gathering.
That was my favorite touch too Kim. Good luck in your new party!!
They turned out beautiful Mary! I love how you textured the hearts, and I thing you found the right amount of wax to make the textured mark show but not to dark. Love them!
Linda I really stepped out of my comfort zone with this one and I am so glad I did. It surpassed my expectations!
I love the warm tones of these clay hearts. They can be used all year. That is the best part. Happy Valentine’s Day, Kippi
I agree Kippi, I am not one to put things up just for a week and then take them down.
I wouldn’t have guessed it was clay. I love the rustic look that adds a farmhouse character. Thanks for the inspiration Mary!
Thanks Katerina we are going for a calm look now! Life is hectic enough!
I really like the natural feel of these banner Mary. Its so quietly beautiful. Pinned.
Leanna they came out just the way I hoped for!
How pretty! Thanks for sharing at Vintage Charm–pinned!
What a great project to do with your daughter! And I absolutely love it! I love the neutral color, and you totally struck the perfect balance between dark and light wax. Perfect for Valentine’s Day. 🙂
Thank you Amy. It is now hanging on my girls bedroom wall.
Mary,
What a cool idea! I see these sorts of DIY projects on the net from time to time and I’d love to try it in the not-so-distant future. Maybe when things settle then I might entertaining trying my hand at it. Thank you for visiting today. Have a funtastic week!
Thank you Cathy. It was an easy project,
Popping over from Esme’s to check out your project. It’s sure to be hit with the grandkids this weekend! <3 Enjoy your week and have a Happy Valentine's Day... Can't believe it's almost here.
Thank you Bette, It would be a great project for the grandkids. For sure! Happy Valentine’s Day!
I love these!! I can see this technique being used for Christmas ornaments too! Stars, angels, snowmen! Thanks for sharing!
Absolutely it can be used with any cookie cutters at all.
These are so creative! Thanks for linking up to Best of the Weekend! You were one of my features! Enjoy the weekend!
Shelley
Thank you so much Shelley!!