How to Make a Fun and Sloppy Coffee Bar Station
Make an easy DIY coffee bar with an upcylced glass tray that won’t take up too much space. This coffee station idea is practical and stylish.

Make an easy DIY coffee bar with an upcylced glass tray that won’t take up too much space. This coffee station idea is practical and stylish.
I am a coffee addict! There I’ve said it. I’ve had all my coffee stuff hidden away in the cabinets but when I get up in the morning I really don’t want to have to look around to find my coffee making stuff. Now I had seen lots of friends making coffee stations and coffee bars and I really liked this idea.
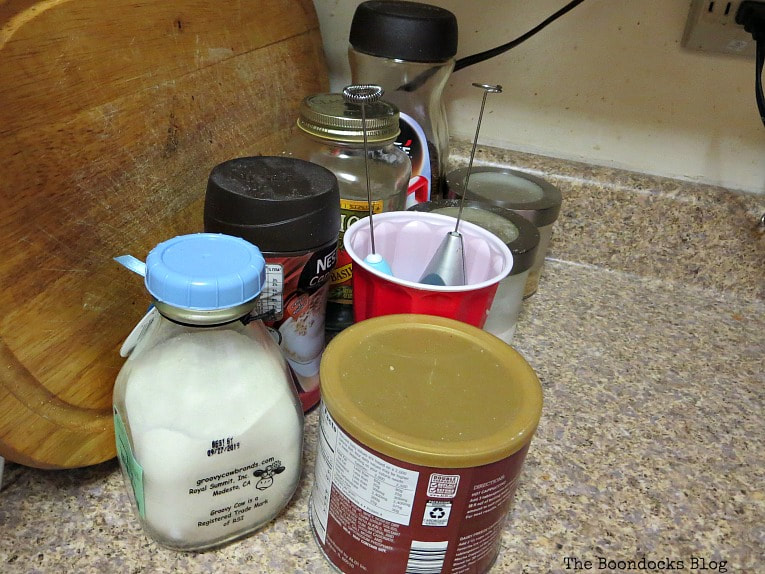
This is what my makeshift coffee area looked like… meh!
It was inexcusable for me to have this mess. I needed to make something pretty right away!
In fact I got the idea from a friend. I had seen her pretty coffee station and thought why not corral all of my stuff into one spot and make it at least a little pretty or at least a little organized.
What I used to Make a Coffee Bar:
Disclosure: This post contains affiliate links for your shopping convenience. If you purchase any of these products through the links, we receive a small commission at no extra charge to you. You can find our full disclosure here.
- An old rectangular glass dish
- Acrylic paints
- Masking tape
- Deco Art Varnish, 8-Ounce, Ultra Matte
- Permanent black marker
- Printable from the Graphics Fairy
- Mod Podge
- Printer and paper
How to Make a Coffee Bar
I had found this old dish in the basement. You see we are getting ready to declutter and I’ve discovered that we have multiples of everything in this house. How did that happen? Anyway there was nothing wrong with this glass dish except for the fact that we really didn’t need it. You can even use an old tray that you have sitting around to make a coffee bar.

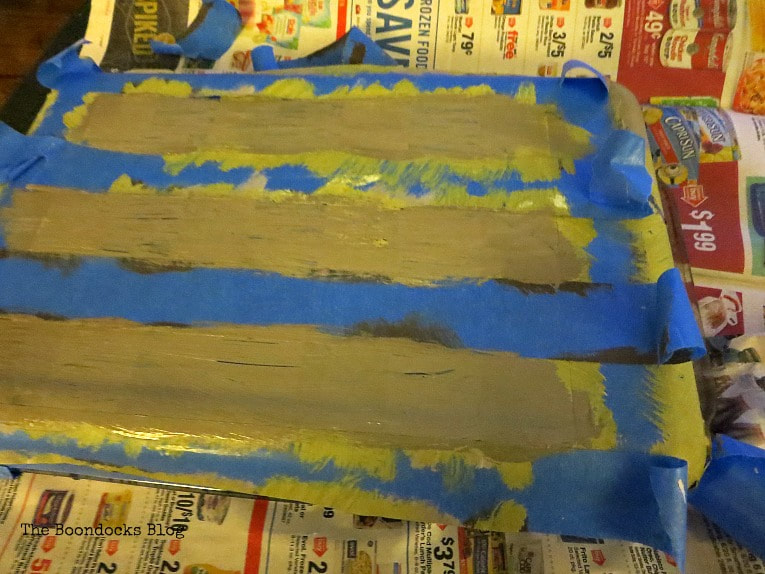
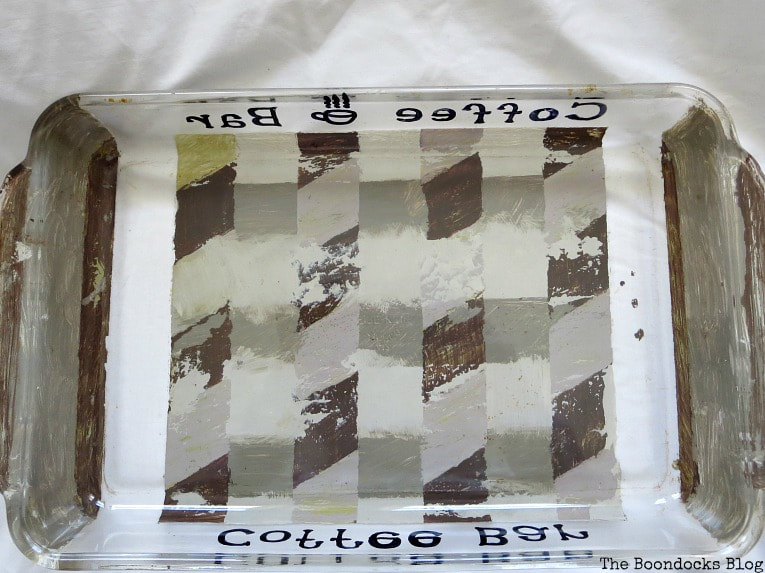
I gave it a good washing and then once it had dried, turned it over and started to work on the exterior of the bottom. This way the pattern would not be in contact with the items in the coffee tray. The plan was to make some sort of a pattern on there using the masking tape to define the areas.
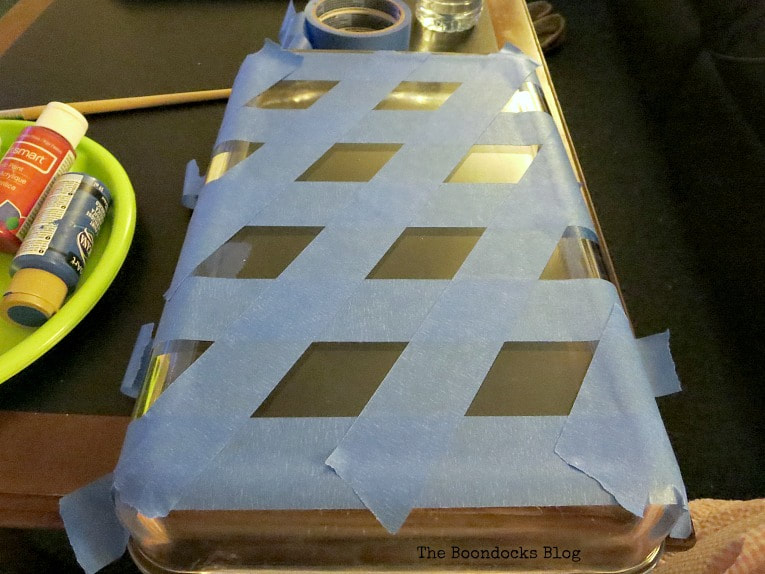
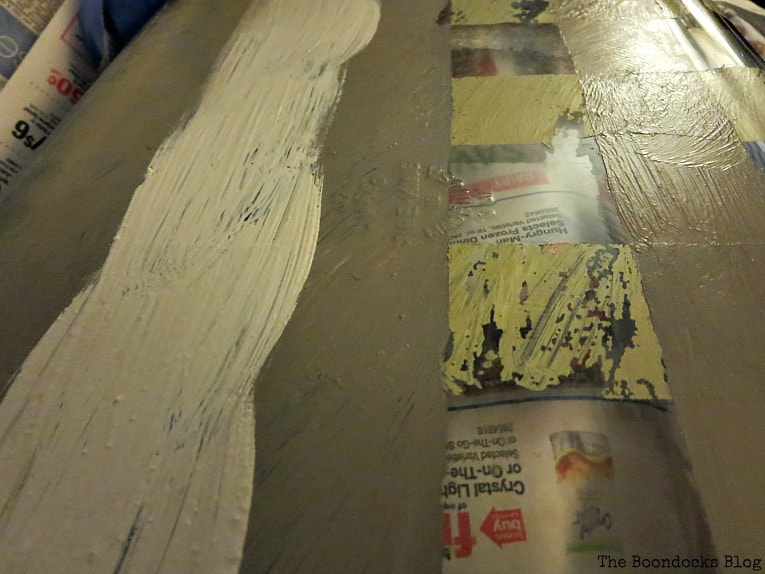
I wanted to do the pattern in the brown beige family to stay close to the colors of the counter top. Turns out I didn’t have any of those colors on hand so I just mixed up the primary colors, red, blue and yellow in different amounts and got brown.
I painted the diagonal sections in brown and then removed the tape. I then added white to the brown and painted those sections as well. It was all done while I was watching TV.
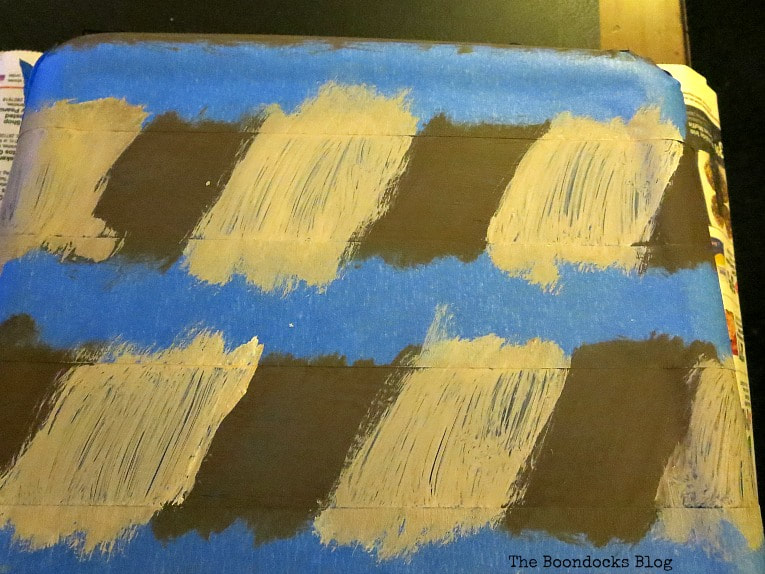
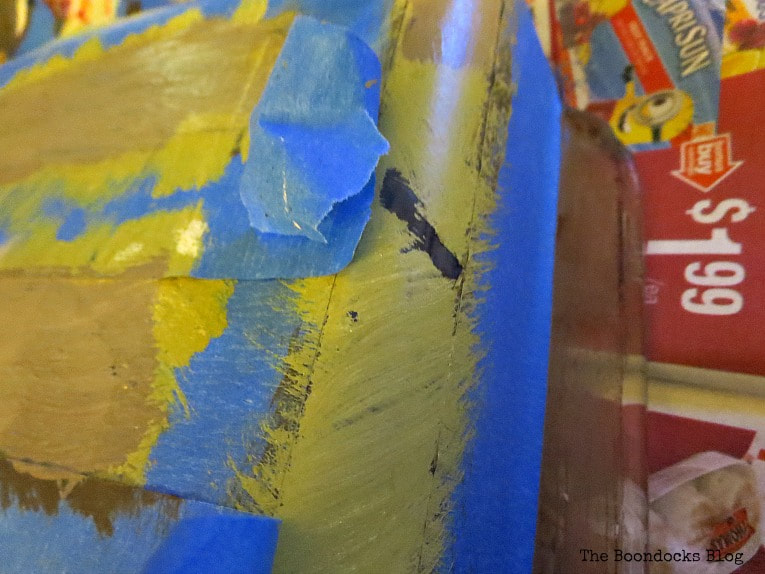
I was so engrossed in my TV show that I was doing a very sloppy job on the painting. After I pulled up the masking tape I turned it over to see how it looked (too soon) and I noticed that some of the paint was coming off. It looked worn out, like it had been around for ages. (That’s a nice way of saying I was very sloppy) 😉
I honestly didn’t want to start all over…After all I was too busy watching the show and I wanted to see how they were going to repurpose a bathtub into modern chairs.

Can you see where the paint peeled off with the masking tape? Oh well! Everyone has bad days!
I was not about to start from the beginning so I decided to add even more age to it and sloppiness by painting over the mess with another beige color.
I was on a roll now! The coffee bar will be ready in no time.
I even painted under the handles and the sides! It must have been the sloppiest job I have ever done and you know what? I didn’t care a bit.
I was having too much fun enjoying the show, mixing up all those colors and just not worrying about creating a master piece.
Now Back to my coffee bar station. Yes I was going all out sloppy. I even used my daughter’s eyeliner (shh don’t tell her) to make these drops of coffee on the bottom! I was going after that authentic look now!
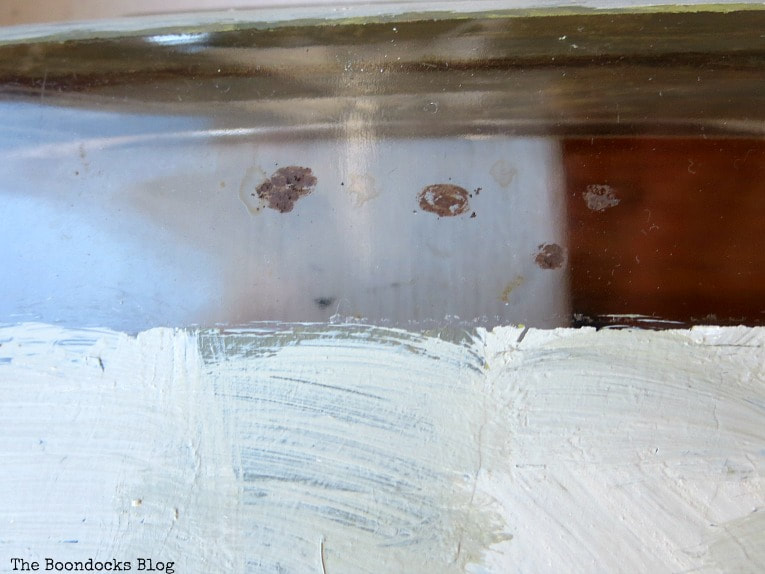
This is what the finished bottom looks like. I had added two coats of varnish to protect it because the counter does get messy and wet on occasion.
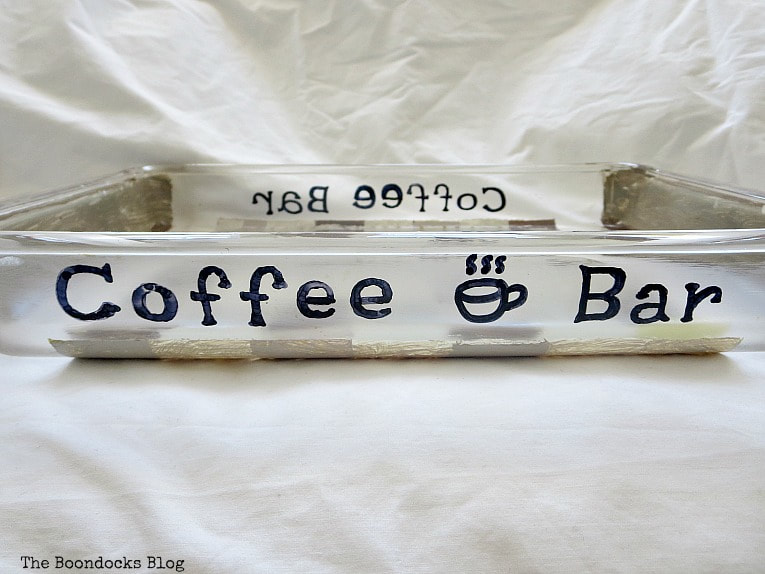
I even asked my sweet girl to add some writing on the sides. She used a permanent marker to write the coffee bar on both sides.

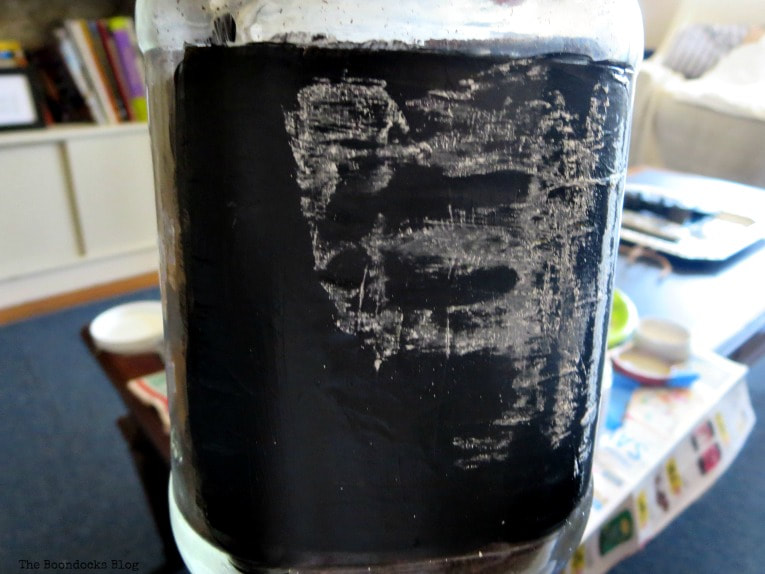
For the coffee jar itself I took a spaghetti sauce jar and painted the label using chalkboard paint. A few coats later and I was able to cure it with chalk. Just run the chalk over it and then wipe it down. It will have that beautiful blackboard look we all love.
At least we love it most of the time.
This was an obvious fail. But I’m showing it to you because this is a warts and all coffee bar post! Just so you know that not everything works out … especially when your mind is on the TV.
I left it there overnight and after looking at the photos I decided to scrap the chalkboard idea and start fresh. In fact I spotted this idea from Michelle’s blog, A Craft Mix, and borrowed it.
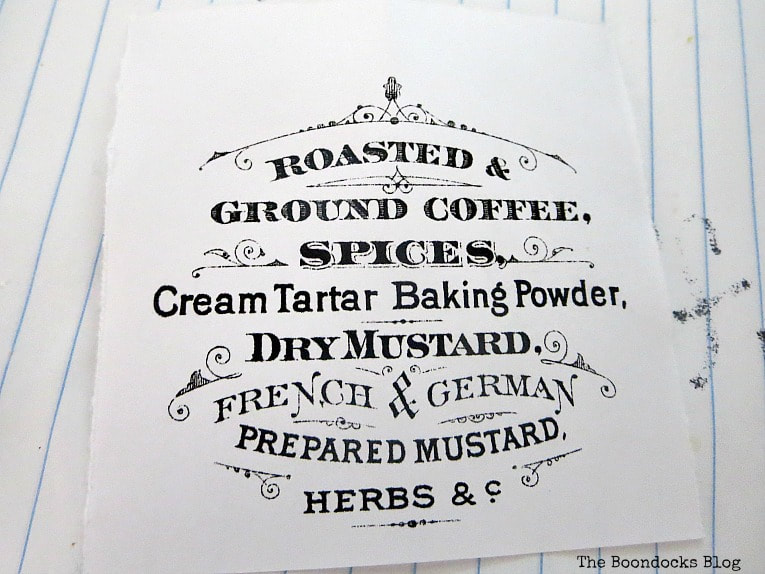
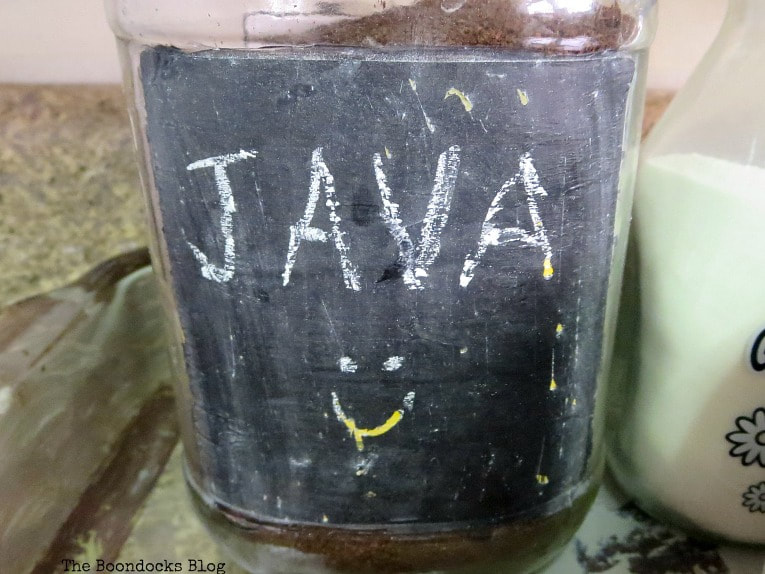
I printed out this image from the Graphics Fairy and then just glued it on the jar using Mod Podge. I then added a coat on top of the paper and I was done.
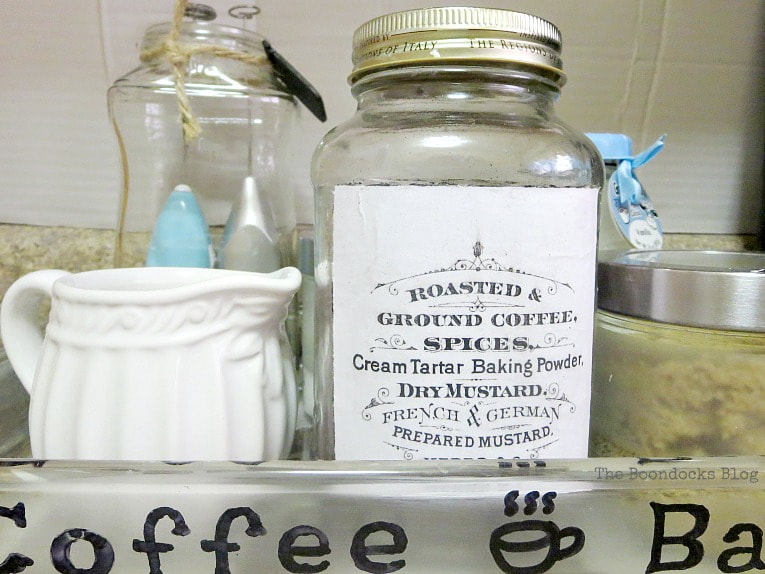
Simple idea – huge difference!
Plus it looks great next to my white pitcher.
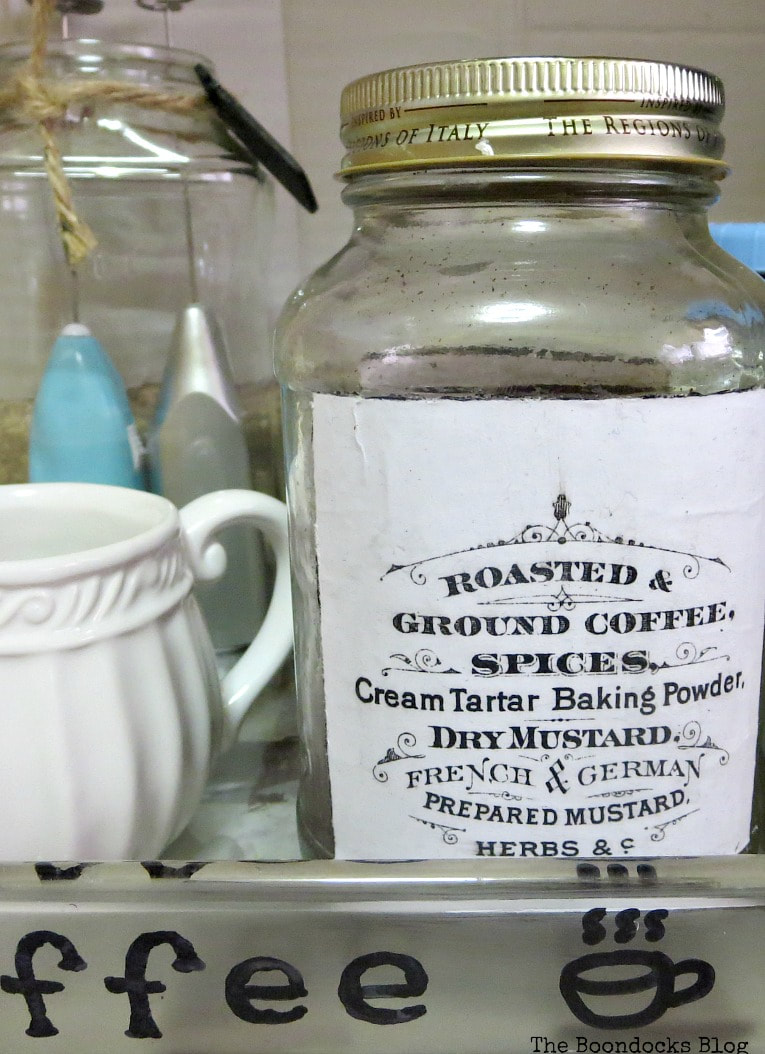
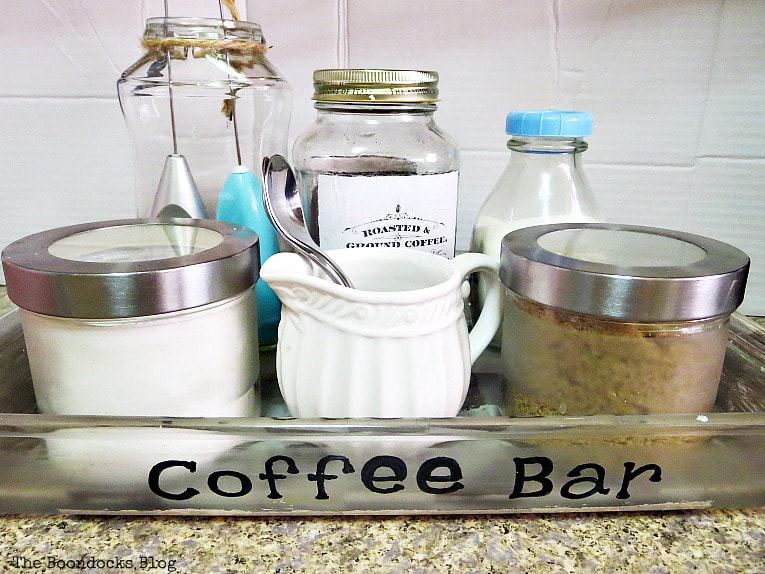
So now I have a great coffee bar station to keep all my most important coffee related things in one spot – cause you know I’m so grumpy in the morning if I have to look for stuff!
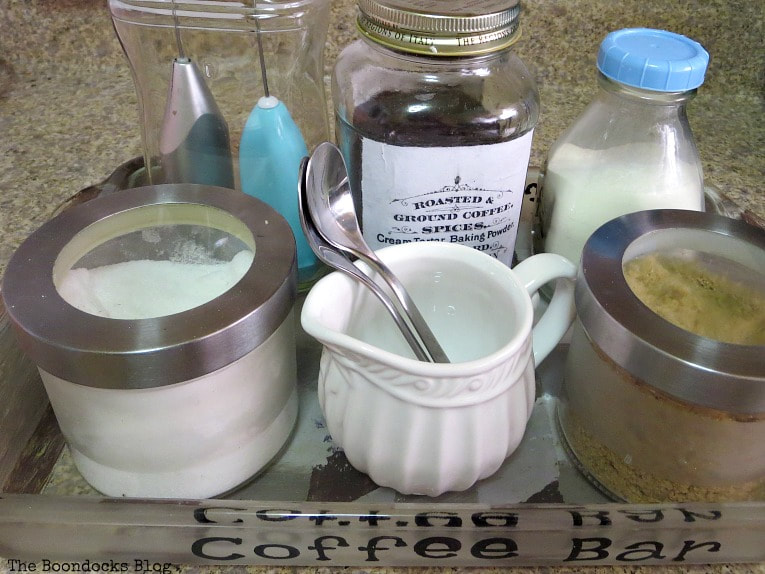
We have the sugars, the coffee and a white powdered thing my girl is drinking. And those mixers are for the Frappe that my son drinks. No tea here for us. The tea gets a whole shelf in the cabinet. If I were to put all the tea boxes on the counter they’d take over!
It doesn’t take up much space and now everything is super organized! And so ends the story of how to make a fun and sloppy coffee bar station. I had more fun than I should have with this project, even if it was sloppy!
Whew that was quite a tough project. I HAD to watch my show while finishing this one, and now that I’ve binge watched it I’m really suffering. Do you have any shows to recommend while I sip some coffee straight from my new coffee station?


More organizing ideas:

This is great. It looks neat, organized, and vintage. What a gorgeous little coffee area. Great job Mary. I love this.
Thank you Leanna and when you put all the coffee stuff on top you cannot even tell I made a mess of it. 😉
Oh Mary, I so love the way you think and do things. You’re just so real. We need to do something about our little coffee area too and I never thought of using a glass dish instead of a tray. I like the fact that the sides are so much higher to keep everything together. We haven’t seen Money for Nothing, but it’s now officially on the list of must watch. It’s sounds like something we would really enjoy
That’s exactly why I picked this one so all my stuff will stay put. Now go and watch this show it is Michelle personified. You are going to love their out of the box thinking.
Looks good!
Thank you so much, Now I am in coffee heaven!
Keep these ideas coming Mary!
I never heard of that show but you can bet I’m going to check it out. Thanks for the tip.
Hope things are warming up a bit for you all!
xxx
You are going to enjoy the show Doreen they have lots of out of the box thinking on there. And I know you’ll be finding lots of treasures to repurpose in your new location.
Thank you, as always, for keeping it real. I can’t do DIY I see on most blogs but this makes me feel like I could actually aspire to this. I probably won’t but it makes me FEEL like I could.
Thank you for that on this rainy Tuesday morning.
I have no other choice Kari. Sometimes we see all those pretty pictures and become intimidated. But we need to feel as if we can make those project, right? I know you can too, just tape some shapes off and go at it. It is super easy and the sloppy look can be achieved by anyone! Go and watch that TV show too, it will really put you in the mood.
Lol, sloppy or not it looks great, and now your coffee fixin’s are organized.
There’s been quit a few times I set up my painting at the breakfast bar just so I can watch a favorite show while painting.
Thank goodness Linda, how we will bloggers ever survive without our coffee?
I just added Money for Nothing to my playlist. Just our kind of show. I love how your coffee bar turned out. The pattern on the dish reminds me of vintage fabric. Plus it is a great idea to use a dish, all you have to do is wipe it clean. And I am a big fan of reusing jars so I love the one you made. The image is perfect. Thank you for letting me inspire you.
Thank you Debra! When I saw yours I said that is such a smart idea why don’t I have one? And the funny thing is I had seen these before but it was your post that inspired me to action.
I hope you enjoy the show, it is full of outside of the box ideas but it is perfect for us who thrive on that kind of stuff.
Wow Mary, I feel inspired by your post…inspired to show some of my negative spots! And you’ve just given me an idea. I like your coffee station, & especially like the use of the glass dish. I like how you weren’t worried about being sloppy. Sometimes we enjoy our spaces more when they’re just prettied up a bit, and you sure did that.
Florence I had a blast making this. I just didn’t care a bit if it got messy and just enjoyed the process. I can’t wait to see what you come up with.
I really like your new coffee bar project, Mary! A great use of a bunch of different ideas to make it all come together!!! I had a little coffee bar at our old house and now we have a corner here in the RV. Plus… Mr. Ethereal has his own coffee shelf in one cabinet and I have my tea shelf in the other ~ both are above our stovetop. 🙂
Enjoy!
Barb <3
A his and hers idea Barbara, I like that!
This looks so vintage! Well done! I love using the labels
Maria
I was glad to find them because the chalkboard idea was not working at all.
Bravo Mary! I think my favorite element is the graphic you printed out for the jar.
Cheers.☕️☕️☕️
It was an afterthought but it turned out to be a very important part of the whole station. Love that Graphics Fairy!
Mary I love how you made this so fun with the interjections of your interesting tv show. And truthfully, I love the way your coffee bar turned out. Your daughter is quite good at lettering.
🙂 gwingal
Thanks so much Nikki. I really had a blast with this one and if you have a chance check out the show its on Netflix.
This is a great project and a great example of upcycling. I love it. Is this show a podcast or a tv show? I would love to watch as well. Great project!
Clearissa it is a show on Netflix, definitely worth it if you are interested in repurposing items. Some the ideas are a bit out there but it is worth watching just for the inspiration alone.
Great idea Mary. I have same glass baking dish, but mine is in the refrigerator half full of homemade lasagna. I’m trying to learn cheese-making, so it has some of my homemade ricotta & mozzarella, plus the sauce was made using tomatoes that we grew and canned last summer. I have also been scanning Pinterest for coffee station ideas. There are just so many ideas; it’s hard to choose.
Josephine I think I like your idea better. Fill it up with lasagna. I love lasagna and can each it all the time. But I have lots of dishes and really needed to find a purpose for this one other then sitting in the cabinet. At least now I’m getting use out of it. I would love to hear about what you are going to do. I guess it depends on your decorating style.
Love this! Especially perfect for when we have company. Thanks for sharing this fun DIY project.
Thank you Ellen. I have mine in the kitchen but I guess it can be put out for company!
Wow! 🙂 I love your blog post! 🙂 What a clever idea! 🙂 I think it is great that you show things that did not work. This is extremely important for DIY products.
I found your link on Your Whims Wednesday. I will pin this!
I am always trying to be real with my readers Christina. After all if we have a fail at least I warned everyone. DIYing takes time and patience and if we don’t remember that then we are bound to feel like failures even before we start. Thank you so much for dropping by.
I think you being real is a big part of the appeal.
I think you’re being real is a big part of the appeal.
I so enjoyed reading this post, Mary. You crack me up! I never would’ve thought to use a baking dish to corral coffee supplies – very clever. Okay, gotta run because I have a date with Netflix – Mama needs to see that bath tub!
Marie I had so much fun watching that show that I ended up neglecting everything else. Those Brits are very clever indeed.
I love this, Mary! You are so creative all the time. You need your own show!
Haha! Good one Kim, only if you join me!
What a difference Mary! Now I need to get busy and corral my supplies. Thank you for sharing with us at Celebrate Your Story and have a great weekend.
Sandra it was like sleepwalking till I found all my stuff in the morning.
What a nice way to organize your coffee supplies! Thanks for sharing at The Blogger’s Pit Stop! Roseann from This Autoimmune Life
Thanks Roseann I need all the help I can get.
It looks awesome! Thanks for a “warts and all” post. It’s really nice to see some ‘real’ DIY that doesn’t look like it’s come from a magazine once in a while!
I’m all about keeping things real. After all no need to show perfection when there is none. Thanks for your sweet comment Teri!
Well, it certainly is fun! Thanks for sharing with SYC.
hugs,
Jann
Thanks Jann, gotta keep things from getting too serious! 😉
Yay! You get to see Money for Nothing over there too!
I love that show although it can be a bit slow. My MIL says Sarah the presenter reminder her of me but I think that’s only in creativity rather than looks or mannerisms!
I just find the voice over by Comedian Arthur Smith a bit much, I feel like he sucks the fun out sometimes but I guess that is just his style.
I love your new coffee area, but for me it’s Tea all the way though!
I happen to like Sarah very much, ever the optimist. As for that voice over guy well he is a bit too smug. I can’t wait for another season of this show. Oh and I found another one with some car guys and a repurposer.
I really love this idea! It’s a great way to move it around, even on the living room table when friends come over!
That is so true Katerina. It really can go mobile.
I love this – I did something like it with a tray about a year ago, but oops forgot to consider the tray ought to be waterproof. It got warped and I never did replace. Using a glass dish to corral everything is such a good idea! Thanks for sharing with Party in Your PJs!
Thank you Lynda. That was my first consideration cause my counter gets messy!
The perfect solution Mary. We don’t want to be ‘grumpy’ in the mornings 😉
Haha that’s right Kerryanne, a happy mom makes for a good day!
Mary, I like your coffee station, it looks cozy and organized. I have seen a few episodes of the Money for Nothing, it’s really neat to see how she and her friends upcycle things. Have you seen the Most Extraordinary Houses? That’s a good one on Netflix.
I’ve drooled over that one too Keri. And now I’m watching one called Grand Design about all these people who build their dream houses. I make my kids watch them too haha!!
I love your coffee station. So beautiful, creative, and useful. Thanks for sharing.
Thank you so much Ivory. It has been such a great and practical way to keep things organized in the kitchen.