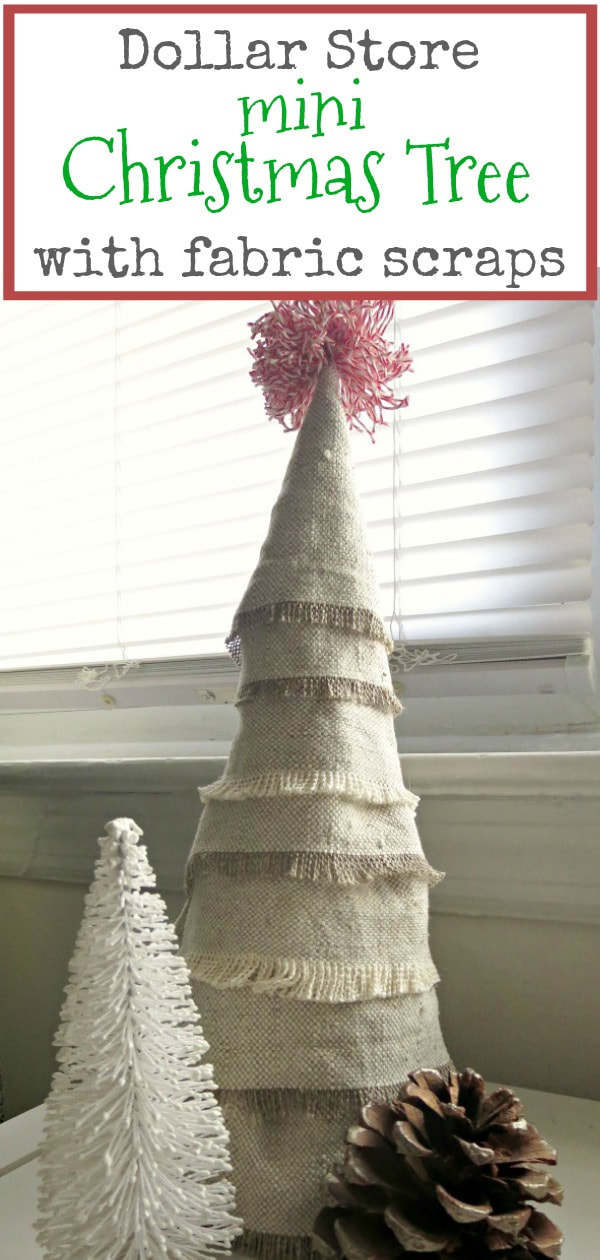
How to Make a Dollar Store Fabric Mini Christmas Tree
Dress up your dollar store Christmas trees with scrap fabric to make a custom mini Christmas tree that matches your holiday decor.
If you have an old tree from the dollar store and it does nothing for you, don’t throw it away! Instead, dress it up with fabric scraps and make a mini Christmas tree that matches your holiday decor.
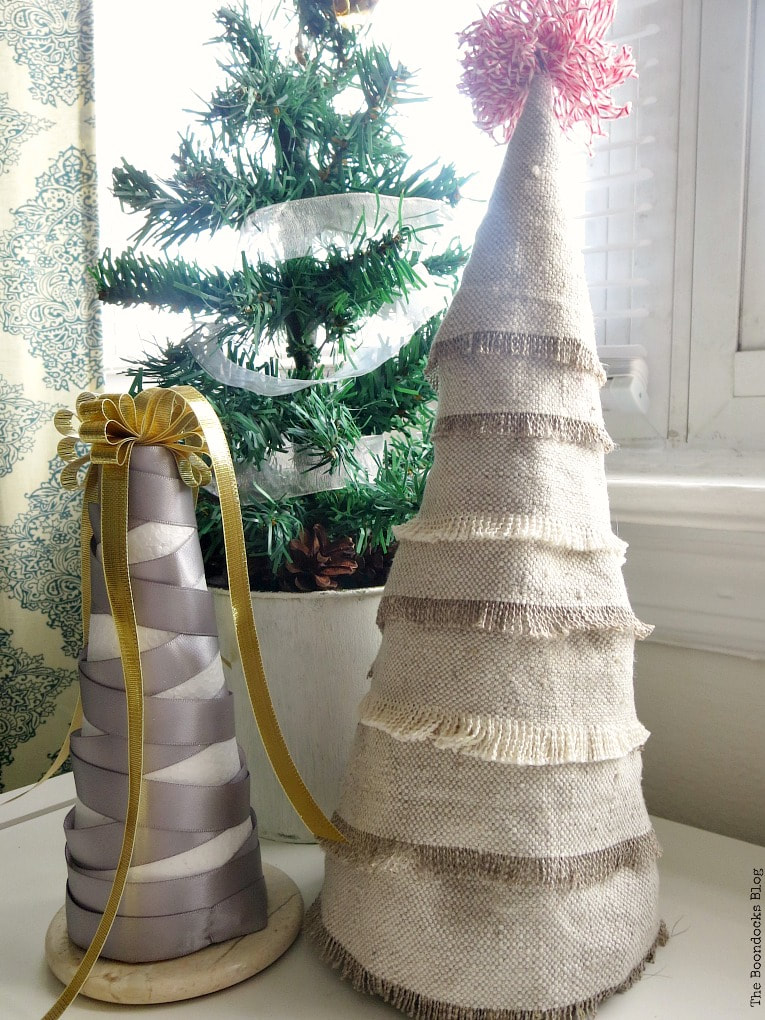
Last week I shared with you my awkward attempts at a Mini Christmas tree done up with ribbon. It wasn’t bad but I wanted something better! And this is what today’s Christmas craft idea is all about. How to make a dollar store fabric mini Christmas Tree.
Today I’m teaming up with a group of friends for a dollar store edition of a Christmas craft. Be sure to scroll to the end of this post to see what my friends are up to.
Disclosure: This post contains affiliate links for your shopping convenience. If you purchase any of these products through the links, we receive a small commission at no extra charge to you. You can find our full disclosure here.
Materials I Used:
- Mini Tinsel Christmas Tree from the Dollar Store
- Fabric scraps
- Pins
- Bakers Twine
- A piece of craft wire
- Scissors
Like I said this is the dollar store edition. I knew I wanted another shot at those mini Christmas trees but I didn’t find anything at the dollar store that made me happy, until I spotted this tree below.
There was nothing wrong with it but it was really not my style. Ha! This coming from someone who filled her tree up with sparkle and glitter.

How to Make a Mini Fabric Christmas Tree:
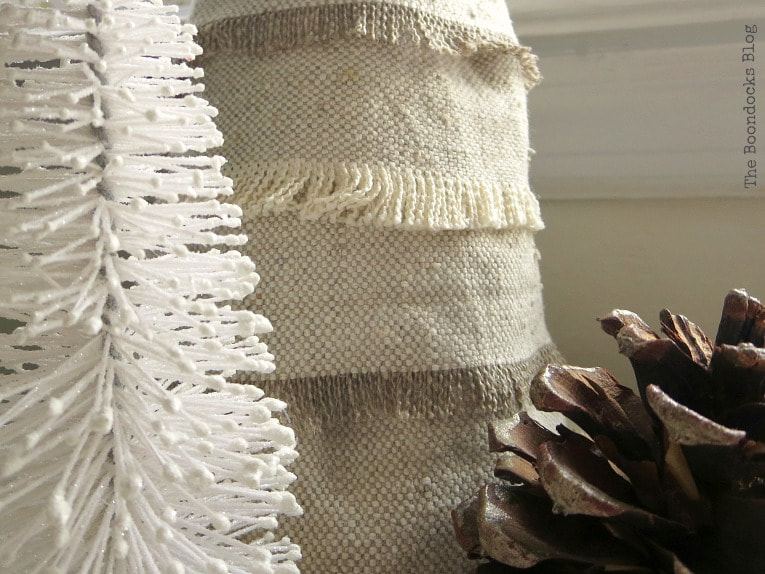
I had lots of this fabric left over. If you have been following me you may remember I used it previously on a fall wreath and also more recently on a pillow.
What do both of these projects have in common besides the same fabric?
They both have fringed ends.
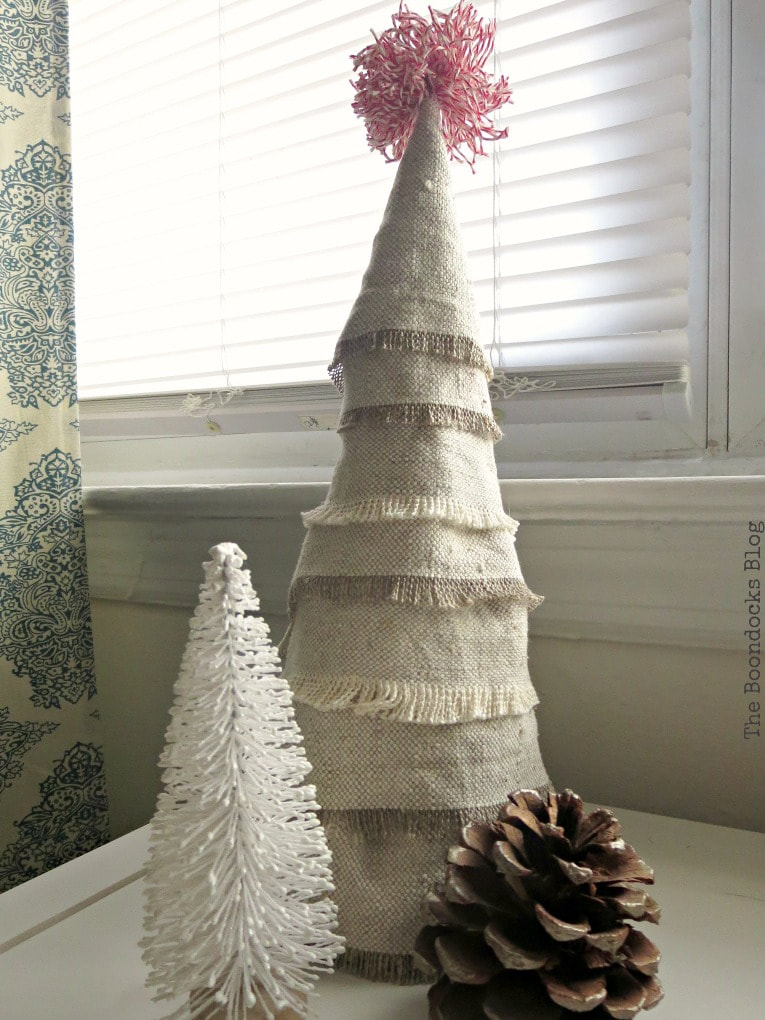
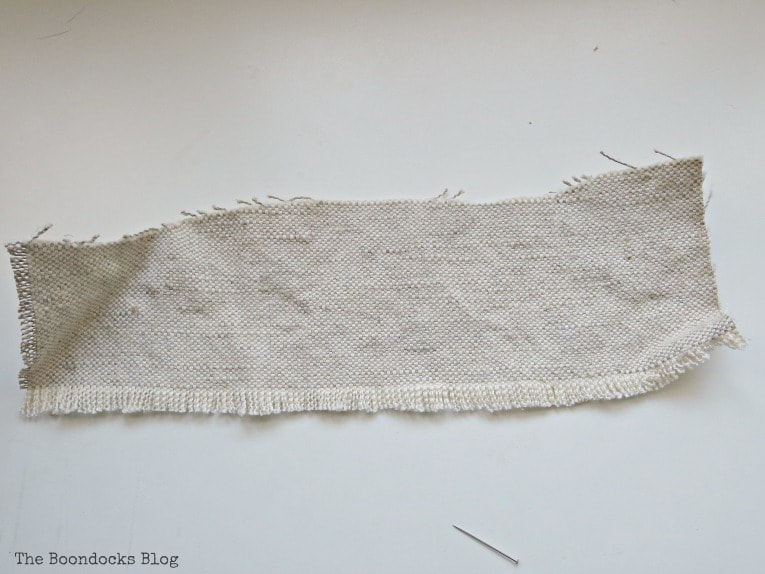
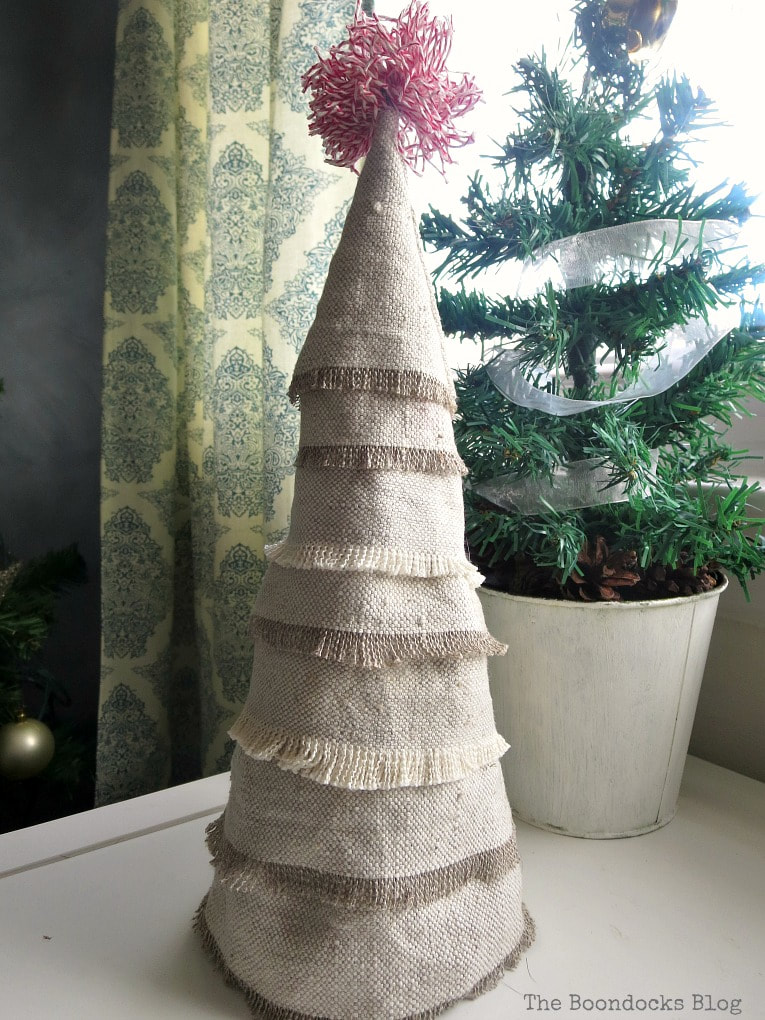
That is what I decided my mini Christmas tree would also have. I cut the fabric strips about two inches in width and fringed one of the two lengths.
After the fringing I simply placed the fabric around the tree to cover the tinsel and secured it with a pin.
I made each successive fabric piece a little shorter going up.
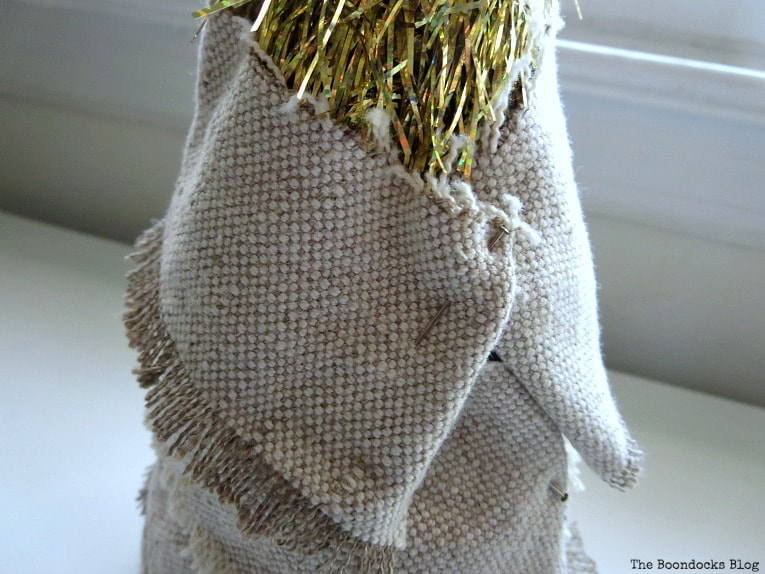

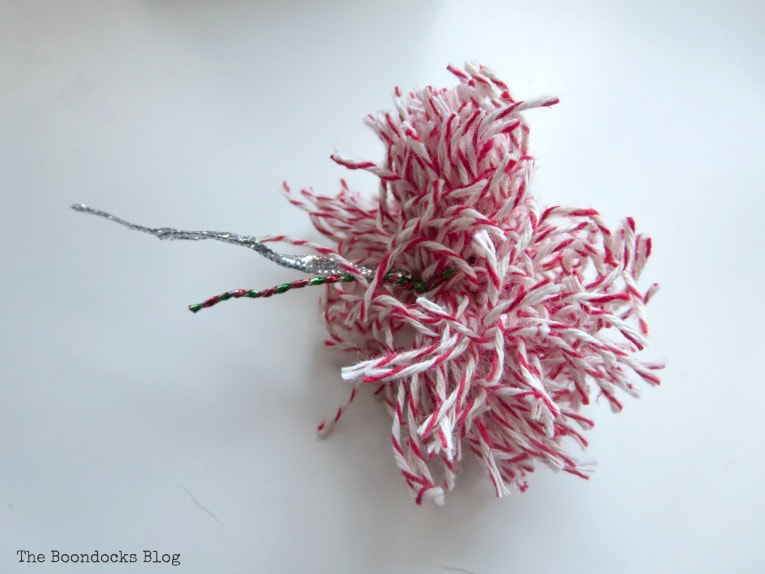
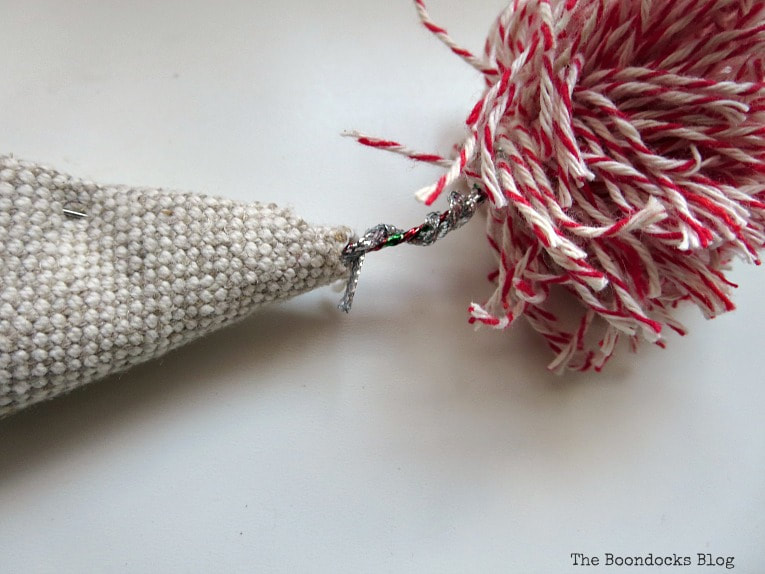
The pompom on top was made with bakers’ twine and secured with a wire.
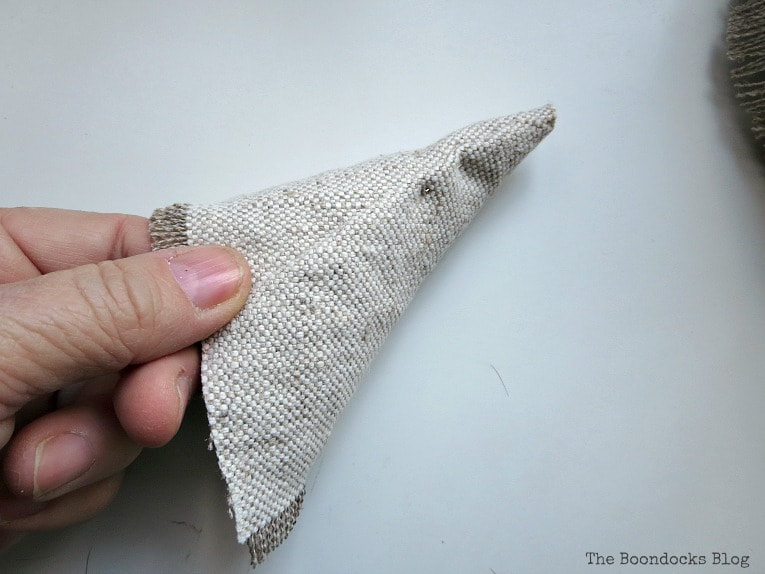
The final fabric piece was shaped like a cone.
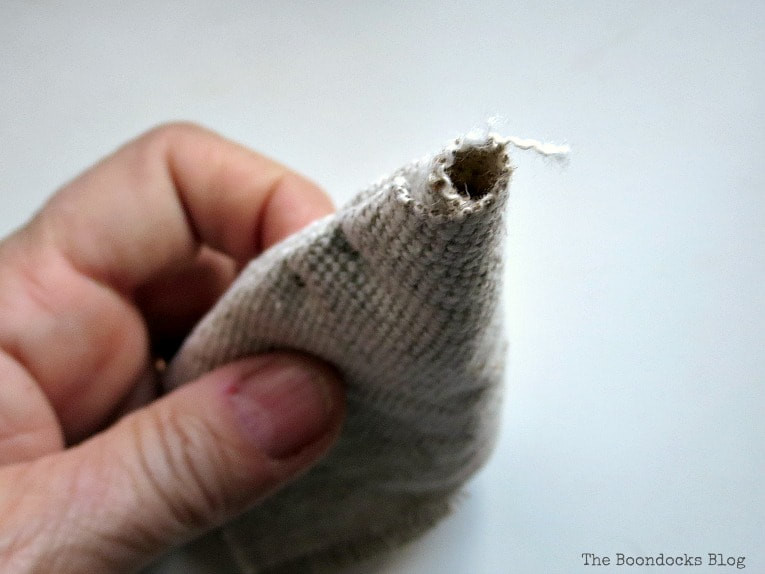
With a tiny opening at the top.
I placed the wire into the tiny opening to hold the pompom.
And my little scrap fabric mini tree was done.
It looks a little like it would fit right in with Dr. Seuss’ Christmas trees.
And just think of the possibilities. Depending on what type of fabric you use, you can have so many different trees!
Doesn’t it look pretty? A proper boho Christmas tree!
And we won’t talk about all the pins in the back since it looks a mess.
But maybe I should address that. I plan on putting the tree in a corner of the bookcase so no one will see the sloppy pins.
Had I wanted to do a better job, I would have created a pattern in the back and made the closures all level with each other.
But since no one will see it and you know nothing about it, (shhhhhh) then that is that!
My mini tree collection has grown thanks to the dollar store!
And I don’t have to look at that tinsel tree any longer! Would you ever guess there is tinsel hiding underneath?
Before these projects I had never attempted any sort of Mini Christmas trees. I hope that I’ve inspired you to try your hand at this and you too can make a dollar store fabric Mini Christmas tree!
Now scroll down to see what my friends have in store for you!


My Husband Has Too Many Hobbies • Across the Blvd • The Boondocks Blog
Stone Cottage Adventures • Sew Crafty Crochet • Purple Hues and Me
Cookies, Coffee, and Crafts • Domestic Deadline • Two Chicks and a Mom
Additional Christmas Crafts You May Enjoy


Very appealing little tree!
Cath
Thank you Cath! I promise to stop after that. It’s becoming an addiction all these mini trees. Haha!!
This is such a great idea. I have so much scrap fabric. Thanks for the tip.
That is a cute little tree. I like the fringe detail.
This is truly using recycle materials.They all look so festive and creative.
Ha, we both did mini Christmas trees with frayed ribbon today! I’m loving your collection of DIY cone trees and the bakers twine pompom is adorable 🙂
Great idea, Mary! Lots of ways to put your own style on this Christmas tree!
What a cute idea for a Christmas tree makeover, Mary! I love it!!!
Well done, you! It’s really cute and certainly a thousand times better!
Super cute little tree! The fabric reminds me of burlap a little, and the little bakers twine pom pom is a perfect fit for the little tree. Love it!
the tassel is so fun!
It’s great that you found a way to transform the tree into a cute one you love. It’s got a fun boho feel to it.
Your DIY fabric tree is adorable! I would never guess that there is tinsel hiding underneath. Very clever! Merry Christmas!
Super cute! I like the fringe of the fabric and the pom pom at the top, very whimsical like Dr. Seuss! Love it!
That’s such a different look. you’d never know what was hiding under there!
Such a simple transformation! I love the fringed ends. Pinned.
Mary, This tree is adorable! The fringe is just enough along with that adorable pom pom topper! Great project.
I love your boho tree, Mary…and those pins are perfect. I’m pin girl myself and I wouldn’t change a thing. Who knows what this tree will become next year, with your creative brain, and pins are way easier to remove than stitches!! Fabulous!
I love the look and the use of the fabric–the pom pom on top is adorable!
Your tree looks great! The fabric fringed up so nicely.
Great results I love the linen fabric too. I like that you used both edges of the fabric to create a “different” color fringe. Merriest Holiday, Kippi