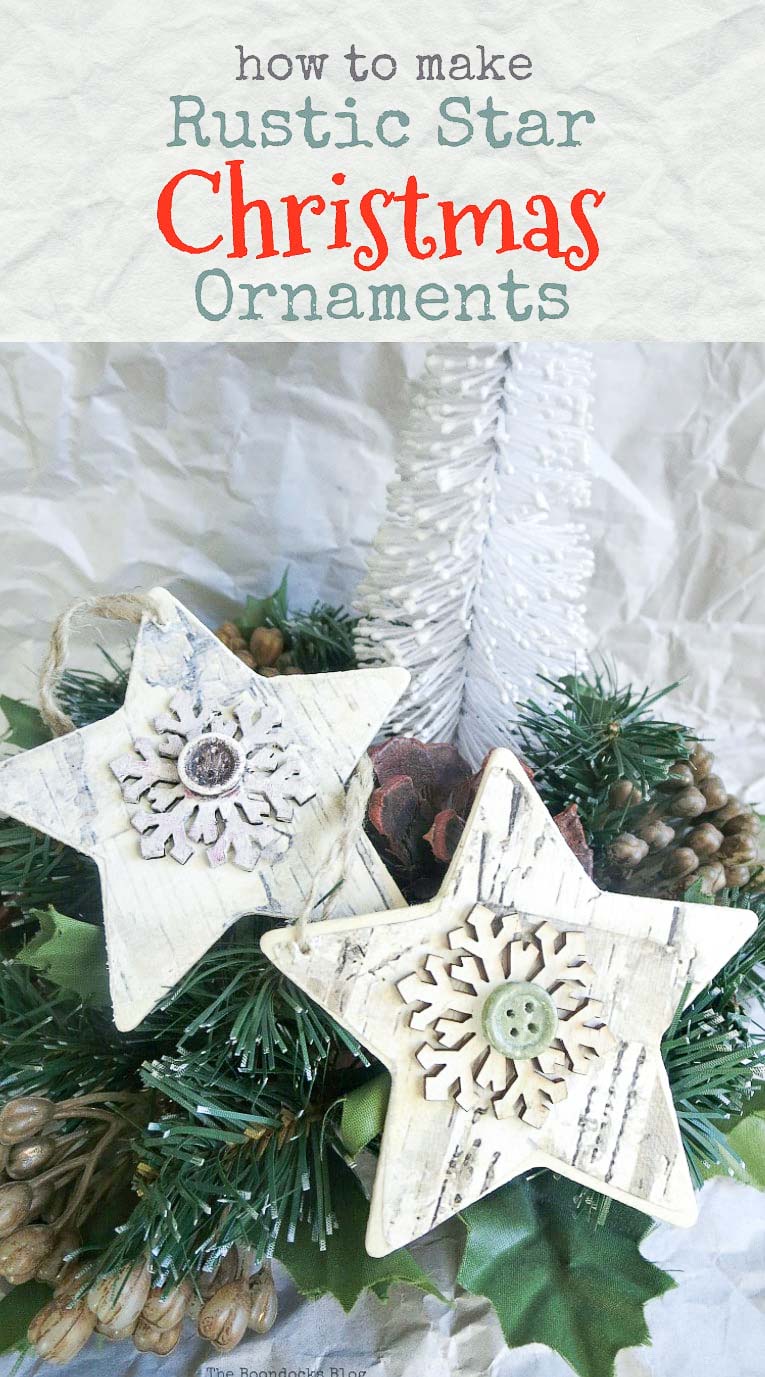
How to Make Rustic Star Christmas Ornaments
Add a rustic touch to your tree with simple upcycled Christmas ornaments using birch paper and paint!

With touches of birch and distressed buttons, these charming rustic star Christmas ornaments are the perfect decor for any tree!
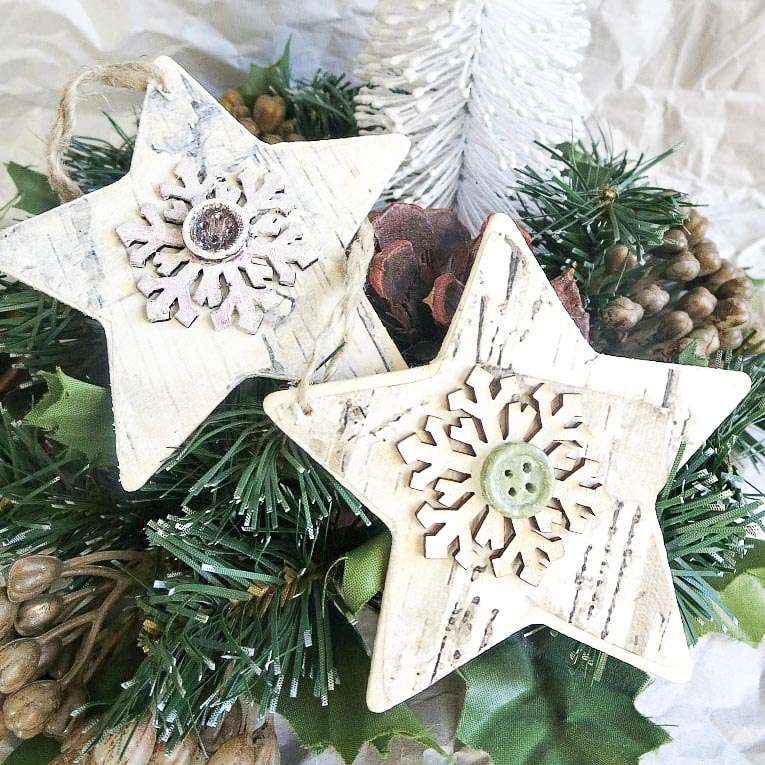
Rustic Star Christmas Ornaments
Materials Needed:
Disclosure: This post contains affiliate links for your shopping convenience. If you purchase any of these products through the links, we receive a small commission at no extra charge to you. You can find our full disclosure here.
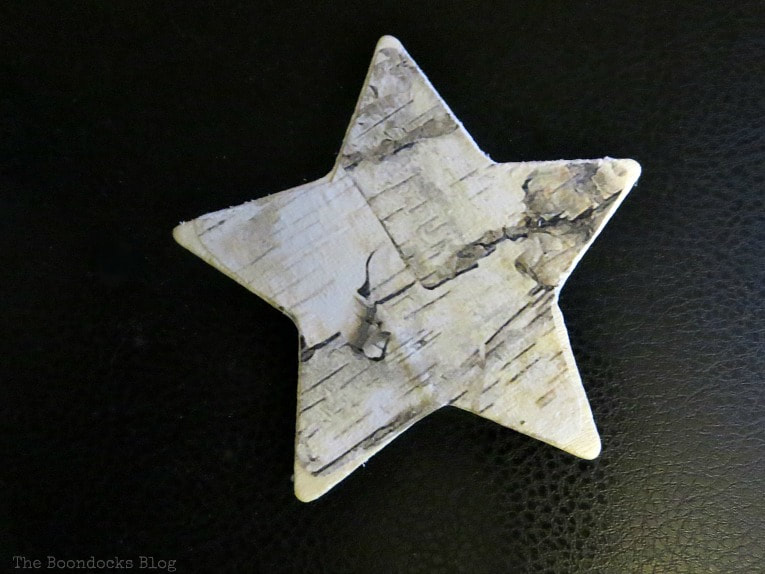
- Wood stars that I bought at Walmart
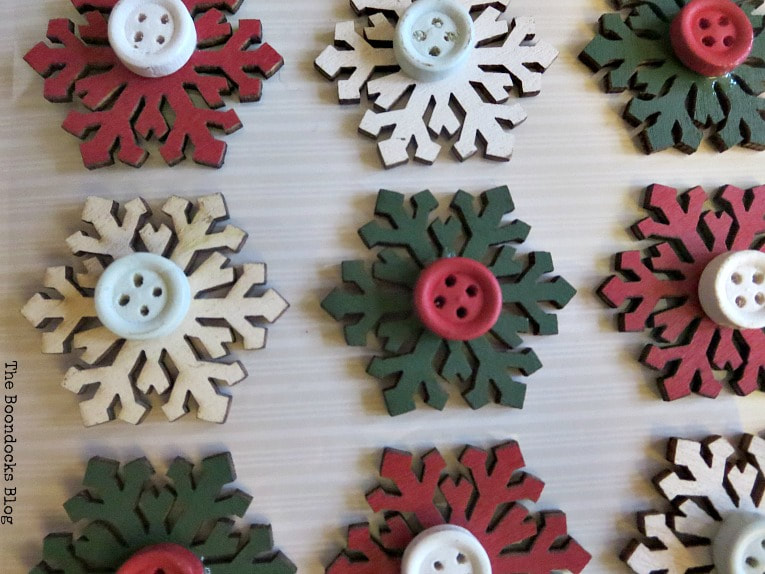
- Wood snowflake ornaments with buttons that are stick-ons purchased at Target
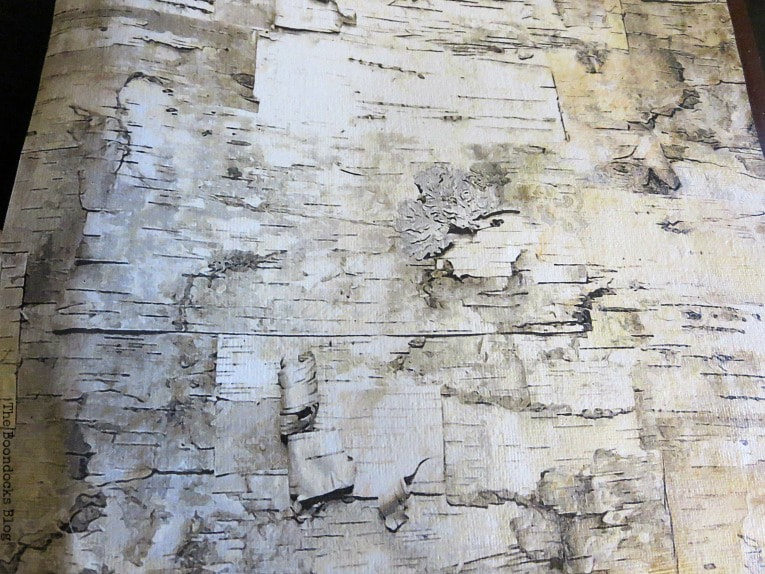
- Birch wrapping paper
- Twine
- Mod Podge
- Acrylic crafters paint
How to Make Birch Star Ornaments:
I found these cute press on ornaments at Target. They are actually meant to be used as gift tag embellishments but I had other ideas in mind.
This birch wrapping paper has been a workhorse for me. I actually used it to cover the back of my bookcases a while back. This time around I wanted to use it to cover the stars.
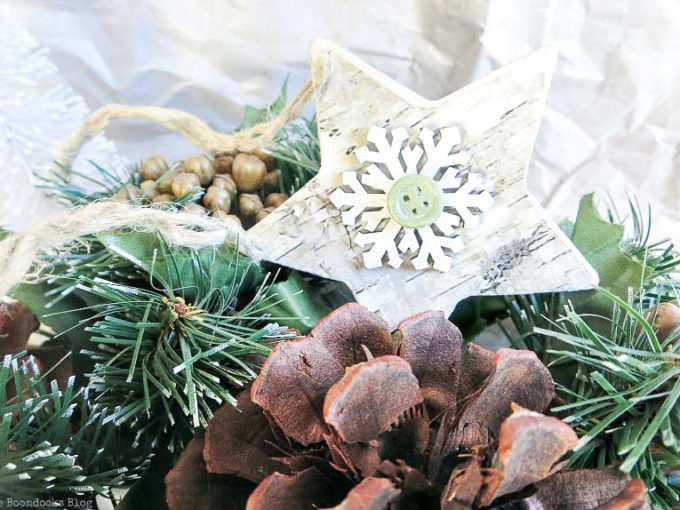
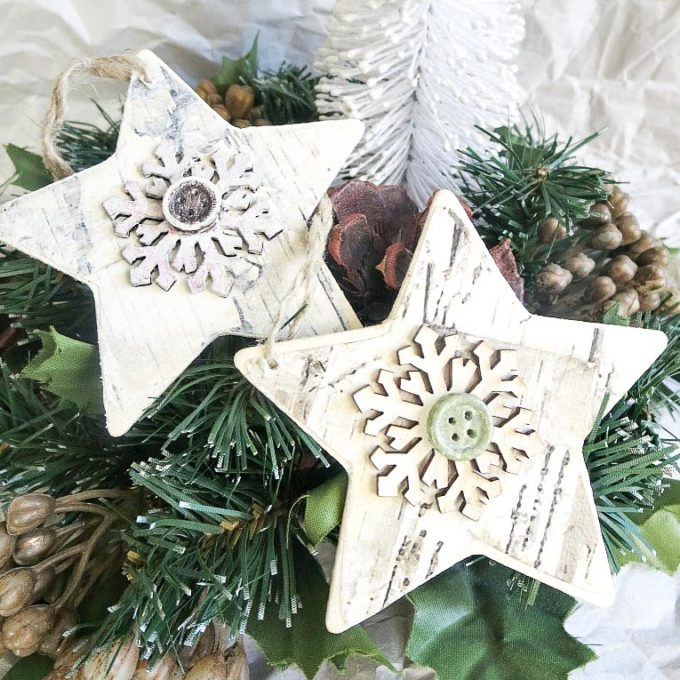
I traced the stars on the paper and then cut them smaller. I wanted them to fit and have a bit of the wood showing through. Then using the mod podge I glued them on and then sealed the paper in. I did this on both sides of the star shapes.
Using some of my left over craft paint, I painted over the red snowflake. And then painted the button in a brown color as well. Now you tell me if that button is not the spitting image of rustic!
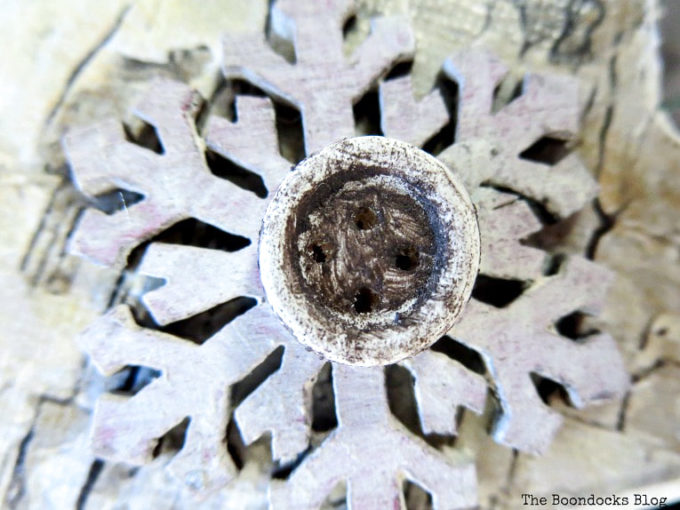
Once the paint had dried I just stuck it onto the wooden star. I had also opened a hole in the star using the edge of a sharp object (be careful) and then passed twine through it to hang it up.
Since they were so easy to make I made two! And you can make your own I have supplied you with similar items you can buy.

And you know I liked them so much I will be making some for my tree as well. It was a super easy ornament to make and has just the right amount of rustic.
I’m so happy with how these rustic Christmas ornaments turned out and will be perfect for my woodland-inspired tree. How are you decorating your tree this year?

If you really like what you see subscribe to my blog and get my adventures in your mailbox. The form is on the sidebar and your e-mail will never be shared with a third party.


What a lovely idea to exchange handmade ornaments and they’re all so lovely too. I bet you and Angela will both treasure each others for a long time to come. Your stars look gorgeous. I really need to get some of that birch paper, it’s so pretty
Michelle it was so much fun to do this. You should try doing it next year with a group of bloggers from your area so you can easily exchange the ornaments.
Ornament exchanges are such a lovely idea and the memory of the special blogger who gave you your ornament will remain for years to come.
I remember when we lived in the cabin we only had to walk outside to get birch bark. I kinda went crazy with it…covering switch plates, vases, etc., lol. When in Rome 🙂
xxx
Doreen I really love the ornament Angela gave me, it has text from “Twas the night before Christmas” and it bought back so many memories.
I never had any birch trees but I have the best substitute
I love your ornaments – that paper is fantastic. Where did you get that? Definitely can see why it’s a ‘workhorse’ for you. Great job on these!
Lauren I found it at TJ Maxx but you can also get it at Amazon. I have a link above that goes it it. It has proved to be very handy around here.
Very pretty! I like its rustic charm.
Amalia
xo
Thank you Amalia, that is what I wanted for my friend Angela.
What a lovely ornament Mary! It has just the right amount of rustic charm, it’s perfect. I bet Angela is going to love it.
Linda I really had a great time participating in the ornament exchange. There is so much to see.
Love these! What a fun idea!
Thank you Sheri, they were fun to put together.
Mary these are the cutest ever! I love that birch paper, it looks so real and makes them really rustic looking!
It seems Angela and I were the perfect pair. A little bit of rustic and a bit of neutrals.
These ornaments are so cute! They seem easy to make too. Love the birch paper. Thanks for the links.
Thank you AnnMarie, they were very easy to make. I hope you have a great Thanksgiving.
I love your stars and I want some of that birch wrapping paper too!
I know I was lucky to have found it while I was waiting on line at the checkout lane.
I love your star ornaments! They are so cool. The rustic wood adds such a unique touch. Thanks for the linkup of such great bloggers and their ornament tutorials. What a fantastic idea!
Thank you for visiting. It is usually very easy to make ornaments and you can make them exactly the way you want them.
Mary these ornaments are absolutely beautiful, so rustic and so original! I would be so happy ito display them on my tree!! I am sure your partner absolutely loves them! #2017OrnamentExchange
She did thank you Evija. This was such a great blog hop to participate in.
Mary, these are fabulous. Really, really beautiful and my kind of style. I look forward to clicking on some of these links, too!
I’m glad you like them Jeanie! I made so many and have kept none for myself. ha!
What a wonderful swap! Your stars are so lovely, Mary. I’m sure your swap partner will be happy
Thank you so much Julia, I was also very very moved by the ornament that Angela sent my way.
Mary, I LOVE these! And I really love that birch wrapping paper, too. Great ornaments!
Thanks so much Carol, that birch paper gives them loads of character.
Love these wooden star ornaments, Mary! The birch wrapping paper was a stroke of genius, too. It really adds a nice rustic touch to the overall look.
It really does make it special Jelica. Good thing I had some left over.
I can tell you are in the shopping paradise (ahem US), those stars are perfect for crafts, and the birch paper so beautiful. The ornaments are the perfect kind of rustic, I am sure Angela will love them
Haha Pili, I spend more time in the supermarket than anywhere else. Haha. But I had to go to Walmart since I had never been there before. 😉
This was so much fun. I love the ornament you made. I think it will look so pretty on any style tree.
I think so too Debra, this year I was really going for a neutral look since we have not settled on any specific color scheme… yet!
Love these! Very rustic. Pinned.
Thanks so much, it pays to not throw your wrapping paper away! 😉
My! What a fabulous post Mary! This is a great idea for making ornaments and I already spotted several I ‘d love to try myself from the hop. I am working on some interesting ones – hope I will be able to show them soon!
I can only imagine how pretty the crocheted ornaments will be Maya.
These are adorable! I love farmhouse rustic ornaments especially when they’re DIY 🙂
And these were real simple to make. No fancy machines!
I really like the birch bark look on these! Thanks for sharing with Awesome Life Friday!
Thank you Lynda for the feature!
These stars are lovely!
Thanks Michele, hand made is always so much fun to do.
This is lovely, that paper is just gorgeous and you “vintaged up” that button just perfectly!
Thanks Julie, that paper really adds a lot to the otherwise plain star.
These would be the perfect ornament to make for a ladies night get together to make ornaments and have a glass of wine over the holidays.
I like your thinking it would make for a great craft night.
I love the rustic look!! So many great ideas in this post – thank you! 🙂
There really are and I am still checking them out one week later.
Mary I really really loved your star! I have already assigned to my father his wooden Christmas crafts for this year so I would have to wait haha!
Unless you can find some of these pre-cut! 😉
Mary, these star ornaments are gorgeous!! You did a wonderful job on them and you’re right it’s just the perfect amount of rustic. They look beautiful!!
Thanks Keri, I’m really glad I didn’t get rid of that birch wrapping paper last time I visited the kids.
Oh, so charming! Love the rustic look and the bark paper…they would look fabulous on my rustic inspired tree!
Hah! And now you’ve got the tutorial. Do you have a Walmart near you? I had to go all the way up to White Plains to find one. :O
I’m going to have buy myself some of that birch wood paper. Love the idea of using it to do a faux birch look. Thanks for sharing this on the ornament exchange.
Thank you Erlene for hosting this wonderful exchange. I cannot tell you how much in means to me. So much inspiration and a fun exchange too.
I love these! They’d fit so well on my tree and I already have some wooden stars so these are looking likely in my house this Christmas! #twinklytuesdays
I am so happy to hear that Becky. I did these as an after thought but they seem to be very well liked. I guess you never know…
These are gorgeous and what a lovely idea the exchange is 🙂 Thanks for linking up with #TwinklyTuesday
It was so much fun Lisa!
Mary your Rustic Star Ornaments turned out so beautiful! That birch paper looks so real! I thought that it was when I first took a peek at your sweet ornies! I bet your Angela was tickled pink with your ornaments!!
Aww Sam it turned out great and everyone loved it so much I gave them all away. Now I need to make some more.
These are just awesome. My tree is covered in birch bark ornaments this year Pinning
Oh that must look so pretty, I’m coming over to have a look.
These are perfectly rustic! That birch bark paper is fantastic!
I love birch bark!! It looks so amazing!
I love all the ideas I get from participating in the Ornament Exchange!!
These are so pretty Mary! Clever idea using the birch paper. Love them!
These are adorable! I love that you used the birch look wrapping paper! So clever! thanks for sharing at Celebrate It!
Hello Mary, I love these stars and I’ve been looking for a creative project to do this Christmas. These look like the perfect project for me. Visiting from Esme Salon x
Soooo cute, Mary! I’m glad you reposted this as I pinned a bunch. To think of using the birch bark wallpaper in this way is genius!!!
Hugs to you, my friend,
Barb 🙂
Amazing Christmas ornament exchange. All handmade! I would have never guessed this wooden star ornaments was so easy to make.
These are so cute, Mary! I love love love that birch paper! I can see how it would be really versitile. Pinning, thanks for sharing at Saturday Sharefest. 😉
I love your star ornaments. That birch paper is awesome.
Please stop by Over The Moon party since you are being featured. https://eclecticredbarn.blogspot.com/2018/12/over-moon-linky-party.html
Hugs,
Bev
Great looking stars, Mary! You did yourself proud.
I really like these and actually have some of those stick-ons. I see no links, however, and was interested in ordering the birch wrapping paper.
Thank you for sharing your wooden ornaments on Friday Features last week, they are wonderful! This week I am sharing them in our party, please stop by and share again!
Happy Holidays!
I love these stars. That paper is amazing. Congratulations, you are being featured on Over The Moon Linky Party. I hope you stop by. https://www.eclecticredbarn.com/2019/12/over-moon-linky-party_68.html
Hugs,
Bev