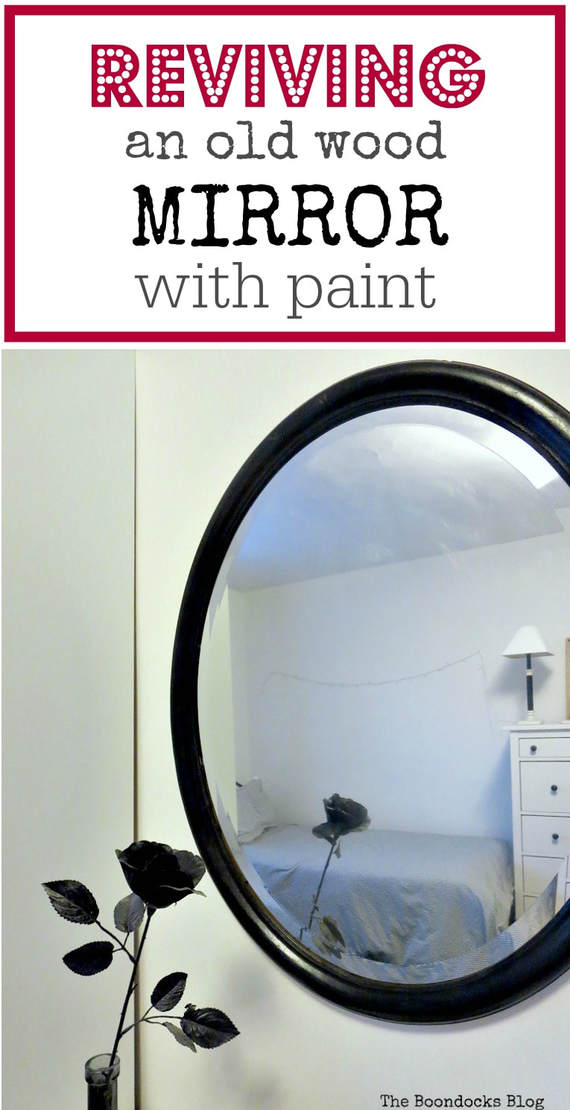
How to Revive an Old Wood Mirror with Paint
I am so excited to be working on the girls’ bedroom. We are adding different…
I am so excited to be working on the girls’ bedroom. We are adding different pieces to it each day. One of them is this old wood mirror which my son had gotten from a friend of his who was all set to throw it out. Lucky for me I’ve trained my kids well to look out for these hidden gems. And so he bought it home for me as a gift.
You can see below that the mirror was in pretty bad shape. It was all scratched up and needed to be revived, which I did with just a bit of paint.
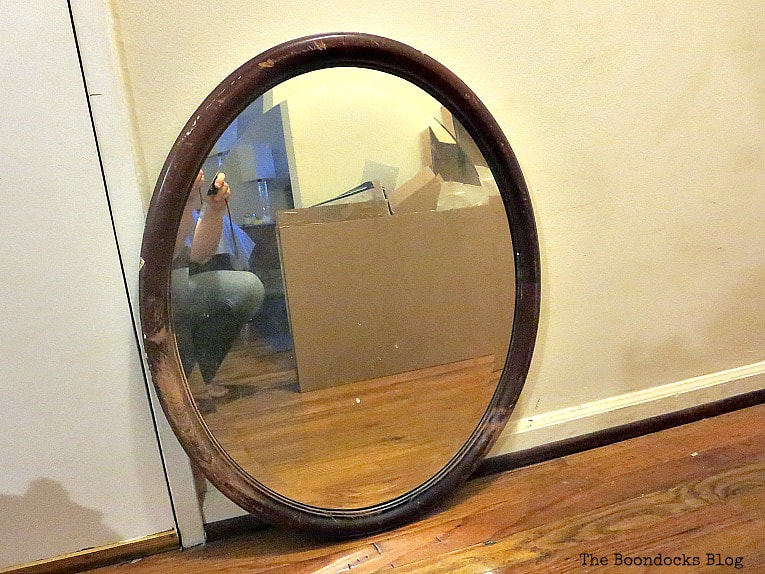
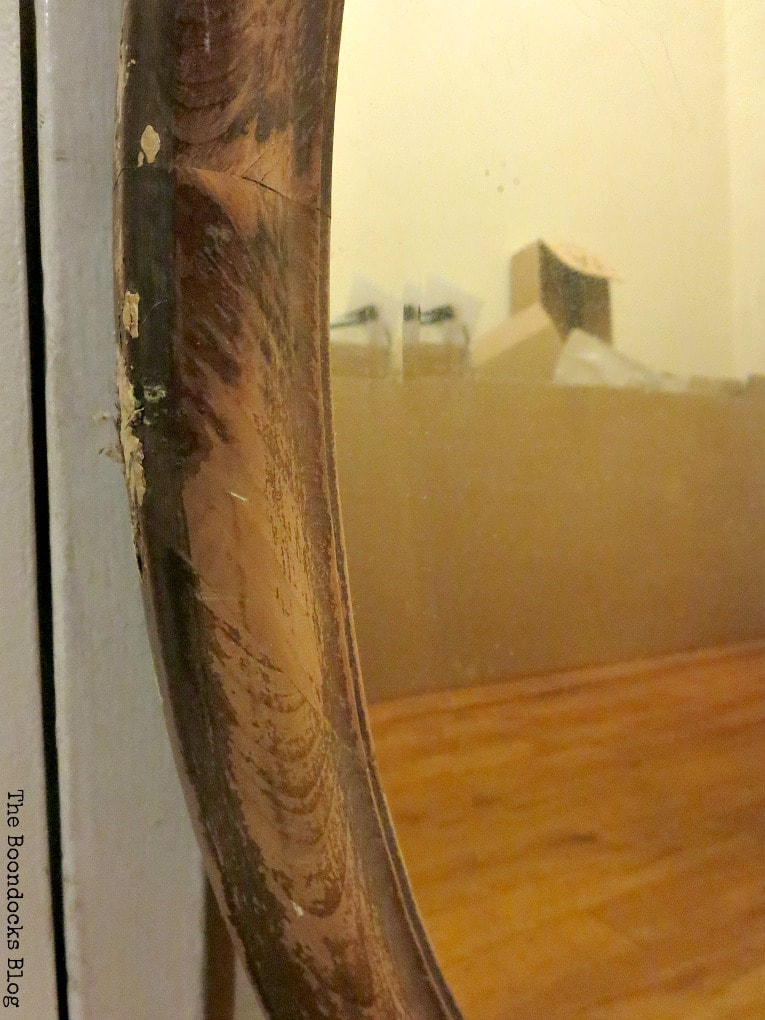
Here is a close up of the mess it was in. I talked it over with the girls and they said they wanted it in their room. But first it would have to be painted black. Remember we had decided to go with a black and white theme for the bedroom.
Disclosure: I was compensated for doing this post with product. However, all the opinions stated here are my own. I only use products I love and would recommend to my viewers.
What I used:
- Masking Tape
- American Decor Satin Enamels in Black
- Paint brush
The How To:
It is embarrassing for me to even write a how to. The first step was to go along the edges with the masking tape, it really does save time from having to scrape the paint off the mirror.

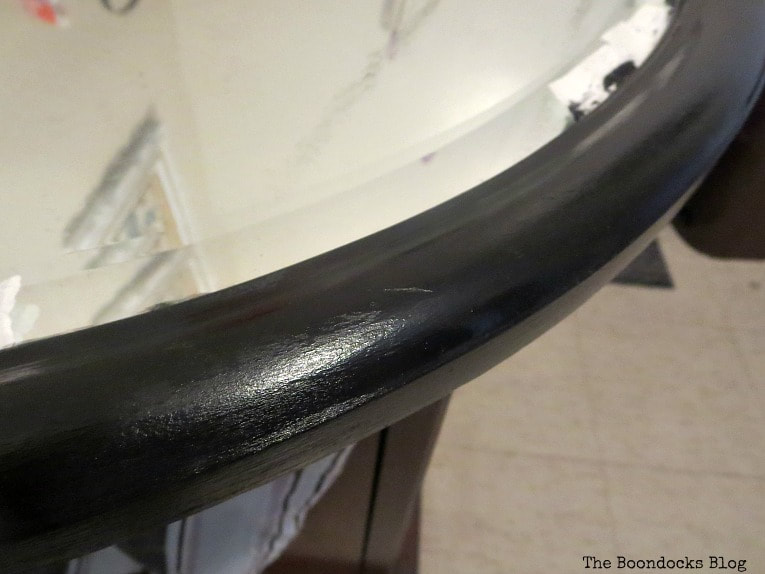
I sanded it a bit to smooth out the rough patches and the worn areas and then just painted it.

Two coats was all it took and it dried to a hard finish. I really love this paint and have used it before on my lamp project. Not only is it super easy to use but it also dries to a hard finish and you don’t need a top coat which makes it a winner for me. I finished this project in a couple of hours including time between drying. I then let it cure for a week so I’d be sure it would be rock solid and that was it.
Disclosure: The items below are affiliate links. If you purchase any of these products through the links, I receive a small commission, that way I can continue to provide you with lovely content. There is no extra charge to you for purchasing through my affiliate links.

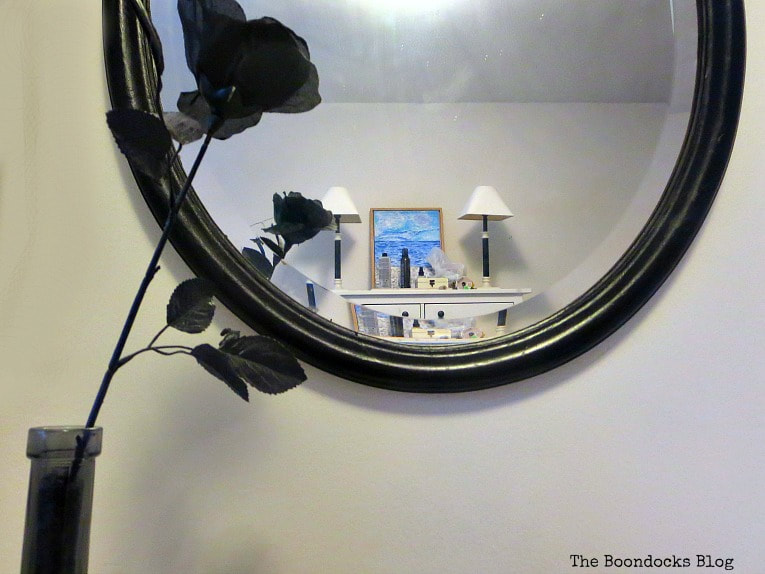
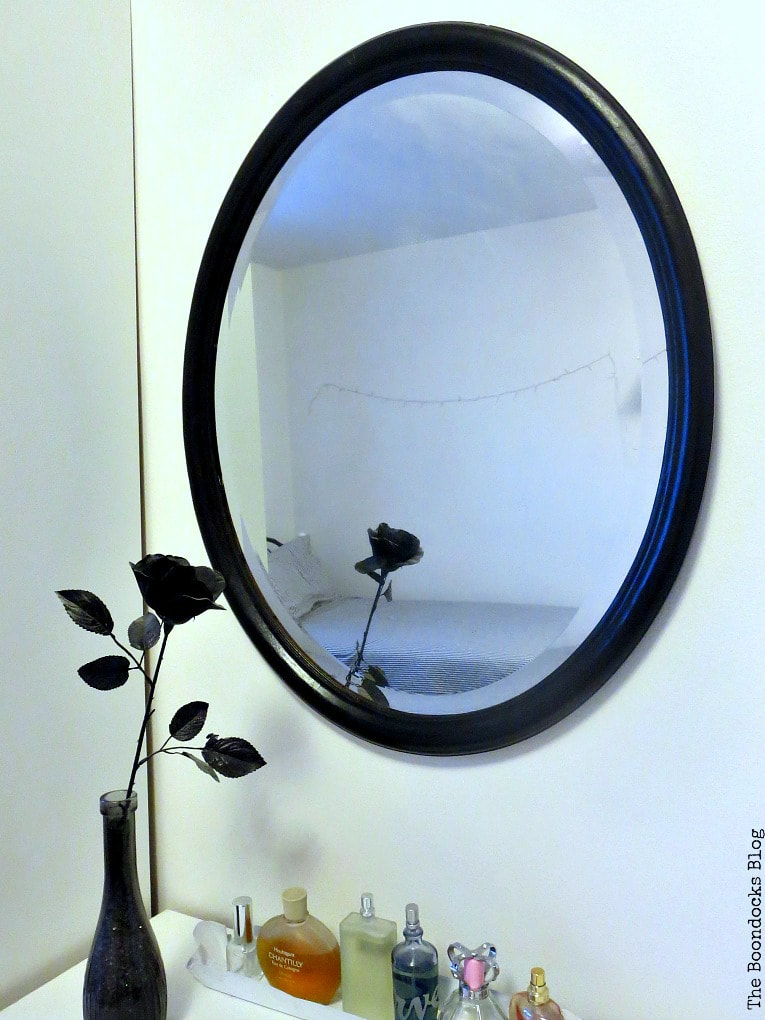
I had originally photographed it in the foyer …
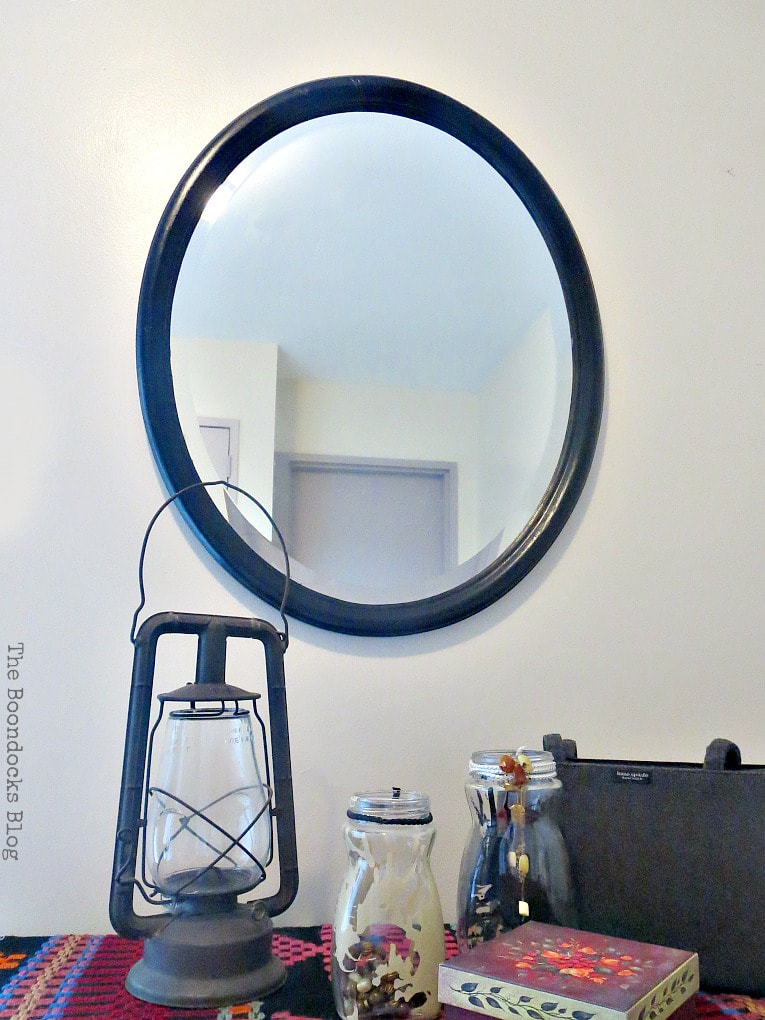
…but I think it is only fitting to show it in the girls’ bedroom.

Such an easy project, if not my easiest paint job yet!
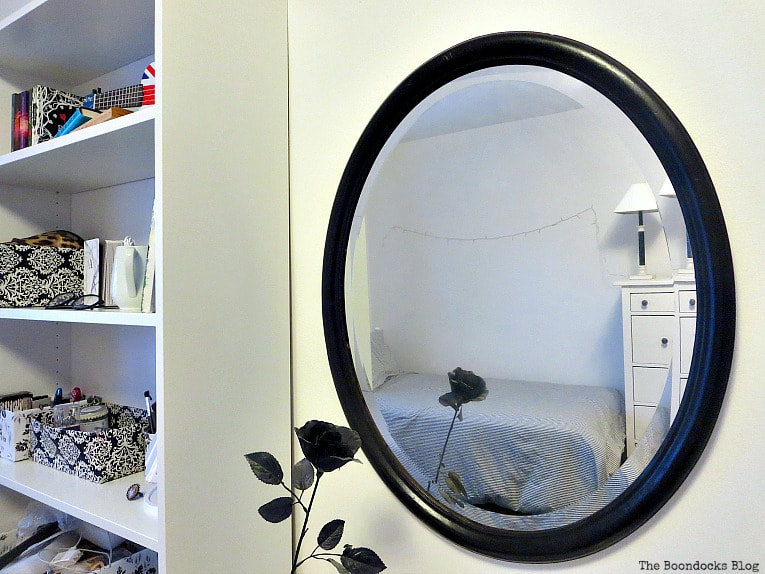
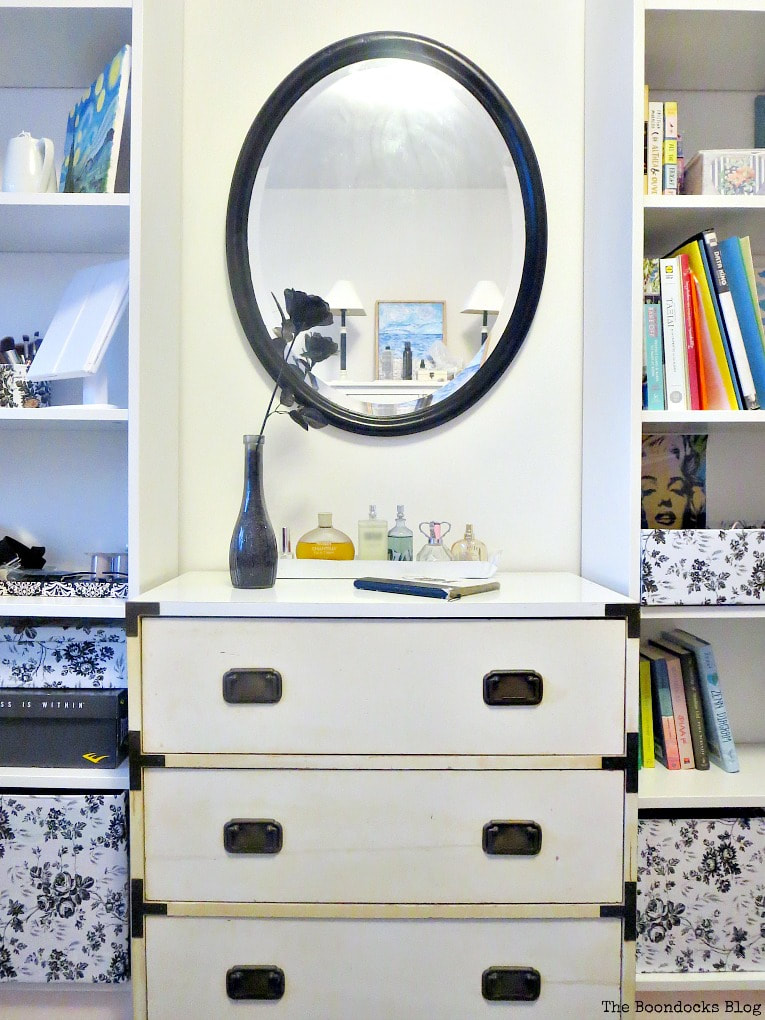
I’ve placed this mirror in between the two Ikea Billy bookcases. It’s actually pretty large, 12 by 30 inches so it really looks commanding in that space.

Below the mirror is a dresser which will also have it’s day on the blog shortly. It needs a refresh since the room is all about bright and clean furniture. In fact I’m planning to use the same paint but in white this time!
I think the mirror was meant to be in this spot exactly!
I am so glad my son had the eye to see the potential in this old mirror and bring it home to me. I know that there are many times we have old things and think nothing of throwing them out. This was such an easy fix, it would have been a shame to just let it go. Reviving an old mirror like this with paint is such an easy project, especially when done with this paint that I used. Go and order some (affiliate link is above) and you’ll thank me!

If you really like what you see subscribe to my blog and get my adventures in your mailbox. The form is on the sidebar and on top. Your e-mail will never be shared with a third party.

More paint projects:
<< Decorating with DIY Home Planner HOME Using Wreaths to Decorate >>
Linking up to these Link Parties
This blog is for entertainment purposes only; my DIY tutorials are not professional advice. Read my full disclaimer here.
I love it when I get your comments and I will try to reply to every one of them. Please do not add a hyperlink to your comment, otherwise it cannot be published.

Mary, you totally gave this tired piece new life. I love the striking statement it makes. Bravo!
Larissa it may be simple but in its setting it really stands out.
The mirror is a gorgeous add in the girl’s room. As always you did an excellent job and gave it a whole new life. But…. wow!!! This dresser under the mirror is one of a kind! I am thinking all white and a bright gold for the metallic parts! Hugs and kisses to you and your girls 🙂
That dresser definitely needs a refresh. But instead of gold we are going to go with black accents to keep the same look as the rest of the room. The girls have a love for black and white.
Looks like your son takes after his mom and his grandfather Mary 😉 The mirror was a great find. It’s a lovely size and shape and you made it even better with that paint. Beautifully done
I am so grateful he bought it home. When I saw it I couldn’t believe the size of it. Wow!!
It turned out beautiful. Actually it is a stunning piece to me. Love that black. Hugs and blessings, Cindy
Thanks Cindy, black was the only way to go with this one to offset it against the white.
Mary, the girl’s room is looking great. You sure are making a lot of progress in a short time.
Love the mirror, it looks fabulous in that spot with the bookshelves flanking it. That paint looks awesome, I’m going to have to try it!
Things are really coming together Nikki. It was long overdue and they were so excited to get into that room and make it their own.
Mary, what a simple fix of a gorgeous beveled mirror. It would have been a shame to have had it go to the trash heap. Good job!
I agree Josephine. I am so grateful my son brought this big treasure home.
I love that your son sees the same value in less than perfect items as you do, Mary. I bet he was thrilled to see your transformation!
He was Kim and I in turn am grateful that he thought of me. He is now in the process of getting more things. Lucky me!
You didn’t say what the name of the paint was! Or did I miss it? Anyway, it looks like it was made for the space, and simple projects are the best. I can wrap my brain easier around those.
Florence I always include the link to the product in my Amazon links. In this case it is the first one. DecoArt Americana Satin Enamel. The best part is that it goes on smooth and there is no need for a coat to seal it in. Also it comes in a bunch of great colors.
Great project and good job training those kids. This will be a good life skill for them. A few years ago my daughter and I would drive around looking for curb finds when dropping the kids off for school. Trash days were always the best bonding days.
I think it is great that you got to spend time with your daughter that way. My kids may scoff at me but when it comes right down to it, they see what I can do with castoffs and they do appreciate it.
Turned out beautifully! Looks brand new! You trained your children well!
Jeannee
Thanks Jeannee, I certainly hope so!
Thanks so much for visiting!! The mirror came out great and looks fantastic!!
Hugs,
Debbie
Thank you Debbie, because it is so big, it really stands out in the room.
WOW! You’ve trained your children well. Haven’t managed this with the boys (yet). My youngest was in Italy. Did he bring home some Italian yarn for his mum? NO! My eldest was is Sweden. Did he bring some Swedish yarn home for his mum? NO!… Sigh… They’ll probably walk past a yarn shop without even noticing it!
Aww Marjan, if you had a girl it may have gone differently. My girls don’t care about what I’m doing unless it involves their room. Haha!!
Love the mirror makeover! It is such a great size and shape for your space. It was meant to be! It is so amazing what a little paint can do.
Sometimes you find a piece and just know it was meant to be. You know that is how the whole room has been feeling like lately. Everything that goes is the room is just meant to be.
The mirror looks great in the girl’s room. Sometimes simple is best. It shows a project doesn’t need to be complicated to revive a room or a piece.
Exactly Debra. It may be simple but it is just right for the room and it makes a statement.
Love the transformation! I love mirrors and this one was a great find!
It truly was Carolann. Just the size alone and it is quite heavy too.
Looks great Mary, and very pretty there above the dresser. That was an easy fix, so glad your son brought it home to you you’ve trained them well. Lol
Mary sometimes all it takes to give new life to something is a little bit of paint. The mirror looks fresh and ready to be up on the walls for many years to come!
So easy, so fresh! Can’t wait to see the redone dresser 🙂
Isn’t it amazing what a few coats of paint can do? I did that years ago with a mirror I found – it was all bumps and grooves and was *gold*. LOL With a few layers of paint and then distressed to show bits of gold, it looked so much better.
You have taught your children well, Mary – he did good with this score! I’m loving the black & white theme you have going on in the girl’s room. You are so right about thinking twice before throwing something out – this painted mirror is perfect!
Your sons got an eye for quality, that for sure. Beveled mirrors are the most sought after, just so classy especially with the black finish, nice job thanks for shRing it at #fridaysfurniturefix!
Simplicity at its best! Your project is this weeks feature at Fridays Furniture Fix Mary!
I love black so this turned out great. It looks so pretty between the bookcases!
You certainly have got your kids well trained haven’t you!?
This paint has a beautiful finish, it is completely transformed.
Julie I can sing the praises of this paint all day. It made a huge difference.
Mary, that’s gorgeous. Thank you for inspiring me to maybe give this a try one day. I’ll be on the lookout for a potential project!
A mirror was one of my first refinish projects and totally got me hooked! I bought it for $2 at a garage sale, covered in spider webs, cleaned it off and painted the frame and it was GORGEOUS! Thanks so much for sharing at our To Grandma’s House We Go DIY, Crafts, Recipes and more Wednesday Link Party! Hope to see you this week too!
I love this mirror. What a nice save. Love the color you selected, niceeeee! Thanks for sharing.
We really lucked out Ivory!
This is a lovely makeover, Mary. Love the paint you chose, too! Thanks for sharing on Homestyle Gathering!
Thank you Julie, the whole room was done in mostly black and white with a bit of blue thrown in to make them happy.
This mirror turned out so beautiful. What a transformation! I want to try your technique on an old mirror I have! Thank you for sharing at Celebrate It!