• Skip to primary navigation
  • Skip to main content
  • Skip to primary sidebar
  • Skip to footer

The Boondocks Blog

  • Home
  • Re Purpose
  • Furniture
  • Seasonal
  • About Us
    • Privacy Policy

Banishing the Shine  - Εξορίζοντας  τη λάμψη!

September 24, 2015 by boondocks 54 Comments

Sharing is caring!

0 shares
  • Share
  • Tweet
  • Email
A blogger friend commented on my recent frame  project that we are incapable of leaving anything shiny alone.  And to prove that point I have found this group of three frames which I had bought at different times in my life.  I had grouped them together, because they all had a gold/silver finish on wood. I used them to put pictures of my kids when they were babies.But now I’m going to be banishing the shine. 

Μια φίλη μπλογκερ σχολίασε σε ένα πρόσφατο έργο μου για κορνίζες, ότι είμαστε ανίκανοι να αφήσουμε τίποτα λαμπερό στην ησυχία του.  

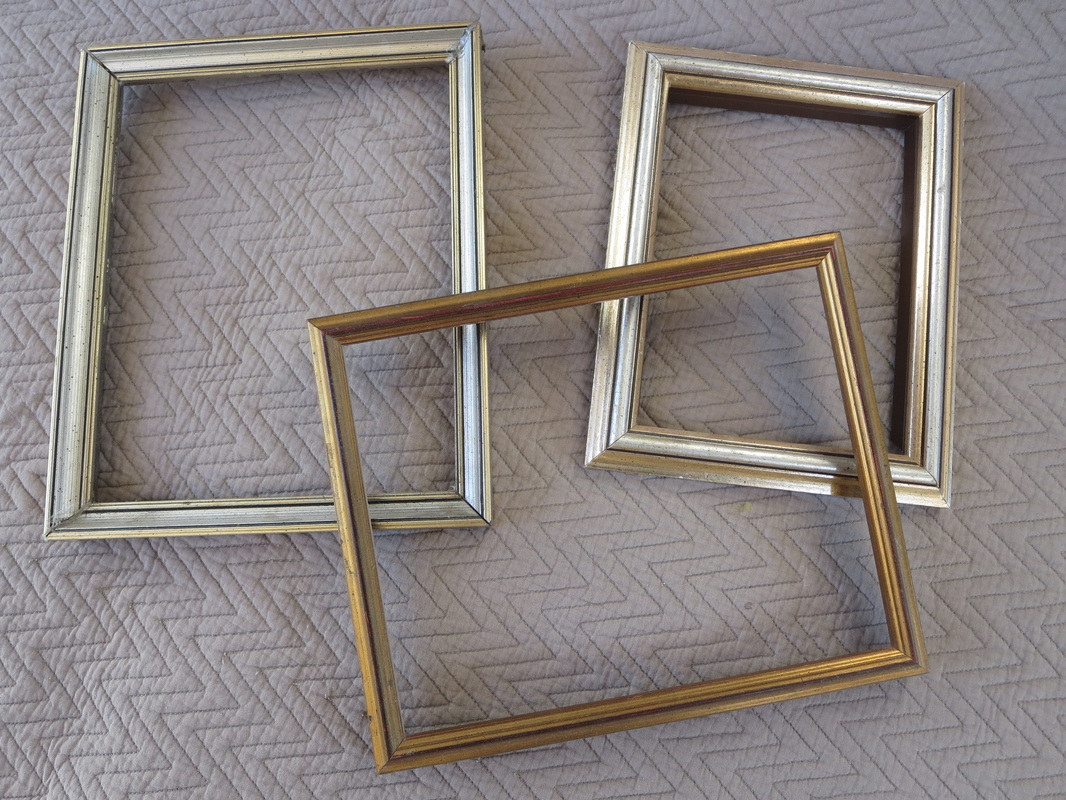
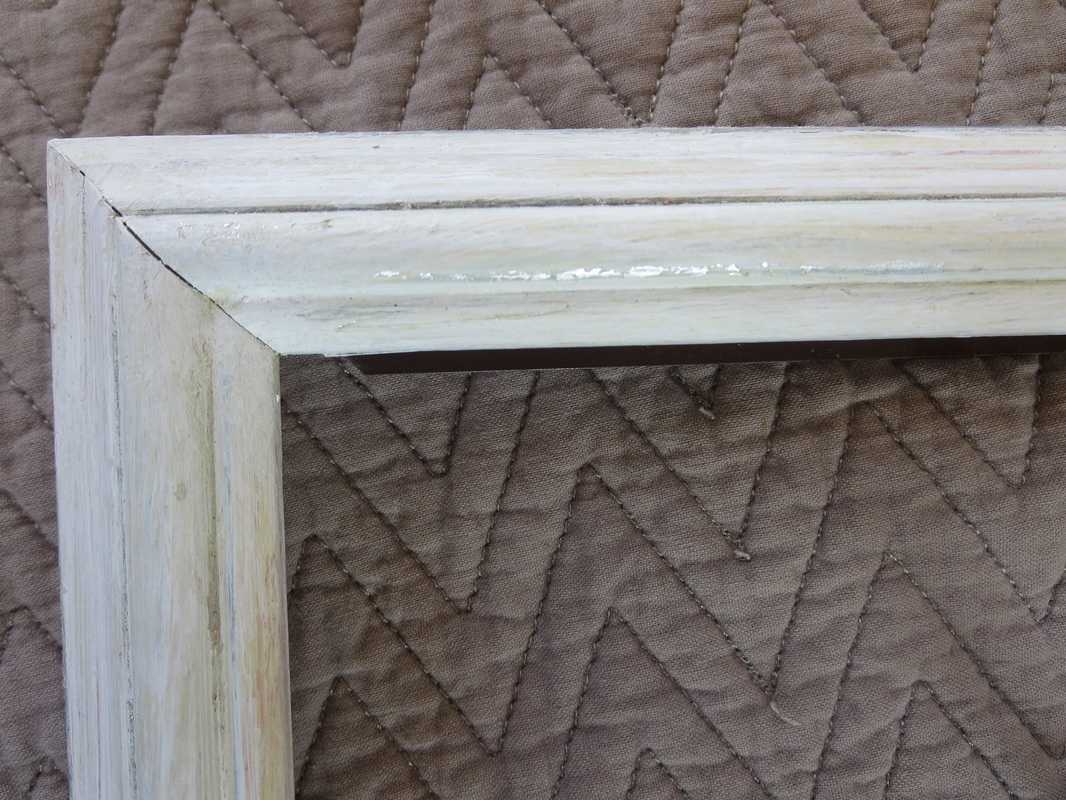
Και για να αποδείξω αυτό το σημείο έχω βρει  μια ομάδα από τρεις κορνίζες που είχα αγοράσει σε διαφορετικές χρονικές στιγμές στη ζωή μου.   Τις είχα βάλει μαζί, επειδή όλες είχαν ένα χρυσό / ασημί φινίρισμα σε ξύλο. Τις χρησιμοποίησα να βάλω τις εικόνες των παιδιών μου όταν ήταν μωρά.
​
three  picture frames with metallic finish, Banishing the Shine www.theboondocksblog.com
After 20 plus  years it was time for a refresh.  I grabbed some paint and slathered it on. Ah, but this was not just any paint. I mixed white with a little silver. 

Μετά από 20 και πλέον χρόνια ήρθε η ώρα για μια ανανέωση. Άρπαξα χρώμα και το  έβαψα. Αλλά αυτό δεν ήταν ένα οποιοδήποτε χρώμα, ανάμιξα  ένα λευκό με λίγο  ασημένιο.
​
Painted with white and a little silver Banishing the Shine www.theboondocksblog.com
Closeup of one frame, Banishing the Shine www.theboondocksblog.com
Then a second coat in pure white. And then using a stone, I dragged it along the edges to get that distressed worn look.  This is what is known as use of sophisticated machinery.

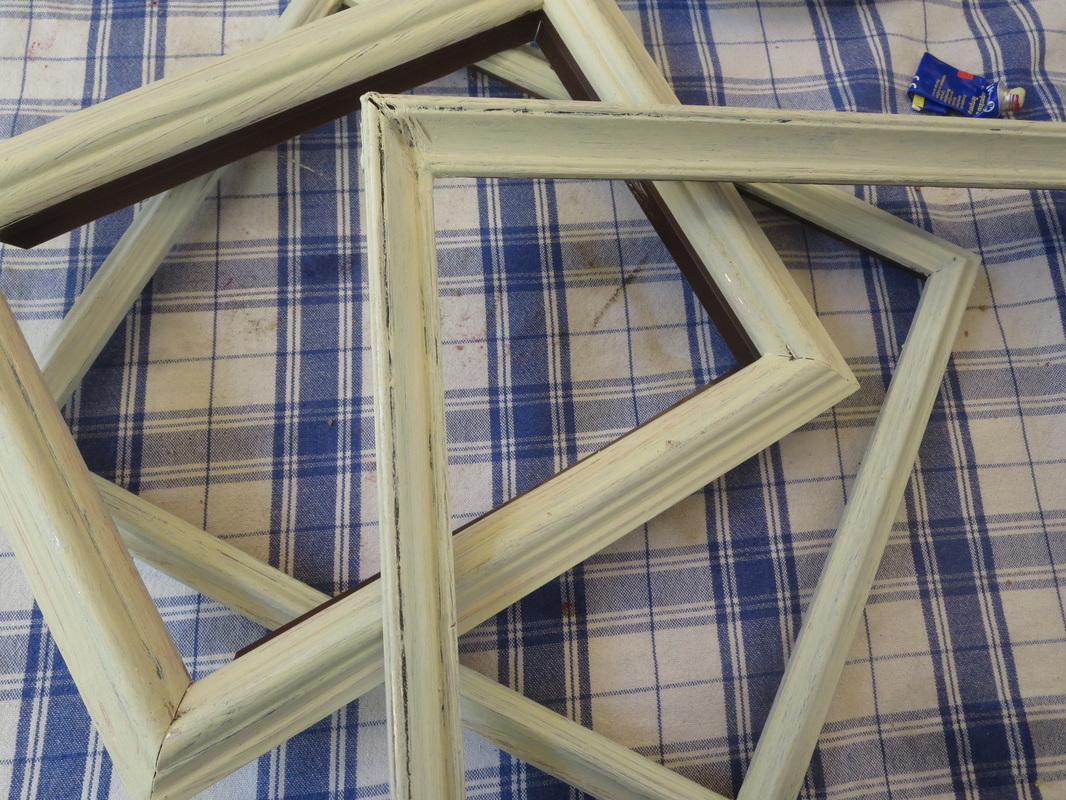
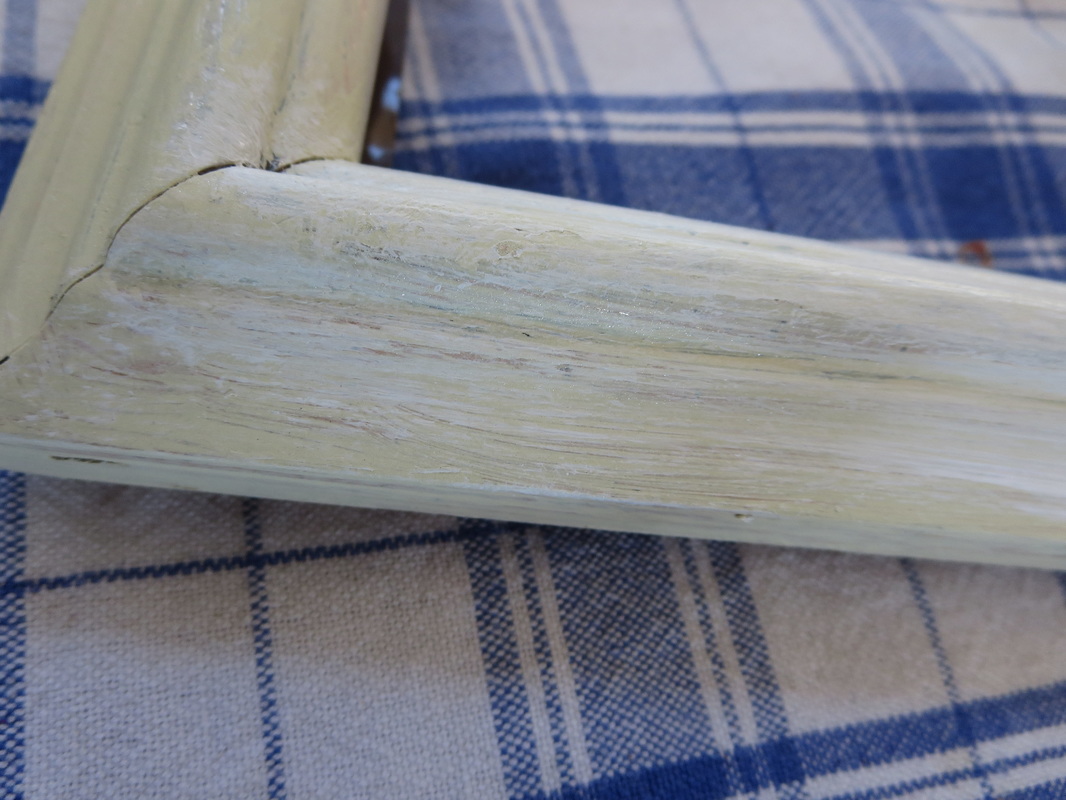
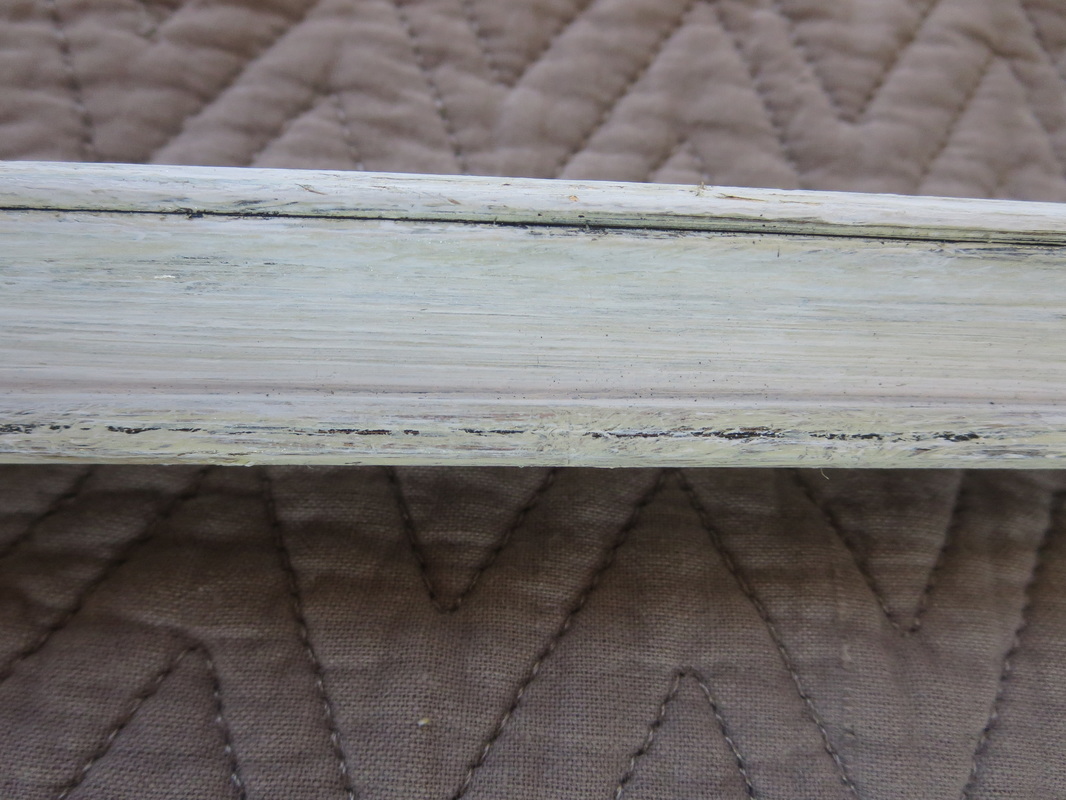
Στη συνέχεια, μια δεύτερη στρώση σε καθαρό λευκό. Και κατόπιν χρησιμοποίησα μια πέτρα, που την έσυρα πάνω από τις άκρες για να πάρει μια φθαρμένη όψη. Αυτό είναι γνωστό ως η χρήση των εξελιγμένων μηχανημάτων.


​
distressing with a stone, Banishing the Shine www.theboondocksblog.com
You can see the original frame color peeking through. 

Μπορείτε να δείτε το αρχικό χρώμα από τις κορνίζες που φαίνεται από μέσα.
​
The distressed look, Banishing the Shine www.theboondocksblog.com
color peeking thru, Banishing the Shine www.theboondocksblog.com
After I placed the photos in the frames, I wanted to position them vertically on the wall.  I took an old pin I had and added a piece of white fabric to it, and nailed it to the wall. 

Μετά έβαλα τις φωτογραφίες στις κορνίζες, που ήθελα να τοποθετήσω κάθετα στον τοίχο. Πήρα μια παλιά καρφίτσα που είχα και πρόσθεσα ένα κομμάτι λευκό ύφασμα σε αυτό, και τα κάρφωσα στον τοίχο.
​
adding a pin to some fabric, Banishing the Shine www.theboondocksblog.com
Once that was done, I placed nails along the way on the fabric and added the frames.

Έβαλα

 καρφιά στην πορεία του υφάσματος και κρέμασα τις κορνίζες.
   hanging pictures along the frame length, Banishing the Shine www.theboondocksblog.com
Each of the pictures had a different background, so it was important to make the frames similar.   This gave the whole group a cohesive look. 

Κάθε μία από τις εικόνες είχε διαφορετικό φόντο, οπότε ήταν σημαντικό οι  κορνίζες  να είναι παρόμοιες. Αυτό έδωσε σε ολόκληρη την ομάδα μια συνεκτική ματιά.
​
frames hung along the length of the fabric strip, Banishing the Shine www.theboondocksblog.com
the last frame and the bottom of the fabric strip, Banishing the Shine www.theboondocksblog.com
three picture framesthat have been painted to eliminate the metallic colors,  hanging on white fabric strip, Banishing the Shine www.theboondocksblog.com

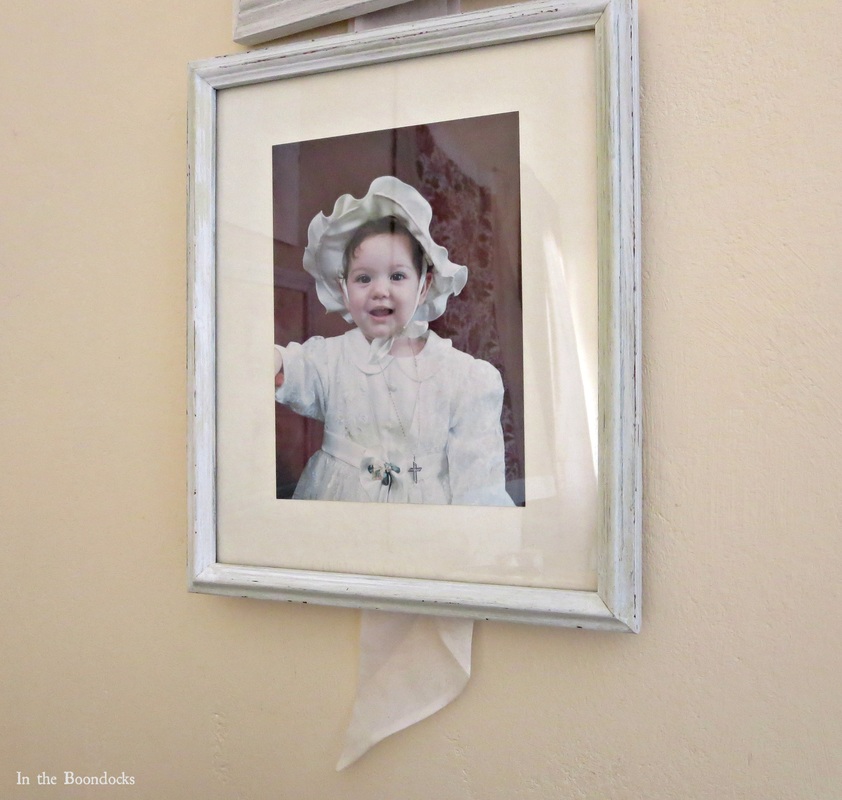
 A fresh new look for my babies (who are no longer babies – in fact they are all taller than me). The frames all match but still retain a bit of individuality underneath. 
And another project bites the dust.  Now I’ll have to look around and find more frames to renew – or banish the shine!

Μια εντελώς νέα εμφάνιση για τα μωρά μου (που δεν είναι πλέον μωρά – στην πραγματικότητα όλα είναι πιο ψηλά από μένα). Οι κορνίζες ταιριάζουν, αλλά εξακολουθούν να διατηρούν ένα κομμάτι ιδιαιτερότητας από κάτω. Και ένα άλλο έργο  τελείωσε. Τώρα θα πρέπει να κοιτάζω γύρω και να βρω περισσότερες κορνίζες  για  ανανέωση – η να 

εξορίσω τη λάμψη! !​
​
​If you like what you see, share it with your friends, or save it on Pinterest.  Above is a Pinterest worthy image!

​If you really like what you see subscribe to my blog and get my adventures twice a week in your mailbox. The form is on the sidebar and your e-mail will never be shared with a third party.

Picture
Related posts:
Σχετικά:
Fixing the Frames

Repurposed Antique Cauldron

<< Seeing Red                   HOME                   A Tour of the Blue Room >>
This blog is for entertainment purposes only; my DIY tutorials are not professional advice. Read my full disclaimer here.​

I love it when I get your comments and I will try reply to them or visit you on your blog. ​Please do not add a hyperlink to your comment, otherwise we cannot publish it.

Filed Under: Jewelry, Picture Frames, Projects, Re Purpose, Uncategorized, Up Cycle, Wall

Previous Post: « The Blue Bunk Bed - Η Μπλε Κουκέτα
Next Post: Seeing Red – Βλέποντας κόκκινο (Έχω τα νεύρα μου) »

Reader Interactions

Comments

  1. Christina Makri

    September 24, 2015 at 3:48 am

    Πολύ όμορφη δουλειά Μαίρη μου. Απλές κορνίζες απέκτησαν χαρακτήρα και αναδεικνύουν με τον καλύτερο τρόπο τις αγαπημένες σου φωτογραφίες. ‘Εξυπνη ιδέα η χρησιμοποίηση της κορδέλας για να τις “δέσεις” μεταξύ τους. Καλή συνέχεια…

    Reply
    • Mary

      September 24, 2015 at 5:34 am

      Ευχαριστω, Χριστίνα μου, ηταν καιρός για ανανέωση.

      Reply
  2. Pili

    September 24, 2015 at 4:03 am

    Mary, all the set looks awesome right now! I love the fabric behind and the pin add a chic style. Lovely way to display their pictures

    Reply
    • Mary

      September 24, 2015 at 5:34 am

      Thanks, Pili. I had to do something to pull it all together.

      Reply
  3. Keri

    September 24, 2015 at 8:35 am

    Mary these frames are beautiful and so are your kiddos!!! Love that pin!!

    Reply
    • Mary

      September 24, 2015 at 9:09 am

      Aww Keri, thanks for the love. Those kiddos are no more… they are all taller than poor me. 😉

      Reply
  4. bj conklin

    September 24, 2015 at 12:41 pm

    This is a beautiful do-over project…and your “babies” are all adorable.
    From Before and After

    Reply
    • Mary

      September 24, 2015 at 1:20 pm

      Thank you bj. and thanks for dropping by.

      Reply
  5. All that's Jas

    September 24, 2015 at 1:39 pm

    Hey, as long as the machinery gets the job done, who cares how sophisticated it is, right? I love the idea of fabric and the pin! Thanks for sharing at the Thursday Favorite Things!

    Reply
    • Mary

      September 25, 2015 at 10:42 am

      Jas, thank you, yes I had very expensive machinery – it was so expensive that n ow I’ve lost it. Thanks for dropping by.

      Reply
  6. [email protected] Interior Frugalista

    September 24, 2015 at 7:52 pm

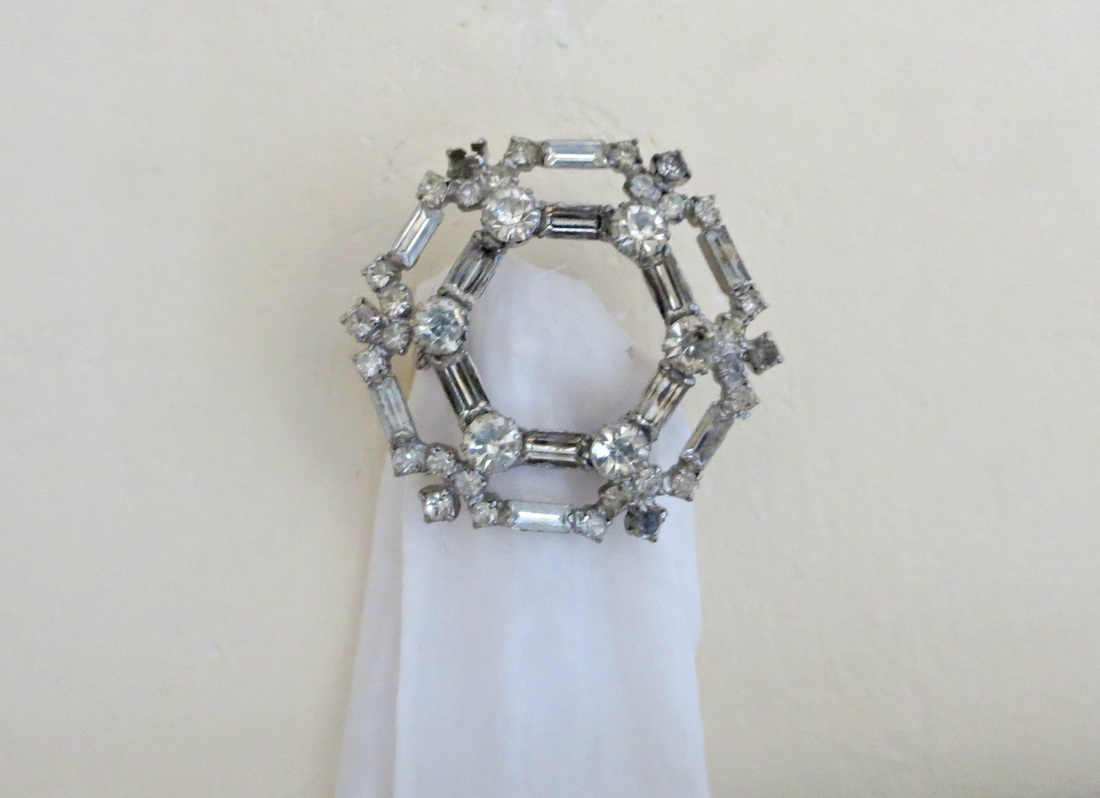
    Very nice sweet Mary, love the repurposing idea of using an old brooch!

    Reply
    • Mary

      September 25, 2015 at 10:45 am

      Thanks Marie, I thought it would be a shame if it just sat in a drawer. Thanks for stopping by.

      Reply
  7. Sharon

    September 24, 2015 at 9:08 pm

    Such a sweet project, Mary. I really love the brooch idea. I have 3 of my grandmother’s but haven’t figured out what I want to do with them yet. Maybe a shadowbox? The frames look great–nice job!

    Reply
    • Mary

      September 25, 2015 at 10:52 am

      Sharon, we usually have lots of stuff hiding, and sometimes we get lucky and remember it and then the magic happens. Of course there might be little elves out there that help us to find the precious. 😉

      Reply
  8. trish

    September 25, 2015 at 2:51 am

    I love how these turned out, Very nice.

    Reply
    • Mary

      September 25, 2015 at 10:53 am

      Thank you Trish, I’m happier with the wall too now that it looks like a unit.

      Reply
  9. Susan

    September 25, 2015 at 1:30 pm

    Very clever!
    Big Texas Hugs,
    Susan and Bentley

    Reply
    • Mary

      September 25, 2015 at 2:46 pm

      Susan thanks for your sweet comment, and Bentley is adorable!! You got me in my soft spot!

      Reply
  10. [email protected]

    September 26, 2015 at 9:28 pm

    I know your babies are all grown now, but they sure we’re adorable! That cute little hat on your daughter is precious :).
    I never would have thought to use a stone for distressing. Very resourceful. The brooch was a nice touch for the frames!

    Reply
    • Mary

      September 27, 2015 at 4:45 am

      Doreen, I just opened my computer this morning and found your sweet words. You just made my morning. Thank you from the bottom of my heart.

      Reply
  11. julie

    September 27, 2015 at 6:09 am

    I love your use of high tech equipment!
    I’ve been painting old frames round here to give them a new look but I think I’m going in the opposite direction to you – I’m mostly taking wooden frames and spray painting them gold!
    Either way it’s nice to reuse old things rather than buying new all the time.

    Reply
    • Mary

      September 27, 2015 at 12:56 pm

      Julie this is so true. So satisfying to change up something in your home. I just checked out your blog, your gold frame is beautiful and the doily certainly is a treasure. Thanks for dropping by.

      Reply
  12. Christine

    September 27, 2015 at 10:43 pm

    Mary these turned out awesome, I especially like how you hung them up. Thanks also for leaving me such a sweet comment on my blog. Unfortunately I have no idea on how to get rust off, I have only ever put rust on…LOL..Wish I had a tip for you!!!! Greetings from WA State

    Reply
    • Mary

      September 28, 2015 at 6:06 am

      Aww Christine, and I was counting on you. Oh well, I really wouldn’t mind the rust except that I can’t get the thing opened. Thanks for your sweet comment and for dropping by.

      Reply
  13. Mimi

    September 28, 2015 at 3:10 am

    Mary, I love how you’ve unified the look of the frames. And the bit of bling on top…now that’s my kinda project! Thanks for sharing at Five Star Frugal this week. Love, Mimi xxx

    Reply
    • Mary

      September 28, 2015 at 6:07 am

      Mimi, I suspected you would like this one. The bling does it!! Thanks for stopping by.

      Reply
  14. April R - Uncookie Cutter

    September 28, 2015 at 12:03 pm

    I love the transformation! I would banish the shine as well 🙂

    Reply
    • Mary

      September 28, 2015 at 4:49 pm

      Thanks April. I had it for too long, it was time for a change!

      Reply
  15. Sarah

    September 29, 2015 at 6:39 am

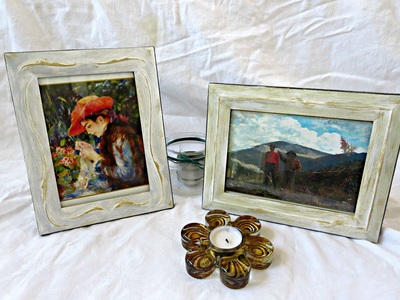
    I love how you used three different types of frames to make this – such a great idea and a good way to unify projects. Love it!

    Reply
    • Mary

      September 30, 2015 at 2:38 pm

      Thanks Sarah, it was bad enough that the backgrounds of the pictures were all over the place, I had to unify them somehow. Thanks for stopping by.

      Reply
  16. Sarah Eliza @ devastateboredom

    September 29, 2015 at 8:42 pm

    Aww such sweet photos! I love how the project turned out!
    And such a funny line… “This is what is known as use of sophisticated machinery.” 😛

    Reply
    • Mary

      September 30, 2015 at 2:41 pm

      Thanks Sarah Eliza, so glad you got my reference. Thanks for stoppping by.

      Reply
  17. Random Musings

    September 30, 2015 at 7:48 am

    Great post, the frames look lovely 🙂 #waywow
    Debbie

    Reply
    • Mary

      September 30, 2015 at 2:50 pm

      Thanks Debbie. I was just looking through your blog and I really like that you tackle such a large range of subjects. I’m going back to read about your favorite bloggers. Thanks for stopping by.

      Reply
  18. Heaven

    September 30, 2015 at 9:25 am

    I love the pin and fabric as a pretty way to hang your frames. I also love the way you used a stone! Nice job. Stopping by from Moonlight and Mason Jars.

    Reply
    • Mary

      September 30, 2015 at 2:53 pm

      Why thank you, I wanted it to be light not heavy handed. And the fabric was very pretty. Thank you for visiting.

      Reply
  19. Emily

    September 30, 2015 at 2:58 pm

    I love painting frames to give them a fresh look. Using a pin and ribbon instead of just nailing them to the wall is creative. Looks great!

    Reply
    • Mary

      October 1, 2015 at 11:41 am

      Thank you Emily. Best part I got to use a pin that was otherwise just sitting in a drawer.

      Reply
  20. Jess

    September 30, 2015 at 11:20 pm

    My sister has done this to frame before and I’ve always loved it! 🙂
    Thanks for joining Cooking and Crafting with J & J!

    Reply
    • Mary

      October 1, 2015 at 11:42 am

      Thanks Jess, it does create unity and gives it a vintage flavor.

      Reply
  21. Beth

    October 1, 2015 at 7:52 am

    Great post! Thanks for sharing.

    Reply
    • Mary

      October 1, 2015 at 11:55 am

      My pleasure, thanks for visiting.

      Reply
  22. T'onna @ USS Crafty

    October 2, 2015 at 1:51 am

    The frames look great!

    Reply
    • Mary

      October 2, 2015 at 12:59 pm

      Thank you T’onna. See you on Sunday!

      Reply
  23. Debbie

    October 3, 2015 at 3:49 pm

    That’s another lovely project, Mary! Cute pictures. It’s a beautiful way to make those moments eternal.
    Thanks for sharing it on #tiptuesday.

    Reply
    • Mary

      October 4, 2015 at 4:32 pm

      And they look almost new. Thanks for dropping by Debbie!

      Reply
  24. Tara @ Lehman lane

    October 5, 2015 at 3:03 pm

    Mary, I really like how you painted your frames! Great job! So fun to see pictures of your kids when they are little. Thanks so much for sharing your projects every week @ Dream. Create. Inspire. Link. I hope you will join us tomorrow night @ 8 EST. Take care, Tara

    Reply
    • Mary

      October 6, 2015 at 3:10 pm

      Tara it is time to redo the whole house and freshen up a bit and so I figured I would start with the small stuff. See you at the party.

      Reply
  25. Linda at Mixed Kreations

    August 24, 2016 at 4:42 pm

    I love how your frames turned out. I’m not much into shiny silver or gold. Just a little bit of shine is ok. Looks like your pictures fit perfectly with the new colors of the frames. I guess I am a little behind I haven’t tried any of the sophisticated machinery that you used for these frames. LOL

    Reply
    • Mary

      August 28, 2016 at 10:30 am

      Linda I don’t like shine anymore either. But truth be told it it was looking really outdated in here. I am much happier with these white frames. . As for my sophisticated machinery, stones are really underrated! 😉

      Reply
  26. Michelle

    March 15, 2017 at 7:10 am

    Oooo I like the way these turned out and the way you used the ribbon to join them all together. Really lovely Mary

    Reply
    • Mary

      March 15, 2017 at 10:56 am

      Thank you Michelle, I needed a way to display them that was not boring but to connect them as one.

      Reply
  27. Florence

    March 21, 2017 at 10:24 pm

    This really turned out nicely Mary! Must have been that “sophisticated machinery” you used. They do all look uniform now…I’m telling you it looks very professionally done. I know you are going to enjoy seeing your “babies.”
    So looks like it is time to go back to the basement to find your next project now.

    Reply
    • Mary

      April 4, 2017 at 8:18 am

      Florence thank you so much. Right now I am decluttering so no need to go to the basement. I’ve got more than I can handle right here.

      Reply

Leave a Reply Cancel reply

Your email address will not be published. Required fields are marked *

Recipe Rating


This site uses Akismet to reduce spam. Learn how your comment data is processed.

Primary Sidebar

Let’s Connect!

  • Email
  • Facebook
  • Instagram
  • Pinterest
  • Twitter

Recent Posts

  • DIY Pallet Table with Reclaimed Wood Legs
  • 20 Creative DIY Pallet Projects to Make!
  • Shabby Chic Wicker Basket Upcycle
  • 20 Household Items Re-Purposed For Halloween Decor

Explore Our Top Posts

IKEA Malm Dresser Makeover
How to Stain a Laminate Table

DIY Pallet Couch

Footer

Disclosure

We are a participant in the Amazon Services LLC Associates Program, an affiliate advertising program designed to provide a means for us to earn fees by linking to Amazon.com and affiliated sites.

Disclaimer

While every effort has been made to ensure the accuracy & effectiveness of the information displayed on this website, The Boondocks Blog makes no guarantee as to the procedures & information contained here. The publisher will not be liable for direct, indirect, incidental, or consequential damages in connection with or arising from the use of the information displayed on TheBoondocksBlog.com. This website is not intended to substitute the advice of a professional. Find our Privacy Policy here.

Copyright

©The Boondocks Blog, 2015-2021. Unauthorized use and/or duplication of this material without express and written permission from this blog’s owners is strictly prohibited. One photo, excerpts and links may be used, provided that full and clear credit is given to TheBoondocksBlog.com with appropriate and specific direction to the original content.

Copyright © 2022 The Boondocks Blog on the Foodie Pro Theme

0 shares