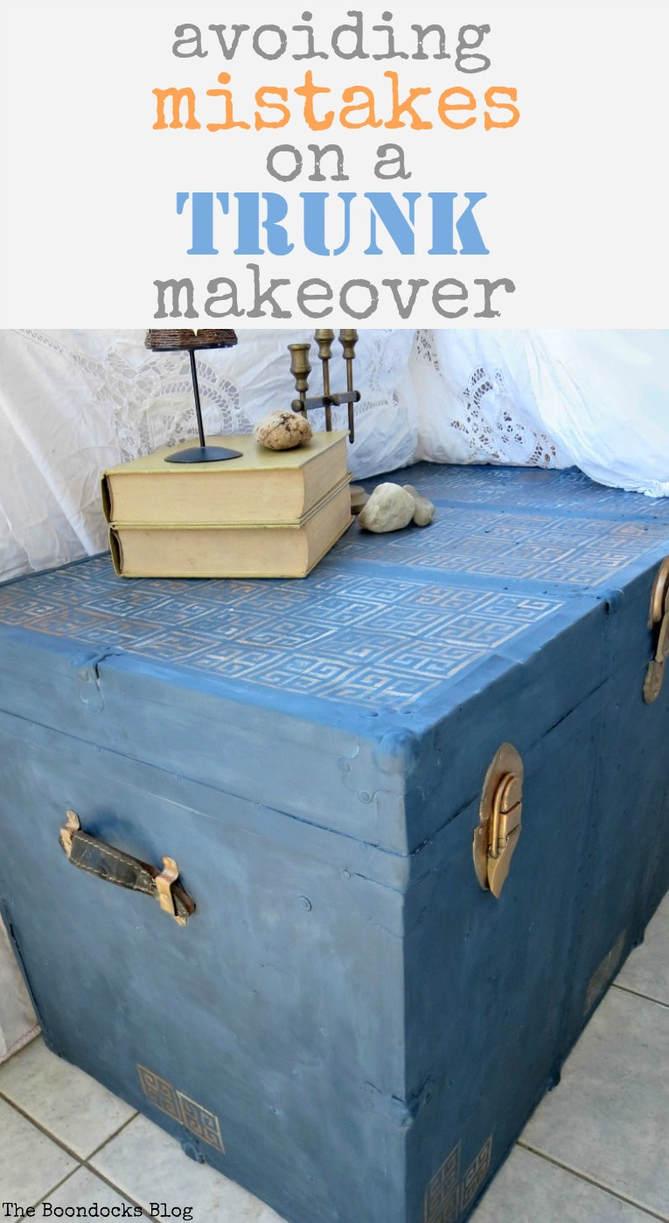
How to Avoid Mistakes When Up-cycling a Trunk
Disclosure: I was compensated for doing this post with product. However, all the opinions stated…
I’m always looking to try new things with these trunks. And sometimes I get myself into hot water. Today I’d like to share how to avoid mistakes when up-cycling a trunk.
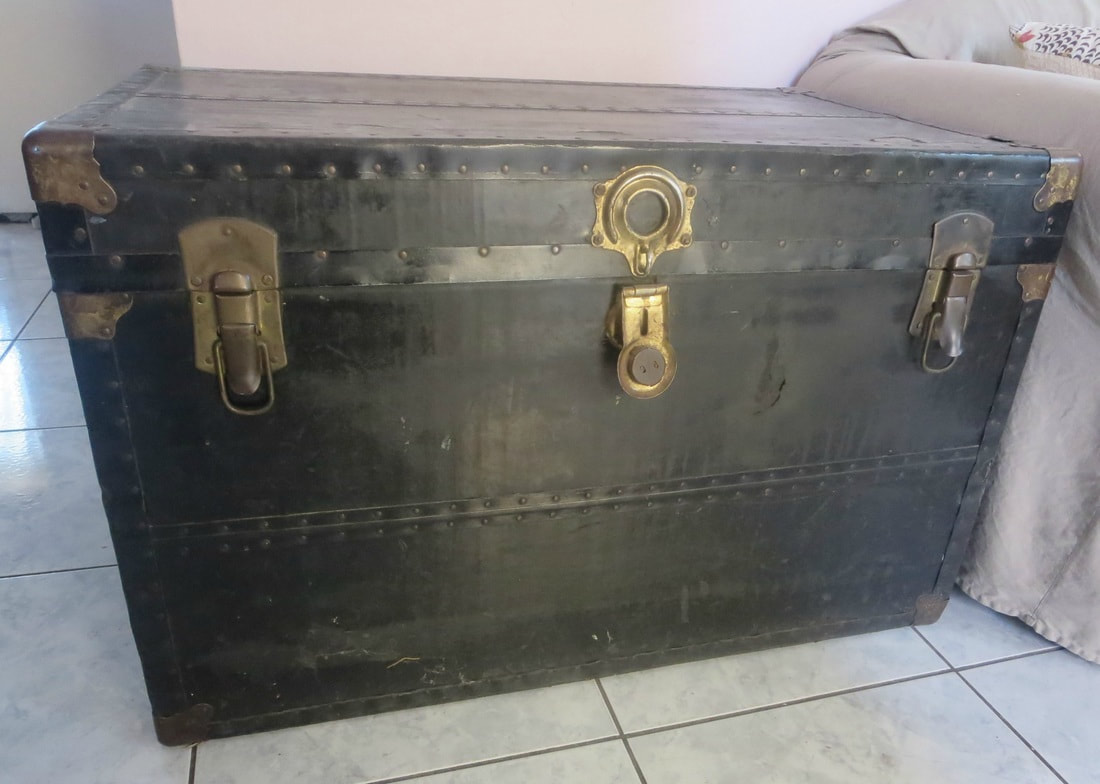
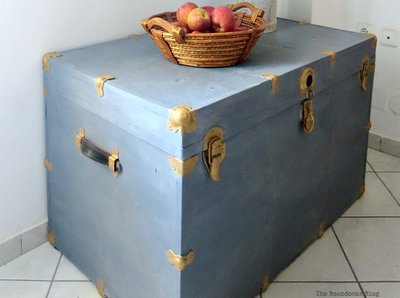
Here is a picture of one of the many I have. They all look the same. And they were all filthy and full of scratches. I was itching to get started on this particular project.
What I used:
- Old Fashioned Milk Paint in Soldier Blue (safepaint version)
- Paintbrush
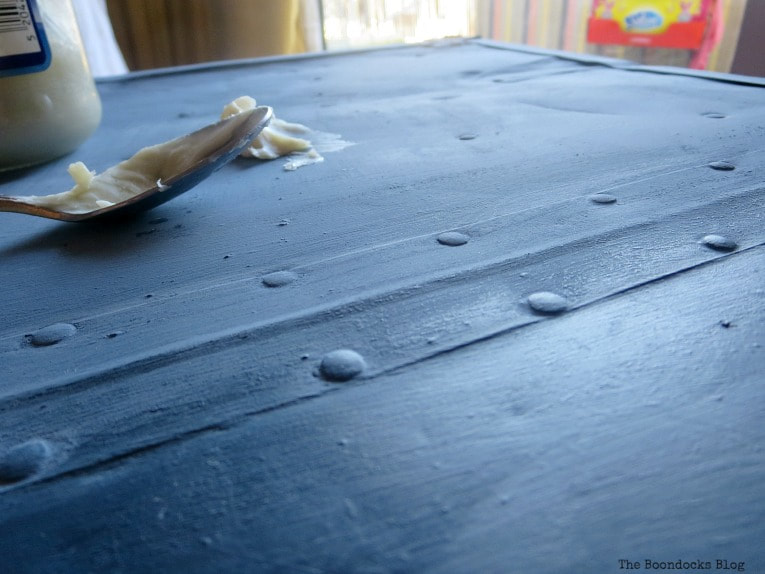
- Homemade Beeswax furniture polish (which you can make here)
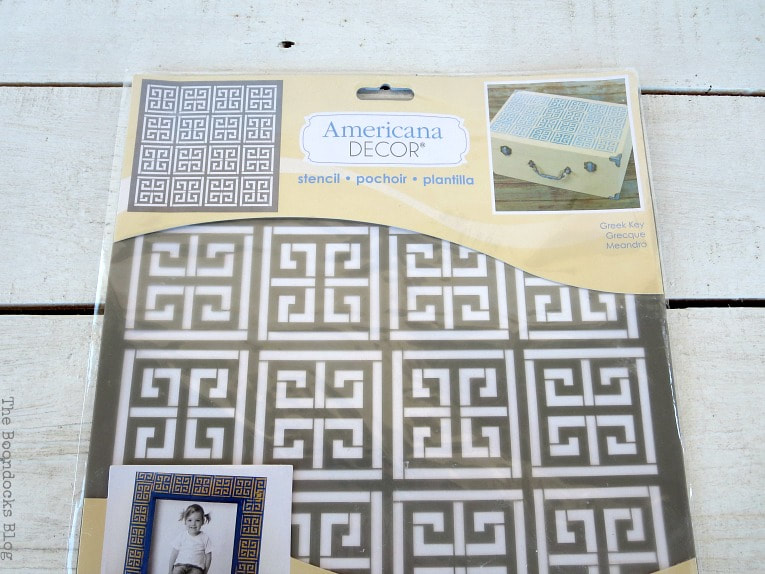
- DecoArt Greek Key Stencil
- DecoArt Americana Acrylic Paint in Antique White
- DecoArt Metallics in Bronze
The How To:

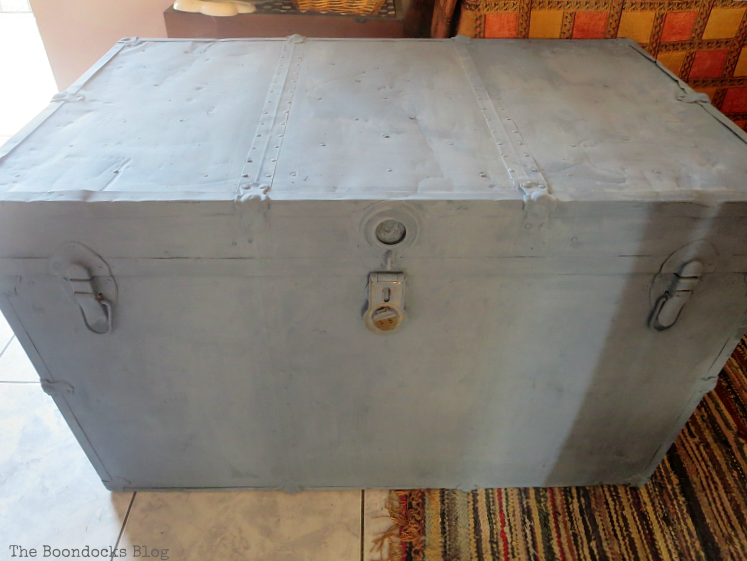
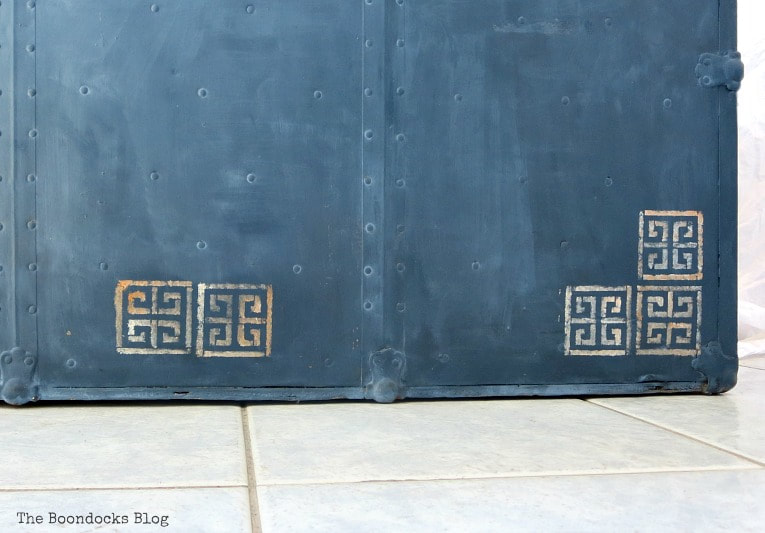
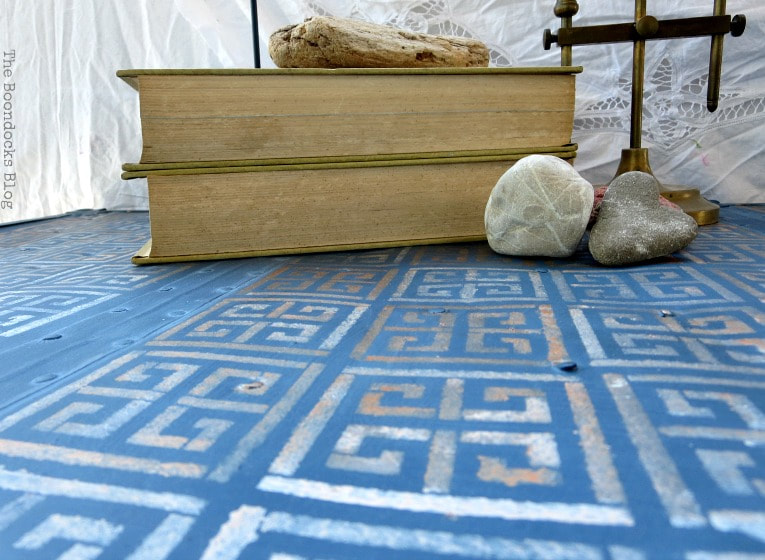
Look at the photo below do you see how uneven the surface is? Remember that.

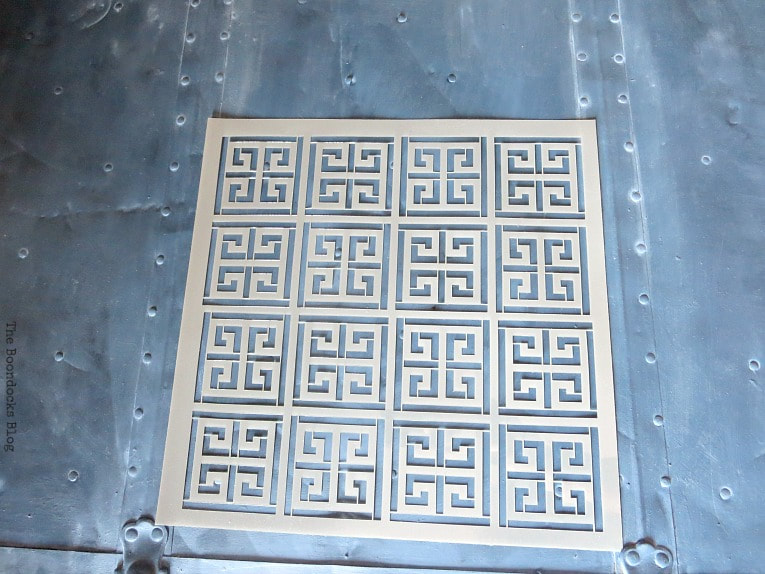
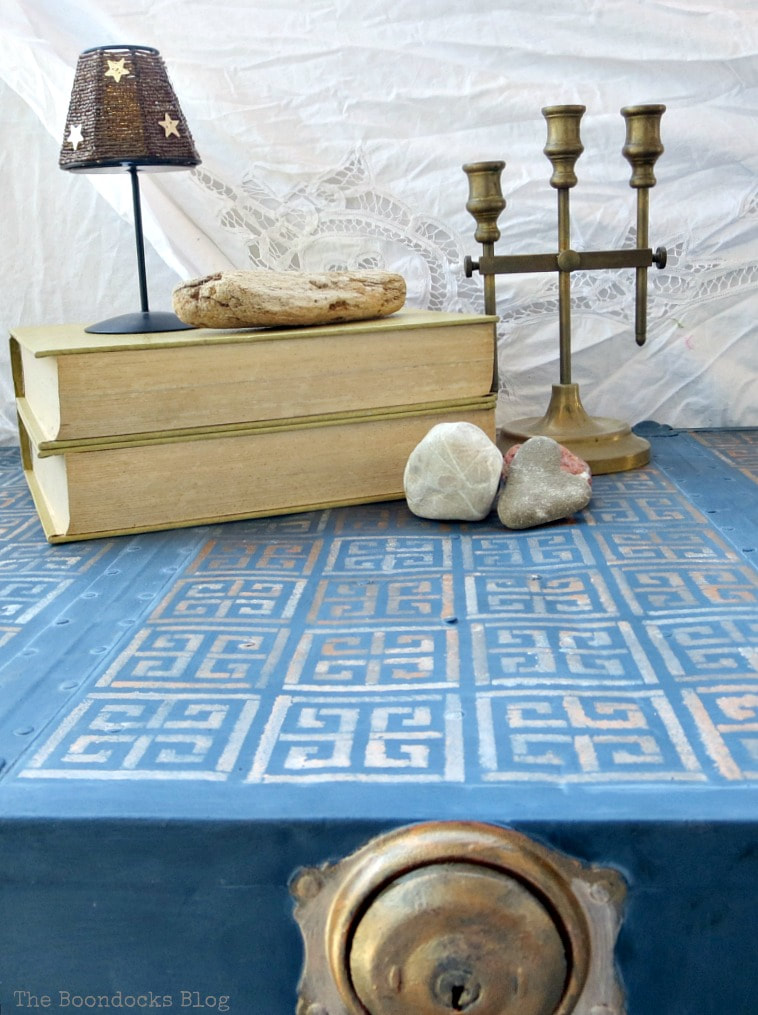
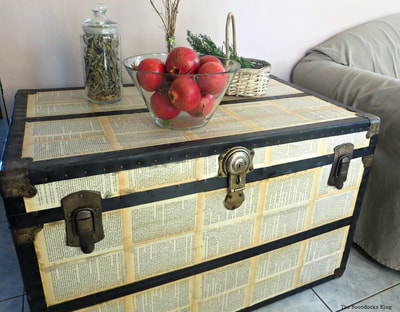
But then I had a change of heart. I thought I would try my hand at stenciling after I received this one from the DecoArt Paint Company. They have lots of designs to choose from but I wanted to try out this one which is a Greek key. A girls gotta pay homage to her roots. 😉
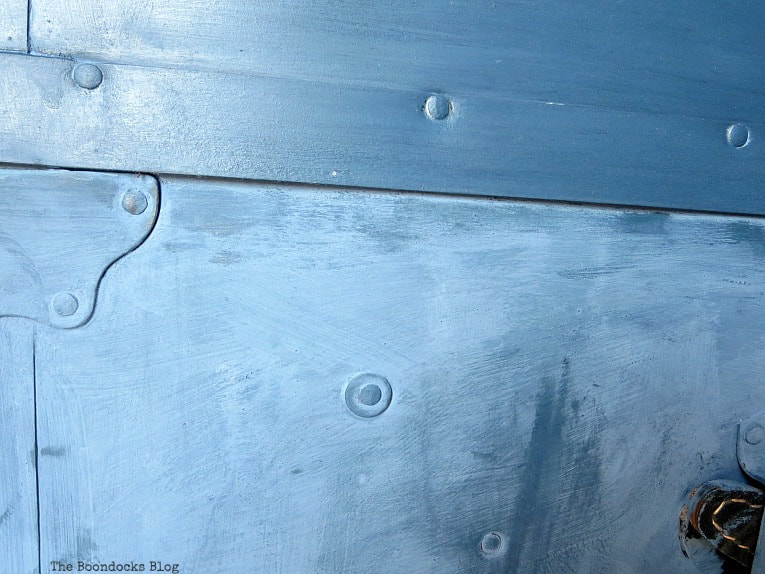
And then I realized that I had waxed the trunk.
Hmmm… wax is used to protect the paint and seal it in. If I painted the stencil would it stay on the trunk or just slide around into a great big mess? I had come so close to amazing!!
I should have thought of this before adding the wax to the trunk. I hemmed and hawed and agonized over this for days. I went on facebook groups and asked their advice. I even had dreams about the stencil design dripping all over my beautiful trunk. I honestly don’t know what happened to me this time, maybe it was the excessive heat.

It was a rough week of procrastinating.
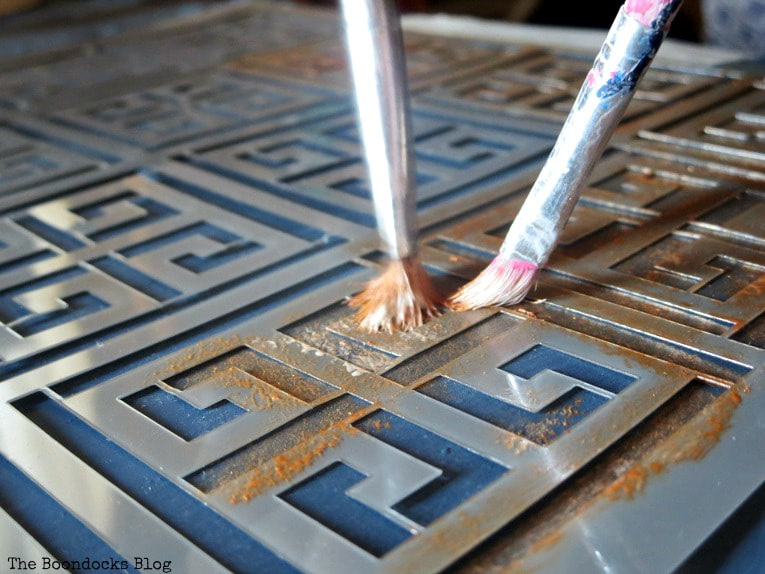
But finally I bit the bullet and just went for it. I figured if I mess up, I mess up. It is my fault for not sticking to my original plan. But these things happen and we have to go along with the flow. Of course that is easier said than done.I taped the stencil onto the trunk and then using two brushes, one to actually put the paint on, and the other one to push down the stencil, I went full steam ahead. Remember that photo above, the one I told you to remember, the one with the uneven surface of the trunk? Yes, that is why I had to hold down the stencil. It was like painting on hills.
Of course the right way to do this would have been to use one of those great spray glues; then there would have been no need for me to push the stencil down. And of course I had to dive right in and pick a tough one. I just went with it and kept on pushing the stencil down and dabbling the paint on.
I had become fearless I tell you! After all I had already messed up!
Could it possibly get any worse?


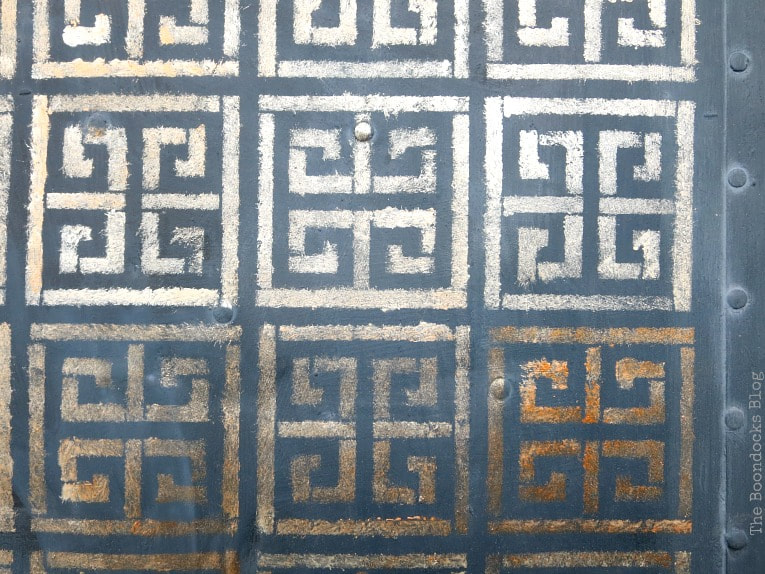
As I dabbled along all those Greek keys the color started to change. In some spots it was bronze while in others it was white and in between it came out a peachy color. And because of the aforementioned hills on the surface, I ended up with various intensities of color.
Was I going to let that stop me? Of course not!

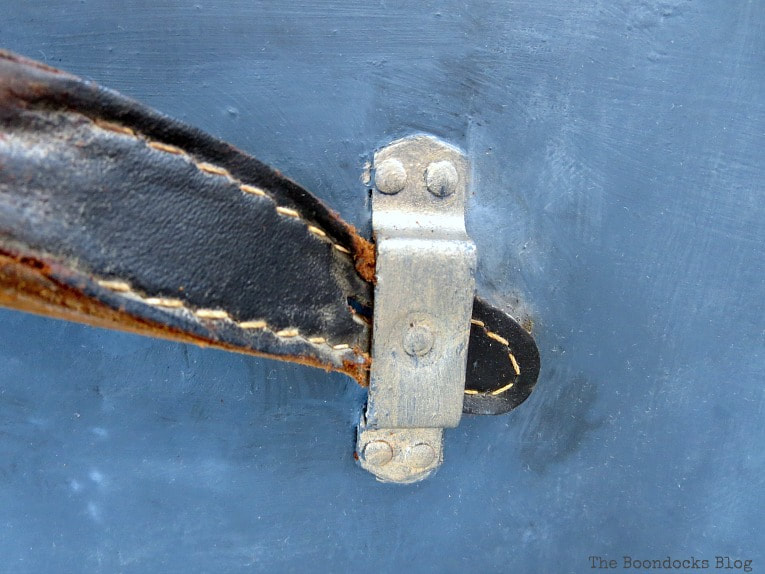
A little color on the hardware and some wax on the straps.
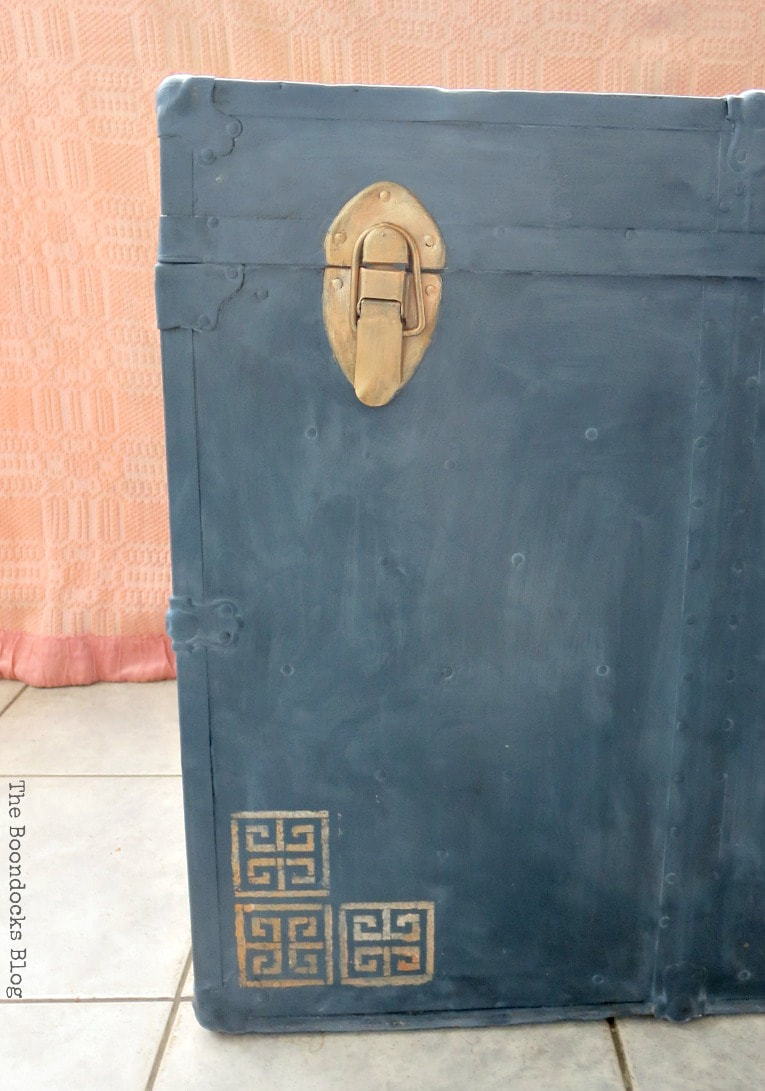
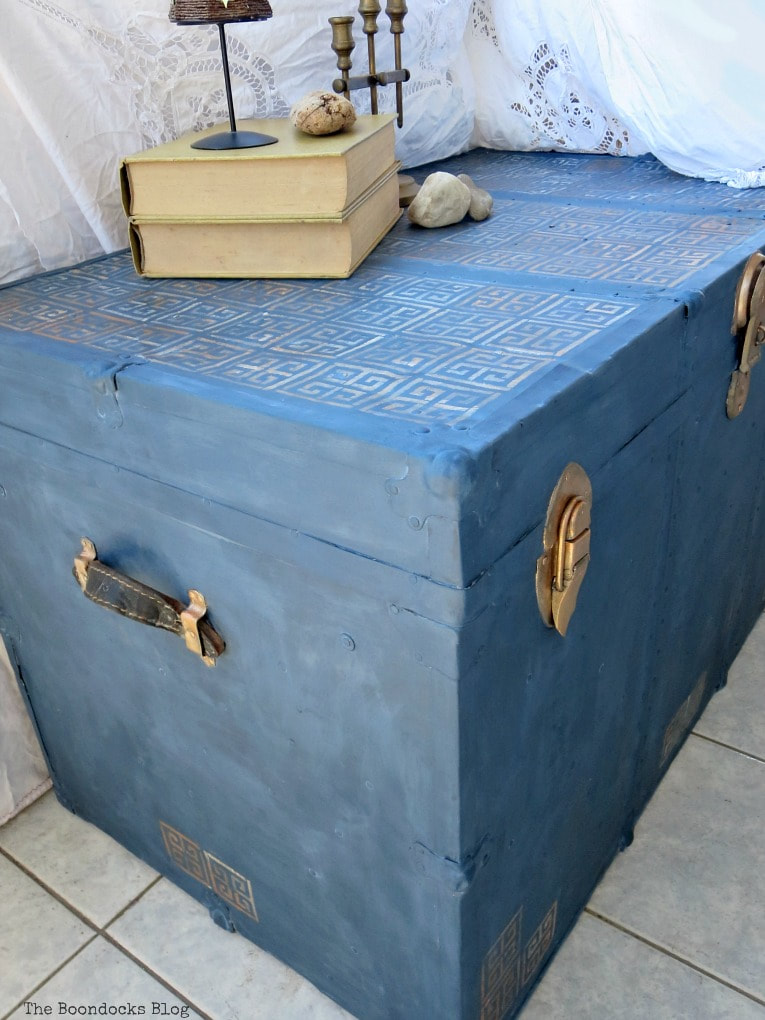
And my trunk was finished!
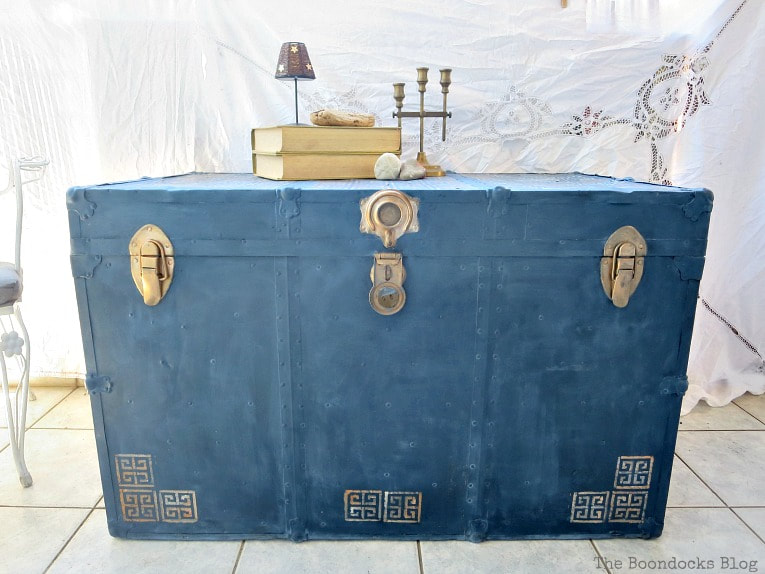
No chips, no paint coming off, no more problems!!
Make sure to have a plan before starting your project!
Make sure to stick to the said plan!
Make sure you buy some glue spray!
And when all else fails, just go for it!!
I want to thank the lovely people in my Facebook group who offered their help for this traumatic time! If you need any help for your DIY projects or are looking for a community of like minded people join us here.
I guess good things can come from mistakes after all!

If you really like what you see subscribe to my blog and get my adventures twice a week in your mailbox. The form is on the sidebar and on top. Your e-mail will never be shared with a third party.

This blog is for entertainment purposes only; my DIY tutorials are not professional advice. Read my full disclaimer here.
I love it when I get your comments and I will try reply to them or visit you on your blog. Please do not add a hyperlink to your comment, otherwise we cannot publish it.
Your truck turned out beautiful! Which I hadn’t a doubt that you would make it work. Love the stencil pattern, and how you added some at the bottom of the truck. Very nice work!
Thanks so much Linda. You have no idea how relieved I was to get it finished.
LOL, and when all else fails, just go for it!! Like only you can Mary. I always loved the book page trunk but I think this one is now my new favorite. It looks like something the Greek gods would have used to store their precious belongings
That should be my slogan “Just go for it”. Did I really have any other choice Michelle. The trunk had turned up in my dreams and not in a good way. Yes those Gods would have definitely used it.
I love how your trunk turned out, it is just lovely. I sure wish I had a basement full of trunks! Actually, I wish had a basement.
Oh those basements can be devious. If you have one you are tempted to fill it up with things you don;t really need instead of decluttering.
Your trunk is wonderful, Mary. I love the stencil. Running into issues during a transformation is no fun but, somehow we always get it done. Glad you found the support you needed. How did I not know this group existed?! I’m going to have to check it out 😉
Check it out and then join so you can share your awesome projects with us.
Hi Mary, I love that shade of blue and you pulled your creation back on track nicely by just going for it. I like the paint affect you’ve used for the keys. It looks nicely worn without the aging.
xx
Debbie that is exactly the look I was going for worn like it’s been around a while.
Well after all of that, it certainly did turn out well! I love that really, almost ANYTHING is salvageable. Sometimes when I think I’ve ruined something, I let it sit for awhile out of sight — maybe weeks or months and then, I figure out a way to fix it. Mostly 🙂
That’s how things work with me too Lauren. Sometimes you just need to let it stew for a while and then an idea will pop up in your head.
It looks great, Mary. And I’m especially pleased to learn that it hasn’t peeled or chipped so whatever you did worked! The blue is great and I think the variation in color makes it interesting and a bit unexpected. Nice!
That;s the funny thing Jeanie, I did nothing. I just let the wax sit there for a few weeks and then just painted it. I think it must be the DecoArt acrylic paints I used. They have proved to be very sturdy.
I’m glad you just went right ahead with your stencils Mary because this trunk is SO beautiful my friend! I think it’s my favourite! The colour and the stencil in it’s different shades are just stunning and it looks amazing!
These have to be the colors of the ancient ruins. I remember reading once that the earthy colors are what were used on the murals in Crete.
Ο επιμένων νικά! Forgive my Greek but the stencil got me! I really really love the end result!
Haha! I totally forgive you. I really wanted to do a Greek key stencil, it reminds me of Knossos. Yes?
I think it was used in many places! In Greek it’s Μαίανδρος https://el.wikipedia.org/wiki/%CE%9C%CE%B1%CE%AF%CE%B1%CE%BD%CE%B4%CF%81%CE%BF%CF%82_(%CE%B1%CF%81%CF%87%CE%B9%CF%84%CE%B5%CE%BA%CF%84%CE%BF%CE%BD%CE%B9%CE%BA%CE%AE)
Mary, when yiu showed thsr first picture of the stencil on the trunk, after you shared all the problems you had, I was thinking to myself “wait, I don’t see the problems, I think it looks fantastic!” I live the combination of colors you used. That bronze and white together is lovely.
It was a long and slippery road Lynn full of sleepless nights. Sometimes the journey is more exciting than the end result. It must be the paint I used for the stencil that saved the day because I had seriously messed up before that.
I love the fact that you have a basement full of trunks! I love trunks and don’t own a single one. I’d love to get one and I love what you did with yours. You are so right about planning. I think we’ve all done stuff like that and yes, sticking to your plan is vital!
Sticking to your plan or having lots of luck, as in my case. I am really happy with how it turned out the paint is as tough as nails. And Carolann you have not lived unless you have attempted to paint a trunk. 😉
Yes, I love it 🙂 . Especially the stencils at the bottom. Great color choice Mary!
Thanks Zografia, I was going for the Cretan look! Hope you are well!!
Ooooh, I love the variation in colors on the stencil and considering the unevenness of the trunk, your stencil went on pretty good. Sometimes those oops give us the biggest learning or welcomed surprises. Another awesome trunk makeover!
Thank you Marie, that’s what I thought too. The unevenness helped create that awesome look that makes the stencil unique.
Gorgeous Mary, I’m so pleased the wax didn’t stop the stencil sticking (I think it must be because of your magic touch!)
Sarah I certainly hope so. It was probably the magic quality of the paints but I can always dream that I have that special touch.
That really came out great Mary! I know what you mean about painting on hills…that’s exactly what it is when you have an uneven surface. I’m glad you went for it even though you’d waxed it…encouraging that it turned out OK!
I was so relieved Florence after all those weeks of worrying to have it turn out so great, actually even better than I expected was a happy surprise.
Thanks for sharing the problems you have faced with this trunk, Mary! The stencil turned out very nice at the end…I like the different shades of the colour! Did you re-waxed the trunk when you finished?
Marie Anne, thanks so much for your comment. I did not re-wax it. i just stenciled it and left it like that. I think it must be the great properties of the DecoArt paints. Those metallic paints must be super durable. Yes, it has been about a month and a half now and the trunk has no dents or chips at all.
The stencil was a brilliant choice. I love it!
Michelle I had to pay homage to my roots.
Mary, you amaze me! This turned out great. You find so many fun projects to do.
I am actually using all these trunks for storage Stacey so they might as well be stylish if I keep them on display.
Mary, you may call this a mistake but I call it a beautiful effect. So this is a happy mistake that is probably even better than what you had intended.
True Debra from now on I’ll have to break all the rules and just fly by the seat of my pants. Who knows I may come up with a masterpiece. Haha!!
We had one of these that my husband’s grandfather gave us. We carried it around when we moved in our younger years, but eventually unloaded it. Oh to have it today! Love how yours came out! Beautiful!
Janine I had it in the basement for over 20 years and if I didn’t have a basement I probably would have gotten rid of it. I guess its all about timing.
So glad you persevered with your trunk Mary!! I love how it turned out!!!
Thanks Sam I really wanted this one to work out even thought it was a bumpy ride.
All’s well that ends well eh! I don’t quite know how you pulled this off but it looks great Mary, I love the stencilling so you were right to go for it!
Julie I felt like I didn’t have much of a choice. I had already done a plane grey trunk a few months ago and now was looking to do something different. I love to try new things and if I mess up well, that is just a learning experience.
Hi Mary, I really love the stencil on there. The variation of the stencil colors give it a lot of depth and interest! I am glad you went for it in the end!!! Looks great!
Thanks so much Kathleen. I knew I wanted that stencil but had no idea as to how to go about it. I guess the hills on the surface helped to create this look.
At first I wasn’t sure about the stenciling but I really love how it turned out. It gives that lovely old trunk some dimension and I love it against the blue of the trunk,
Yes I was looking for something more than just a new color since I had already done that on a previous trunk. Thanks Toni!
Oh Mary, this is me…I never have a plan. I dive right in and hope for the best! It looks fabulous! Exactly how big is that basement? More trunks, huh? It would not surprise me at all if you pulled a car or a boat out of that space! 😉 And I know that if you did, you would do something spectacular with it.
You know the bigger the basement the more stuff that can be stored. I think it is a bad thing because we end up keeping things that we don’t really need. We have an iron gate door which I love but it is so heavy we cannot move it out of there.
I think this turned out great! I love the blue color, as well as the variation in color on the stenciled areas. Definitely a great makeover! I’m also super interested in your homemade wax. I need to check that out!
Yes, that wax has to be amazing if it allowed the paint to stick on while protecting the other paint below.
I like it! Definitely an upgrade! Love the color and the greek key design! The difference in the white and bronze just adds to the patina effect!
Jeannee
Exactly Jeannee I love that variation of color for the stencil.
Mary,
Your trunk is beautiful!!! I think this is my favorite of all the projects you’ve shared recently… I’m biased, though. I have three trunks: the one my parents bought unfinished and my father stained a reddish brown, the wicker one I bought at Cost Plus when that store was new to Sacramento back when I was 16 years old {one of my first ever decorating ideas!!!}, and a true antique I asked my father-in-law to refinish and have never found leather handles for. Still love them all!
Wonderful job and great idea adding the Greek key pattern!
Barb 🙂
Barbara you have quite a collection there. Have you shared any of them on your blog?
Mary, it turned out gorgeous! I’m amazed that the paint adhered over the wax, but good to know. I end up changing steam over the course of a project and I admire your sticking to it. I would have put it in the corner with the other unfinished projects! I love the depth and shade of the paint, it makes it so interesting. And the color combination is perfect! Love all your trunks, but this may be my favorite!.
Nikki you know I had a time bomb ticking over my head with this one I had to finish that apartment.
THIS IS GORGEOUS! <3
Thank you Evey I am so happy everything turned out well in the end.
Έκανες καταπληκτική δουλειά Μαρία.
Εχω κι εγώ 3 μπαούλα και σκέφτομαι να τα βάψω.
Καλή συνέχεια.
Kali idea Rena. Ta ginoun koukles!
I love how your trunk turned out the blue is lovely with the gold stencil. It almost has an oriental look to it.
Yes an old world kind of look. I was actually thinking of the byzantine empire for this one.
Greek Key is a favorite pattern of mine and I don’t use it often enough. I love the color you chose and it came out looking very good. I have my mother’s trunk and it’s probably 50 years old and very banged up. Thank you for sharing with us this week at Celebrate Your Story, and I hope your week is going great.
I hope I’ve inspired you to tackle your mom’s old trunk. Mine was in really bad shape but you know we all love the power of paint.
I love the old trunks and I think my mother in law she had one.. somewhere .. You did a great job Mary!
Thank you Eleana I was not about to let it sit there unfinished.
Your trunk is lovely. I love hearing about people’s “oopses” because so many times all you see is the perfection and for someone who has made boiled frosting and ended up calling it chocolate sauce, it makes you (knowledgeable, just about perfect) “bloggers” seem just like the rest of us novice DIYers! Thank you for sharing your project!
Thank you so much Kathy. Your comment means the world to me. I am all about the mistakes because those are the ones that makes us better DIYers.
Glad you stuck with it – it looks great Mary
Amber after all those sleepless nights there is no way I was going to give up!
Great blue color and the stencil turned out great. It really gave it personality! I love the little imperfections. Thanks for sharing with SYC.
hugs,
Jann
Thanks so much Jann. It really needed a bit more than just a little color.
Stencilling onto a rough surface is almost impossible. You did a really great job Mary, sometimes you need to go for it. Your trunk turned out really well Mary.
Thanks Leanna it was driving me crazy and I figured I had nothing to lose except my mind.
Mary, the trunk looks beautiful! I’m glad everything worked out and the paint went on without mishaps. The variation of colors was a good move, it looks wonderful!
Thank you Keri, this one is my favorite out of all three. But wait when I make another one that will become my favorite. 😉
Haha, you’re an artist, Mary!
Thank you Cath, I can only aspire!!
You are so brave…it came out beautiful. Thank you sharing your link on the Classy Flamingos Blog Party we’ve enjoyed it. Come back soon. poinsettiadr.com
Thank you so much Linda!
Beautiful transformation. I love Greek key design too! Happy Summer, Kippi
Thank you so much Kippi!
I love your colors and your willingness to share potential “boo boos.” As a long time crafter, but fairly new DIYer, I have had my share of failures. I find it SOOO reassuring that you “experts” have bad days/failures/unexpected results, too! Glad it came out so well!
Kathy I always try to keep it real around here. There is no point in pretending that things are perfect and hopefully we can all learn from each others mistakes.