DIY Graphic Pillow-With or Without a Sewing Machine
Today is a special day! I have a very good friend visiting me all the…
I’ve always wanted to visit the Greece that Mary shares on her blog, haven’t you? The color of the sky and ocean is bluer than I’ve ever seen; and having the option of dipping my toes in the water while listening to the waves, or taking a drive up into the mountains, is so cool!

DIY Graphic Pillow – Mary Style
Use this pillow all year round or as holiday decor. Mary loves her holidays, gathering her family together to enjoy the celebrations. I’m right there with her. Is there anything better than decorating for the holidays, anticipating the time spent with those you love?
I think not!
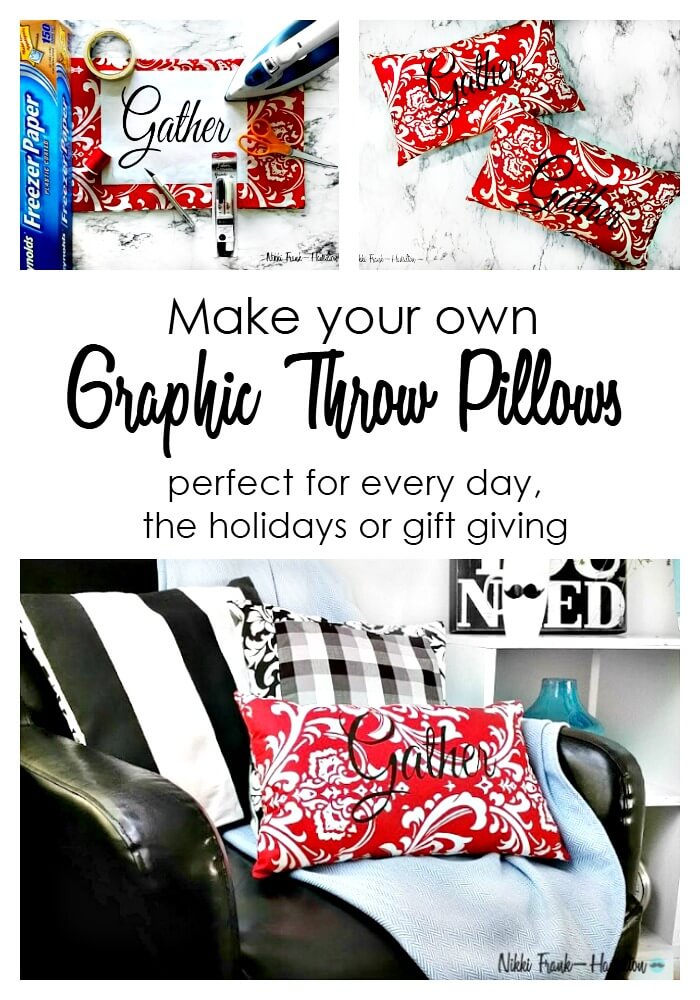
Today we’re going to create a DIY Graphic Pillow, quickly and easily. Add it to your holiday decor or give it as a gift. (Another thing Mary loves-checking things off her Christmas gift list early, I wish I was as organized!)
DIY Graphic Pillow
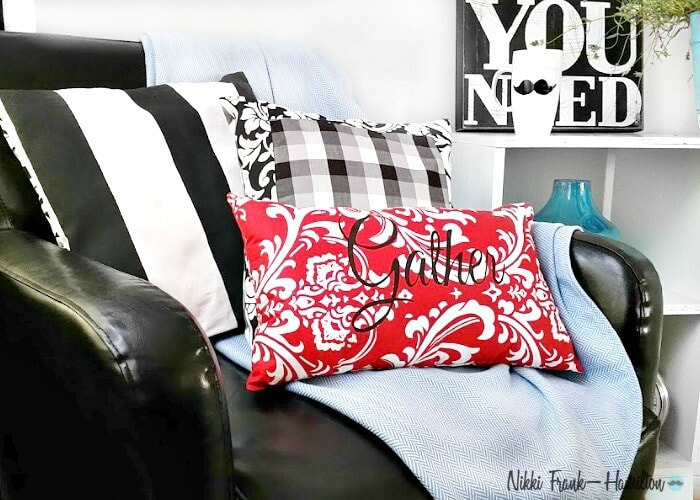
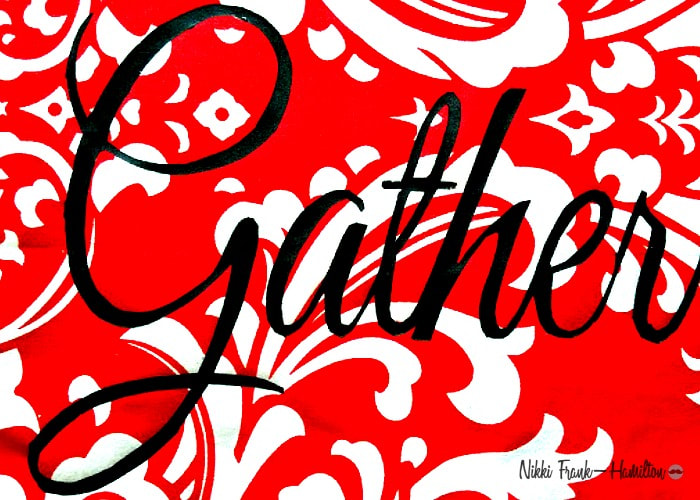
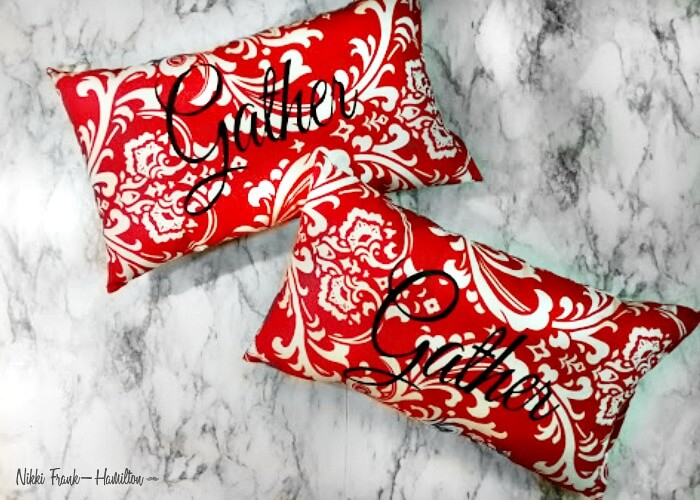
And lastly, I wanted the pillow to be pretty. I love a great graphic on patterned fabric. It creates depth and interest. This pillow can be used throughout the year or holiday season. I chose “Gather” as the graphic and a pretty red scroll fabric.
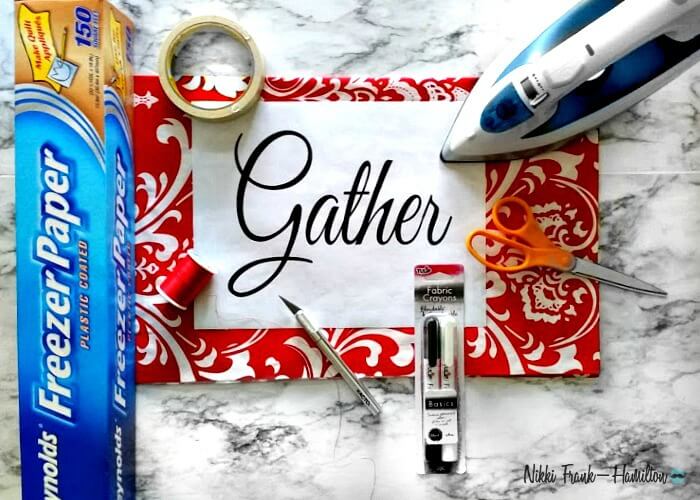
Supplies needed for DIY Graphic Pillow:
- freezer paper
- copy of graphic (8.5 x 11 for bolster or 11 x 17 for larger pillow)
- X-acto stencil knife with a sharp blade
- tape (masking or painters tape work well)
- Tulip Fabric Crayons (come in a 2 pack, white and black)
- Thread (match your fabric or use white thread)
- Sewing Scissors
- Iron
- Poly-fill stuffing-16 oz. bag
Step One-Get Your Fabric Ready
To make 2 bolster pillows cut your fabric in half so you now have 2 sets of fabric 18 inches wide and 11.25 inches tall. Each set will have a front and back piece.
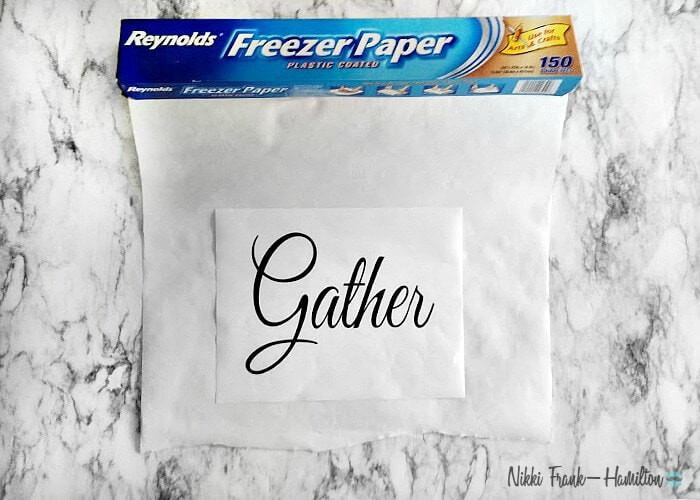
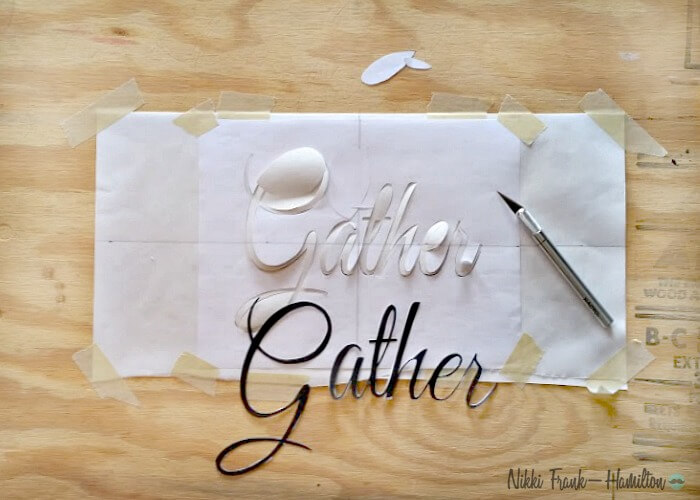
Step Two-Make the Stencil
Tear off 2 sheets of freezer paper, a bit larger than your graphic, lay them on top of each other with the shiny side down. This is a simple way to cut 2 stencils at the same time.
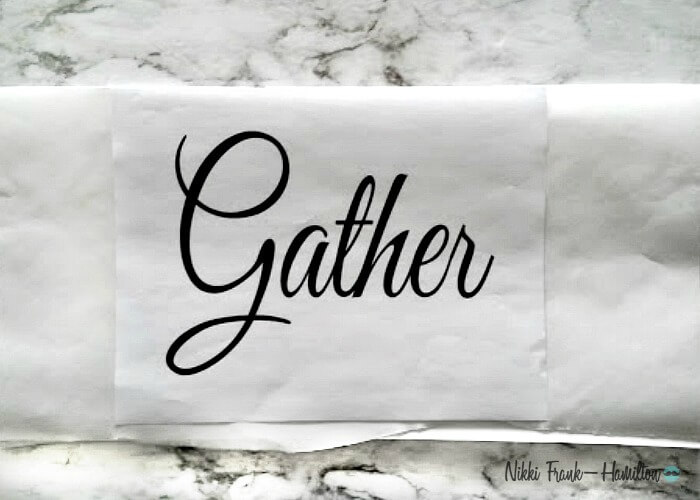
Lay your freezer paper on a hard surface, I use a piece of plywood. Then secure it with tape after centering.
Make sure that your exacto knife has a sharp blade, you’re cutting through 3 layers of paper. Clear crisp cut lines create a gorgeous graphic stencil.
Step Three-Create Your Graphic
Lay your stencil on top of the fabric, squaring it to ensure that your graphic is perfectly aligned. Having a crooked graphic can ruin your day. Not that I’ve done it, at least not more than once a few times.
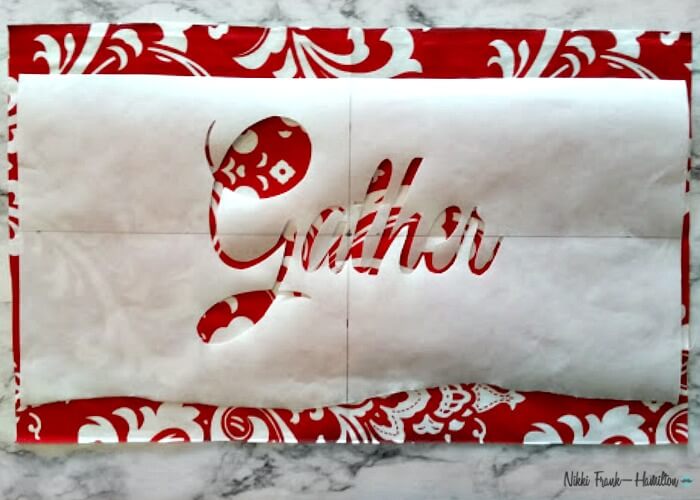
Add the pieces into the G, a and e. Iron over the stencil. Make sure that the edges of the graphic are adhered well so the fabric crayon won’t seep under the edges, ruining your nice crisp lines.
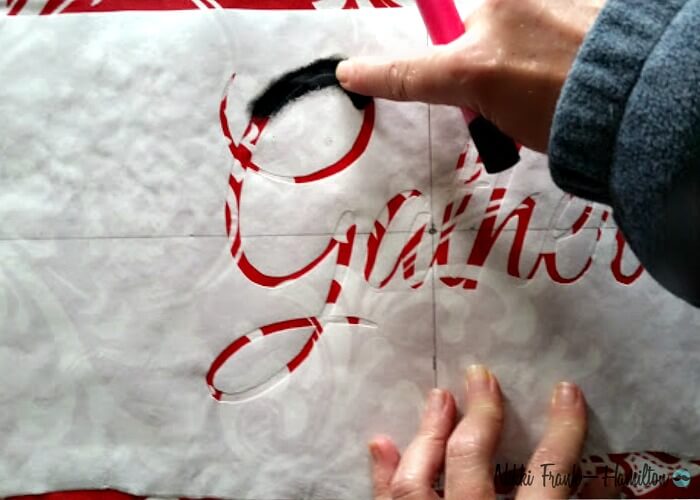
See the wrinkles in the paper below? This is how the freezer paper looks after it’s ironed on. Start ironing on the outside of the stencil, test the heat, adjust as needed. Then iron over the entire graphic.

Step Four-“Paint” the Graphic
These crayons are smudgable, which is great for getting crisp lines.
Finish coloring the entire stencil.
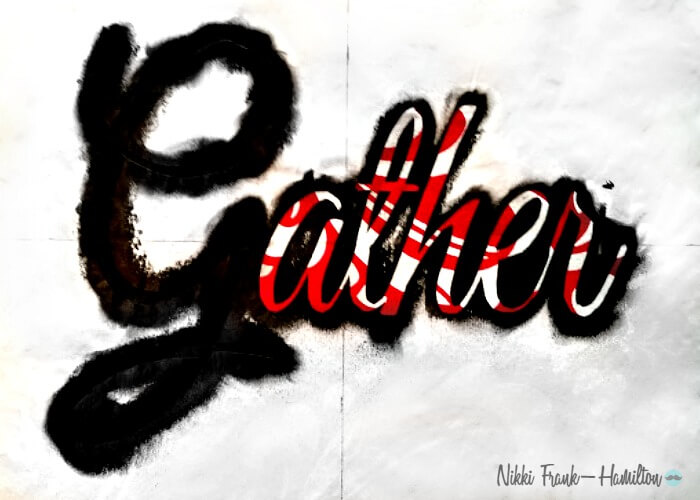
(As you can see I am using this stencil the second time to create another graphic pillow. If you’re on my Christmas list forget you saw this! LOL)
One thing I love about freezer paper stencils, you can use them over and over. By cutting 2 stencils at once you can create 6 graphics, or pillow fronts. Yippee!
To ensure the sharpness of the graphic color and smudge it twice. Then carefully remove your stencil-so you can use it again.
Let dry for at least 24 hours, before ironing, to set the paint. If it’s not dry the crayon will smudge across your fabric.
Lay a pressing cloth over the graphic and iron on high heat to set.
Step Five-Put it all together
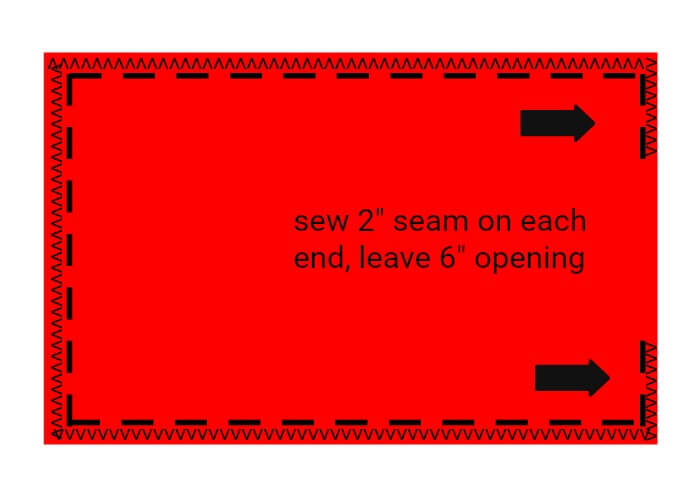
If using a sewing machine stitch 1/2 inch seam, leaving the ends open-as pictured above. Then zigzag stitch to finish the edges.
To hand sew, stitch the outer seams by hand, leaving the opening as above. Sew your stitches close together with the thread doubled for a stronger seam. You may want to stitch the seam twice for durability.
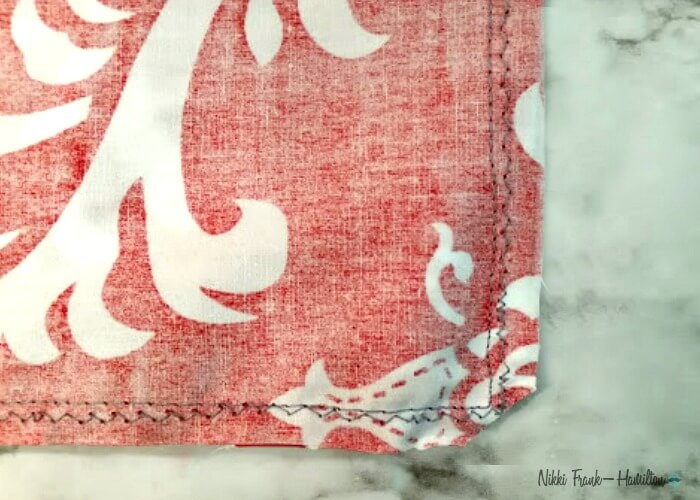
For sharp corners clip the tips, as shown above, do not cut your stitches.
Turn the pillowcase inside out, use a chopstick (or another pointed tool-knitting needle etc.) to push the corners out, for a nice square edge.
Stuff the pillow, beginning with the corners at the bottom, fill them out nicely and then work your way to the top of the pillow. Push stuffing into the other 2 corners, then the middle area.
(For directions on how to properly stuff a pillow click here.)
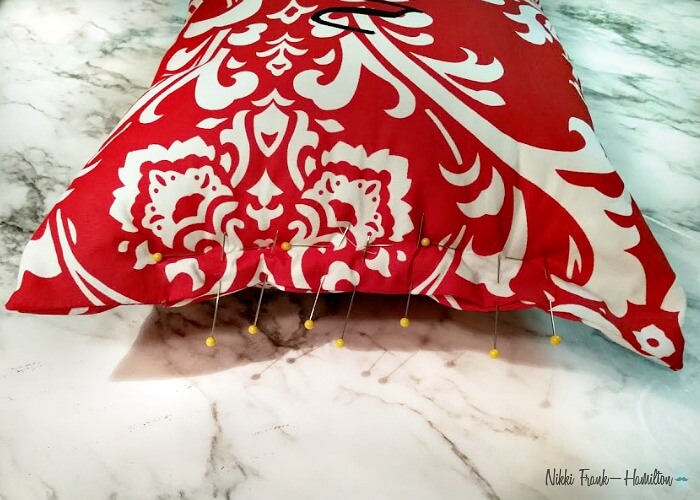
Once you have the pillowcase filled, push the stuffing down a bit near the open seam. Fold over the edges of the fabric and pin together.
In order to keep the seam flat, so you can stitch it, add another row of pins about an inch above the seam line.
Then machine stitch 1/2 inch from the edge, or hand stitch the opening with a Hidden Stitch.
We’re finished!
I love how the graphic looks on the printed fabric and really love that it costs about $10 to make both!
Cost:
- Fabric-half yard-$2.44
- Stuffing-16 oz. bag-$3.50
- Paint Crayons-pack of 2-$3.99
- Copy of graphic $.20
You could cross almost everyone off your Christmas list and make a few for yourself. Everyone needs a few gorgeous throw pillows, right?
(Click here for a download of this exact graphic to make your own “Gather” graphic pillow.)

Wow that was such a fun post. And I love that I don’t need to use any special machines to get this great look. Nikki knows me well, she knows that these fancy machines are not in my budget. In fact I have bought pillow from Nikki’s shop, you can see them here.
Thank you Nikki for joining me here today with your very well written tutorial on how to make a DIY Graphic Pillow, with or without a sewing machine. Now I’ll have to go looking through my stash to find some pretty fabric so I can make one too.
To see lots more pillows and pretty projects hop on over to Nikki’s blog View from In Here.

Linking up to these Link Parties
This blog is for entertainment purposes only; my DIY tutorials are not professional advice. Read my full disclaimer here.
I love it when I get your comments and I will try reply to them or visit you on your blog. Please do not add a hyperlink to your comment, otherwise we cannot publish it.
I sure wish that I could come visit and make this with you. We’d have a blast!
Thanks for having me I hope that your readers enjoy it and use the tutorial to cross items off their Christmas lists!
One of these days we are going to have coffee in person! Can’t wait.
We would have such a great time we would get nothing done. Just be drinking coffee and chatting up a storm. 😉
You are probably right. Once I get you to myself we will have so much to talk about!
I love these pillows, Nikki! And thanks for this awesome tutorial! I had never heard of paint crayons until now. They seem so much better that regular or fabric paint for stenciling! And it’s so sweet of you to make a lovely pillow for Mary and one for you! What a great friendship you have with her!
Gail, thanks so much. Mary is a wonderful friend and I’m grateful for her! And she’s so talented.
You are right, for stencils these crayons are the best. One black crayon will do at least 4 pillow fronts. As long as the stencil is adhered to the fabric well these are perfect and make really nice clean lines. The freezer paper is great for this purpose and it’s so much easier to cut smoothly than stencil plastic.
I hope you try this, there are so many great words that you could use. I love a great graphic pillow!
Thank you Gail. You should come up and we could all hang out and drink coffee together and talk about pillows. 🙂
What a gorgeous pillow Nikki and Mary! White, red and black will be my holiday colors this year and I could see this on my sofa! I love your tutorial and the freezer paper trick on how to transfer letters is genius! I´d come and hang out with you ladies and try out all of the pillows no problem 😉
Katrin that trick with the freezer paper, I’ve never seen it before. I will definitely have to try it. We would love to have you join us, but I warn you we probably end up drinking too much coffee and yapping.
Katrin, we would have so much fun! BTW, if you try the freezer paper let me know, would love to see what you create. xx
And I’m really excited to see your holiday decor.
Wow this is so beautiful and I thought too hard to make but obviously I was wrong! Thanks ladies for a great tutorial!
Thank you Katerina. We are always learning new things from our friends. That is the beauty of blogging.
What a lovely idea. I love these super clear step by step instructions too. Fab.
Yes they are so clean that even I can do this! 😉
What a lovely gift Nikki, and it suits Mary to a T. She’s one of those beautiful souls that we all want to gather around. And thank you so much for the great tutorial on using freezer paper to make stencils. That’s going to make such a big difference next time. I hope you and Mary do get to meet in real life one day real soon.
Thank you Michelle for your sweet words. We are all so blessed to have the internet and to have connected with one another on so many levels. Like minded souls and all.
Michelle, one day we will all get to meet, won’t that be a blast????
Perfect timing! I’ve been thinking about Autumn toss pillows, but didn’t have any great ideas. Thank you for the tutorial! ‘Gotta go dig thru my stash of fabrics now! 😉 Pinned. -Marci @ Stone Cottage Adventures
Marci I do too. So many great quotes out there to add to the pillows.
What a great team you guys make. This is a gorgegous pillow. I like how Nikki shows how to make a stencil. I will certainly be trying this idea. The fabric is so pretty also.
Thanks Debra, we do make a great team from a distance but from close up I suspect we would get no work done. Haha!!
Debra, if you make these please let me know, I’d love to see your unique twist on it!
Beautiful pillow and great font for “Gather”. I like your idea of using a graphic print. It really makes the pillow special!
It takes it to the next level Jolene. Nikki did a fantastic job with the tutorial too.
Jolene, you can pop over to my site and the graphic is there, printable for you to make quick work of the project.
Oh wow! This looks so great! I have never used this technique for creating a stencil and I do not have any fancy machines to make them so this is amazing! It looks kind of hard to cut all those curvy lines? Maybe I just need to make sure I have a really sharp blade. I’m definitely pinning this and I think I may be headed to the fabric store today . . . 🙂 Thanks for sharing such a great project!
I’m glad that Nikki was able to inspire you Lauren. I too want to try this, it must be easier than it looks. Good luck on picking a fun fabric.
Beautiful pillows! I love the fabric pattern, and the font. Great for great around.
Thanks Nikki for sharing your easy to follow tutorial, you make it look really easy. These would make cute gifts for Christmas, if I just get my butt in gear.
I haven’t ever tried the freezer paper stencil, I will have to give that a try sometime. Thanks! 😊
Thank you Linda. It is a great idea and an interesting and frugal option to all those stencil machines out there that some of us cannot afford.
I was with you right till the sewing came in and then it went out of my wheelhouse! Maybe I can find a plain one already made and give that stencil part a go!
Oh don’t worry about the sewing Jeanie. You can always use that glue that is just as good. Good luck.
This is a great tutorial. I could definitely follow this and have a few ideas in mind! Thanks for sharing ladies! 😊
Thank you Kim, and I know you really love it cause it’s red!!
Pretty pillows! Love that bright red fabric! Enjoyed Nikki’s tutorial & post. Didn’t realize freezer paper was a key ingredient in making your own stencil. Going to remember that & pinned.
I had no idea about that either Florence. You see how great blogging is, we get to learn new things every day!
Fabulous pillow Nikki and Mary! I just love it! Thank you so much for the great instructions!
Thank you Mia for taking the time to visit us.
Love this DIY pillow, makes me want to make one soon. I have a punch of fabric, Hopefully things get better in time management. Been busy helping my daughter with her new baby.
Maria
You have the best use of time Maria. I would drop all the crafting and decorating if I had a grand baby. Enjoy your time with the little one.
Great tutorial nice and detailed. Maybe you’ll get to go to Greece one day, I haven’t been since I my earlier 20’s but have very fond memories of a beautiful country.
I would love it if everyone came to Greece. Now is the best time too because there are no more heat waves… at least I think so.
Thanks for the tutorial. I feel like I’m the one and only without a fancy vinyl machine so I need to make graphics “old school”, lol. Great pillow! Visiting from Brag About It party.
Victoria you are not the only one. I don;t have any machines like that either. The point of my blog is to do things simply and with out spending all that money. So this great tutorial is just perfect for us.
How fun to have a virtual visit. The tutorial is awesome too! Pinned to share.
It was such a lovely surprise for me when Nikki knocked on my virtual door bearing the best gift of all.
The pillows are gorgeous! and I had no idea that freezer paper would stick. Three times even!
🙂 gwingal
You never know what you can learn from a fellow blogger. I also had no idea about this. Maybe we should tell Nikki to become a craft maven?
First, those pillows are super cute! Second, I didn’t know Nikki is also from Indiana! She’s only about 2 hours away from me 🙂
Hoping my dad’s health is on the mend so I can get back on track with blogging and socializing with friends. I missed it! Mary, I think you should visit us in Indiana sometime soon! XO
You see now I have found another friend for you. Now if I visit can we also get Kim to join us?
I hope your dad is feeling better. It is always so rough when our loved ones are not at their best. I will be praying for him Jas. And looking forward to your return in blogland.
Yes, wouldn’t that be fun? Now you have 3 reasons to come to Indiana! And since you love snow so much, come in January! LOL
Hi Mary and Nikki!
Cute, cute pillow and adding the graphic is so easy! Would you believe, I am having the hardest time finding freezer paper??! Guess I’ll have to break down and actually go to a regular grocery store and not a Walmart or Winco. 😉
Still working on stencils over here {wish I’d thought of cutting into a piece of wood} but using a Cricut now. 🙂
Happy crafting!!!
Barb 🙂
Ahh lucky you you have a fancy machine. I am on a budget so I really appreciate Nikki’s great tutorial. Of course I have quite a way to go to get to her level of mastery. Barbara, go forth and make lots of fun pillows.
I can imagine you both hanging around together face to face one day and I am sure you will have a blast! Mary what a beautiful and meaningful gift, Nikki’s pillows are all adorable. Thank you so much for the tutorial, I haven’t heard about those crayons but I’d love to try.
Pili that is what I am thinking too. Such a cool technique and fun crayons. I definitely want to try this because I cannot afford one of those fancy machines.
The pillow is fantastic and the tutorial great so thank you both on sharing a lovely Christmas gift idea!
Thank you Maya for your sweet words. I think they will make great gifts for Christmas.
Loooks great, Mary!
And a good tutorial.
Thank you
many greetings
Uwe
Thank you Uwe, it is always best to make something yourself instead of buying, but of course you know that.
Mary, Nikki did such a great job on these pillows! I love the fabric, and the Gather stenciled on there looks amazing!! Definitely need to whip some of these up for gifts.
They would be perfect for Christmas with that red color. Or even a nice idea is to put kids names on them and give them as gifts to the kiddos.
Very cute! There is just something about that word, gather; that I love! Thanks for sharing with SYC.
hugs,
Jann
It invokes a sense of friendship and community.
Firstly the pillows are just gorgeous!!!! To make a stencil is easy after all… I have use some other way in one of my old posts but the result is similar!
I had no idea they could be done so easily and without all those fancy machines.
That turned out really cute! Thanks for sharing at Home Sweet Home!
Thank you Sherry for dropping by.
I am loving this idea. Thanks for sharing your tutorial.
The easier the better!
Absolute gorgeous pillow Nikki and thank you for the great instructions too 🙂
Thank you Amber Nikki did an incredible job not just on the beautiful pillow but also on the tutorial which is so easy to follow along to.
Hello Mary and Nikki,
Pinned again and found freezer paper today! Yeah!!! Excited to try your Gather soon,
xoxo Barb 🙂
Great to hear Barbara. I will be looking out to see your version.
That turned out beautifully!! I would probably make the words with my Cricut with iron-on, but I love the idea of using the stencil. Amazing!
Thank you Jamie. I was so happy to receive this lovely gift.
Hello – I wanted to let you know this post inspired me to make some very similar pillows for winter. Of course you will receive credit tomorrow for their big reveal! Thank you for the MANY ways you have inspired and encouraged me! -Marci @ Stone Cottage Adventures
Thank you Marci, that is such a nice thing to say. Nikki is so talented I also learned a lot from her and the tutorial.