How to Decoupage Without Wrinkles: A Complete Guide
Are you tired of bubbles and wrinkles ruining your decoupage projects? The good news is…
Are you tired of bubbles and wrinkles ruining your decoupage projects? The good news is that achieving smooth, professional-looking results isn’t as hard as you might think. Today we’re sharing a game-changing technique for how to decoupage without wrinkles: the iron-on decoupage method.

What is Iron-On Decoupage?
When we think of decoupage the first thing that comes to mind is placing a paper onto wet decoupage glue and trying to smooth is out before it dries. I love to use this method for small embellishments or on uneven surfaces.
However, if you have a nice flat surface, you can use the iron-on method: you let the decoupage glue dry fully, then adhere your paper to the glue using heat from an iron. You can see this amazing technique in detail below. We also have a video of the process on our YouTube channel.
What Kind of Glue Should I use for Iron-On Decoupage?
The beauty of this technique is that it works well with a variety of decoupage glues. Our favorites are Mod Podge (the original Matte formula) and Decoart Decoupage Glue. Both of these provide great adhesion. I should note that we like these for the “gluing” but for a top-coat sealer we prefer something like Decoart Duraclear Varnish (comes in different finishes) for a streak-free result.
Choosing Your Paper
The type of paper you use significantly impacts your results. Thinner paper give that seamless, painted-on effect but can be harder to work with as they wrinkle and tear. Here are different options that work beautifully:
- Tissue paper or paper napkins (perfect for delicate projects)
- Decoupage paper (specifically designed for smooth results)
- Rice paper (durable and provides beautiful texture)
- Wrapping paper (choose high-quality, thin varieties)
- Copy paper printed at home (Creative Fabrica is one of our favorite places to find graphics for our decoupage projects)
Perfect Decoupage Results: Step-by-Step Technique
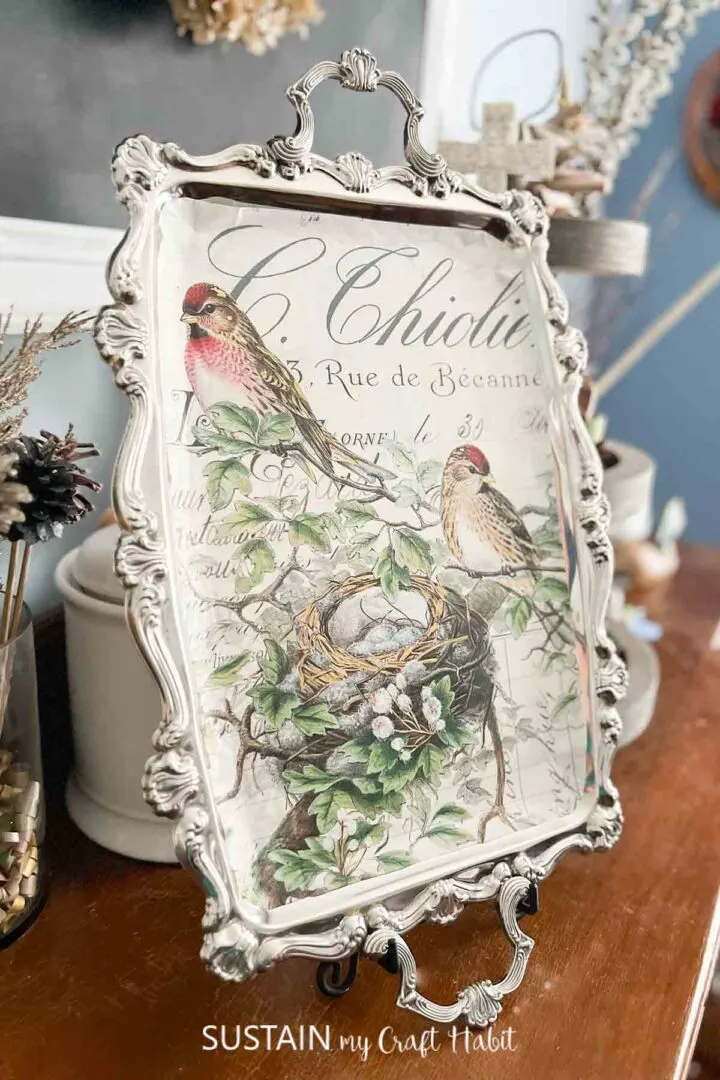
To demonstrate how easy and effective the iron-on decoupage method us, let us share a decoupage tutorial using a thrifted silver tray. This project showcases how to get professional results without any frustrating wrinkles.
Materials Needed:
Disclosure: This post contains affiliate links for your shopping convenience. If you purchase any of these products through the links, we receive a small commission at no extra charge to you. You can find our full disclosure here.
- Your chosen surface (like our thrifted silver tray)
- Decoupage paper or tissue paper (we used this beautiful Roycycled design)
- Decoupage glue
- Sponge brush
- Piece of parchment paper
- Hair dryer or mini iron
- White chalky paint (if using a silver tray)
The Iron-on Method:
Prepare your surface. For a silver tray, apply a base coat of chalky white paint and let it dry completely.

Apply a thin layer of decoupage glue to your surface using your sponge brush.

Carefully place your paper onto the tacky surface. Starting from the center and working outward, use your fingers to smooth the paper gently.
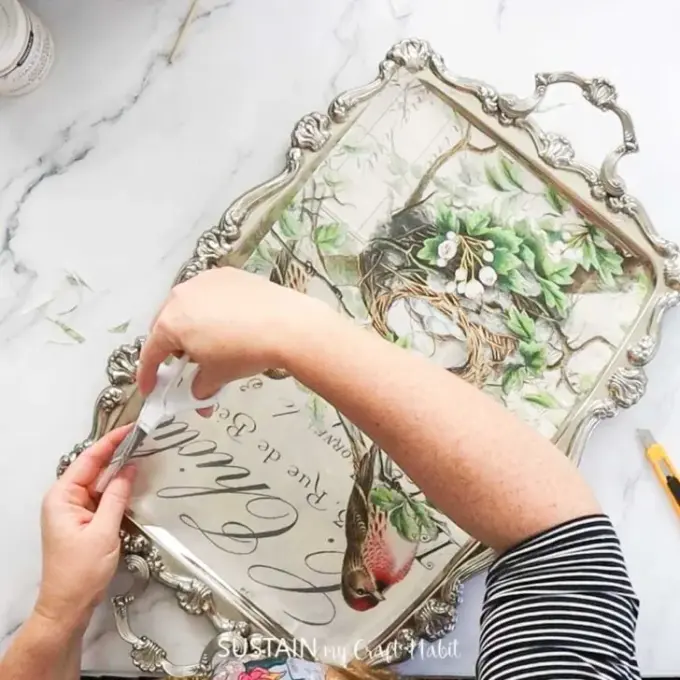
Place a piece of parchment paper over your design. This protective layer prevents sticking during the next step.

Here’s where the magic happens – use a hair dryer on medium heat or a mini iron to warm the piece. The heat helps the paper conform to the surface without wrinkles.
Once cool, apply your top coat of glue. This final coat seals your design and provides protection.

Adding the Final Touches
Add a top coat for extra protection once your base design is secure and wrinkle-free. This final step seals your work and gives it a professional finish. Allow each coat to dry completely before adding the next one.
TikTok-Inspired Tips for Success!
The decoupage community on TikTok has shared some brilliant techniques. Next time you start a decoupage project, remember these tricks:
- Work in small sections for larger pieces
- Keep your paper taut as you apply it
- Use the back of the paper to smooth out any air bubbles
- Apply a second coat only after the first is completely dry
- Keep your top layer thin to prevent cloudiness
Troubleshooting Common Issues
If you notice wrinkles forming, don’t panic. Lifting the paper gently and repositioning it while your glue is still wet is good. Sometimes, the paper needs a moment to settle – patience is key for perfect results.
Bubbles can appear even in careful work, but they’re simple to fix. Use a plastic card to smooth from the center outward, working systematically across your project. You can pierce tiny bubbles with a pin and smooth them down with your finger for stubborn air pockets. Working in smaller sections helps prevent trapped air, especially on larger projects.
Paper tearing can discourage even experienced crafters, but there are ways to prevent it. Keep your hands clean and dry while working, and support delicate papers with a piece of cardstock when moving them. Apply gentle pressure when smoothing thin papers – let the glue do most of the work. Try using a dry brush technique for extremely delicate papers and consider pre-cutting detailed shapes before applying any adhesive.

Uneven drying can create unexpected wrinkles, but managing the process is straightforward. Work in sections to control drying time, and rotate your project occasionally to prevent glue from pooling in one area. Using a fan on low setting can help circulate air evenly around your project. Keep an eye on the edges during drying as they lift first. Place small weights strategically until the piece is fully dry if you notice any lifting.
Edge lifting can be particularly frustrating but is preventable with the right approach. Apply some extra adhesive around the edges using a small detail brush for precise work. Consider weighing edges while drying if needed, and always apply an extra sealing coat around the perimeters of your design. This attention to detail ensures your edges stay firmly in place.

How to Decoupage on Different Surfaces
Did you know that you can decoupage on rocks, plastic, wood, canvas and much more? Learn how to decoupage on different surfaces here:
- How to Decoupage on Plastic
- How to Decoupage on Canvas
- Learn how to Decoupage Shells
- How to Decoupage on Wood
- How to Decoupage a Rock
- Best way to Decoupage onto Glass Jars
- How Not to Decoupage on Plastic Bottles
- How to Decoupage on Clay Pots


Making Your Project Unique
The techniques you’ve learned here work on countless surfaces. While we used a silver tray as an example, you can apply these same wrinkle-free methods to furniture, boxes, or any decoupage project you dream up.
Remember, practice makes perfect. Each project teaches you something new about working with decoupage glue and different paper types. Start with smaller projects to build your confidence before tackling larger pieces.
Whether you’re refreshing thrift store finds or creating something entirely new, these techniques will help you achieve smooth, professional results every time. The satisfaction of completing a wrinkle-free decoupage project is worth the extra care and attention to detail.
Like it? Pin it for later!