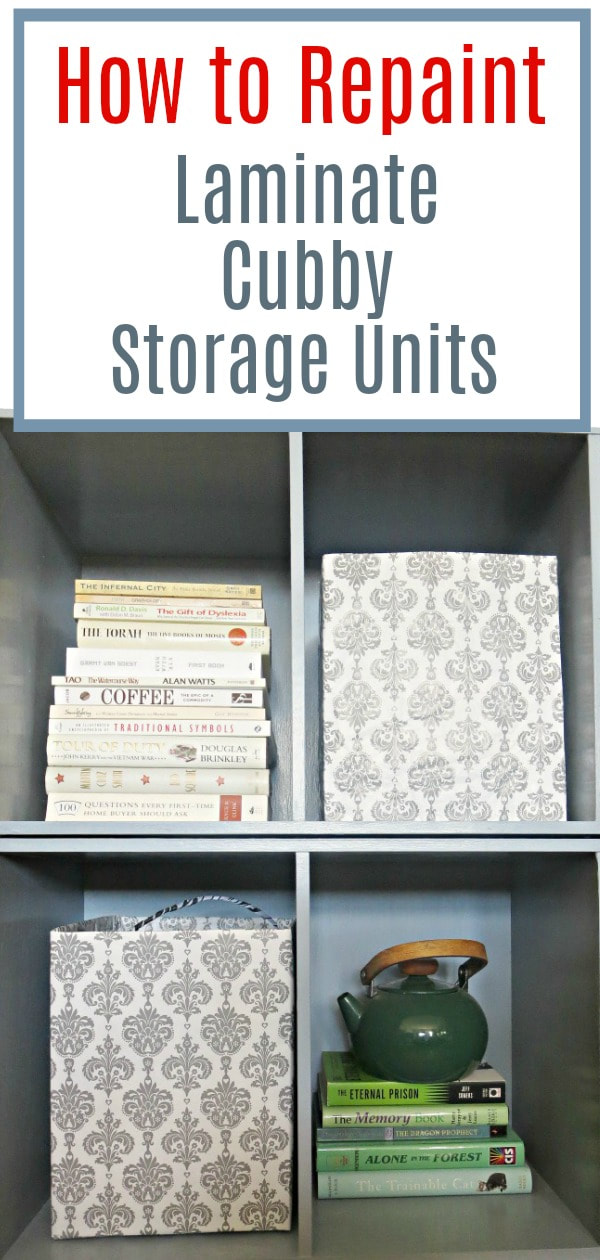
How to Paint a Cubby Storage Unit the Easy Way
Do you have an ugly cubby storage unit in need of a makeover? Paint makes all the difference and I’ll show you how to paint cubbies the easy way.

Do you have an ugly (yet practical) cubby storage unit that’s in need of a complete makeover?
An Easy Cubby Storage Unit Makeover with Paint
What do you do short of tossing it out and buying a new one? The answer is in my motto: “The Power of Paint” . The simplest way to transform something is with a coat of paint.
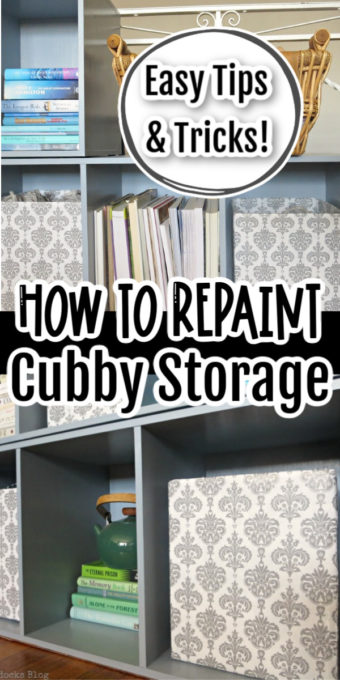
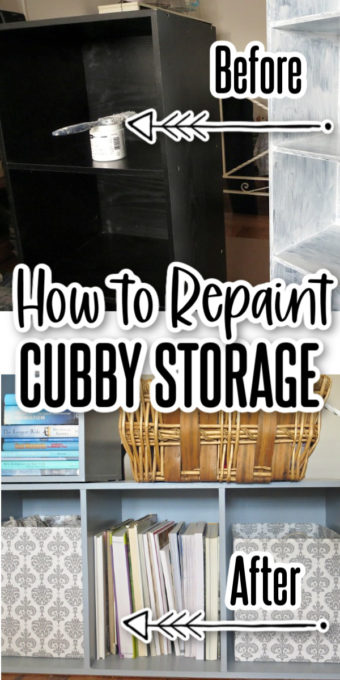
See the ugly below? Although my cubby is perfect for holding all my things, it really stands out in my living room in a not-so-good way. The black cubby storage looks inexpensive with it’s dark laminate surface but I found a way to solve this problem!
Disclosure: We have not received any compensation for this post. However, we have (and continue to) receive products from DecoArt. This post also contains affiliate links. Should you choose to purchase items through these links we will make a small commission – at no expense to you.
Last year I gave my bedroom a calm, relaxing makeover which involved decluttering the entire space. One of the items that was taken out was this two piece cubby storage unit. There was simply no space for this in the bedroom so I moved it into the living room.
But first they needed a makeover…and the paint makes all the difference! Just look at how the same Satin Enamel paint completely transformed this wood headboard (without sanding or primer), as well as this painted bathroom vanity and even all these painted kitchen cabinets.
Supplies Needed for Painting a Cubby Storage Unit:
- DecoArt Americana Satin Enamel Paint in White; in Black; and in Beige* (or alternatively, use this similar Smoke Grey* color instead)
- Soft tip brush*
How to Paint Storage Cubbies:
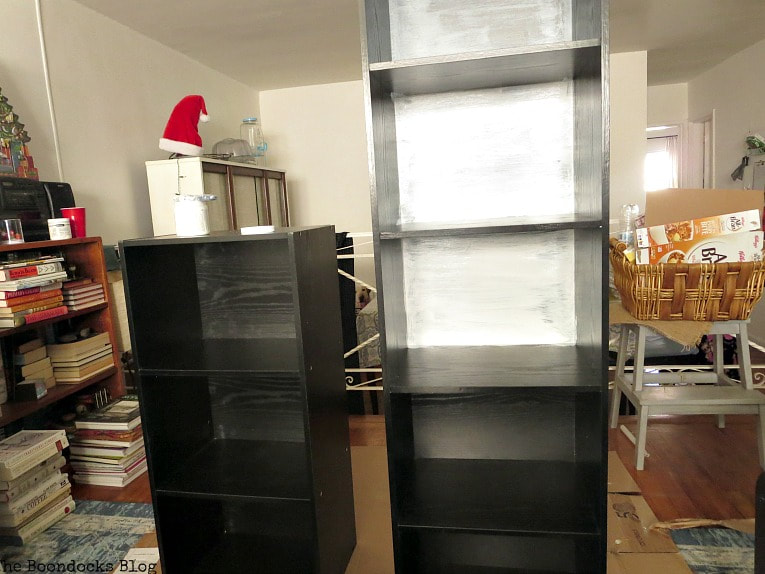
The reason this is such an easy DIY is because DecoArt Americana Satin Enamel paint does not require any priming or sanding prior to painting! Using a soft bristle paintbrush, apply the paint in long even strokes over the entire surface. Avoid using a bristle brush with coarse hair because it leaves all sorts of streaks.
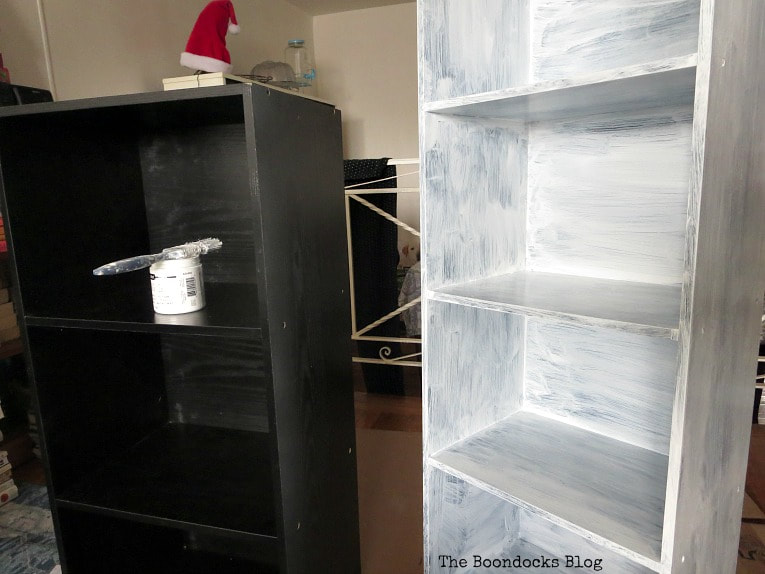
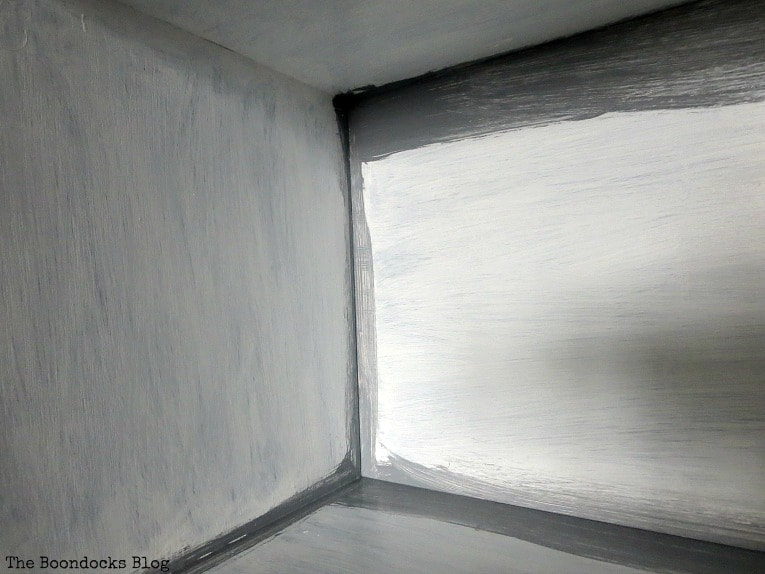
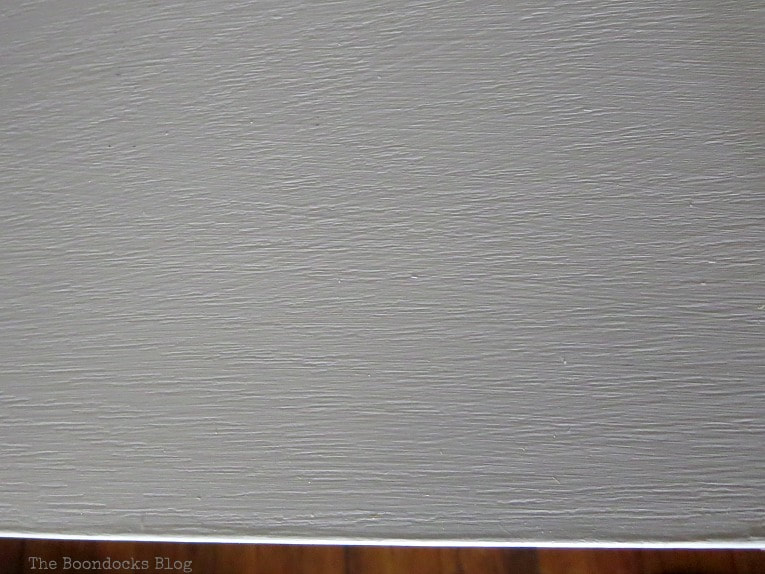
After two coats of satin enamel paint, the cubby storage unit looked like this. I knew it would take quite a few coats to cover the black but as I was painting I changed my mind and decided to go with a dark grey finish.
I added a bit of black to the white and also a tiny bit of beige to warm up the grey to come up with my own custom color. Of course I could have just bought this Decoart Satin Enamel in Smoke Grey* color that but I really like to torture myself. Also, this is a taupe grey* which is also nice.
Actually in the spirit of decluttering, I am on a mission to get rid of all my paint cans so I just used what I had around. I got this idea from my friend Marie of the Interior Frugalista. Go check out her blog and you can thank me later. She is a wiz with the paint brush!
After a couple more coats of paint, I left it alone for a few days to cure.
If you are working on a piece that is wood and you want to seal in the wood paint you can also use this sealer.
In fact I’ve also painted laminate furniture many times in the past, on this campaign dresser, this Ikea Malm dresser, using gel stain, on this Ikea desk, and these nasty bookcases. That was a lot of painting!
Finishing Touches and Styling:
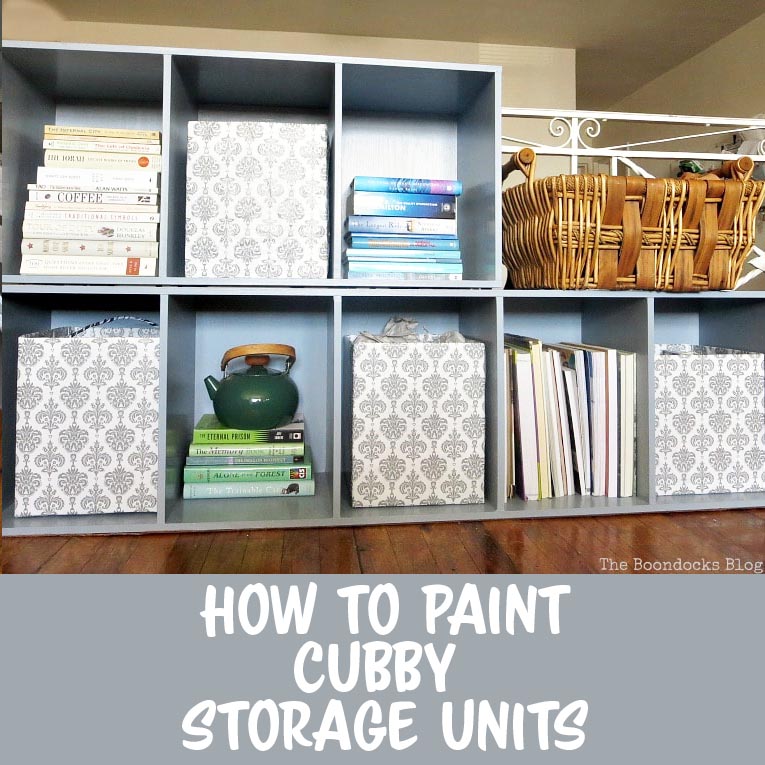
I ended up placing the cubbies horizontally on the floor. This way they do not block the sun from reaching that dark dining area. And lucky for me, it was a perfect fit, just grazing the railing.
Once dry it mimics the faux grain of the laminate. The color is grey, but depending on the light it can have a hint of blue, which works fine by me. If you know anything about me, it is my love of blue and how I’ve transformed the living room into a blue oasis with a cloudy effect accent wall!
Creative Storage Solutions for Your Cubby Storage Unit:
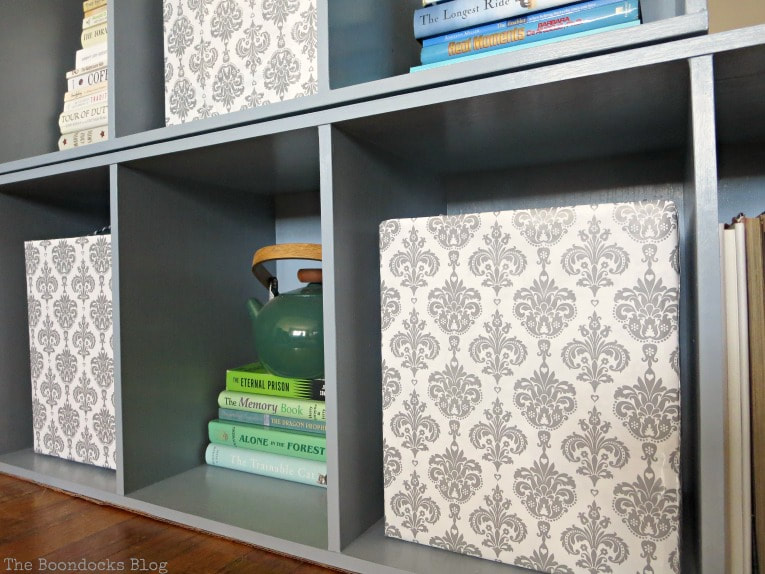
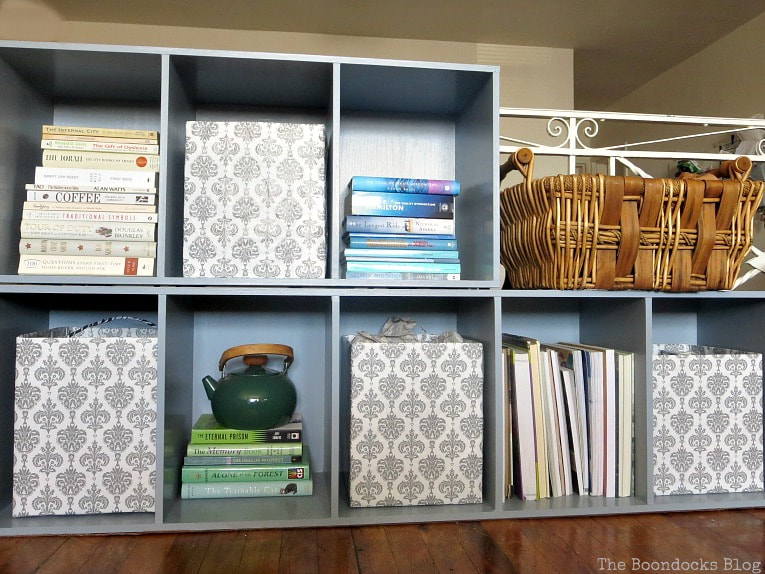
My storage solution was to take some inexpensive cardboard boxes and dress them up with wrapping paper. You can also use fabric to recover cardboard boxes to make storage bins or wrap tissue boxes in twine for stylish storage containers.
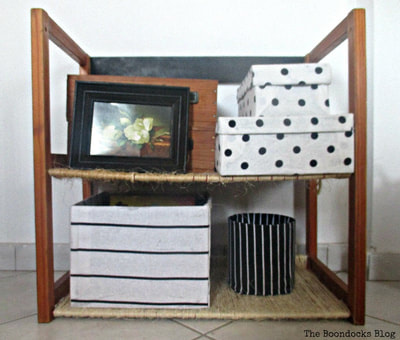
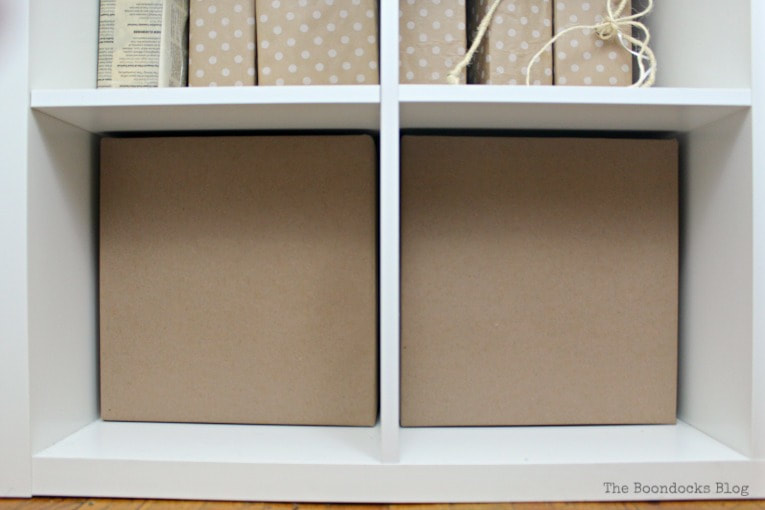
Wrapping Paper over Cardboard Boxes
Now I have lots more storage and a place to put all those books which get displaced from their normal spot on the bookshelves every time I get the desire to create vignettes for every season! Oh the first world problems we have!
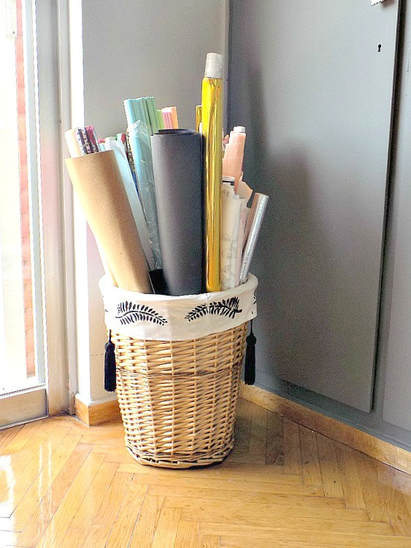
And that basket makes a nice contrast to the whole grey look. Should I paint it white or leave it as is?
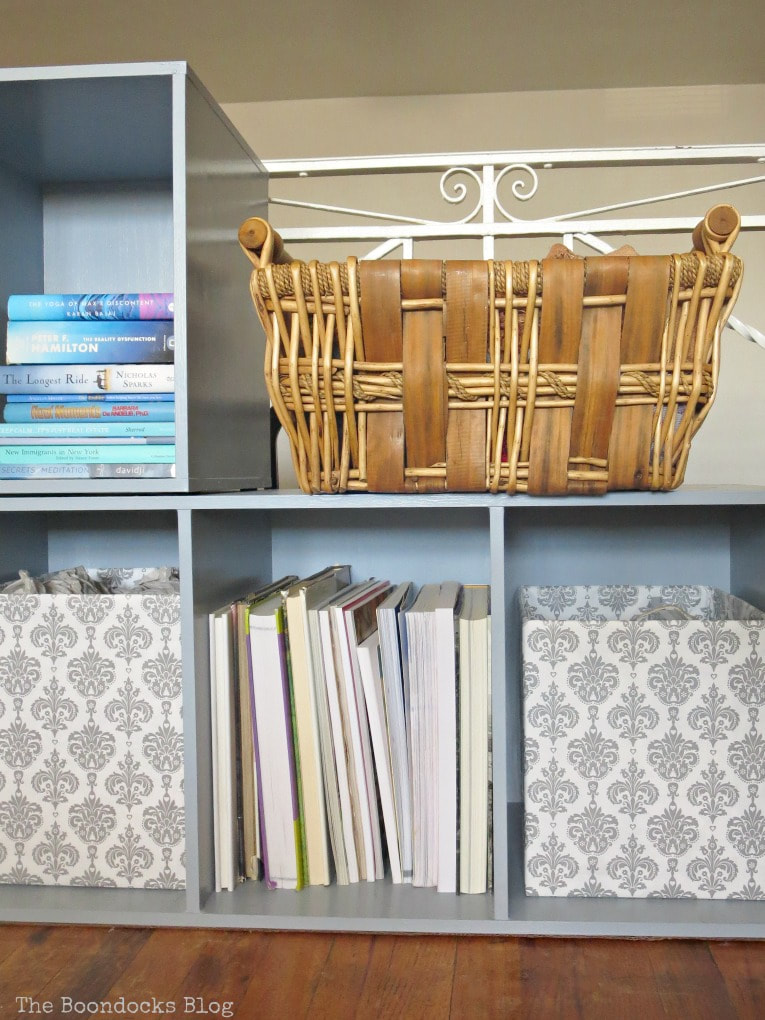
I put some of those felt furniture pads on the bottom of the units so they would have a bit of a cushion too.
And that is my solution to my storage problem. You can see just how easy it was to see how easy it was to repaint these cubby storage units. I was really glad I could make use of these storage cubbies and in a way that fit in perfectly with the rest of the room.
For more DIY project ideas involving storage, check out my painted Ikea wood crate storage unit and wallpapered bookcase.

Have you ever tried painting laminate?

Well done! You made perfect use of those storage units and they do look much better now than they ever did before!
Marjan they were a horror before but still useful. The best option is always paint in my opinion.
I was wondering if you could tell me about how much paint you had to use for the cubbies. I’m really not sure how much to get and the link for the paint shows only an 8 oz jar of paint. I’m not sure if price wise it would be worth me painting what I have already or buying a new one in the color I want depending on how much of that particular paint I would need.
Thanks in advance.
Looks great. Don’t you just hate given up storage space? If you can make it work, then make it WORK! love it.
Oh my goodness, YES!! I really wanted to reuse this somewhere in the house but just needed to find the right spot.
perfect use of storage.
have a great day
Thanks so much Tanza!!
YES!!!! I’m a firm believer in the power of paint and those cubbies of yours do look so much better now that they’re got a new coat. Who ever invented paint deserves a medal. What would we do without it. Love the way you turned them on their sides against the railing. I’m not sure if you should pain the basket. The warm brown contrasts beautifully with the cooler greys. Mmmmmmm decisions, decisions 😀
Do you remember when I had them in the bedroom how out of place they looked. This was a great idea and putting them on their sides made all the difference. I’m really happy I found a spot for them. It makes the living room look more cozy too.
What a great transformation. I never get tired of the power of paint.
Neither do I Debra and there is always so much you can do with it, although most of the time I try to go simple.
I love these quick updates that give a living space some ‘pop’!
This was the black hole before the paint job. And it stuck out like a sore thumb!
You knocked it out of the park. Gorgeous and so much fun storage!
You can never have enough storage, now can you?
Hey! I just came by via Cathy’s 4M post because I loved the title of your blog and had to check it out! I can’t wait to explore more because I have a ton of DIY I need to do and can use the inspiration!
I am so happy you came by Kim. I am always looking to make my home comfy and pleasant but frugally because there is no need to throw everything out and start from scratch when you can paint.
This looks fantastic and I love that you placed it hortizontally on the floor. I am not sure I would have been that smart! LOL!
I think it was the railing that helped me with that idea Michelle. Lol!!
…a coat of paint makes a big change,
You can say that again!!
The bookshelves look SO much better now, and the way you turned them around is great!! I love that little basket on top and it looks great as is with the rest of the decor.
Katrin I was really glad to be able to reuse these cubbies. They were such an eyesore before.
Mary, the cubbies look great painted custom grey and I love your brilliant idea to stack and set them horizontally. Your papered boxes really look pretty and pop against the grey. Thank you so much for the mention 🙂 Don’t you just love seeing those paint cans slowly dwindle?
Slowly but surely they are dwindling. That means we can buy new stuff now!!
Mary,
Thanks for sharing the power of paint! It never ceases to amaze me how paint can transform and old piece of furniture or drab room and make it feel fresh. And it’s so cheap 🙂
Thanks,
Denise
Denise isn’t it a shame when we throw away perfectly good pieces of furniture just because they look outdated or out of style? I’ve been on a mission to keep all my things and just update them and this way I can also be friendly to our mother earth and my pocketbook. Thanks for stopping by!!
Your bookshelves look fantastic now Mary. Your idea to place them horizontally on the floor it is a brilliant idea!
It made all the difference Christina, otherwise I would not have been able to use them in the living room since there is limited space there.
Paint really is magic! It looks like a totally difference piece! I also love the color you choose Mary.
That color really makes me happy. It is soft and somewhere in between a blue and grey so it blends right in with the room.
Mary,
I LOVE how these turned out, and I especially love how creative you were, turning them on their side. Your storage area looks lovely and that little tip of covering the boxes with wrapping paper is brilliant! Thanks for sharing the inspiration. I want to scout my house now for something to paint.
I hope you do find something to paint Karen. When we moved back here the house was full of odds and ends and I was in no position to buy new so I started painting everything in sight. Slowly but surely, I’ve managed to get a unified look to each room and the house in general. We can never underestimate the power of paint.
Well done! I like the small storage boxes you put in the finished cubbies – looks perfect!
Thank you Carol, I was really glad to be able to keep it and it turned out to be more versatile than I had originally thought.
Nice transformation…the power of paint! Have a great week!
Shelley
That’s definitely my motto Shelley!
This is a fabulous upcycle! Thanks for sharing at Vintage Charm!
Thanks so much Cecilia I love it now.
These look great now, Mary! I absolutely love the gray color. I also love that you turned them horizontal. Brilliant idea! The power of paint really is a magical thing. 🙂
Yes paint is the best. I am so glad I was able to redo this because now I have tons of storage!
The power of paint, indeed!! I love how you flipped them, too. Genius idea!
Indeed it turned out to be perfectly useful once it was painted and turned on its side.
I absolutely love how these cubbies turned out! The color is perfect! Thank you for sharing at Celebrate It!
Hi Mary!
I love how your shelving turned out!! The grey is a nice soft grey and I like how you’ve laid the bookcases down on their sides. I was wondering if they were going to be standing up or not. 😉
Pinned almost every photo for you! <3 I am beginning to wonder about the lack of storage in our new house, especially since we haven't moved anything in yet and it only has 3 bedrooms. Charles is already talking about putting in a parking area on the side of the house since the garage is pretty small for two cars and no storage. I don't think the city will let us (it'll look ugly having cars invading the garden anyway).
Happily we have a few different storage bookcases and we can let a bunch of things go, including books...
Happy weekend to you,
Hugs,
Barb 🙂
Beautiful transformation Mary! Love how you turned them on their sides. Their perfect for storage and such a pretty color!