How to Pair MCM Furniture to Get one Unified look
Vintage mismatched furniture can look cohesive with a bit of paint and imagination!
Remember way back, when I shared my ideas and mood board for the bedroom? It was a while ago.
I had been sitting on top of this project for a while now, feeling very indecisive about the whole bedroom really and in particular the two Mid Century Modern pieces of furniture you see below. Should I paint them grey and which portions should be painted or should all of it be painted one color. It went on and on… this plethora of choices.
The problem was too much furniture and too many colors in a small room. I needed to paint these pieces so they would look unified without making too much of a statement.
But I’m back to show you what I have done and how I paired those two pieces of MCM furniture to get one unified look.

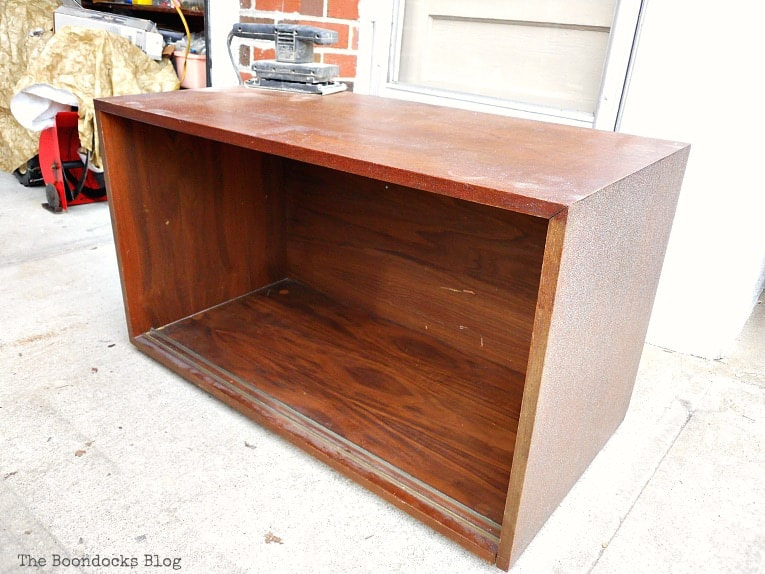
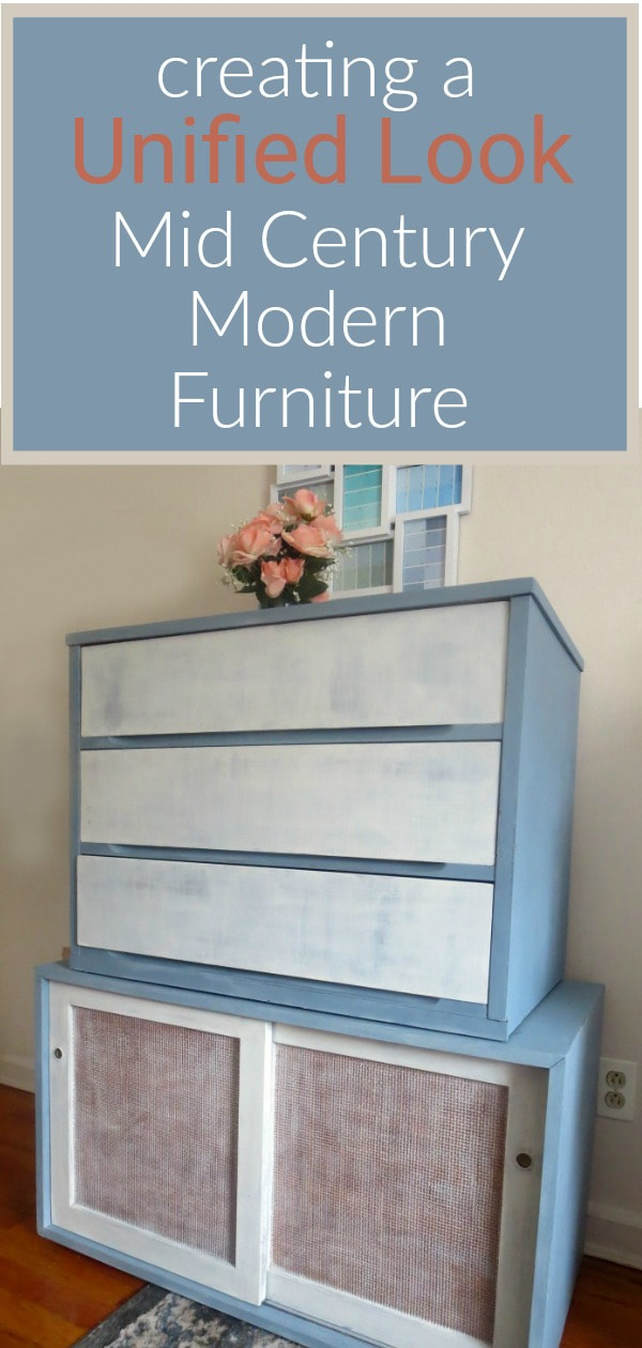
The bottom half of this combo was originally a sideboard and looked like this below. I had painted it in a soft grey color and left it at that. But I knew I would eventually have to work on it some more because there was too much of a contrast between the sides and the doors in the front. I was aiming for a unified look.
What I Used:
Disclosure: This post contains affiliate links for your shopping convenience. If you purchase any of these products through the links, we receive a small commission at no extra charge to you. You can find our full disclosure here.
- Old Fashioned Milk Paint in Snow White the Safepaint formula
- Old Fashioned Milk Paint in Slate the Safepaint formula
- Sandpaper
- Daddy Van’s All Natural Beeswax and Furniture Polish in Lavender
- Paint brushes
- Brush for waxing
- Rags for waxing
The How To:
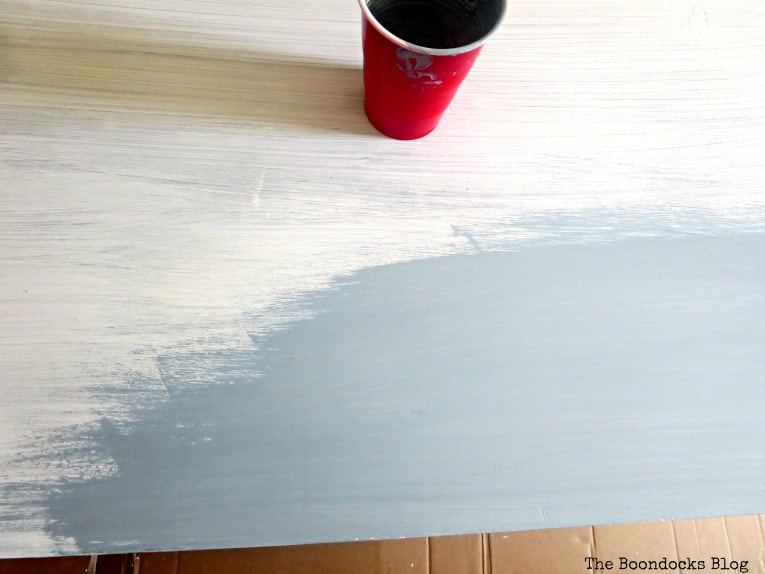
I stared off by going over the soft grey paint first in the snow white color.
Now would be a good time to mention that this wonderful paint comes in two versions, a regular milk paint, that is perfect for untreated wood, and a safepaint version which is good for surfaces which have already been painted.
You can also add Extra Bond an agent which will help the regular milk paint stick.
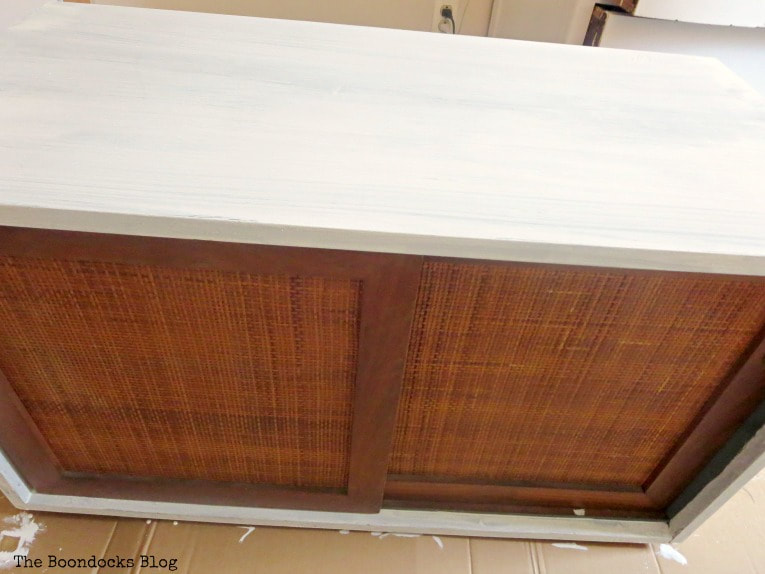
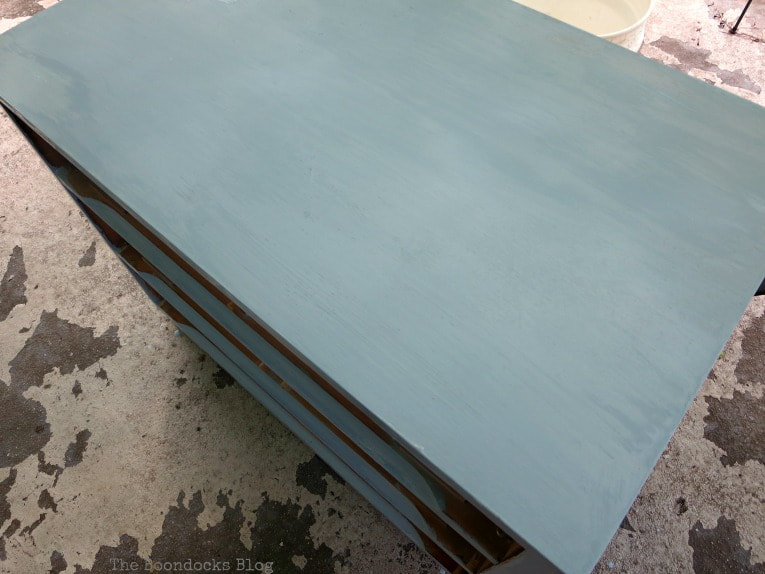
And then going over that with the Slate color, which is a soft blue. I did two coats of the blue and it covered beautifully, using long brushstrokes.
The doors also got a paint job, sine they were the ones that had been sticking out like a sore thumb in the first place.
It was really hard for me to decide what to do with the doors since I had been agonizing over the whole look of these two pieces. In the end I opted to do the outsides in the slate color and the fronts in the white.
I painted the frames with the Old Fashioned Milk Paint in Snow White.
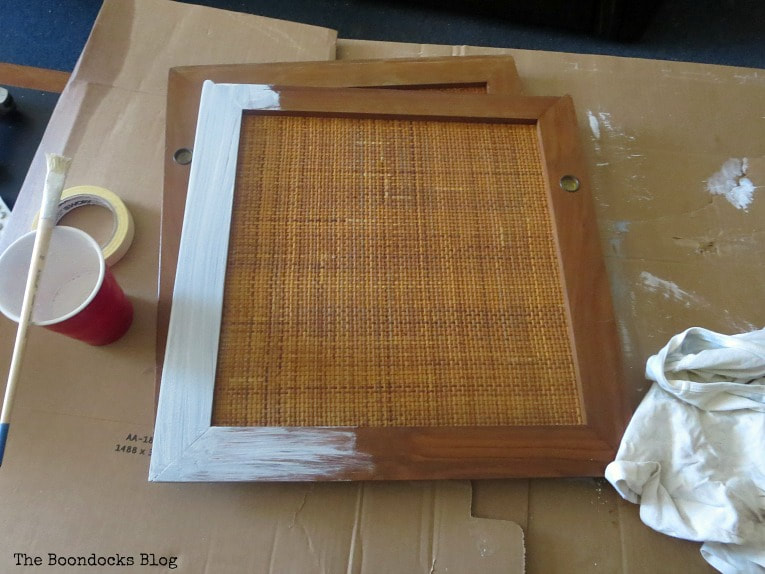
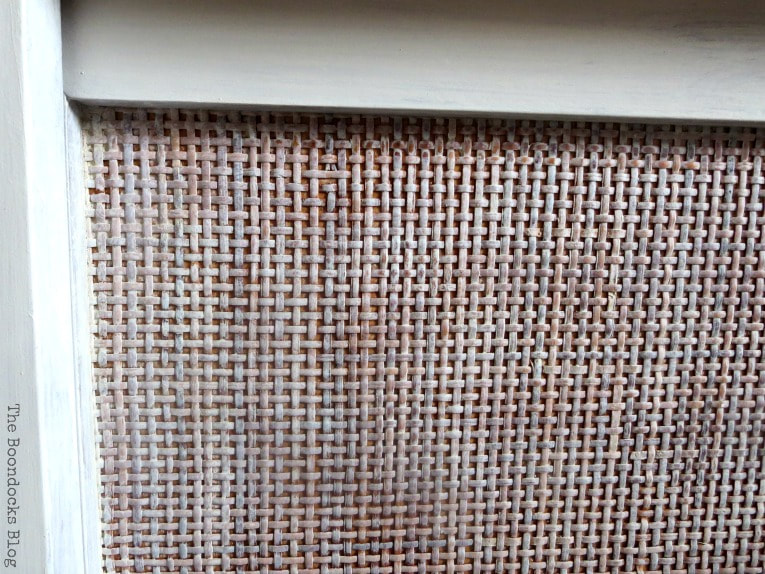
For the interior rattan part I did a dry brush technique, where I would put paint on the brush and blot it a little on the white rag. Once I had applied the paint to the rattan, I went over it with the brush distributing that little bit of paint all over as much as possible before having to add more paint to the brush.
In this way the look was soft and the paint did not fully coat the rattan.
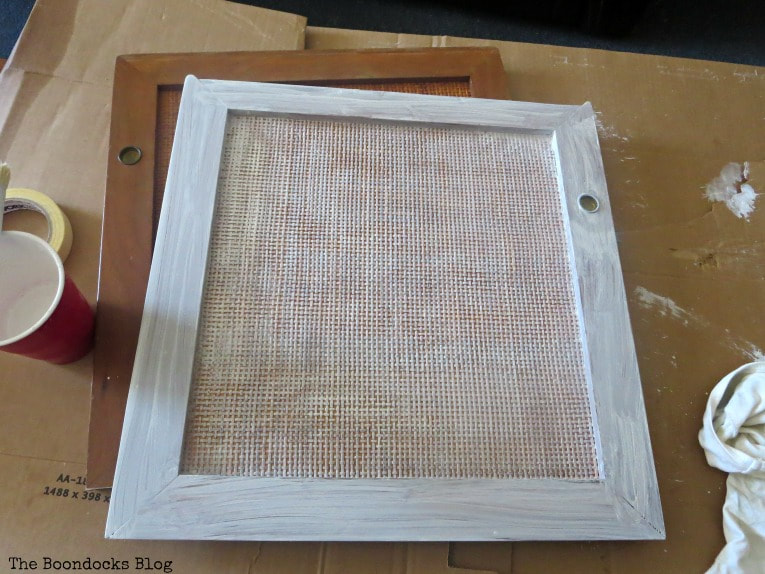
Once I added the wax, to seal it in, it became even softer because some of the paint wiped off.
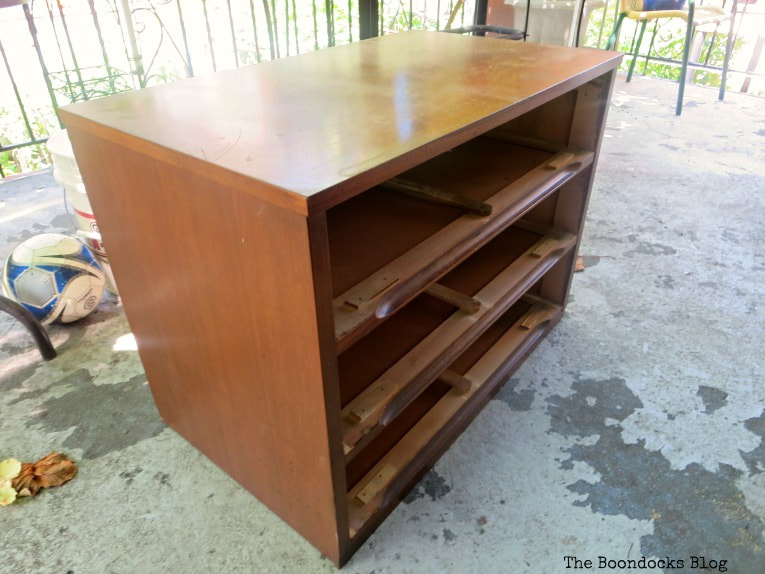
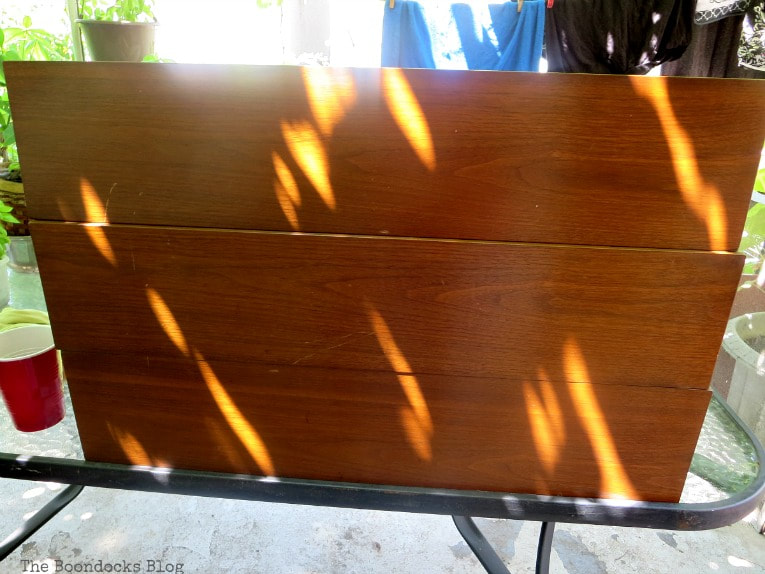
Now let’s look at the other half – the top part. This is a Mid Century Modern piece. I would describe it as a small dresser or side table. It has three drawers.
By the way, I had rescued this one from my dad, who used it to store his tools. That seemed such a waste of a pretty dresser to me, so one day I just took it and he has been looking for his tools ever since.
He was quite annoyed with me but I went on and on about the vintage look and how valuable it was and it was a shame to be storing tools.
You know sometimes that works. But this time he really was not happy… tool storage is very important to him.
I repeated the process with this dresser, adding one coat of Old Fashioned Milk Paint in Snow White…
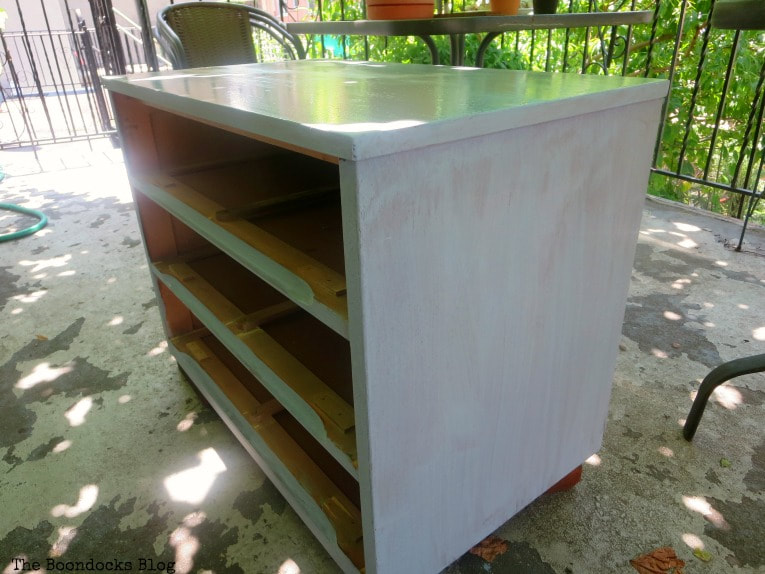
… And then finishing it off with three coats of Old Fashioned Milk Paint in Slate. The last coat was added with long brushstrokes from one end to the other.
Now it was time to tackle those drawers.
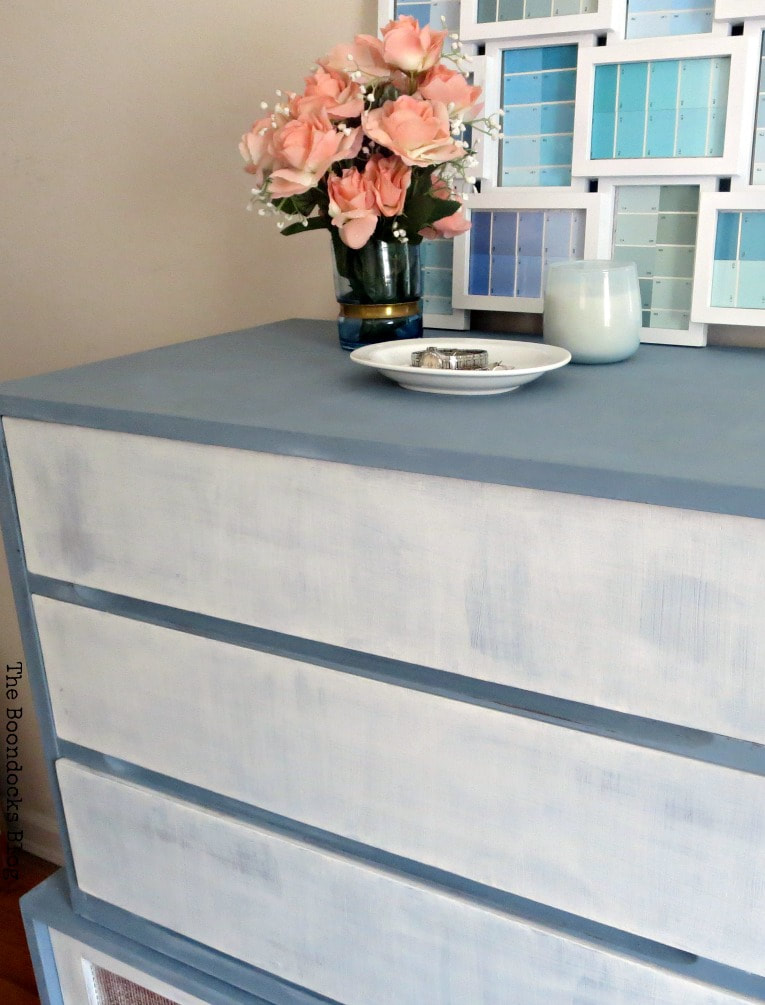
After much thought, I decided I would do the drawers in white, just like the doors of the sideboard. This time I used the snow white milk paint for all the coats.
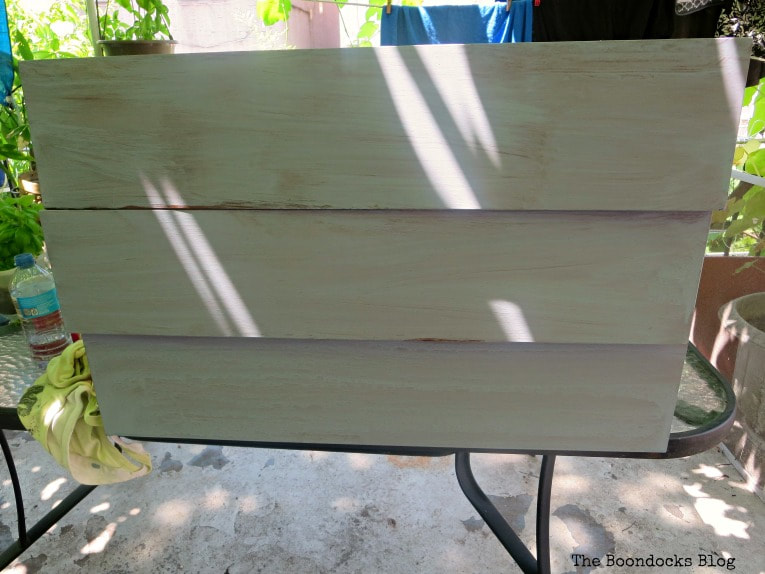
The second coat was painted in the opposite direction, and the third and fourth coats were also done this way.
So across, then up and down, across and up and down.
This was the result.
Sort of like a soft pattern.
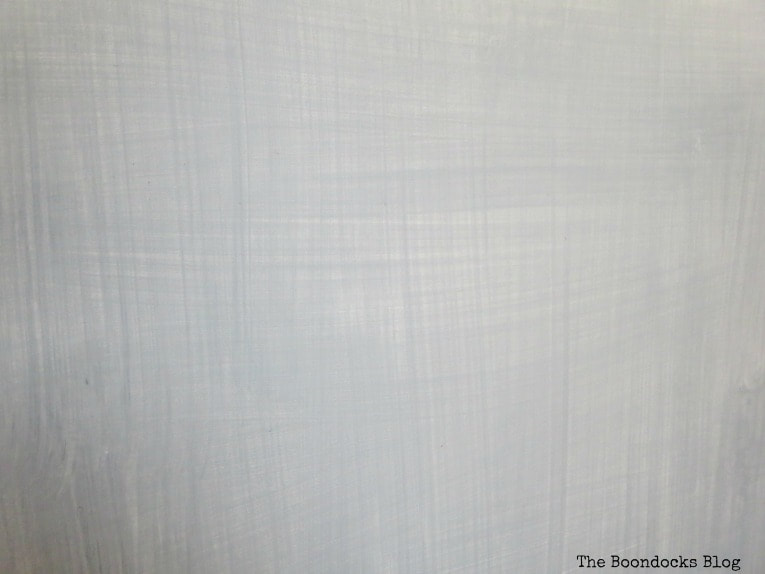
Next I lightly sanded the drawer fronts. Can you see the light and dark variations? This was deliberate to give a bit of interest to the front.
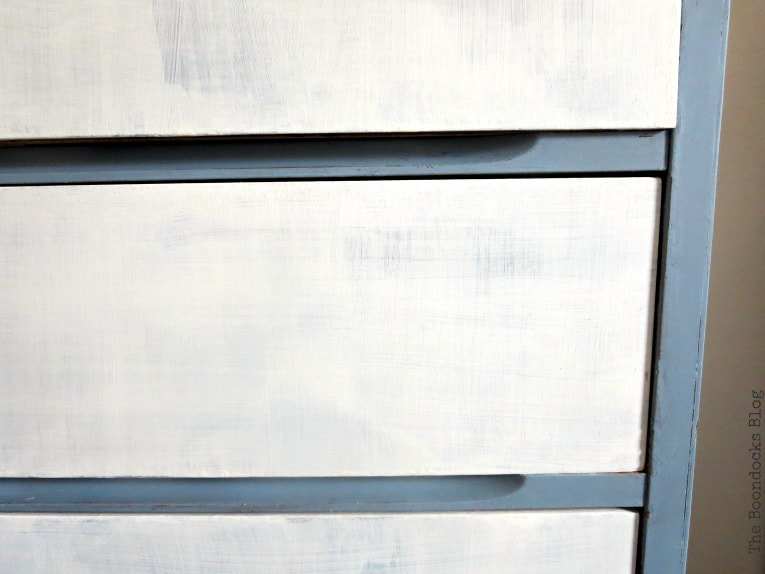
I finished the whole thing off with Daddy Van’s All Natural Beeswax and Lavender Furniture Polish, to seal in all that milk paint goodness. I used a round brush for this, it makes the whole process go so much faster.

And here is the finished piece of furniture. Doesn’t it look like one piece now? I needed the right colors in order to make these two look like one piece of furniture.
The fronts are soft, not like before when the rattan doors were too much of a contrast.
And I just love the dresser drawer fronts which almost look like soft clouds now.
Why, the color even matches my rug (similar)!
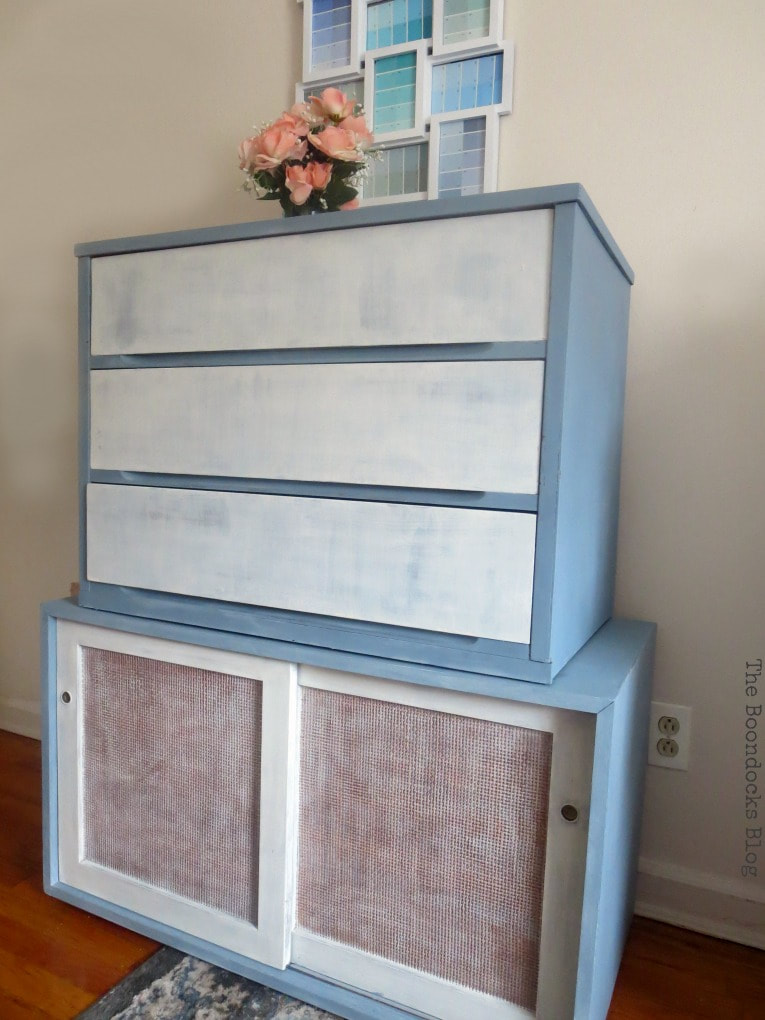
I’ll be using this two piecer to store my paperwork and all the printing paper. The printer will go on top because this may be pretty but we also have to be practical!
Of course the icing on the cake for me was when my dad came to inspect his former tool storage! He looked at it, raised his eyebrows, put a smile on his face (which is rare for him – he only smiles at our dog) and said “It came out very nice!”
Now that is high praise coming from someone who would have been content with misusing this lovely piece of furniture.
And that is the end of this bedroom dilemma. Just a few more pieces to finish for this room and I should be done. To see what has been completed so far look below.
What do you think, was I successful in creating a unified look by pairing these two pieces of MCM furniture?

Addition Bedroom Projects You Might Enjoy:
If you really like what you see subscribe to my blog and get my adventures in your mailbox. The form is on the sidebar and on top. To see my privacy policy click here.
This blog is for entertainment purposes only; my DIY tutorials are not professional advice. Read my full disclaimer here.
I love it when I get your comments and I will try to reply to every one of them. Please do not add a hyperlink to your comment, otherwise it cannot be published.

Lol, what happened to the tools? Nice colours, looking forward to seeing what else you do in the room.
Can’t get the notify me of new comments box to work.
Those tools have been shoved in boxes and put in the garage along with all the other boxes of tools. I swear my dad has too many tools.
I love older hand tools, nails and screws.The newer stuff from China etc is often made with poorer quality steel and breaks easily, or rusts.
Yup, you did it. They’re unified 😀 and in such a lovely way too. So happy to hear that your room is making progress even though it might feel like it’s slow going. You’ll get there Mary.
I actually took out those two black bookcases and now there is space in the room and I feel so much better and less overwhelmed about the whole room.
Very wise choice.
It looks terrific, Mary!
Thanks so much Jeanie, those colors are so soothing and really make the whole room look much more relaxing.
I’ve been waiting to see what you decided with these two pieces, Mary. Sorry to hear your Dad was unhappy about his tool storage disappearing. Did he change his tune when he saw the finished piece? The pretty blue milk paint totally unifies these two pieces now!
He most certainly changed his tune. It looks so much softer in here now. The whole tone of the room has changed. Between you and me, I think he has way too many tools.
Mary, you did such a wonderful job connect the pieces together. Now they look like a match set.
Thanks Patti, that’s what I was hoping for and this way I also save a lot of floor space.
It does look like one piece for sure now Mary. What a fantastic idea and how lovely your choice of colors! I’m curious about your room, can’t wait to see more!
I am slowly getting there, It seems the summer time really had me go on a screeching halt. But now that I did this I am motivated to finish the room.
Love your makeover. We did something similar with a desk and a low entertainment cabinet. We turn it into a hanging cabinet with shoe and jean storage underneath. It was very helpful in a room with no closet.
Thank you Lorin. I think this is a great way to create much needed storage without taking up floor space. Anyway who wants to have to bend over all the time to reach things.
Pretty and practical! And best of all the daddy stamp of approval. 😊
I think they look great together, and you can store so much in them.
Thanks Linda, the daddy stamp of approval was the icing on the cake. I gave him such grief after I hid his tools. But now all is good!
Outstanding, Mary! It looks like it was made that way…and I love the paint swatch artwork on top…cool vibes!
Thanks Kim. I am so glad to finally have made a decision and be done with it.
The pieces aren’t mismatched any more. I like how you did the drawer fronts. It makes me think of sun bleached denim. I am glad your Dad gave it his seal of approval.
Thank you Debra. I also really like that effect it reminds me of the fabrics we used back in the old days.
I am not a big fan of MCM furniture but I do like how yours turned out, Mary!!! It was a good idea to make them look more alike by painting. Great idea! Oh, and I’m glad your dad liked his dresser, too.
Pinning to my Perfect Paint and Stain board for future reference. Great tutorial!
Hugs,
Barb 🙂
Barbara when I was younger I used to hate this type of furniture. Now that I am older, I have really come to appreciate the clean sleek lines of it and am trying to restore it every chance I get.
Thanks so much for stopping by!!! I love how this turned out and i love the color of it!! thanks so much for sharing!!
hugs,
Debbie
Thank you so much Debbie, it seems I have really come to love the blue.
Your room is coming along but its so much work. Your pieces look very cohesive, and I especially like how the texture of the doors turned out.
Thank you Leanna I wanted the top to mimic the texture from the bottom doors somehow. I’m glad it shows through.
Mary, I did something similar by stacking two tables. This turned out great! Thanks for sharing at Vintage Charm! Pinned!
Thank you Cecilia, the additional floor space was worth the work.
What a fantastic creation, Mary! You took two bland pieces and made them shine. Pinning!
Thanks Larissa, I really wanted to create a softer look for the room and this color combination really did the job.
This looks great, Mary! What a fantastic idea, and the thought and detail you put into it makes it so much more special. It definitely looks unified now. And I’m glad your dad gave it the stamp of approval. 😉
Wowza, that really is high praise!
They do look great together, I love that soft technique you used on the drawers.
I’m curious to know what your dad keeps his tools in now, a cardboard box?!
Julie I dragged everything into the garage and stuffed it into boxes and anywhere there was space. 😉
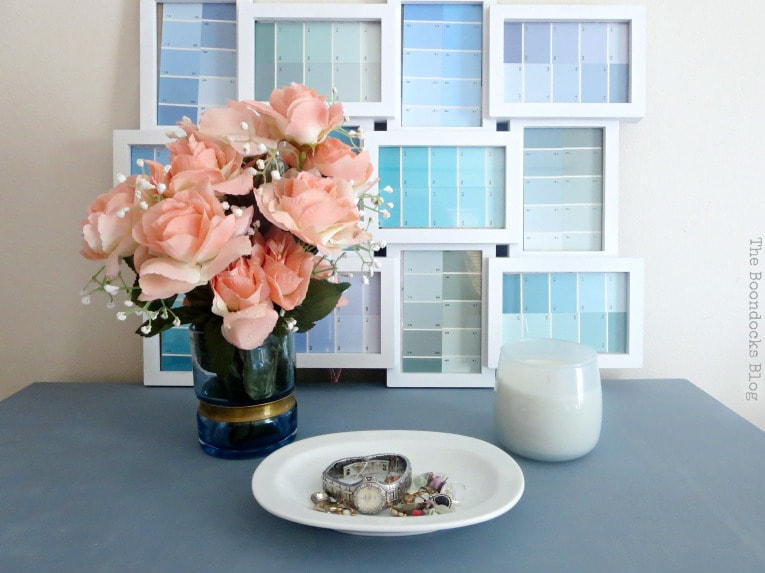
I love everything here, as well as your cute framed paint color chips.
That was an afterthought because I really wanted to use that frame for something.