Tri-Color Refurbished Wood Coffee Table
Have an old, beat up wood coffee table? Give it a complete makeover similar to this step-by-step DIY refurbished coffee table tutorial!
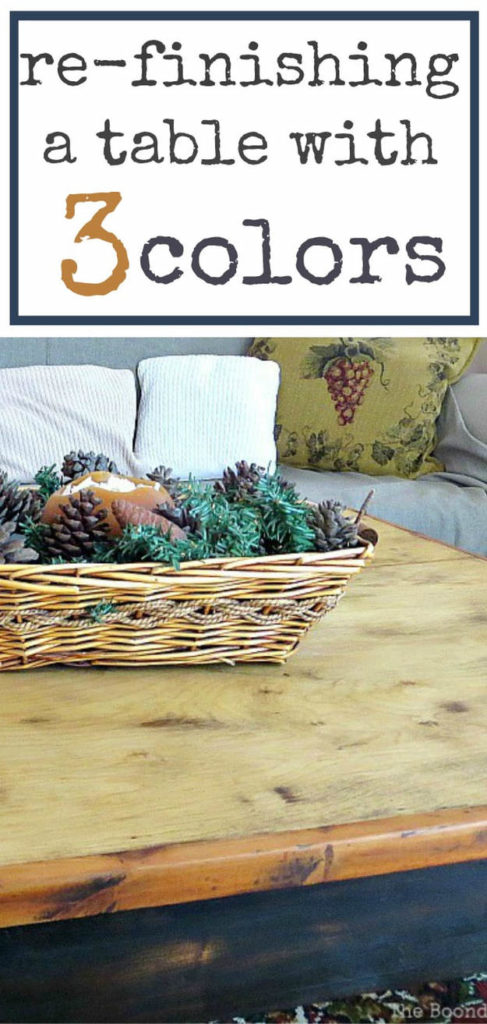
This refurbished coffee table idea is a budget-friendly and beautiful way to add a rustic farmhouse touch to your living room. Transform your own dated coffee table with this step-by-step tutorial.

Refurbishing a Beat Up Coffee Table
As many of you may know having kids can be quite the challenge. They run, jump and do all sorts of things that would make me pull a nerve in unwanted places in my body. For them it’s all in a day’s play. But my furniture takes a beating.
For many years I had a vintage trunk for a coffee table. It was solid and it did not budge. But after a while, I wanted to feel like a normal human and have a “real” coffee table.
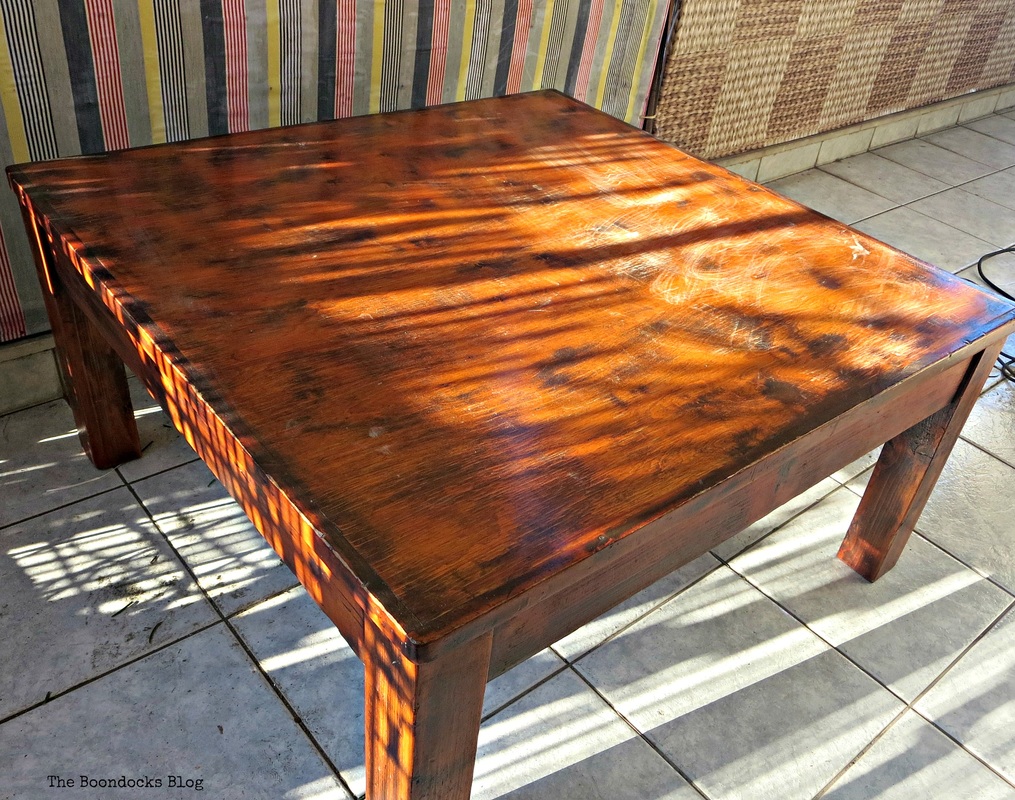
I spotted this old table (no, it was not in the basement) and asked the hubs to cut the legs down to coffee table height. I stained it this color that you see above, which was fine 10 years ago when “orange” was all the rage.
But looking at it now, well it looks too orangey. And it was full of scratches (thanks kids) and cracks. Time for a much needed update or an accident waiting to happen?
Materials Needed for this Coffee Table Upcycle
- old solid wood coffee table
- orbital sander and sandpaper
- dust cloths and drop cloth
- clear varnish
- paint brush
- black chalky paint
How to Refurnish a Coffee Table
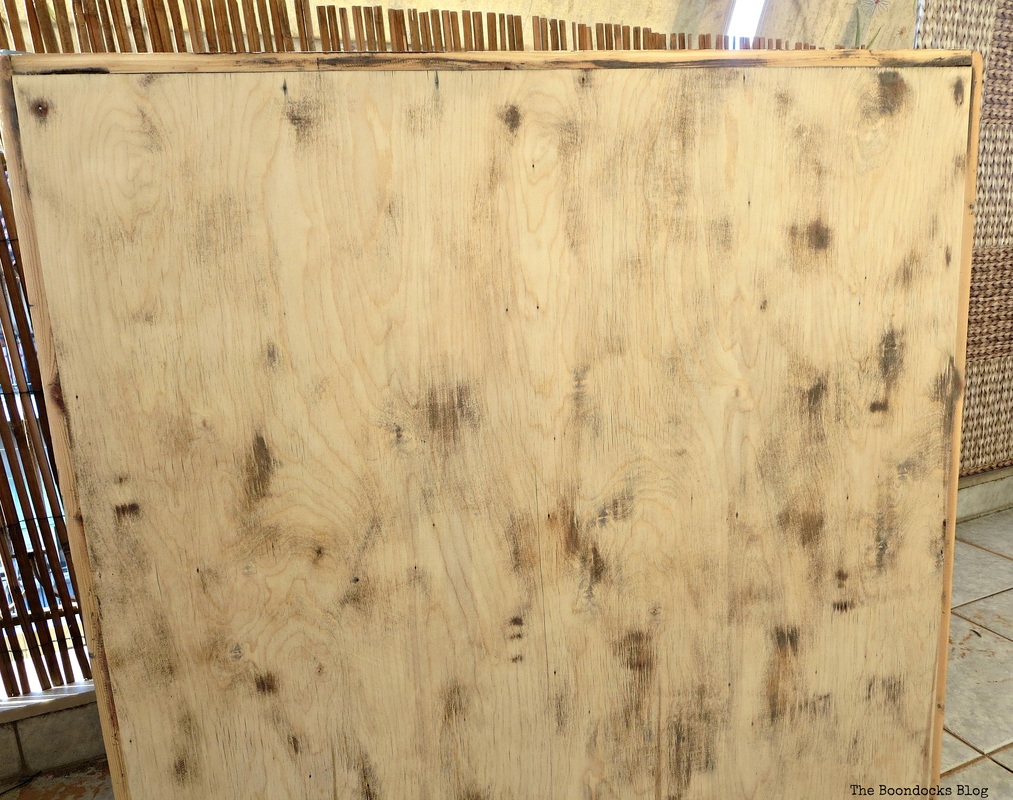
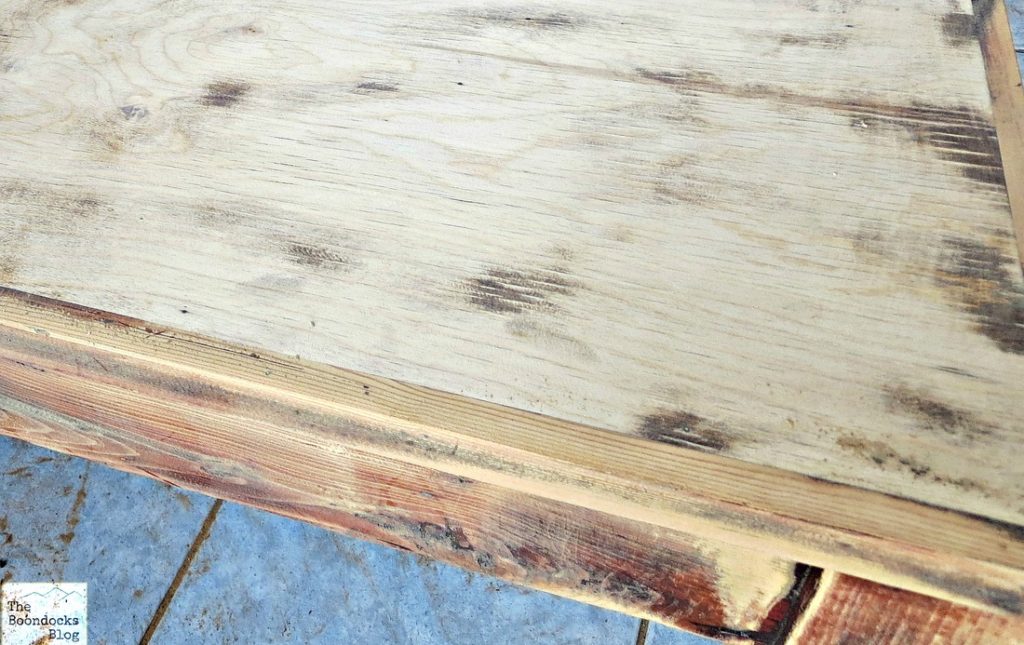
I gave it a good sanding and this is what I found underneath all those layers of stain and varnish.
Imagine my surprise when I accidentally discovered that the frame of the table top was a different wood than the actual top.
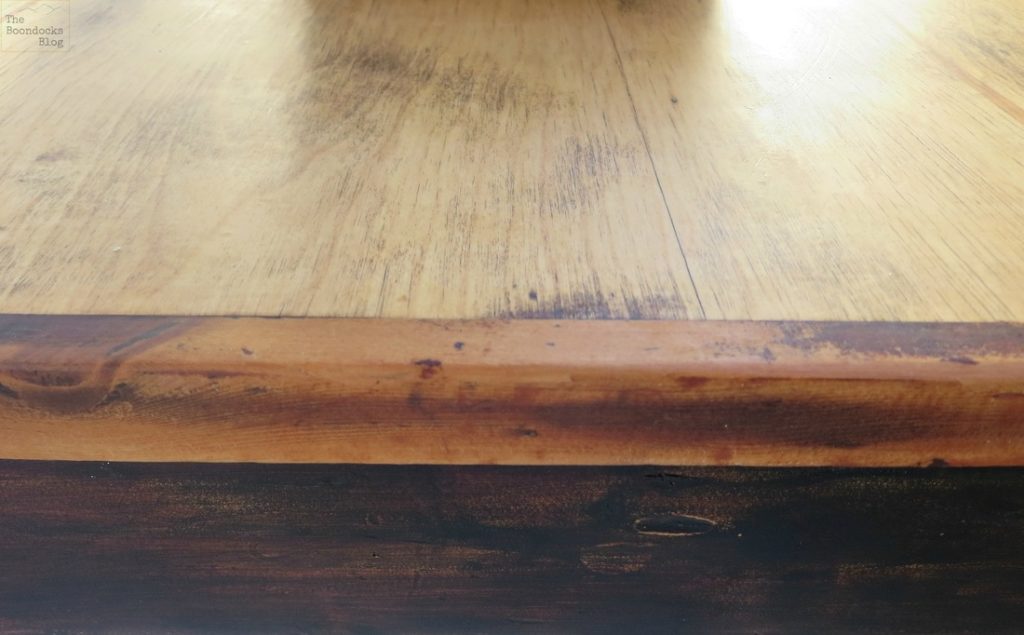
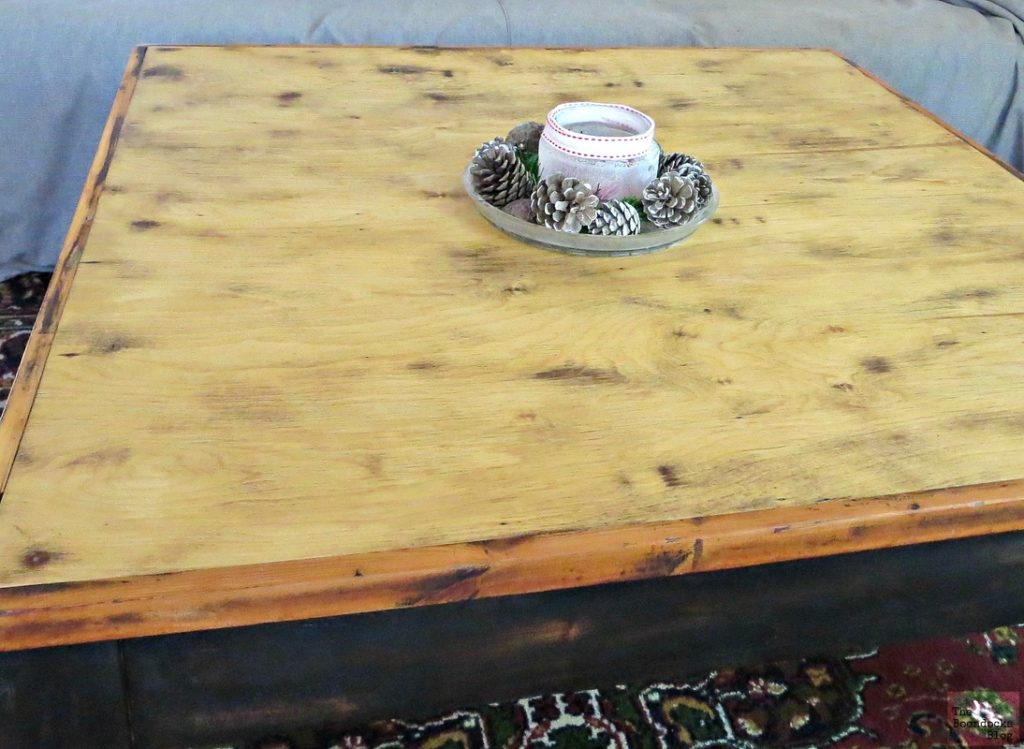
I liked this blonde wood so much I decided to keep it and not stain it a darker color. I used a colorless varnish that had just a tiny bit of yellow in it.
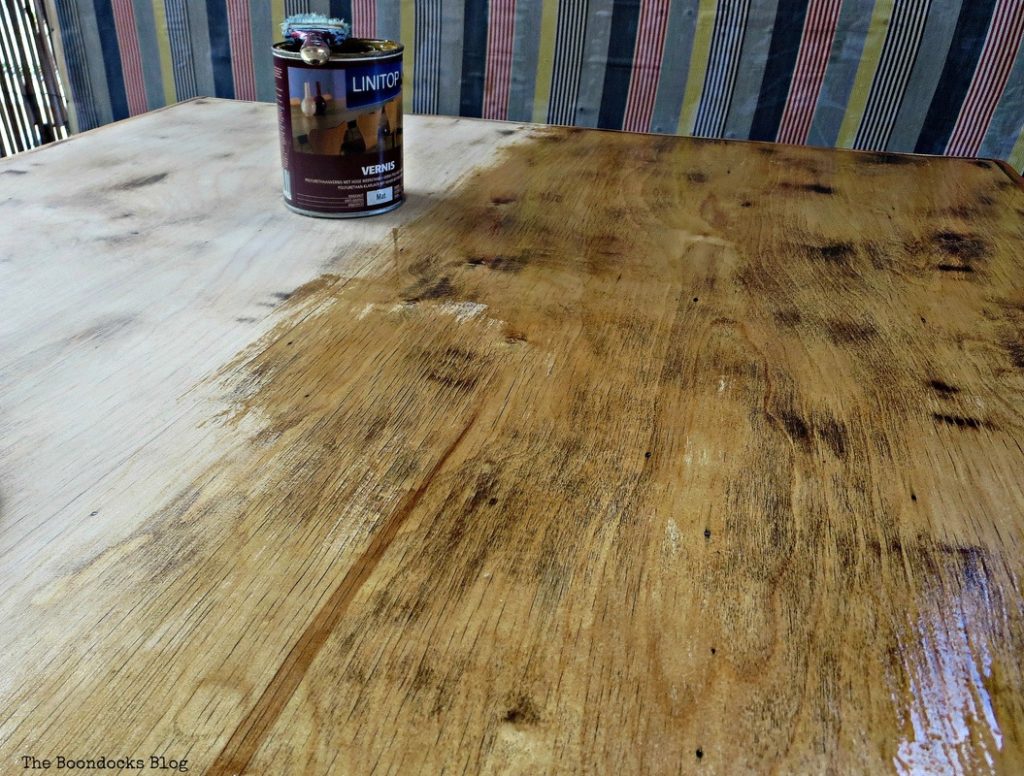
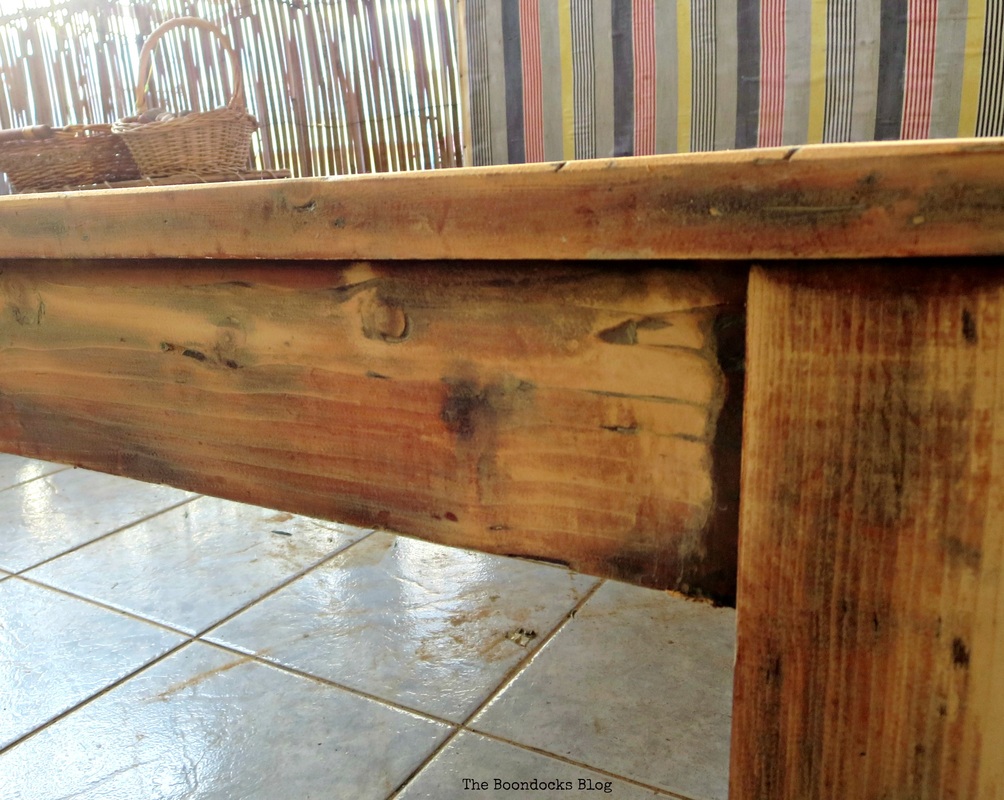
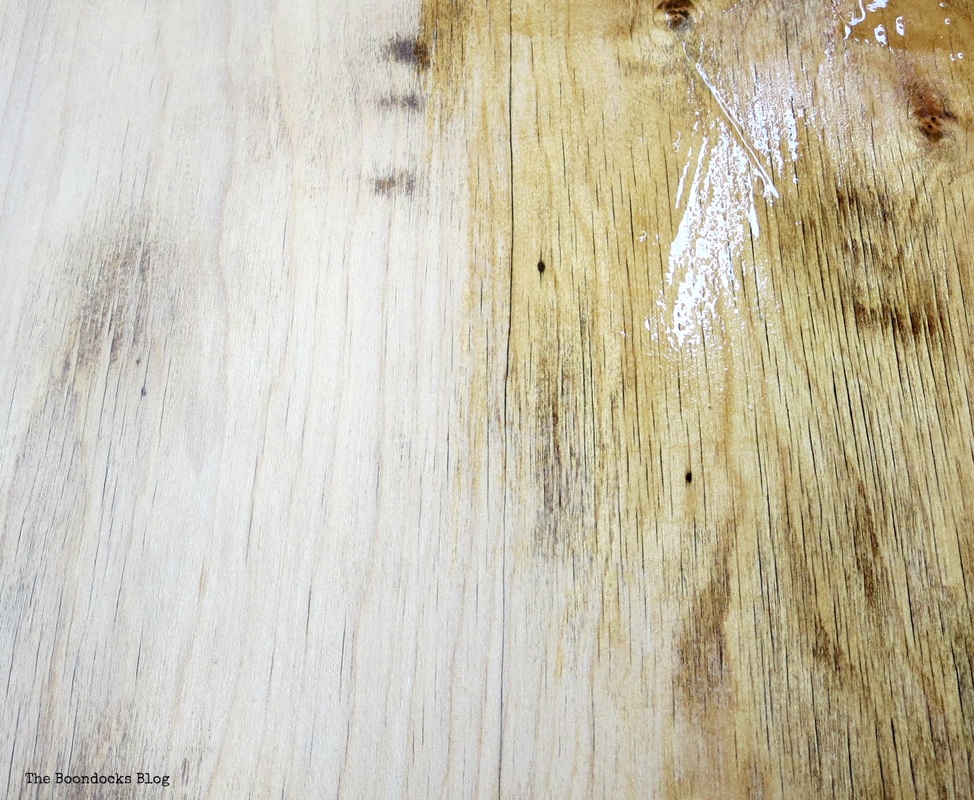
Here you can see the difference between the naked wood and the varnish which was still wet. It took about 4 coats and 2 weeks of waiting for it to finally stop absorbing the varnish.
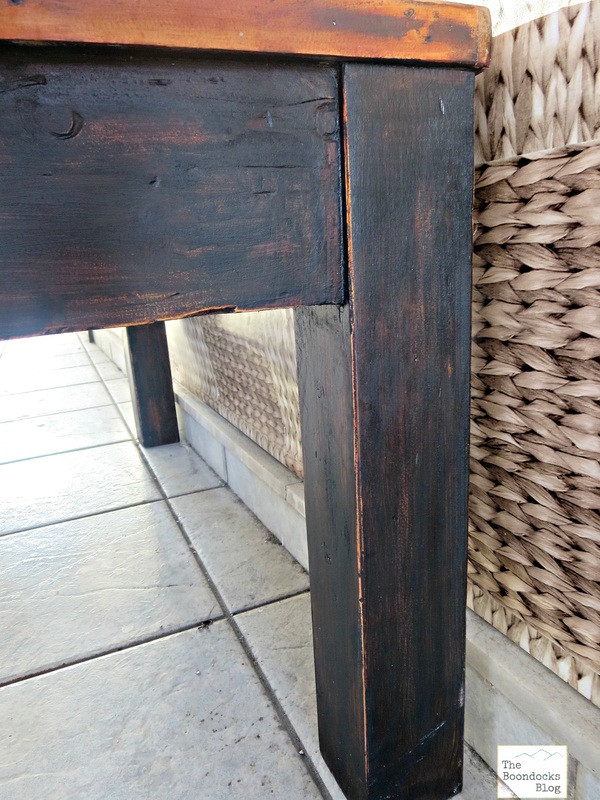
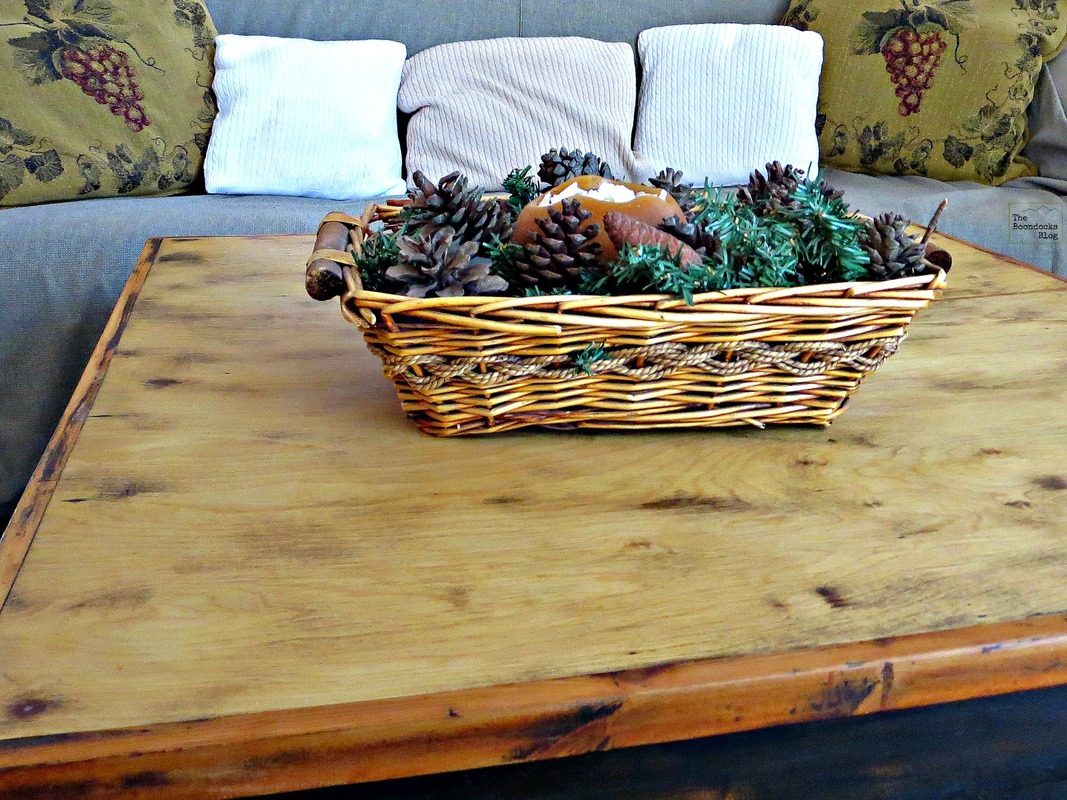
When the coffee table top was finally finished, I opted to paint the legs with black chalky paint, and lightly distress them. Here you can see how nice the legs look with the wood showing through, which also happens to be the same wood on the frame top.
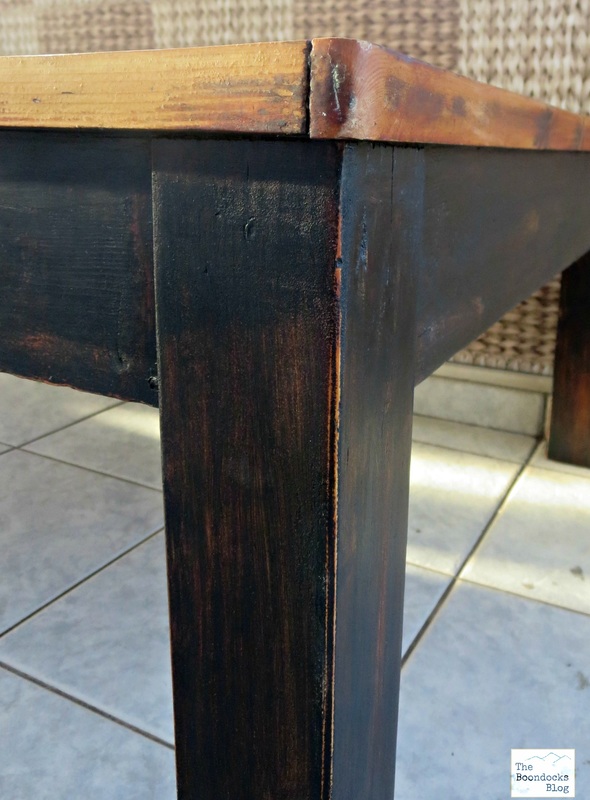
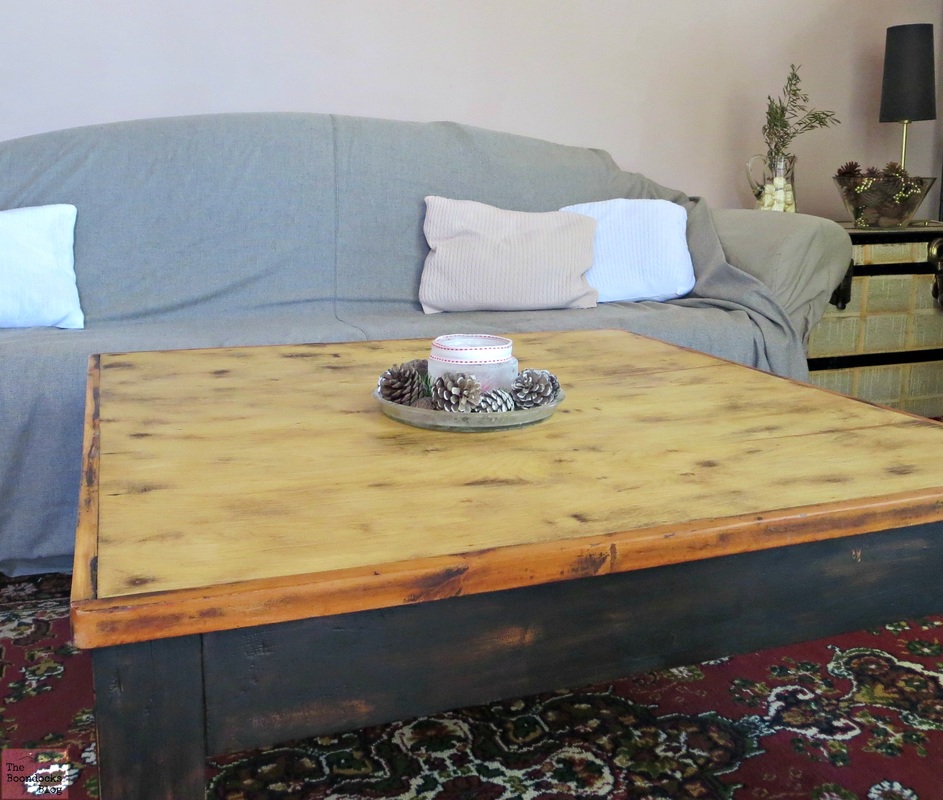
And here you can see all three colors of the refurbished coffee table: the black, the reddish and the blonde! I couldn’t have done a better job if I had planned it. Another happy accident!
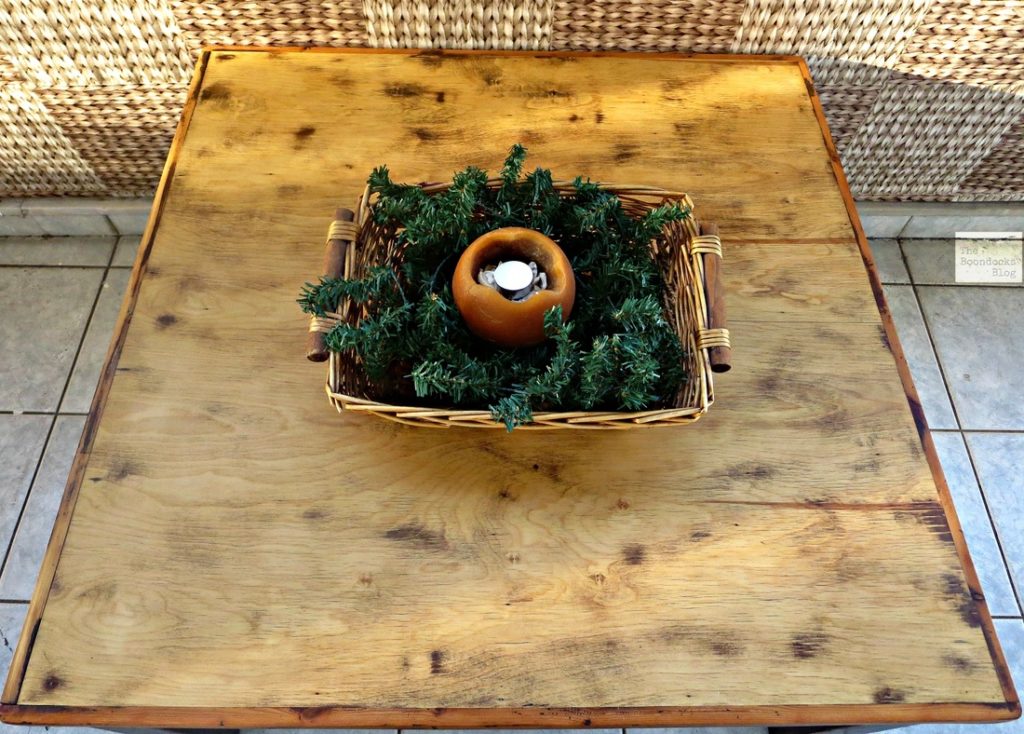
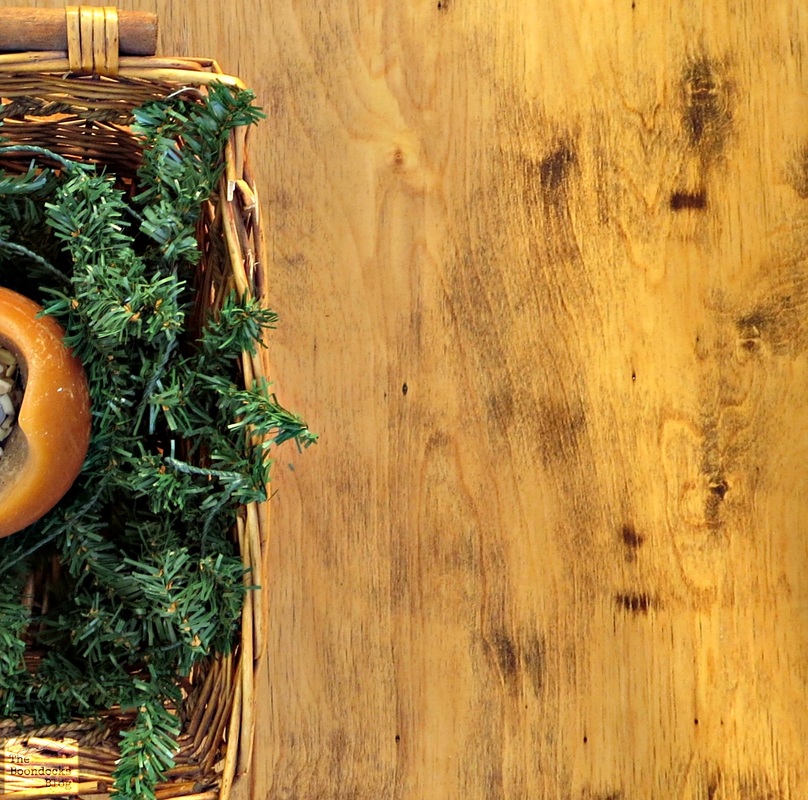
By choosing to use a colorless varnish for the coffee table surface, the natural grain of the wood shone through. This was not visible before the makeover nor were the dark spots on this unique piece of wood.
Here is the refurbished coffee table in it’s natural habitat!
One last look at that horrible before:

And that smooth blonde color which is so soothing to my eyes.
This old table has been around for about 70 years, and now with it’s new colors, and no more little kids in the house, it’ll be around for many more. I did not set out to make a tricolored table. But it seems that this month’s theme has become happy accidents.

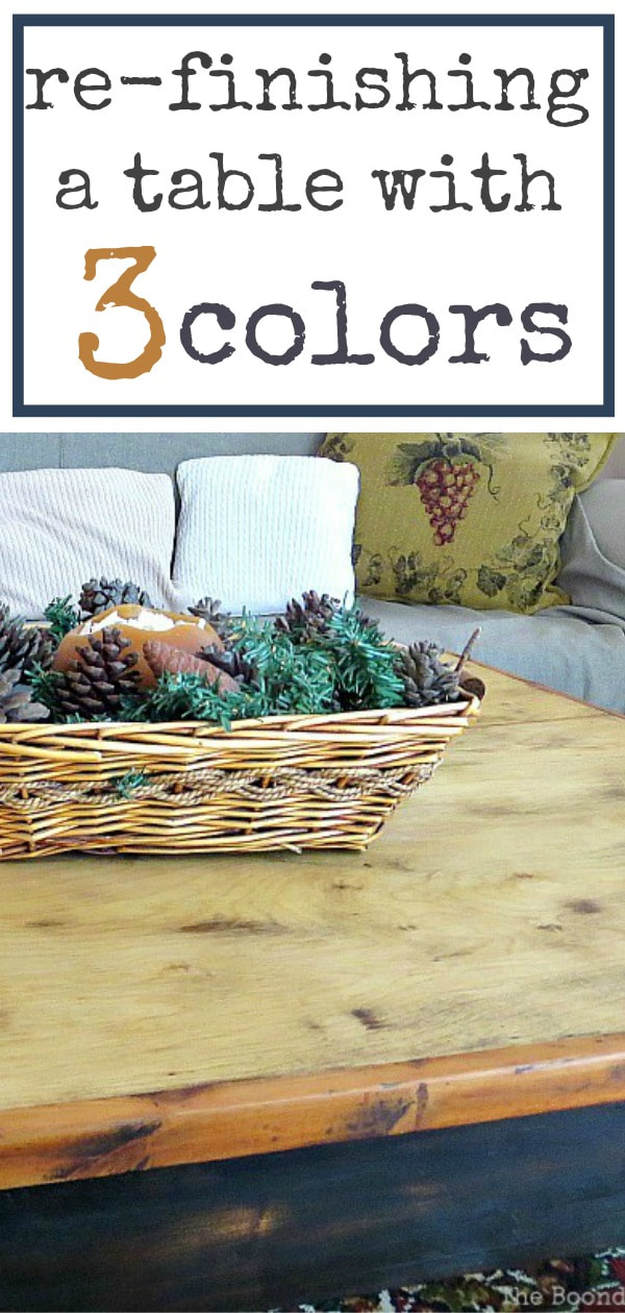
If you like what you see, share it with your friends, or save it on Pinterest. Above is a Pinterest worthy image!
If you really like what you see subscribe to my blog and get my adventures twice a week in your mailbox. The form is on the sidebar and your e-mail will never be shared with a third party.
We love it when we get your comments and will reply to each and every one of them.
The table turned out looking great. I tend to like more natural wood and a mix of blond and dark. You sure were able to bring it new life! I never would have thought to use chalk board paint (I have never used it). I noticed that you have used this kind of paint several times. I will have to try it.
Krista, thanks for the compliment. I wanted to unearth whatever was hiding under all those layers of orange. The black chalkboard paint is very easy to use and it is so smooth to the touch. You should definitely give it a try.
How beautiful and rustic Mary! I think it looks quite unique with the dark legs and the blonde top! You did a great job transforming it and it sure looks fantastic! I can’t believe it’s 70 years old!
Yes Katrin, that old, my husband had it in his family so he should know. I am so happy I was able to give it a new life. It was all full of cracks before.
Mary, this may be one of my most favorite of all your projects! I love how the different colors all work so well together. That’s something that I wouldn’t have planned to do either, so its always such a nice surprise when those ‘accidents’ work out so well. And 2 weeks for the varnish to dry! Wow, I might expect that in my humid Southeast, but not where you are. Wonder why it took so long.
Hugs and Kisses and enjoy your Monday!
Lynn
Lynn I didn’t even realize they were different till I applied the varnish. It was only then that the colors showed through. As for the drying time, In the winter it is very humid here because we are in a plain near the bay. And it also kept on raining whever it felt like it. 😉 xoxo
What a great idea! It turned out very beautiful. Thanks for linking to #overthemoon!
Thank you Marilyn, now it can proudly sit in my living room without giving me a headache.
The table looks really nice! Thanks for sharing!
Thanks for the compliment, I am so relieved it is finally finished..I actually had it done in time for Christmas and it made such a difference to the room.
Mary, this turned out beautiful. I love how it looks!
Thank you Carol, my eye sore is no more and now it is calm and soothing in my living room.
Wow! What a great transformation, I love the look of the blonde with the black. Rustic chic! Congrats on the “grown up” table lol xoKathleen
Yes Kathleen that is exaclty what it has become. All the scratches are gone. It’s as if it got a facelift. lol
Mary, ooh, I love the look you accidentally gave this table!!! The blonde, red and black just go happily together!! I love how that beautiful wood grain shows through!! Such a beautiful makeover!! 🙂
Keri I ended up with a few surprises not only did I get three colors but the grain showed up that I never knew existed before. I guess a good makeover once in a while can be freeing.
It’s interesting and certainly unique. Very happy accident. 🙂
And a big improvement over the orange eyesore. Thanks for your visit.
Love the result, Mary! Great job, as always…👍🏽
Thanks Anne, now that the kids are grown I’ll be able to enjoy it a bit more instead of worrying about the abuse it might take.
Mary, this looks so lovely! I love the way the natural elements come through and have all absorbed the stain in their own way. It really makes for a unique and truly beautiful piece. Great work! Enjoy it!!
Thanks Kim you hit the nail on the head, each wood type absorbed it in its own way. Exavtly what I was thinking but it wouldn’t come out.
I love the new look of the coffee table. Isn’t it funny how we thought the “orange” look was so cool back in the day. It is great you updated the table as it looks very well made and a classic style.
Thanks Debra. I am so happy with the outcome. The newe color looks like and feels like butter. And no more of that dated orange. I guess it must be human nature for us to get tired of a color after a while.
so beautiful! I wish some of the furniture we redid had such a lovely surprise under the paint and varnish! I agree, a very happy and wonderful accident!
I have to admit Millie, this is the first time this has happened to me. Maybe they built things differently 70 years ago. Haha!!
Mary, I am loving your accidents! LOL You may have to change the name of the blog! It looks really great in your home, lighter, brighter and it fits right in!!!
Nikki that’s exactly what I was thinking, it looks brighter and bigger because of the lighter color. I am so happy I was able to finish it for Christmas dispite the damp weather. As for the blog name change… were is that to-do list?? lol
You’ve done it again, Mary! Your happy accidents are fantastic. I love the new look of the table. It is much improved over the old color. And the contrast in the wood and paint choices make it a real statement piece. Well done!
I have to agree with you Kathryn. It is a big improvement from the eye sore that it had become. It even looks bigger now.
The table looks wonderful! I love that you made it three different colors! I love creative furniture projects like this! I’m pinning it to my Fabulous furniture board! 🙂
T’onna, sometimes these thigs seem to have a life of their own and they steer you in the direction that they want you to go. I did not have this in mind when I first started out. But I’m glad it took me there.
Mary-this is so fun! I love how you are always repurposing things, and how the same table can feel completely different and new. The black + wood look is so appealing too. Great job! -Nicki
Hi Nicki, so glad to hear from you. This one was long overdue for an update. The wood was so dried out it was cracking in places.
Wow, it looks fab! My coffee table is desperate for a makeover. It’s all just pine though, so I won’t get any happy accidents. Wanna swap? Lol
Stella,it may be all pine but if you redo it you may end up with some fancy grain patterns like I did…I wasn’t expecting that either. In general I have no expectations, I just push forward blindly when it comes to my projects. Hahaha.
Ooh Mary, this looks lovely! It is so satisfying stripping wood back to its raw state, isn’t it? I am so pleased you kept it looking natural, the grain is beautiful, and the contrasting legs look great. Good size too – I wish we had room for a decent coffee table in our living room, but this one would literally take up the entire floor space! (Cottages have their downsides!)
Anna, this one practically takes up the whole room. My home is also on the small side. But now it opens the room up and it looks bigger than before when the table was that nasty orange! You never know what will fit or how it will look unless you experiment.
I like the contrast between the black base and the light wood. This pieces that seem to have a mind of their own and offer pleasant surprises are the best, aren’t they!
Marie, I learned to love the black from your gorgeous pieces. And this black chalkboard paint is so smooth and shiny. How could I resist!
Wow Mary, you did a beautiful job refinishing the table. I love all three colors of it! What a difference. I hope all is well with you. Enjoy the week.
Julie xo
Thanks Julie. I am happy with my surprise as well, it’s a great compliment to the living room, as I’m trying to bring it to the 21st centrury and get rid of the 90’s effects.
I love how this turned out, Mary! Such a great idea to cut the legs down for a coffee table…and I love the way the top turned out. A wonderful transformation! Thanks so much for stopping by my vintage valentine post, and for leaving such a kind comment!
I agree Linda, the legs needed to be cut down so that it could be functional because it was a square shape and did not really fit anywhere else in the house.
Whoa, you sure know how to revive wood. I love & appreciate the natural look. Thanks for leaving a comment on my post about the bottle fish. I didn’t make those. Found them hanging in a restaurant and have no need for them just thought it was a clever idea. So glad you left a msg because that led me to your blog, because I don’t always have a way to acquire an email address to say thanks. Will be back.
I understood Joy, but the fish are very unusual! I also like to walk around and photograph all the unique things in the world and share them, because we all live in different areas and all have a unique point of view. Thanks for dropping by and leaving a message.
Mary – this table looks fabulous. You did an amazing job saving this beautiful piece of furniture! Love it!
Thank you so much Ilka! I really wanted to save it because it was old and solid. I’m glad I was able to give it a new life!
Mary, I love how the table turned out!!! I was a little nervous when I stared reading that you were going to paint it. I’m not like some people (you know, the painted wood police) but I agree that the grain is unique so I’m happy you decided to stain the top. “Natural habitat”–haha!
He he, you were afraid that I was going to paint it? Well I wanted to, till I saw that blond wood which I was not expecting and then I had to switch gears! I’m sure the painted wood police will forgive me for the legs! 😉
Your table looks fantastic:-) Great job:-)
Thank you Anita, anything would have been better than that orange mess.
You did a loooot of work Mary! And it sure was worthy it! I
And in the damp rainy December weather! It’s a wonder I ever got it finished. Thanks Zografia!
Hi Mary! Popping over from Brag About It to thank you for taking the time to link up your posts with us! I hope you have a fantastic week!
~Laurie
Thank you Laurie. Thank yo ufor always taking the time to visit. Have a great weekend.
This is beautiful, Mary! Way better than that orange stain! I love the tri-color effect with the legs. It looks perfect in your home!
Thanks Celeste, I really didn’t want to get rid of it, it may be old but it’s very solid, all wood and nice grain which I didn’t know was there. I knew I’d have to do something to save t from its’ orange self! lol
Wow! What a difference this makes! The table itself had great bones, but the color was too much for your room, too heavy, and too orange! LOL I love the way the texture shows through now, and the rusticness. Painting the legs dark really helps to ground it in the room without looking bulky! I really love this. Your mistakes are wonderful! I think it’s more than luck though! xx
Nikki, you say the sweetest things! I actually have that wall unit which has a black metal framework so I was trying to tie the table in with it by using the black. For an old thing it sure is sturdy! I’m glad I was able to salvage it.
Those contrasting colors are GORGEOUS! Man, I wish you and I could go shop thrift stores together and… redo my entire house… ;P
Always so inspired by you!
Sarah Eliza I am so happy with it. And I wish I could go thrift shopping to but those things don’t exist where I live. Just wait till I come stateside!!
Beautiful work! Thanks for sharing with the Thursday Blog Hop!
Thank you Pam for your kind words! So glad you liked my project.
I love the new look Mary! Repurposing is so very rewarding! I found you via Five Star Frou Frou Friday. Have a lovely weekend 🙂
JES @ Strangers & Pilgrims on Earth
Thank you Jes. it is such a calm look after the soreness of the orange. The blond has a buttery feel to it also which I’m really loving.
What a lovely accident. It is a wonderful update.
Horray for accidents. I should definitely attempt more of them.
This is gorgeous! Really great job!! Thanks for linking up to my craft party on Thursdays! I always pin every instructional post!
Thank you Denise. I am so happy with how it turned out. I’ll have it for another 70 years! Thanks for the pin!
This turned out beautifully, Mary. I love that the wood pattern shows through. The contrasting colors gives it such a pretty look. Pinned and Tweeted. Thanks for partying with us!
Beverly, you would not believe how it had started out, all brown and caked with dirt. The orange phase was it’s second life, now I’ve given it a third!
The table looks great Mary. It looks like a lot of hard work and effort went into to. It’s nice to give old things a new lease of life. Enjoy your new coffee table.
Sally @ Life Loving
#LifeLovingLinkie
Sally that’s exactly what I intend to do. Because it was an old but solid piece I really wanted to revivie it and keep it.
What a fantastic transformation! The table is beautiful. Thanks for sharing your techniques with us at Merry Monday.
Sherry, I hope when you come across a sorry sack of a table you ‘ll remember this mess and save it as well.
What a gorgeous transformation, Mary ~ happy accidents are the best! Thanks for sharing @Vintage Charm!
Thanks Cecilia. I am so proud of this one, it gets to sit in my living room and smile at me.
Beautiful!!! I love seeing rustic DIY projects!
Thanks so much for joining us again on The Alder Collective! Pinning, and we hope to see you again this week!
Thank you Kaya, I hope you enjoyed the post!
Πολύ ωραία η μεταμόρφωση του τραπεζιού και αυτή η τριχρωμία!! Τελικά αυτά τα ‘ατυχήματα’ δίνουν καταπληκτικά αποτελέσματα!!
Έτσι Ελεανα! Να εχουμε πιο πολλά ατυχήματα!
I love this to bits Mary! Thankyou for sharing at Five Star Frou-Frou. Mimi xxx
Thanks Mimi, I am so happy with it now, it is not an embarassment in the living room.
Don’t you just love a happy accident? This is unrecognisable from the sad scratched original. Great job!
The color before was weighing the whole room down. Now it is bright and glowing!
Aren’t accidental little surprises the best Mary! Love how your table turned out! Has a beautiful rustic feel to it!
Thank you so much for sharing your project with us over at Waste Not Wednesday! Always so lovely to see what you have been up to 🙂
That blond wood color has really grown on my Sam and it brings a warmth to the room.
I LOVE how this turned out! I’ve never tried a colorless varnish before…one more to add to my “gotta try it” list. Thanks for sharing:)
Sara I was really suprised when I saw that wood underneath all that cherry varnish. I’m really glad I did this. It adds such warmth to the room.
I realy love it. We have a beat up coffee table in the studio and it needs some saving. my oldest son left the hot boxed pizzas on top of it the first week we owned it. It has gotten uglier and more beat up now for 13 years! lol
You table is wonderful. I need to up my skills to your level.
Pam
Pam, it wasn’t that hard. I just did it at the wrong time of the year when there was way too much humidity. I think the most important thing is to be patient. Good luck with your table and we want to see it.
I really believe that accidents are not that. In fact, it seems that is a major force that ruins our plans to achieve a better result than what we had initially planned. I like how it looks very much.
Pili one year later and I love it even more now. It is such a buttery soft color and has a smooth feel to it. I wish I would have done it years ago.
The blonde wood is perfect Mary – I love the make over
Imagine my surprise when I saw this showing up!
Nice project! I love how different wood can look once it’s been stripped.
I agree Stephanie. I was pleasantly surprised to find this blond beauty underneath.
I love your table! Omgosh, the varying colors add dimension and grandeur to it. Thanks for sharing your makeover with us at Merry Monday!
Thank you Marie for your sweet words. I am so proud of this little table, I only regret not doing it sooner.
What a statement piece! It’s truly beautiful and gotta appreciate those happy accidents, for sure 🙂
Happy accidents are always the best!
Hi Mary: I really like the blonde woodwork on the coffee table. Its really great that you are able to preserve and use items from your family.
I am always looking back to see what I can salvage. The old table is so solid Leanna. My kids used to jump on it years ago when they were smaller. It has survived a lot.
Hi Mary,
I meant to tell you last week (I found this post through To Grandma’s House We Go link party) that I LOVE how your table turned out. Love love love it! Love it so much I couldn’t get it out of my head a week later so I had to come back for another look. The blonde and the black look so good together 🙂
Hi Kate,
My living room has a wall unit on one end that is made of black metal with orangy shelves. So the black is something I really wanted but the other two colors were such a happy surprise. Also the varnish really shows off the wood grain. So glad you like it. I am really happy with how it turned out.
This table is beautiful. Thanks for sharing it with us at Family Joy Blog Link Up Party this week. So glad you joined us.
Mary,
Do you ever sleep? 🙂 I like the black legs contrasting with the wood-toned top of your updated coffee table.
Judith
Judith you made me laugh. Of course I never sleep! 😉
This turned out great, I love how weathered it looks even though it’s brand new. Great work!
Thanks Holly. It’s actually got to be at least 40 years old. But we managed to give it a new life.
I love it when refinishing projects take their own turn resulting in a total unexpected finished product, it makes the process so exciting. Wonderful project, thanks for sharing it at Fridays Furniture Fix Mary!
Brenda I was so delighted with the way this one turned out. Did not expect to see that blond wood at all!
Your table is perfect Mary, I know what you mean about that orange. I am working on a project that went that colour so I had to restrip it and start over. I think the choices you made for your table are spot on, I love reading about how your project develope.
Your “accident” turned out beautifully! I love it! Thank you for sharing at Celebrate it!
The table is beautiful! I love the different colors. Kids are so tough on furniture & floors. Thanks for sharing at Merry Monday
Hi Mary, I love the rough and ready look about your table. The different colours work well and I like that the natural grain is visible adding interest to a very nice table. Now it just needs some coffee mug rings!… Or is it just my lot who seem to avoid using coasters?
xx