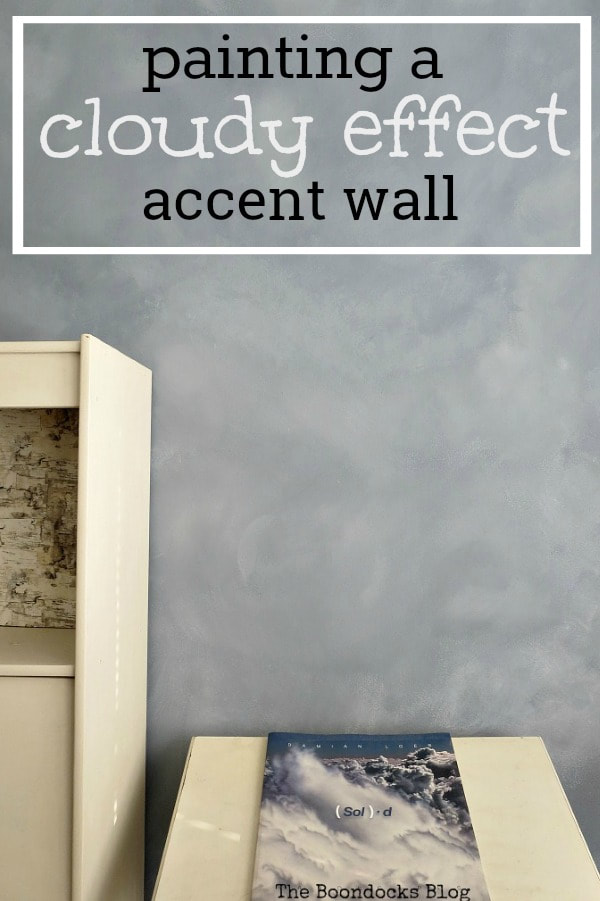
How to Make an Awesome Cloudy Effect Accent Wall
Learn how to paint clouds with a sponge, paint brushes and milk paint. Create a unique accent wall with this cloudy effect.

Make some awesome paint effects on your walls by learning how to paint clouds with a sponge, paint brushes and milk paint. With the cooler weather kicking in I have been neglecting my blogging duties and painting an accent wall instead!
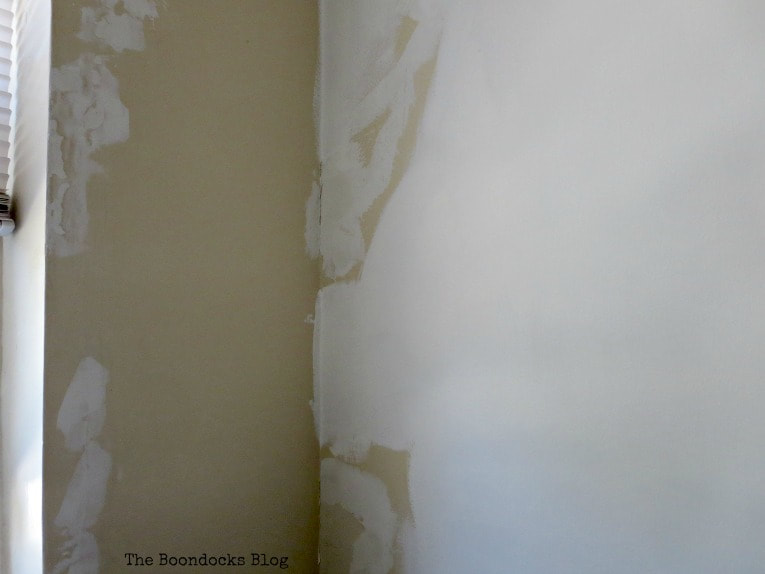
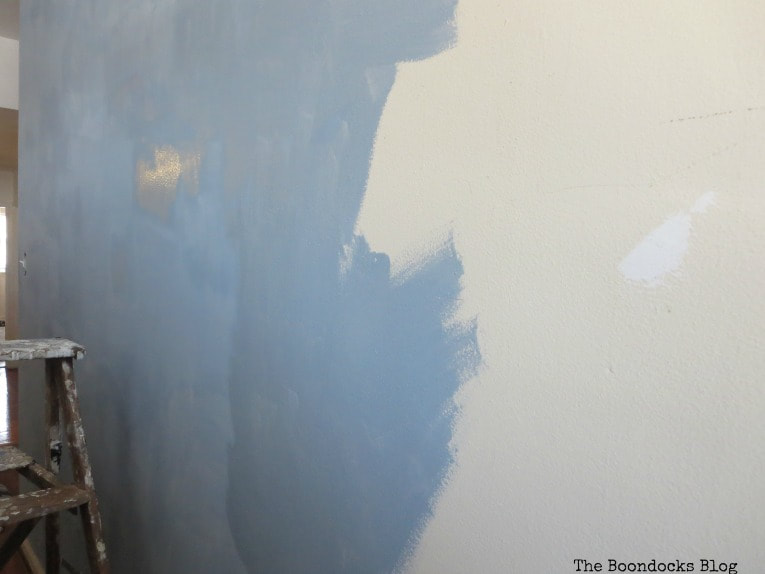
Yes, I’ve been painting the rest of the house. It really needed it as you can see from that wall below. Today I have a special project for you. I am going to show you how to paint clouds with a sponge and make your accent wall look awesome!
I know the word “awesome” is overused but in this case I think it is a perfect description for my living room wall.
Disclosure: I was compensated for doing this post with product. However, all the opinions stated here are my own. I only use products I love and would recommend to my viewers.
I have a rectangular living room that is opened on one side. This is the one that faces the sofa. I was going to paint the whole thing white but then I saw this post from Pat of The Wood Spa and was seriously smitten! She also has a video showing us how to make this masterpiece.
I was so inspired I started right away without a moments hesitation. But the kicker here is that instead of using regular paint I used Old Fashioned Milk Paint, the Safepaint version which is specifically designed for walls. I honestly had no idea what would happen but I was feeling adventurous! Going out of my comfort zone here folks!
Disclosure: This post contains affiliate links for your shopping convenience. If you purchase any of these products through the links, we receive a small commission at no extra charge to you. You can find our full disclosure here.
Materials Used to Paint A Cloudy Accent Wall
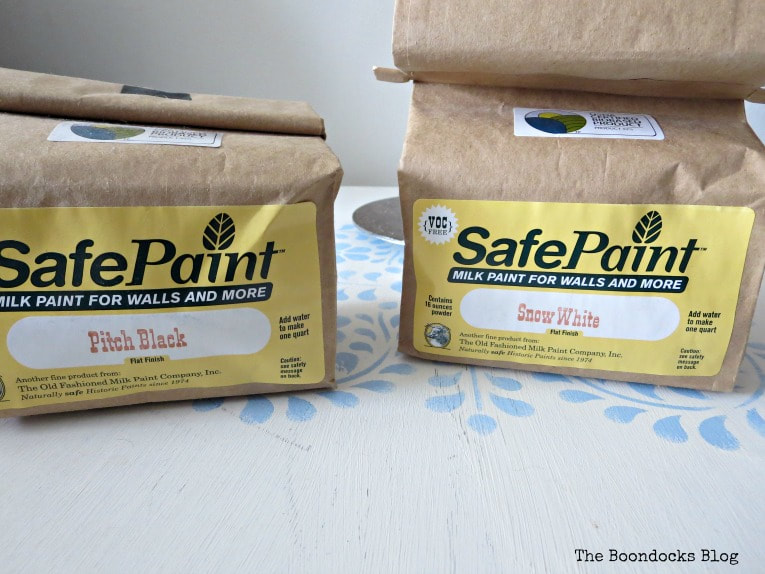
- Old Fashioned Milk Paint Safepaint Version in Slate
- Old Fashioned Milk Paint Safepaint Version in Snow White
- Old Fashioned Milk Paint Safepaint Version in Pitch Black
- Three brushes for painting
- One brush for feathering
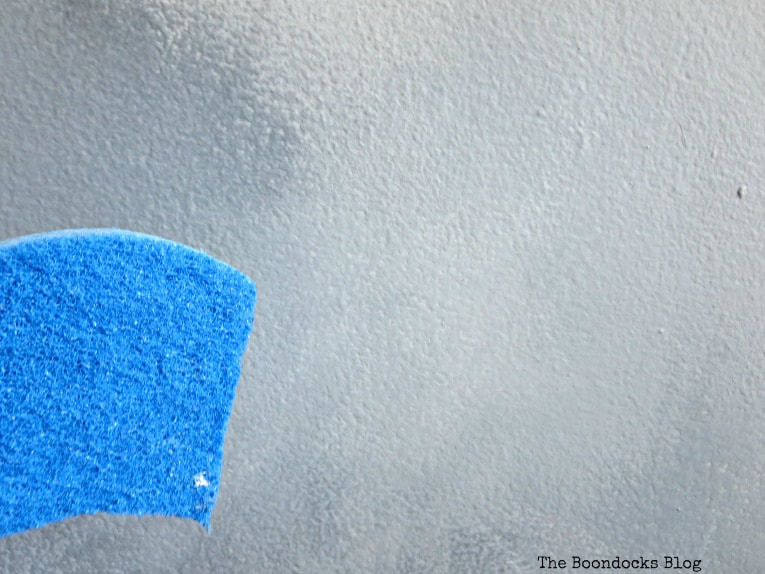
- Sponge
- Lots of plastic containers
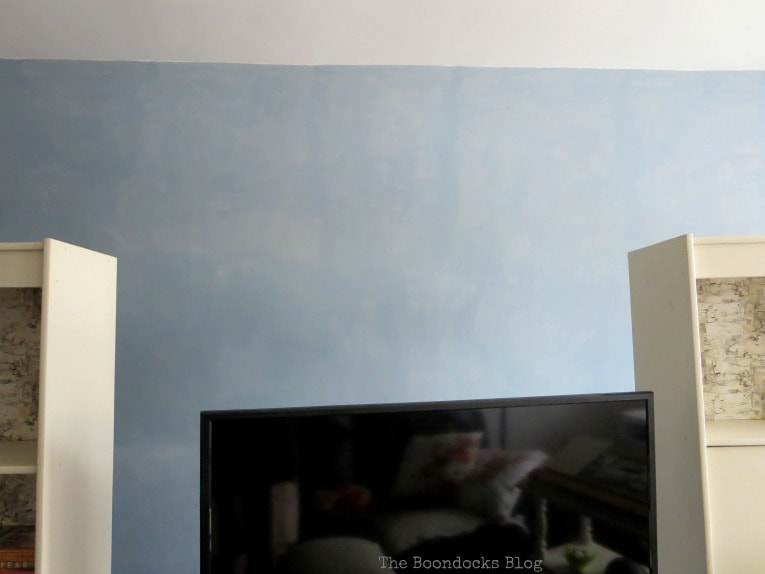
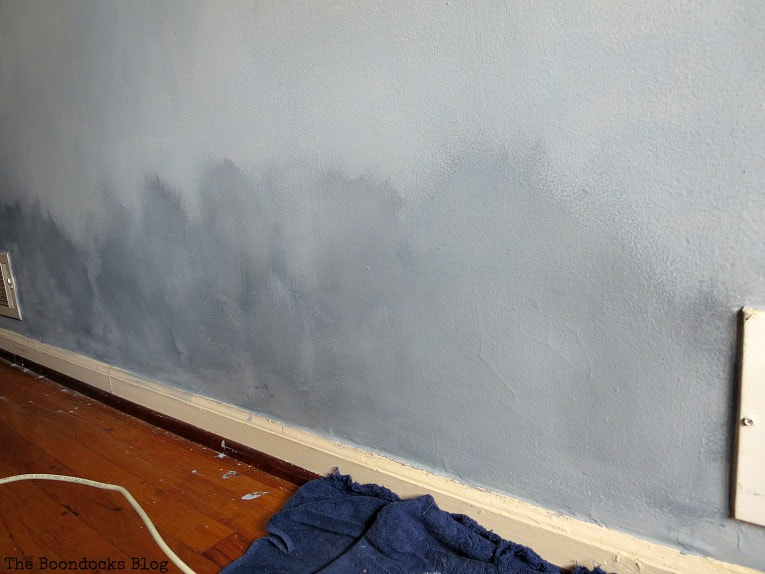
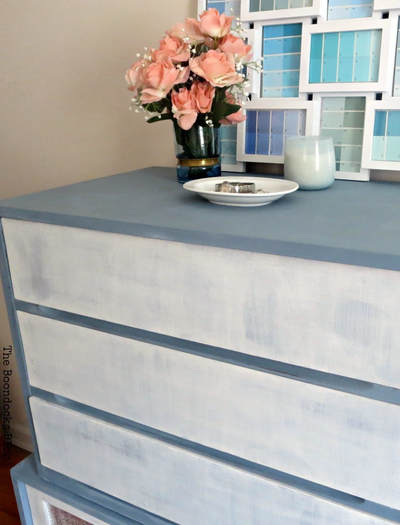
Below you can see the first coat. It looked good but there was not enough coverage which I expected. The color you see is Old Fashioned Milk Paint in Slate. I’ve also used this color when I painted the top of my vintage TV cabinet.
How-To Paint Clouds with a Sponge
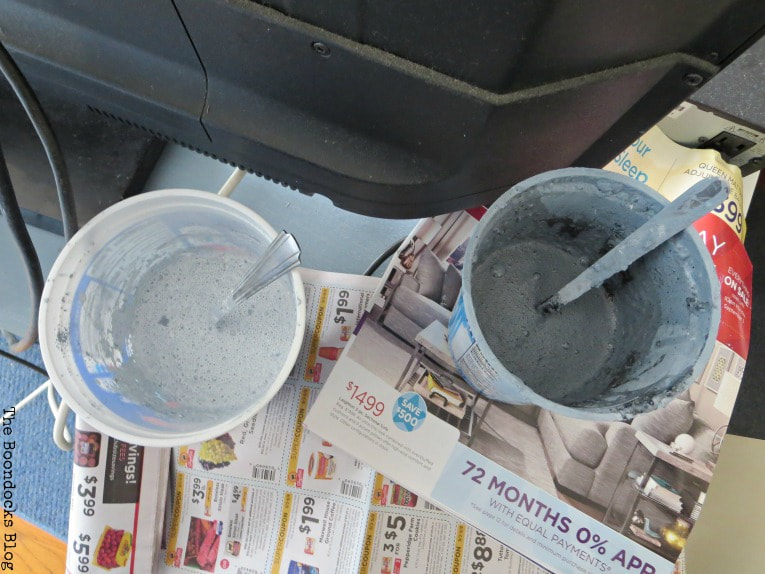
Milk Paint comes in powder form and is mixed in with equal parts water. I usually mix it in jars and shake it well but you can also use a paint mixer. Once that is done you have to let it rest for about 15 minutes until the paint becomes frothy.
Mix only as much as you think you will need otherwise it will go bad after a few days. I usually keep it in the fridge where it lasts for a week. The powder form can be stored in a jar in a cool dry place indefinitely.
Once I had finished with the first coat it was time to start adding the cloudy effect that I love so much. In order to achieve this I had to mix up two batches of blue.
The darker was achieved by adding a bit of pitch black to the original slate color, and the lighter by adding the snow white color to the original slate. Here are my yogurt containers with two different shades of the blue.
At this point I panicked (being truthful here folks) and consulted with one of my blogger friends Thea of That Sweet Tea Life, who has also done a similar wall with a beautiful cloudy effect.
Then it was back to work! I mentally divided the wall into horizontal sections of four. Within each section I would paint a swatch of the darker color about two feet in height and length. This is the darker shade.
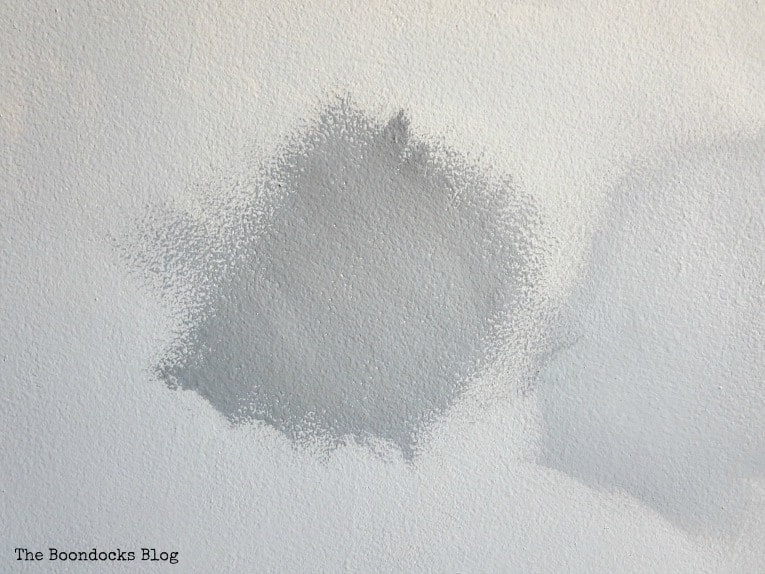
Then I’d add a bit of the lighter color on top.
Using a dry brush, I went over the area smoothing out the paint so it blended in.
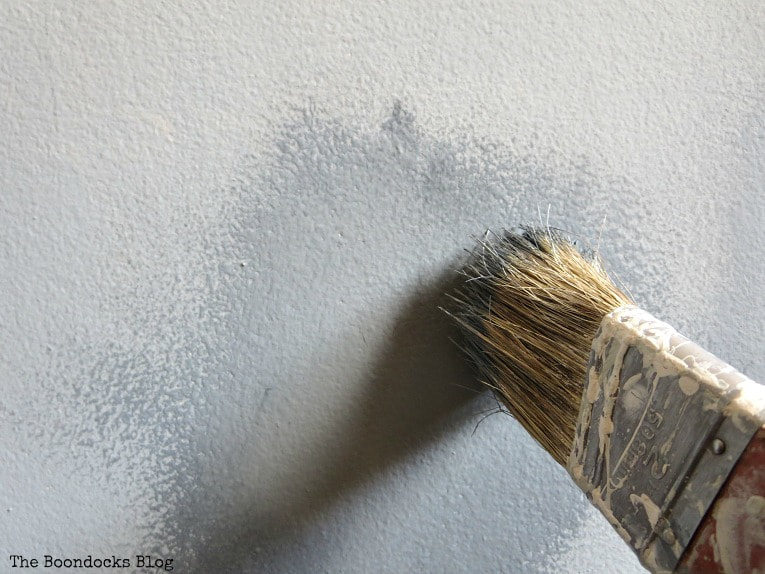
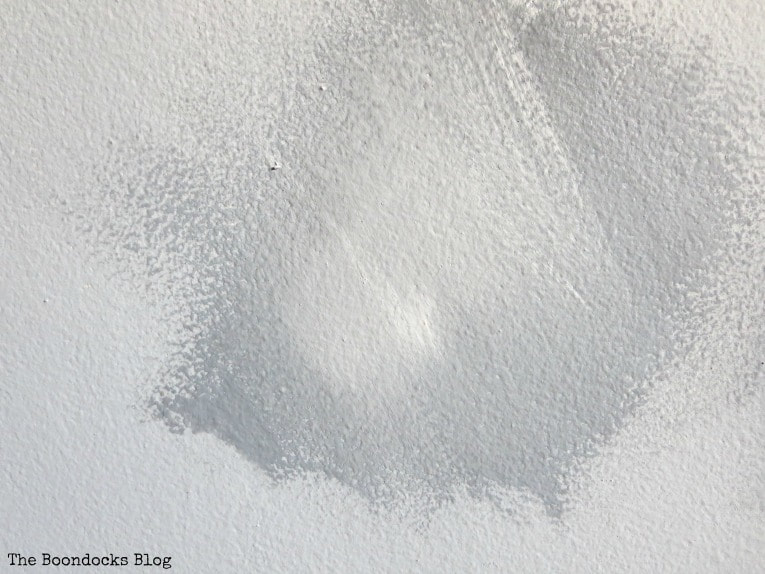
This is very fast work that’s why you have to work in sections. If the paint dries then go back over it with a slightly wet sponge that will help to blend in the two colors.
Here is how mine looked on one section.
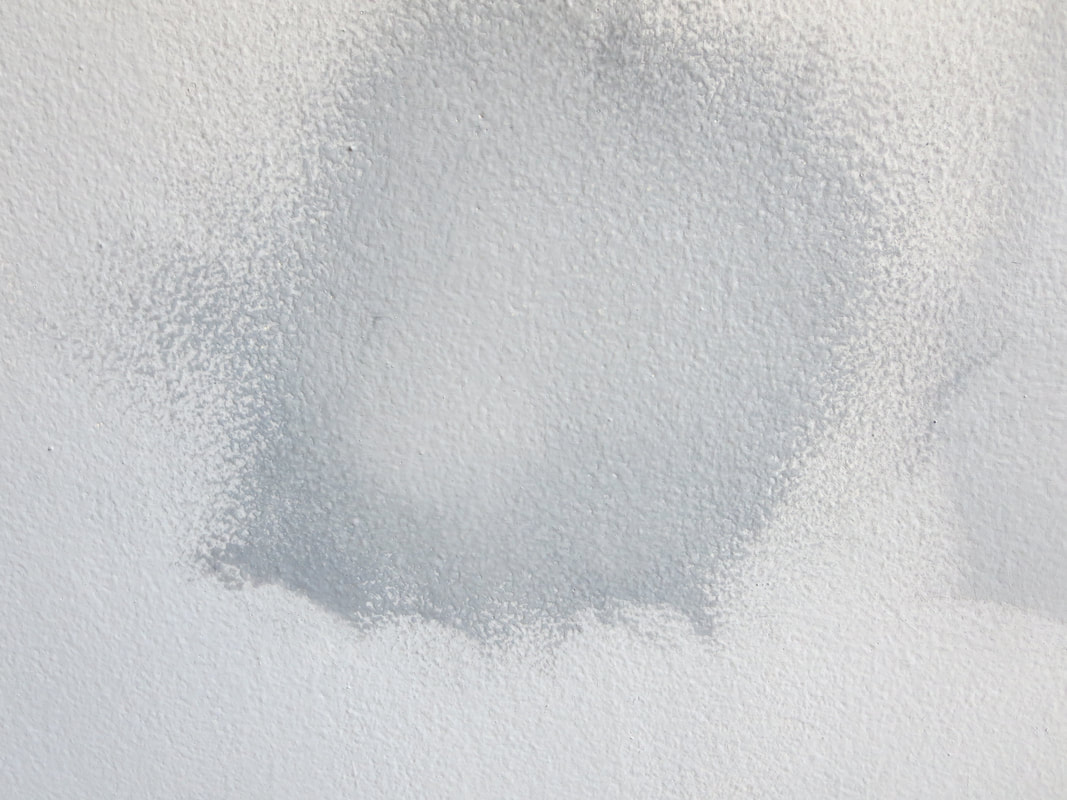
And so it went as I worked my way across the wall and eventually up. Once I got to the top I realized that it was too dark and moody.
So I mixed another color that was between the light and dark and used that as the base coat and then applied the darker and lighter shades to create a variation.
Of course once I was done I had to go back for touch ups or to change some cloud shapes that did not look cloudy at all. After all, I didn’t want obscene shapes on our living room walls!
There is no science to this, just use your imagination and go with what looks right to you.
The whole thing took me two days to do. The first day for the base coat which I let dry overnight. Milk Paint dries very fast and is environmentally friendly with no odor! Yay!!
And the second day was for the actual cloud effect.
Just imagine me perched up on a ladder trying to juggle three containers of paint with three brushes in them and a dry brush on top of all of that! It was quite comical and frustrating at times. Even my dog was well behaved and stayed out of my way.
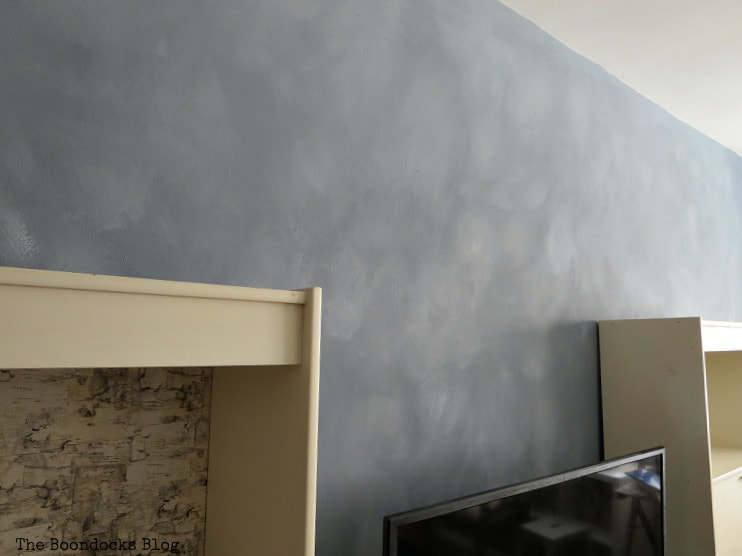
But even with all of that I am over the moon happy with how it turned out. The room now looks twice as big, which makes no sense at all to me considering that this is a dark color. But I am really loving the drama of this wall. The milk paint is a beautiful hue and is so easy to work with, it went on easily and covered very well. And if I made a few mistakes it was no problem to paint over them. The color is actually a bit more blue than what the photos show.
Oh and did I mention that it is awesome!? Did you see how easy it was to paint clouds with a sponge and milk paint?
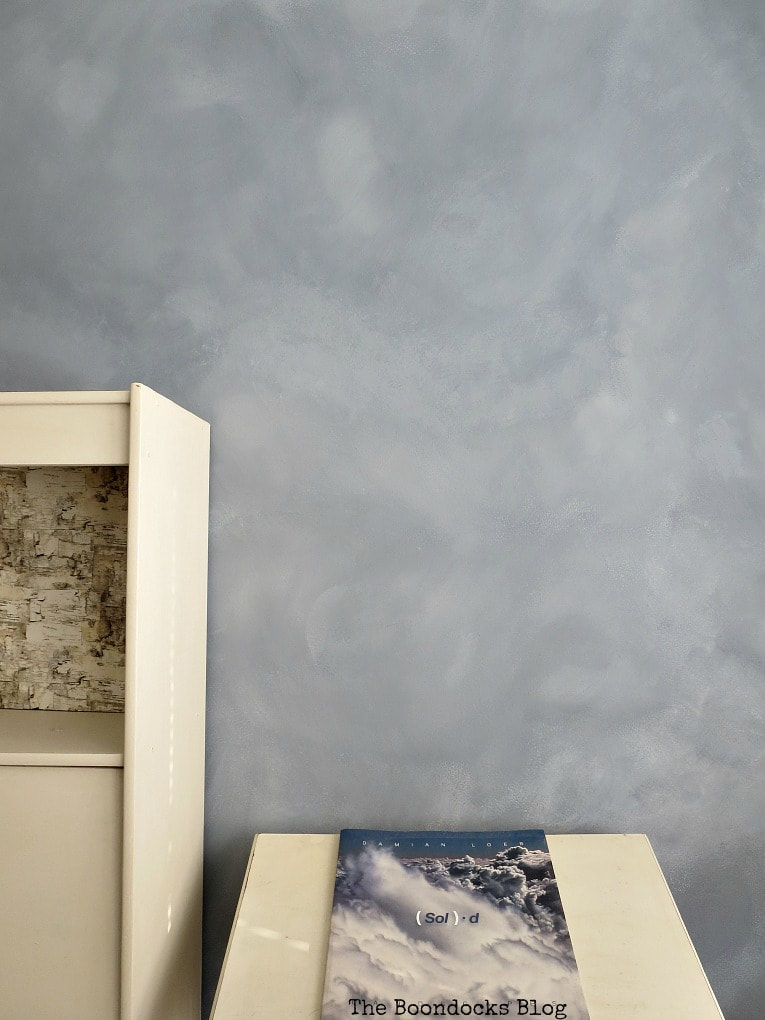
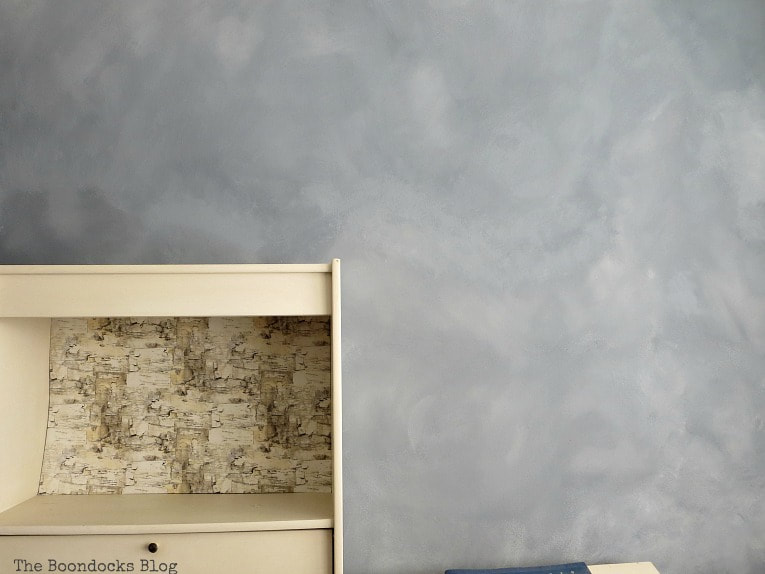
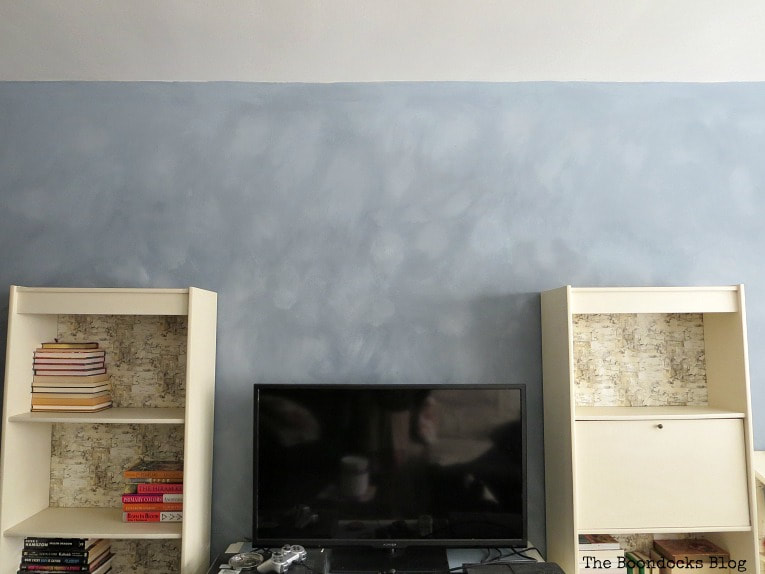
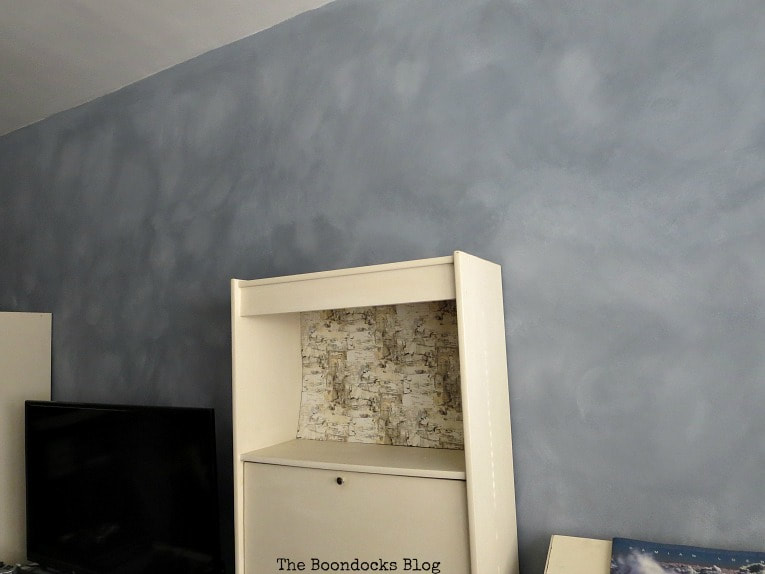
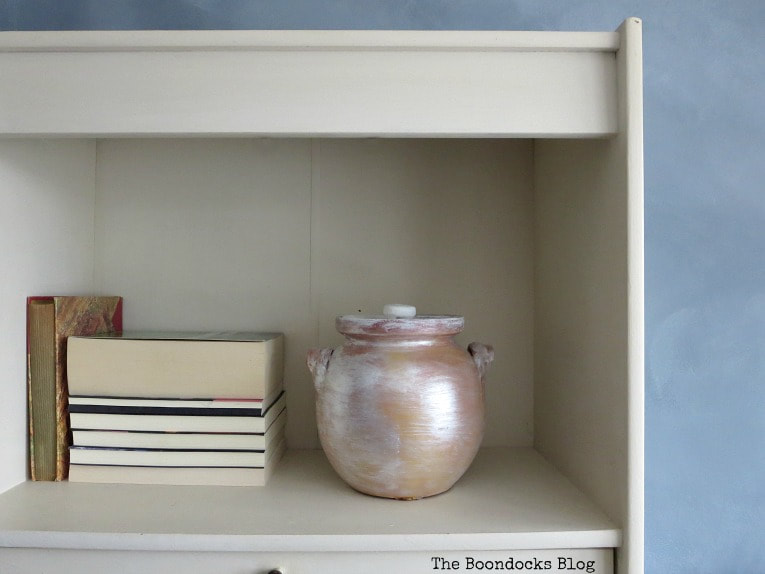
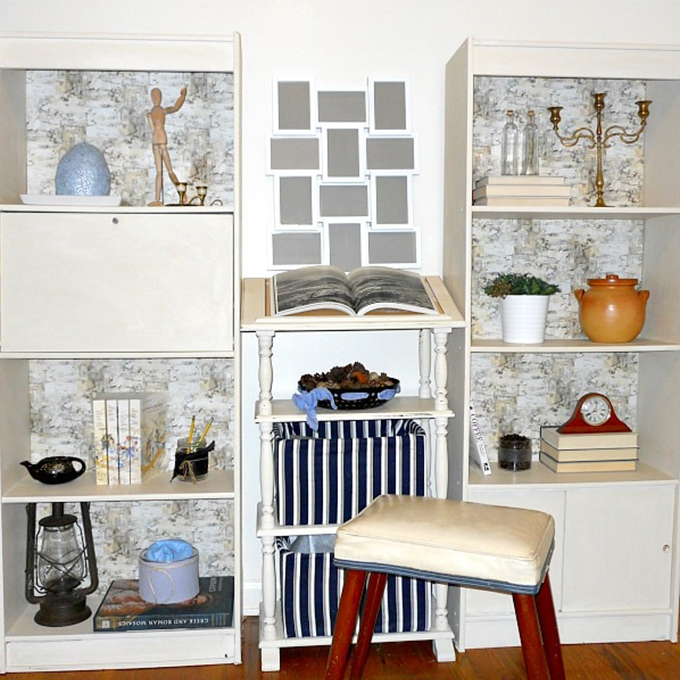
Now I need some help. I have these upcycled bookcases in front of the wall and my question to you is: should I leave the birch wrapping paper as a background?
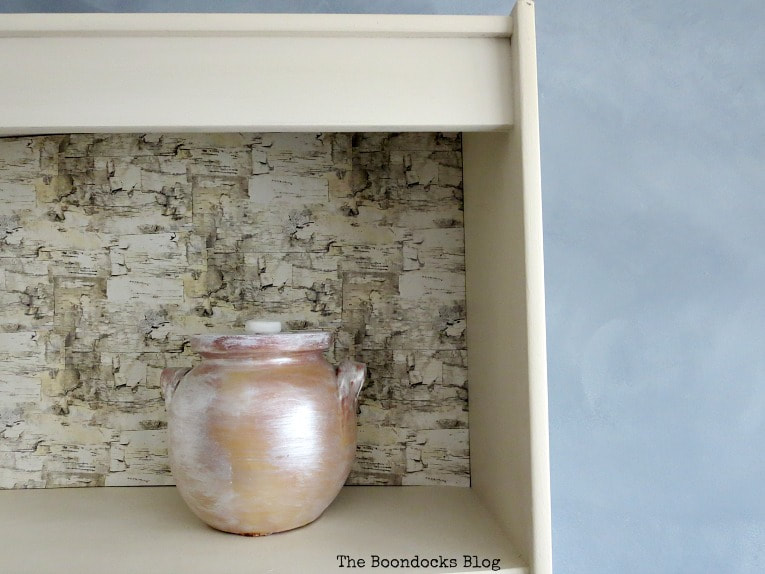
Or remove them for a cleaner look? Let me know in the comments below.
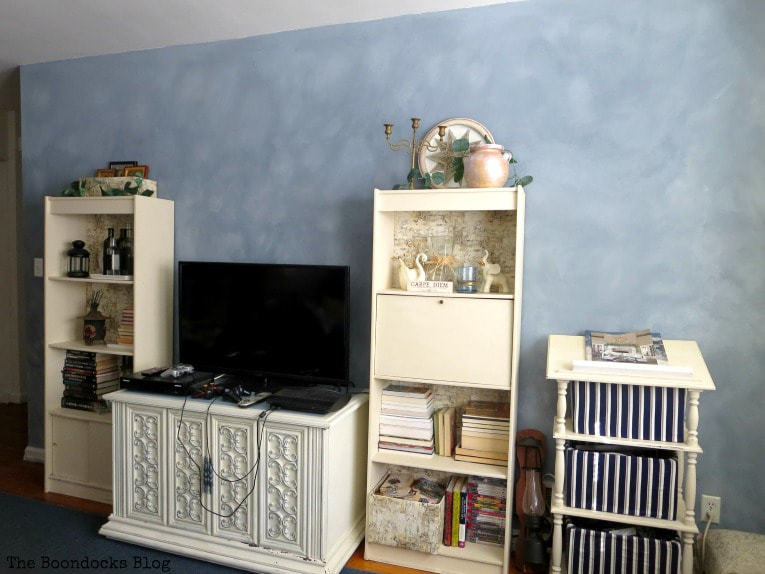
One last look with all the furniture in front!
It was a lot of work, in fact I am still sore as I type this, but so so worth it.
If you enjoyed this you might also like a peek at my girl’s ombre wall.
I think it is definitely worth going out of your comfort zone once in a while. I hope you enjoyed my tutorial on how to paint clouds with a sponge, milk paint and paint brushes. Would you ever try something like this?
And don’t forget to check out Old Fashioned Milk Paint, it will surely change your life and your ideas on how to paint.

More Ideas Using Milk Paint:

Awesome is just the perfect word really! That living room wall simply is awesome!
Thanks so much Marjan. I am so glad I did this, it really changes the look of the room.
You did it Mary!!! And it looks amazing. All those sore muscles and aches in places you didn’t even know you had are so worth. You’ll be enjoying your beautiful cloudy wall for many years
Michelle it was so worth having all those aches and pains. The room looks twice as large now and so fresh and so me!!!
The wall is beautiful. I love the final outcome. All of your hard work is well worth it.
Debra I had all this left over milk paint from another project and thought why not use that. I am so glad I did. It has such a deep look it it.
Beautiful! I love your foggy, cloudy wall. And that soft blue is perfect because it kept the room bright and airy. Great job Mary!
Pat I was really surprised after I finished it and sat down at just how big it looked. What a pleasant surprise!! Thanks for lighting the fuse in a good way!
That turned out totally AWESOME sweet lady! Love the shades. Hugs and blessings, Cindy
Thanks so much Cindy. I really needed to finish painting the house a whole year after moving here. It was about time!
I know how much work this was so kudos to you for sticking it out. I can understand why the room looks bigger even though this color is a bit darker than what was there before. Generally when a space is ‘fresher’ looking that’s what happens. I’m a bit confused by the first picture. You mentioned the wall on the right, but both walls look like they’ve been patched somehow. There’s an ad under the photo for damaged walls so I wasn’t sure if that’s what I was seeing but when I saw your watermark I knew it was your photo. Did you do just one wall?
(My vote is to remove the birch paper.)
Hope you’re enjoying the New York Autumn!
xxx
The room has three walls and one of them has windows. I was showing you the one with the windows in the first photo so you could get an idea of just how dark and drab the previous color was. I painted the sofa wall and window walls a white and just did the tv wall with the blue. Hope that clears it up.
And you know I’m reveling in this beautiful weather and the colors!
You did it and it is AWESOME! Love that you did it with milk paint too 🙂
It was a departure for me and I was initially hesitant to do it so dark but in fact it opened up the room so much, since the other walls are all white.
Love that cloud wall and think you should remove the paper in the bookcases…let the clouds have all the attention!
Mary, you made it! Cloudy sky, indeed!
I have seen the link you shared last week, ombre storm-like wall. You have achieved the same feeling. I really like the look, no need for extra decorations on the wall.
I Wonder if you could achieve the same look at bookshef back side, so it blends with the wall. All of your white decor on the shelves and books would pop out!
Mary, this is awesomely awesome. Painting can be a huge job, never mind trying something new. You go!
I vote to take the paper out.
Happy blogging!
Well, I love it! It really turned up interesting. I was quite suspicious when I read the title of the post without seeing any pictures and was quite amazed with the final look!
My new house was entirely repainted just before we bought it. It is a moody bluish gray, not unlike your new wall, with out the special effects of course. I don’t want to have to repaint, since the entire house is coordinated. I am not loving the color so far, but I am trying to get used to it. I think I need to live with it for awhile. I am finding that I like it better with gold accents and a lot of white in picture frames. We’ll see if I decide to learn to love it or repaint eventually.
This is pretty darn cool Mary and I have a wall or two that could use this. Thank you for sharing with us at Celebrate Your Story and have a great weekend.
Mary, This wall turned out great! I love it!
This looks gorgeous, Mary! I can’t believe it only took you two days to complete. It looks way more involved than that! I’m so curious about milk paint. You talk about it all the time, but I’ve never used it. Must put it on my to-try list!
Wow! This is just moody and dramatic and all kinds of fabulous!!!
I am really drawn to some moody accents around the house too! i like your idea of painting a wall and it looks great Mary. I’d remove the background birch paper I think.
I admired the end result on Instagram and I had to stop by and read all about it. Really amazing job Mary. I think the birch paper looks ok.
Thanks for sharing at To Grandma’s House We Go DIY, Crafts, Recipes and More Wednesday Link Party. I pinned this! Hope to have you join again next week!
Awesome job Mary! The cloudy technique looks really cool! I think I like the clean look best now with the new wall color.
Well, I think awesome is the perfect word and bears repeating. You have so much energy Mary, I don’t know how you do all that you do…but it looks great. Can’t wait to see what you come up with next!!
I think that looks lovely. Deep blues are receding colours, plus you have a 3 d depth called trompe l’oeil going on, hence the bigger appearance of the room.
I have 3 rooms done in this effect but with a different method. We have a medieval type thing going on so it’s more appropriate than flat wall paint. Hides the cracks a bit too.
Regards Cath
http://anaussieintheworld.blogspot.com.au
I like how you divided the wall into different sections based on shade to create depth. My husband and I have been talking about doing a unique accent wall in our downstairs family room. We’ll have to figure out what we want and get a professional to paint it for us.
You should try your hand at it Mindy. It may look intimidating but it wasn’t all that hard. Good luck and I know you will enjoy looking at that wall as much as I love mine.