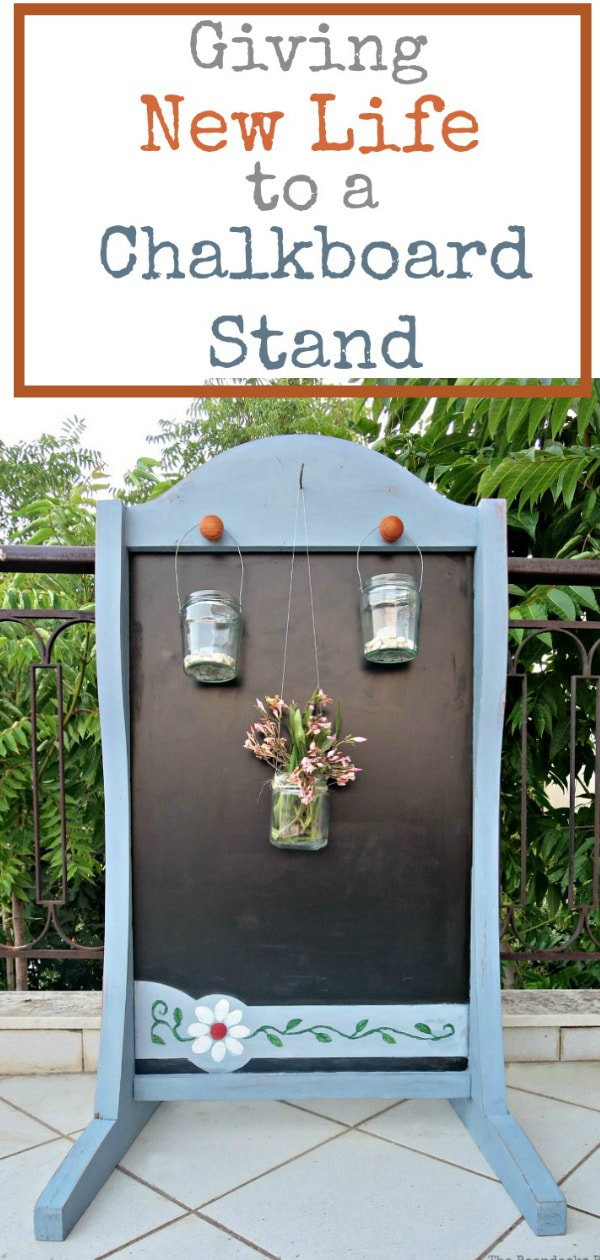
Upcycling a Vintage Chalkboard Stand
This vintage chalkboard got a new life with a bit of imagination and paint. The perfect farmhouse style addition to any indoor or outdoor space!
Summer is here and the time is right for fixing up our outdoor spaces. You all know where I’m gong with this. Yes, in between melting from the heat wave I’ve also been working on my balcony. The upcycling of this vintage chalkboard stand was the next project on the list!

Giving New Life to a Vintage Chalkboard Stand
I have a huge outdoor space that needed to be filled up. So far I’ve made my super easy pallet couch but I also wanted to add ambiance. Today I’m going to share with you how I upcycled it, added a bit of character and gave new life to a chalkboard stand.

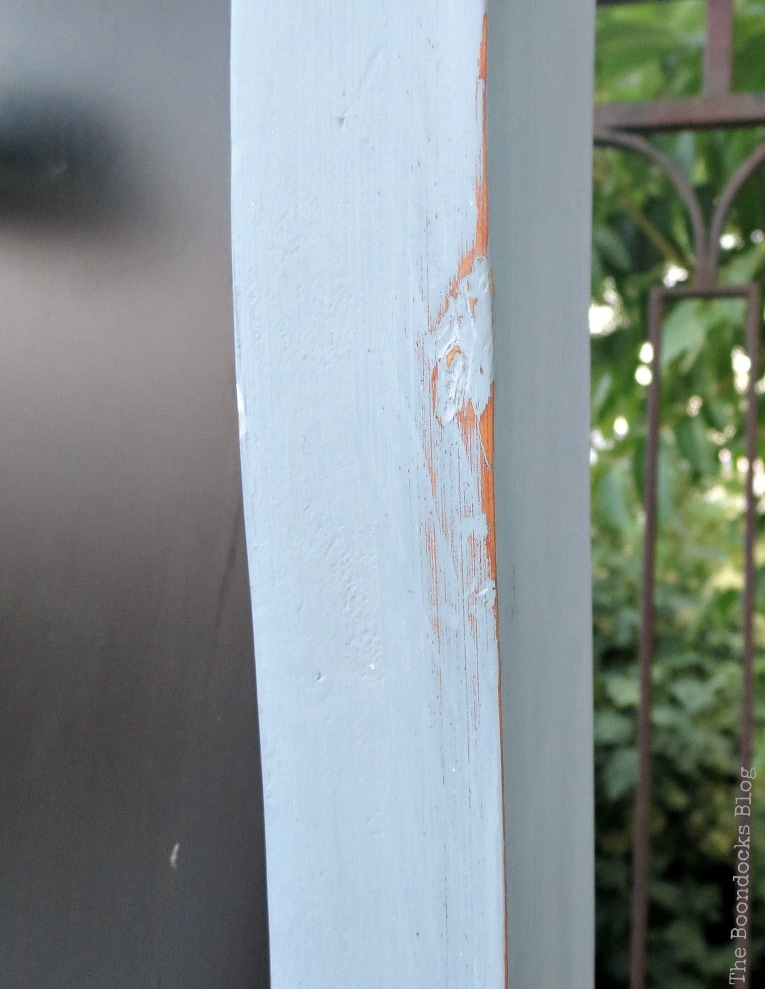
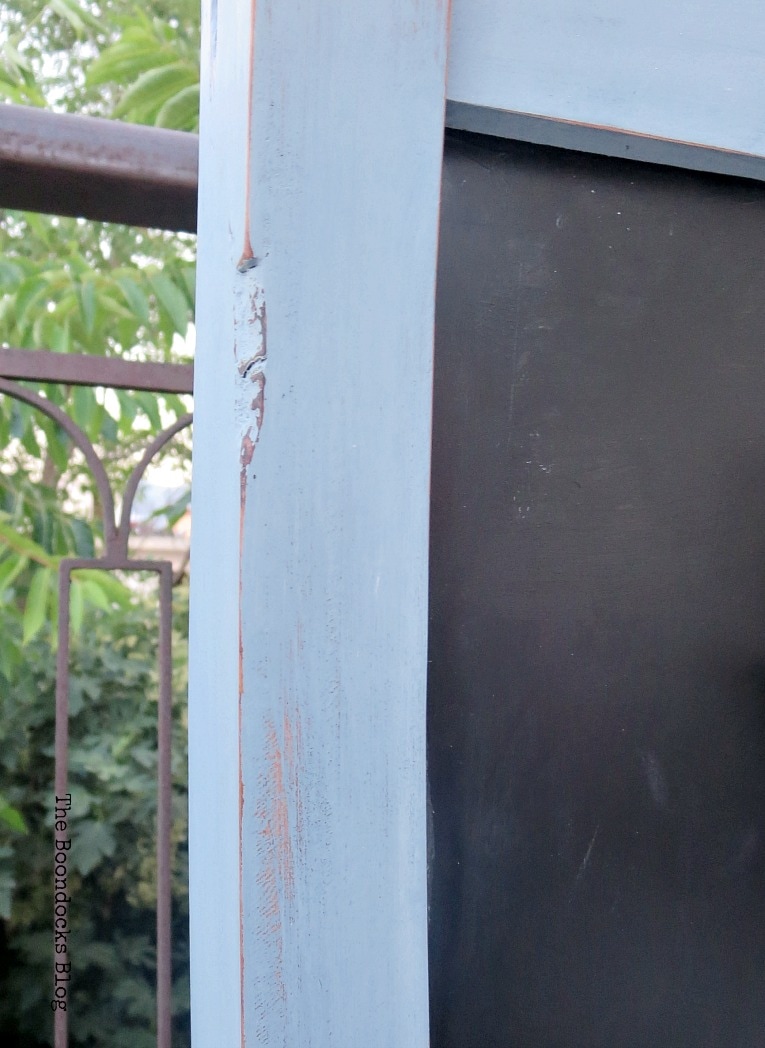
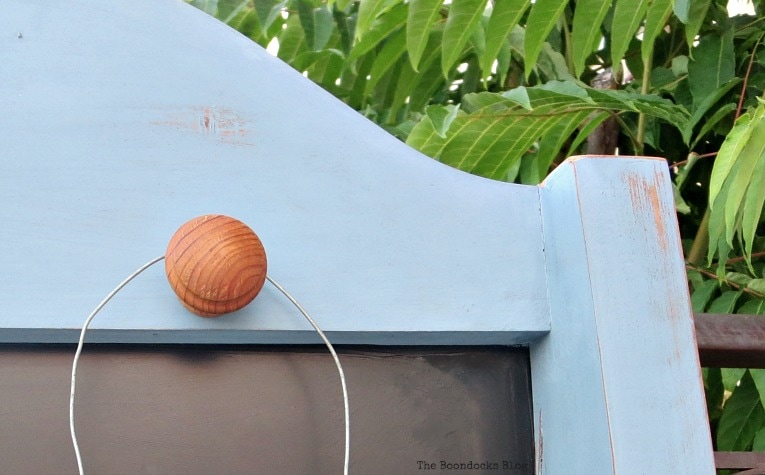
This wooden vintage chalkboard stand was in serious need of a makeover if it was going to make an appearance on my balcony. First of all, it had a sticker on the top that I removed. You can see the discoloration below. And secondly, it had that orange plastic piece that would not come out. It was an ad for an orange drink. Obviously something had to be done with it.
Oh and I should point out that this was another “gift” left behind by my former tenants instead of the rent. As you can see I let nothing go to waste. I had a few more gifts from them including the lattice from the colorful fence.
Materials Needed for this Chalk Board Stand Makeover:
Disclosure: This post contains affiliate links for your shopping convenience. If you purchase any of these products through the links, we receive a small commission at no extra charge to you. You can find our full disclosure here.
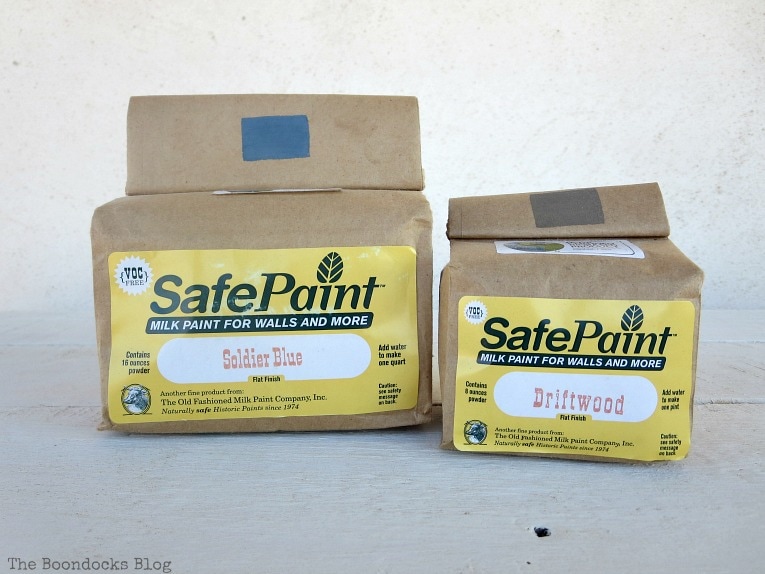
- Old Fashioned Milk Paint Soldier Blue
- Old Fashioned Milk Paint Driftwood
- Acrylic craft paint in white, green and red
- Daddy Van’s Lavender Bee’s Wax
- Sandpaper
- Blackboard paint
- Masking tape
- Paint brushes
- 2 knobs and 2 hooks (optional)
The How – To Upcycle a Vintage Chalkboard Stand:
The first step was to clean this dirty chalk board stand. I used a mixture of vinegar and water. I then taped off the wood from the blackboard portion.
Once it was dry I mixed my Old Fashioned Milk Paint. I always use the SafePaint version so as to not get a chippy look. To get a softer blue I mixed a little bit of the driftwood into the soldier blue. I ended up putting 3 coats of paint.
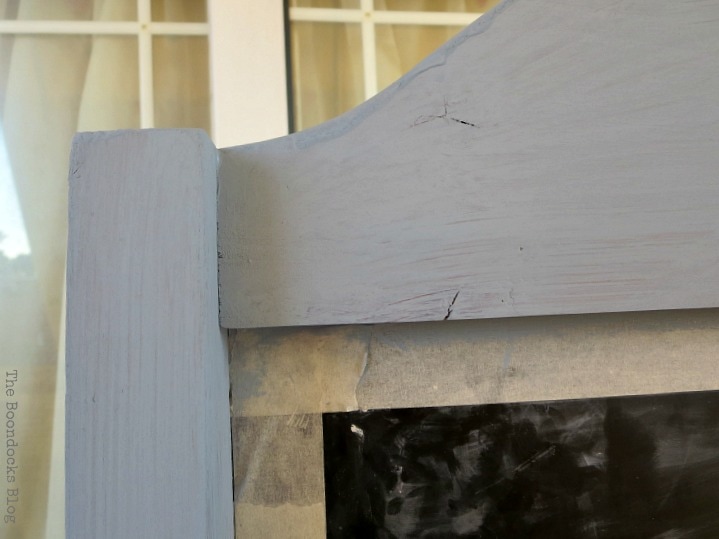
Once the paint was dry, I sanded it down to make it nice and smooth. As you can see from the photos, it was full of imperfections and instead of trying to hide them I decided to embrace them and really show them off. So I distressed them to the point where you could not ignore them. A bit of rustic charm never hurt anyone.
Next I added Daddy Van’s all Natural Beeswax and Lavender Furniture Polish.
Now it was as smooth as a baby’s bottom. And whenever any friends come over I immediately drag them over and have them cop a feel. It is that soft and smooth.
I applied blackboard paint to the vintage chalkboard to give it a fresh up. It was full of some sort of permanent chalk. Of course we didn’t want that.
And finally to take care of those orange plastic pieces on the bottom. They were not coming out easily so instead of fighting with them I just painted over them using the same blue paint mixture. No more orange drink ads!
I then asked my sweet daughter to help me. She painted one side…
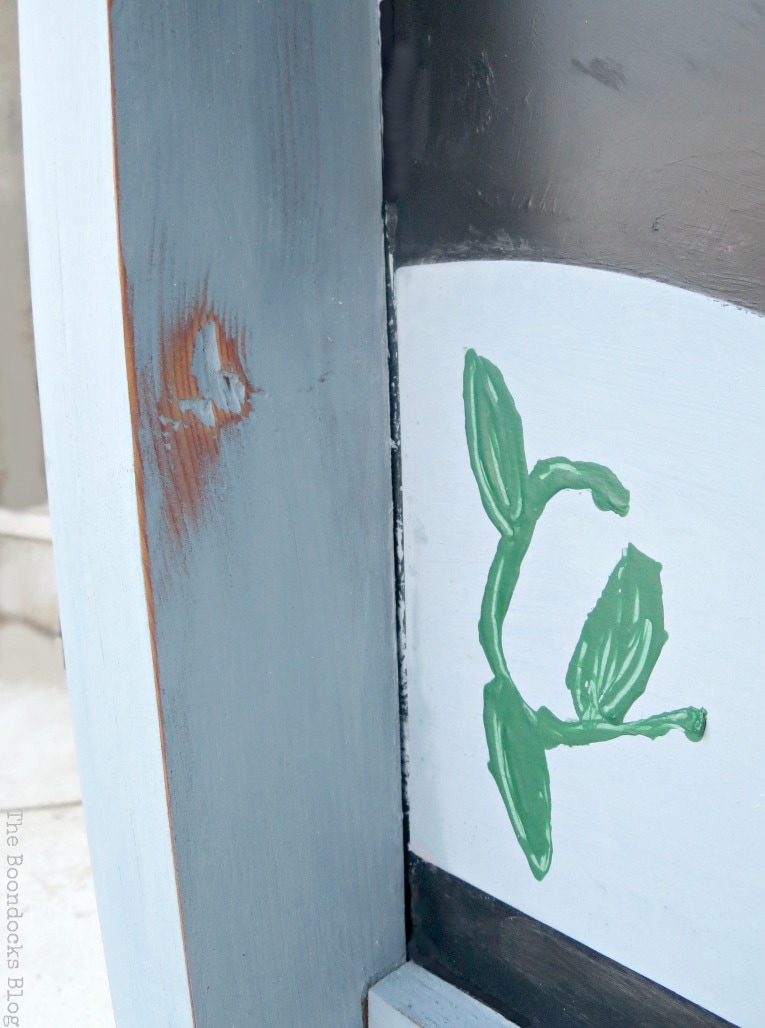
This is her version of a white and red flower and vine.
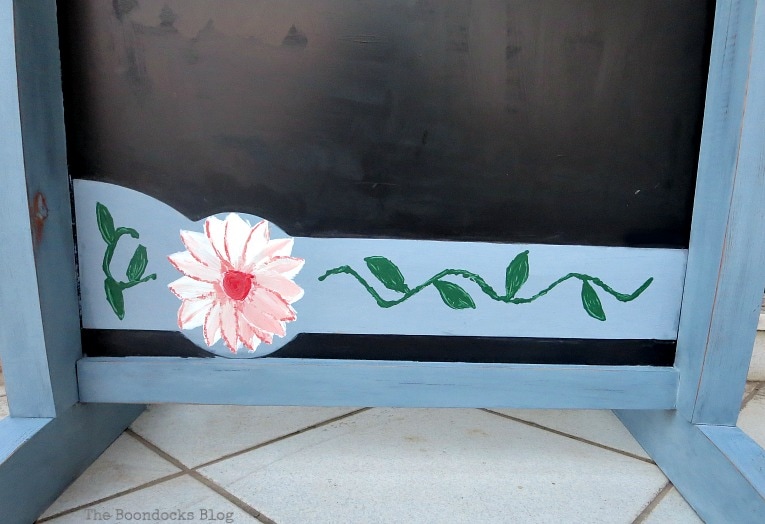
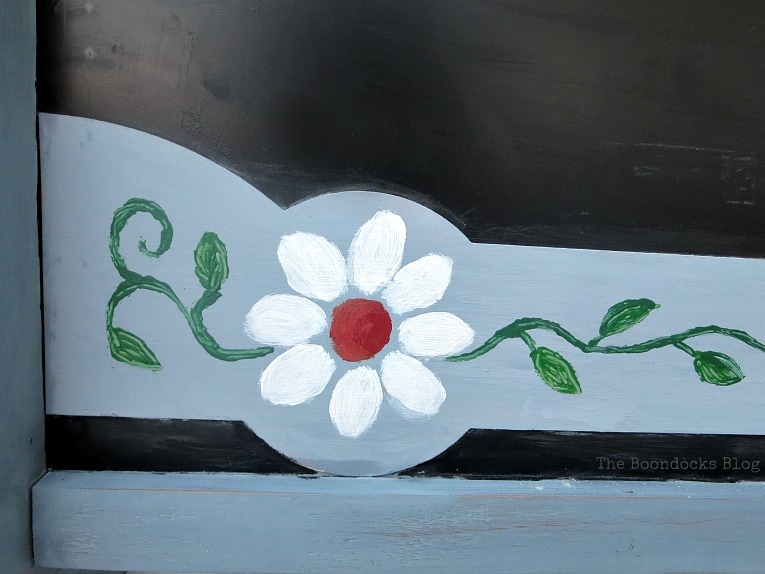
And on the other side was my version. We painted this work of art using acrylic craft paints.
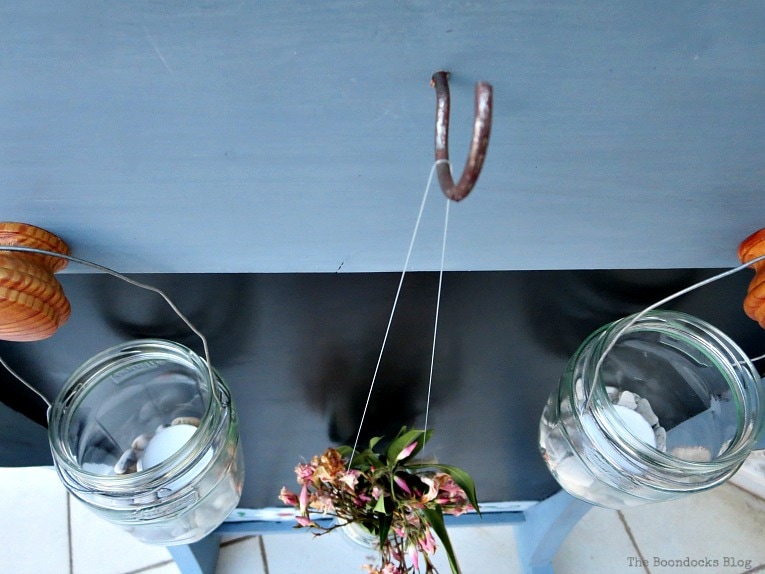
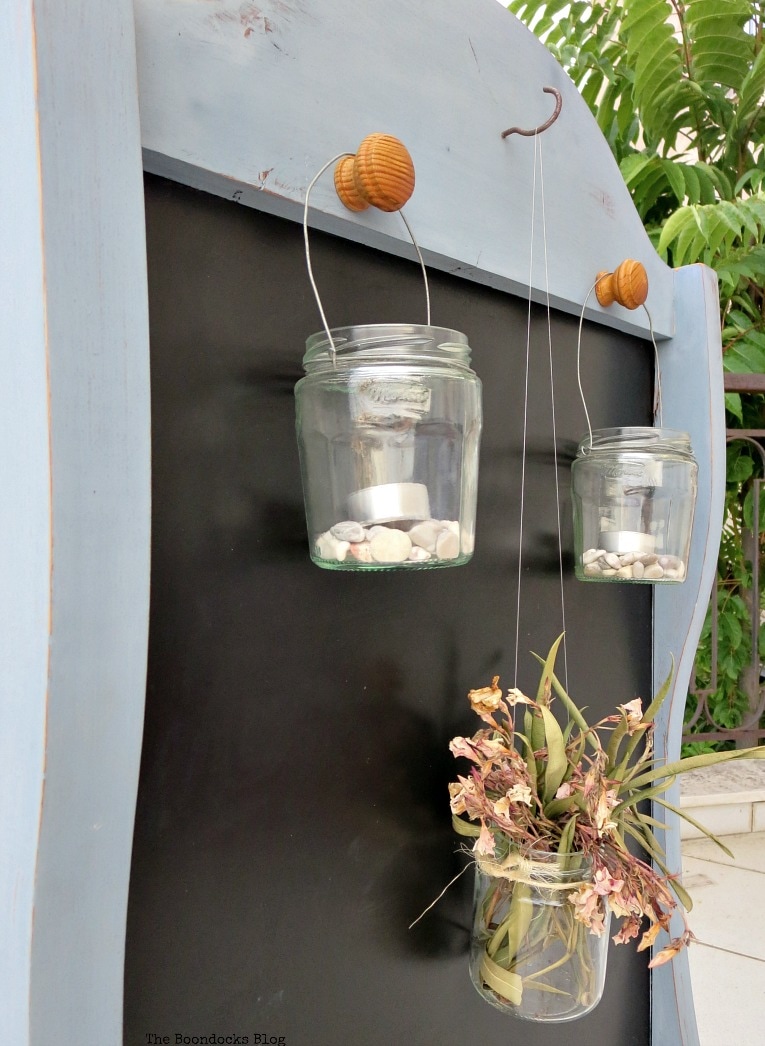
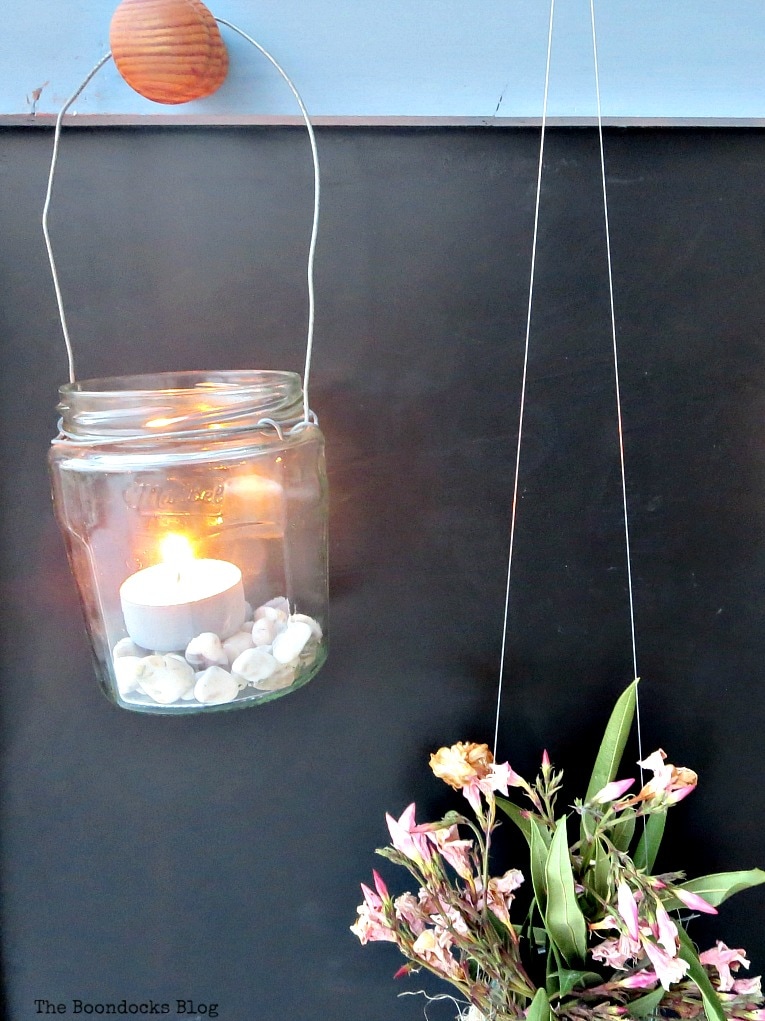
The final touches were to add two knobs so that I could hang my simple tea light lanterns. See how everything is coming together.
Finally, I had to add a rusty hook in the center.
So there she is!
This is the one side…

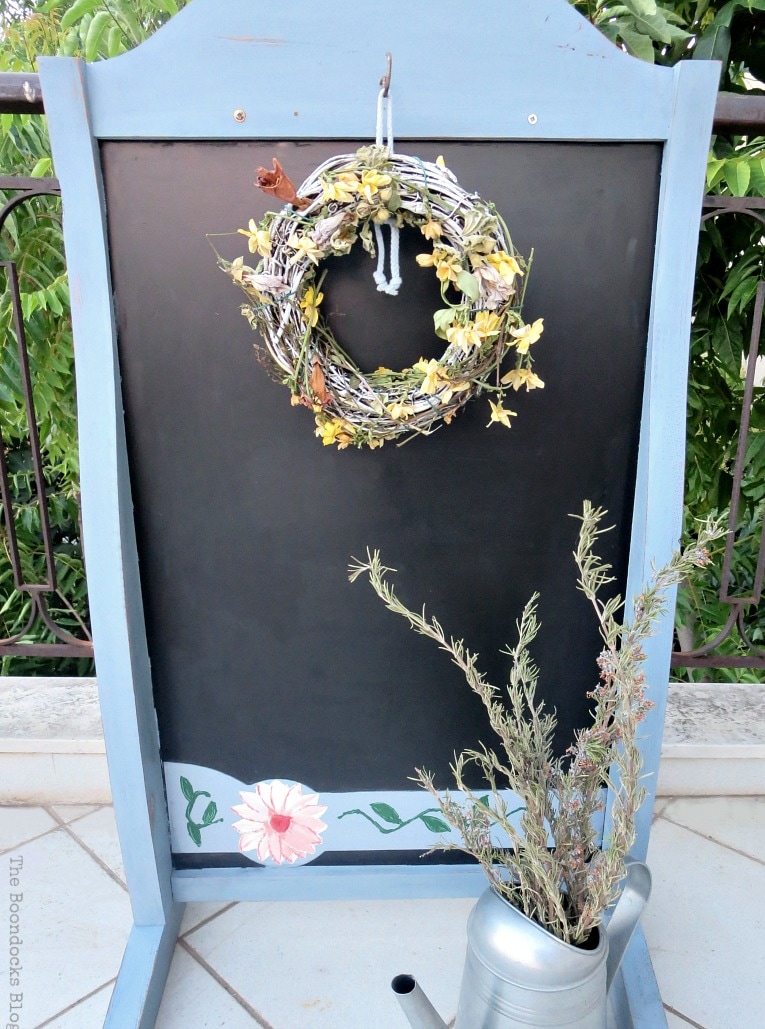
And this is the other side, where I’ve hung a simple wreath.
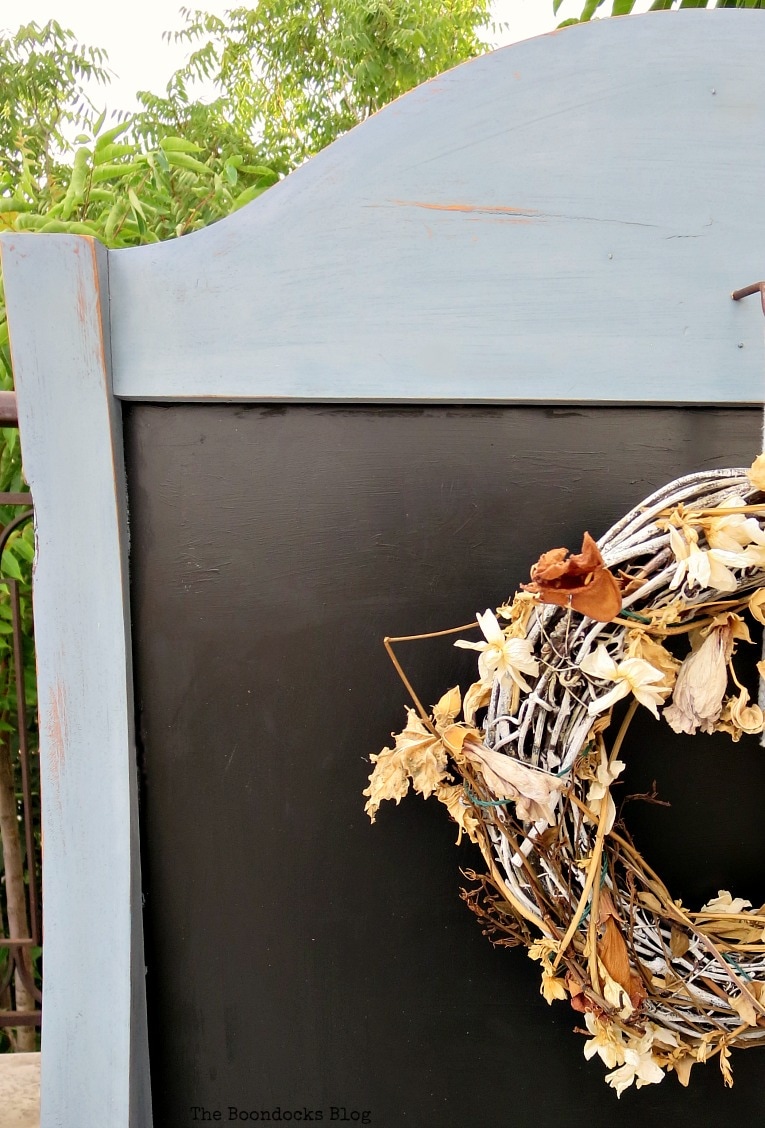
It looks great in the evening when the lanterns are lit.
So you can see that even when life hands me oranges, I always find a way to turn them into orangeade or in this case pretty flowers! I think I’ve succeeded very well in upcycling this piece and turned a bad situation into something positive.
Now when I look at it I think of how pretty my balcony is going to be when it is all done and I can share that with you all. Now do tell what would you have done with something like this?

If you really like what you see subscribe to my blog and get my adventures twice a week in your mailbox. The form is on the sidebar and your e-mail will never be shared with a third party.
This blog is for entertainment purposes only; my DIY tutorials are not professional advice. Read my full disclaimer here.
I love it when I get your comments and I will try reply to them or visit you on your blog. Please do not add a hyperlink to your comment, otherwise we cannot publish it.


This turned out really well…orangeade indeed!
Ha ha, I had to get rid of that ad!
LOL Mary, can I come over a cop a feel? I’ve been hearing so much about Daddy Van’s Natural Beeswax lately, but I can’t find seem to find it here in South Africa. Your de-oranged chalk board stand turned out great btw. That blue is so pretty and it’s the perfect spot to show case your lanterns too
When I did this I made the chalkboard first and then I decided to make some lanterns to add to it.
I love chalk boards. When I entertain I love writing on them in different fonts. The paint colors blend well together. Thats a pretty large size chalk board. I think its perfect for writing cool stuff on it and displaying outdoors on your porch.
Maria
I’m gonna have to write something on there. I was so busy working on the actual project I forgot the fun part
How pretty! I love the wreath and candles! -Marci @ Stone Cottage Adventures
Marci I made this from Junk. I am so happy! Wreaths rule!!
Mary, this is so pretty! I love the art work you & your daughter did! The furniture knobs are also a nice touch. Can you write on the blackboard too? I’m sure you’ll get around to seasoning that. Gee, I wish someone would leave me a “gift” like this! Haha, at least you got something out of the bummer tenants. I love the fact that it’s a stand, so you can change up your displays & move it around easily. I love that cocomat backdrop or whatever that is. I’m sure it’s great for helping to block out that strong Greek sun.
Florence at least I got this stuff. And I turned them into things that make me happy! I will have to draw something on it. I was so busy painting that I forgot to do that. Haha!
The background is just a vinyl tablecloth that was tacked onto pieces of plywood to keep out the sun and the nosey neighbors. 😉
What a transformation. I would love to find something similar to refinish. You did a fab job. Thanks for sharing!
Jenny @JennyLouiseMarie.com
Thanks Jenny, I live for this stuff!!
A perfect spot to hang your awesome tea light jars. How fun to have a chalkboard stand on your balcony – just think of all the fun any silly messages you and your family can leave for one another. Love the color you painted it!
It is so hot here now, when I go to the balcony in the evening I just collapse on the couch… with the wine bottle next to me. 😉 But yes I need to write something on that board.
You did a sweet job revamping this chalkboard. Enjoyed the post!
Thank you Wendy. It made me very happy to be able to erase its past.
You took something simple and plain and turned it into something so cute, all while battling the heat 🙂 Impressive, as always Mary.
Thank you Doreen. I really wanted to get rid of all the traces of its past and make it my own.
Mary I love chalkboards and yours is so pretty with the beautiful painted flowers on it! I also love that it´s standing on it´s own, it can divide spaces or just add a lot of fun like it is! Your little lights and wreath look lovely on it!
Katrin that is exactly why we kept it. It is like a small divider in the space where we have it. I will show the space soon.
Mary – this is such a fun transformation! Thanks so much for sharing this for I DIYed that! I love the addition of the painted flower on the chalkboard – so cute!
Thanks Jen, I had to find away to hide the advertisement for the orange drink. Lol!
I love this makeover. I wish I was lucky and came across some the treasures that you have bestowed on you, lol. Thanks for sharing on Sunday’s Best.
Ha. I had to pay a lot of month’s rent for this treasure. But we let bygones be…
Fabulous makeover Mary!! So many wonderful things you can now use it for! Your flowers are a beautiful touch!
Thanks Sam. Everything looks better when the sun is coming down.
Love this Mary! The color is perfect! The flowers were a great idea. What a fun project!
Anything to get rid of the orange drink ad!! I had a lot of fun doing this one.
I love the chalkboard and how you and your daughter painted the same thing. You will have such fun writing and drawing on it. I also like how you made it into a backdrop for the tealights. But what really made me laugh is how you have all of your friends “cop a feel”.
That is going to be our private joke from now on Debra! But I’m sure you know exactly what I mean since you are also an OFMP fan.
I never would have thought to hang candles. What a very cute idea.
That way I can move the stand and place it anywhere I want a bit of extra light. I’ll be doing a post soon so you can see the whole balcony and how I’ve set it up.
My dear friend what can I say for you? You have the gift to re purpose and transform everything!!!! Keep on this excellent work 🙂
Thanks Christina. I really had to get rid of the Amita!
Remarkable difference Mary, especially the decoration on the bottom of the chalkboard, very very well done.
Thanks Leanna. My girl and I each did our own version of a white and red flower. It was fun.
Love how this turned our Mary! I’ve never been a fan of orangey wood. That blue colour is so pretty and sooo much better. Love it!
Not only was it orange but it was discolored too. It definitely needed a paint job.
I love how this turned out Mary! I’m sorry that your former tenants skipped out on the rent, but looks like you made the most of a bad situation. By turning the trash they left behind into treasures. You and your daughter both did a great job on the flowers and vine. I bet this looks so pretty in your outdoors space. I love how you made it where you can hang your pretty lanterns. Your outdoor space is coming along beautifully!
Thanks Linda. I am looking forward to photographing the balcony to share with all of you soon.
It looks lovely now. I love the way you painted the frame. You just need to decide what you are going to write on the board.
That will be the fun part Claire. 😉
Another beautiful transformation Mary. I like how this has retained it’s doublesidedness, it can be a lovely space divider now.
Exactly that is why I kept it Julie. I also liked the two sided idea.
I love your solution to cover the orange ad! Absolutely brilliant! And the whole stand looks way better with its improved looks 🙂
That ad had to go and so did any traces of its former self.
Hi Mary!
I like your new chalkboard and I’m thinking that this summer, in the evening, when friends come over for a little evening gathering coming up your backstairs… Have this up at the top as the entrance onto your deck. Candles in jars around the patio on little tables, next to your new seating benches. Hang a few twinkle lights or some cute lights on wire crisscrossing above and your patio will look marvelous!!! Have a little more blues out on the patio to bring your whole look together… It’s going to be a fabulous party and I wish I were over there visiting! Could feel just like Jaqueline Kennedy Onassis visiting your lovely home!
xoxo Barb 🙂
Ohh Barb you have created such a lovely vision of my balcony. I love all of the details you have added. I only hope I can do half of them. I will be posting about the completed balcony space soon.
Mary, I love how you gave this chalkboard a new finish! The flowers and vines that you and your daughter painted are beautiful! I bet it looks amazing with the lanterns lit. Great job Mary!!
It does, Keri. I look forward to going out there in the evening just so I can light all those tea lights.
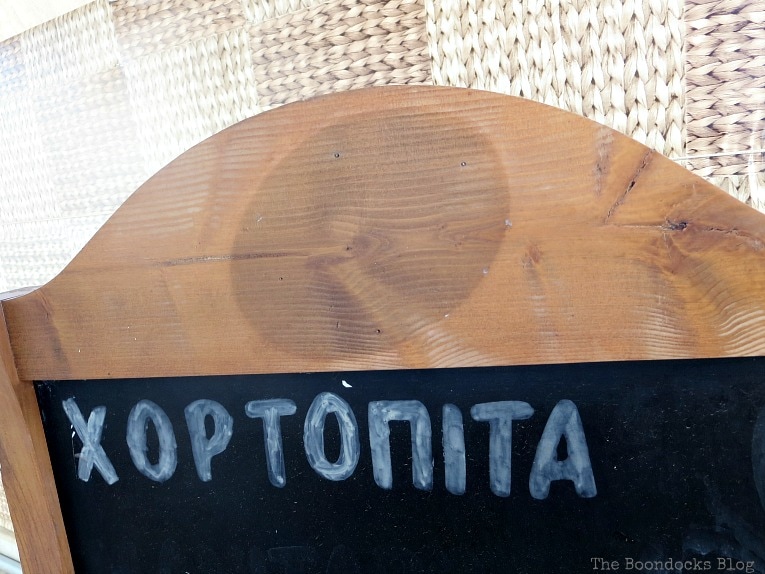
Like mother, like daughter! I love both sides and I would also love a piece of χορτόπιτα please! I’ve also just invited you in my group board in Pinterest if you care to join us!
Thank you Katerina. I’ve already joined and pinned!
What a great transformation! Thank you for linking up with The Creative Gallery – you’re one of my features this week!
Best,
Kelly
Thank you so much Kelly! It is an honor!
This turned out so sweet Mary 🙂 The blue is just perfection and I couldn’t stop laughing when I read “cop a feel”. I definitely understand that though when visitors come by and you want to show them your latest project!
Haha! Poor visitors I am probably scaring them away, because I insist that they feel the furniture. I guess only we crazy DIY bloggers do these sorts of things.
That looks wonderful! Great work. 🙂
Thank you so much, it really was a good idea to banish the orange.
I love how the chalkboard looks now – it is a great update Mary
Thanks so much Amber. And it also feels buttery soft.
Hi Mary, you’ve done it again! You’ve managed to something out of nothing. I think it’s easy to see where your daughter gets her artistic side from. I couldn’t draw a flower if my life depended on it.
xx
Aww don’t say that Debbie. I couldn’t have done it either till I started and then I realized that I could. Does that make sense? Just like with photography you weren’t always the great photographer you have become over time. 🙂
It turned out great! I love anything chalkboard, and you did an excellent job breathing new life into this one!
Thanks Cherryl it would have been a shame to throw it out just because it had that big sticker on it.
Love to find projects like this that give me inspiration to do something with some of the old stuff we have. Found you on Simple Homestead Blog Hop.
Thank you Candy. I always try to inspire others to look at their old stuff with a new eye.
A little rustic charm never hurt anyone- indeed! We just bought a new house and we will have a much larger patio. I am looking forward to creating a nice space but of course i will be on a tight budget. You provide lots of inspiration for the imagination of my new space!
Amazing!
Congratulations! Your post was my feature pick at #OverTheMoon this week. Each Hostess displays their own features so be sure to visit me on Sunday evening and to see your feature! I invite you to leave more links to be shared and commented upon. Please don’t forget to add your link numbers or post title so we can be sure to visit!
So many great ideas can come out of this project. You did a great job. Well done. Pinned
OMG! I was so surprised how you transformed the chalkboard.The hanging tealights are the best!!!
Happy summer,
Kippi
Thanks Kippi. I really liked lighting those tealights at night.
Very cute idea! love it!
Thanks Sylvia how could I not save it.
Beautiful color! Made me laugh when you described it as soft as a baby’s bum! I like the wreath idea, looks great against the blue framed chalkboard.
Thanks Audra it really did feel like that it must be the milk paint combined with wax!
Love this, Mary… and I like how you styled it several ways!
Julie they are two different sides of the same chalkboard. Thank you.
What an inspiring idea to repurpose this. I love when items get a second chance to be beautiful. I’ll be featuring it tonight at Merry Monday. Hope to see you at the party.
Thanks so much Jenny! I really appreciate it.
I always look forward to your redo’s. They turn out so cute. Love the idea of adding a painted banner across the bottom. And when you hung the jars on one side, it looks like a face to me so that makes me smile too.