Storage Unit Up-cycle No more Red Plastic
I have kept old furniture from a lifetime ago, always trying to re-use it over…
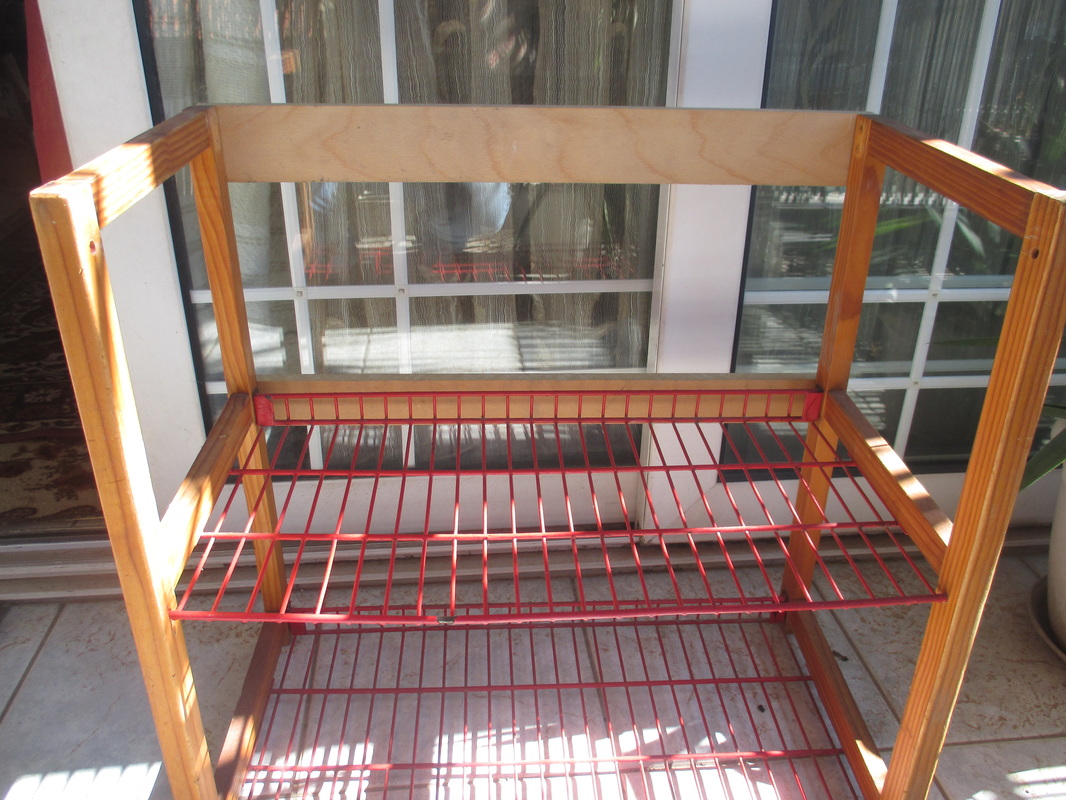
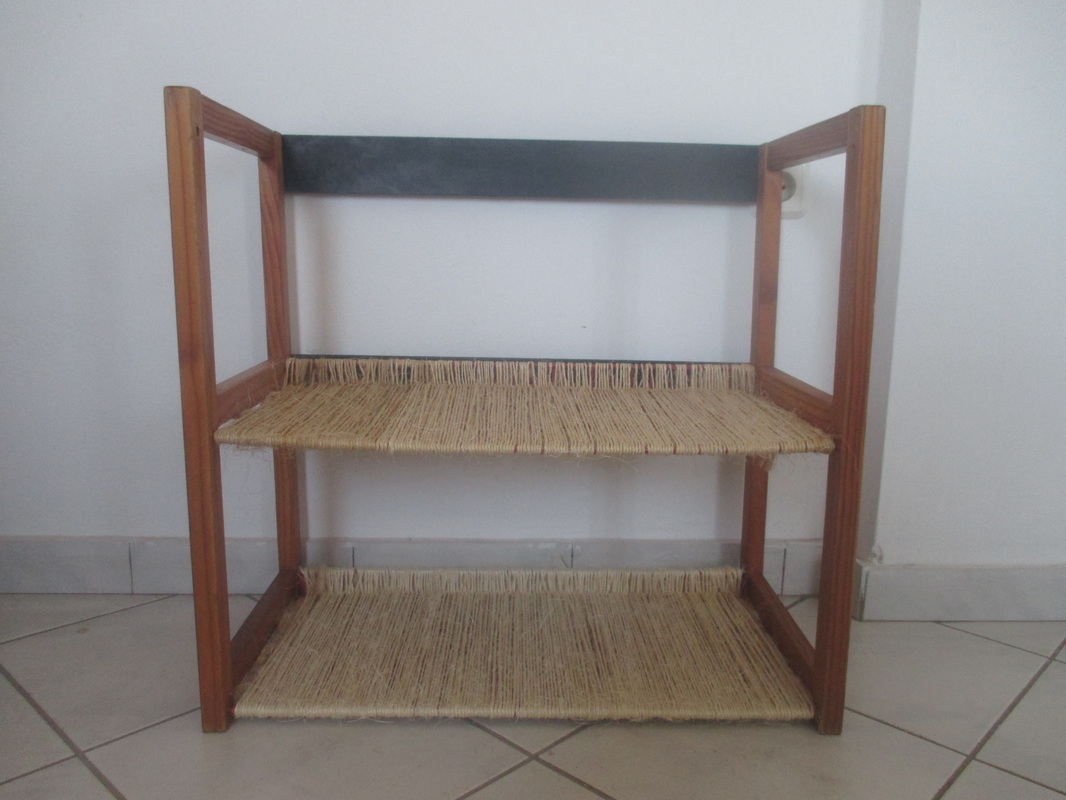
Έχω φυλάξει παλιά έπιπλα, προσπαθώντας πάντα να τα επαναχρησιμοποιήσω όλα αυτά τα χρόνια. Είχα αυτό το συγκεκριμένο κομμάτι για πάνω από 22 χρόνια. Ήταν μια μονάδα αποθήκευσης για τα παιχνίδια των παιδιών μου. Αλλά μετά από τόσα χρόνια είχα βαρεθεί την εμφάνιση.
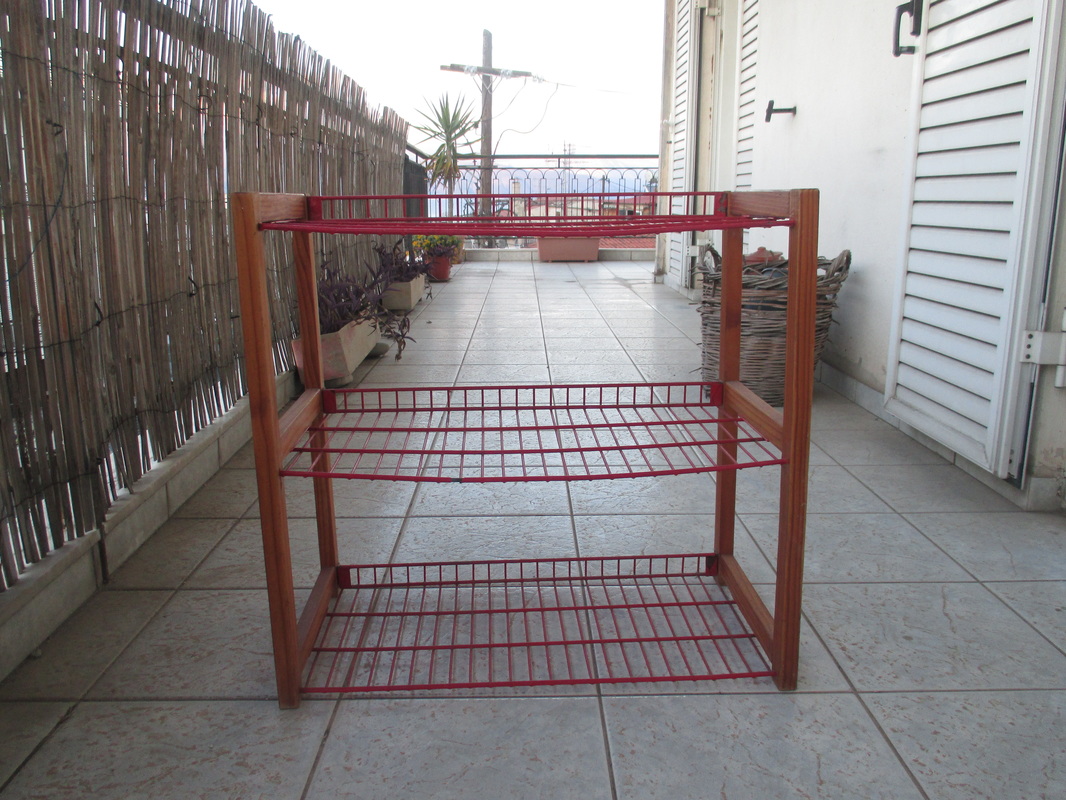
Όπως μπορείτε να δείτε, θα ήταν ιδανικό για ένα παιδικό δωμάτιο, αλλά έχω έφηβες. Τέλος πάντων ήρθε η ώρα για μια αλλαγή. Ήθελα να το βάλω κάτω από ένα γραφείο που έχω και να το χρησιμοποιήσω για την αποθήκευση κουτιά και πράγματα, αλλά θα έπρεπε να είναι αρκετά καλό για να ταιριάζει με την μαύρο και ξύλινη διακόσμηση του δωματίου. Ήθελα, επίσης, να αφαιρέσω το πάνω ράφι, έτσι ώστε αν χρειάζεται να αποθηκεύτουν τα ογκώδη αντικείμενα από πάνω.
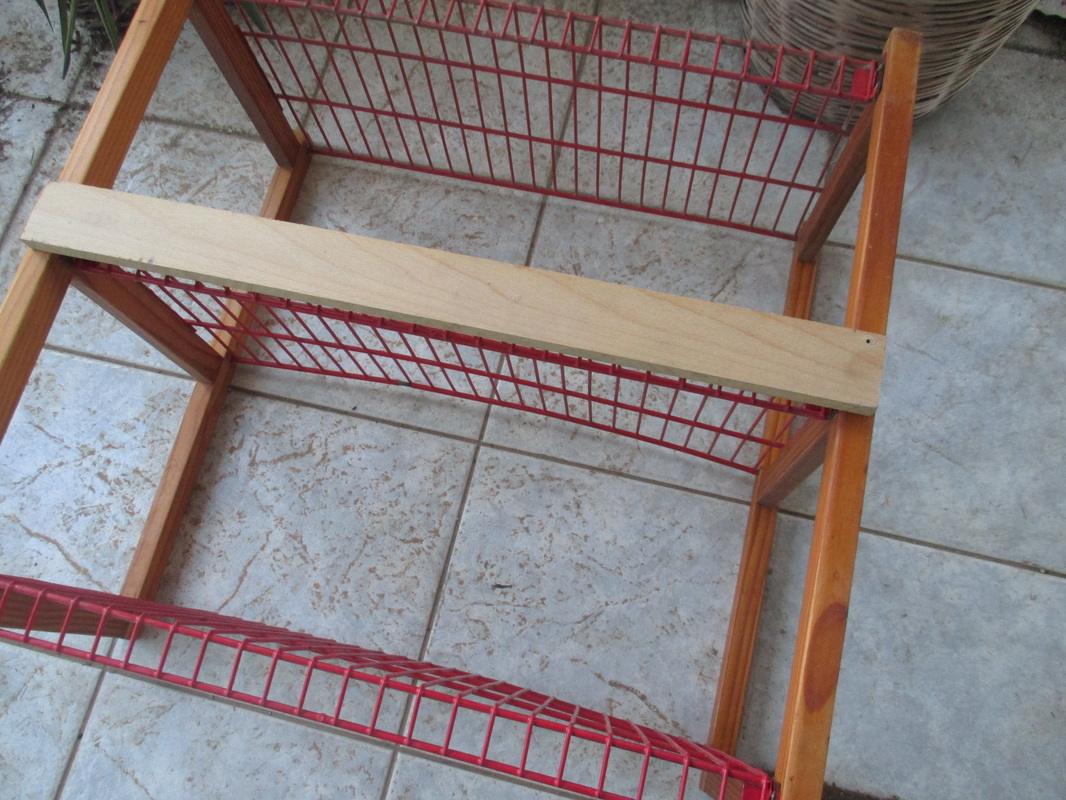
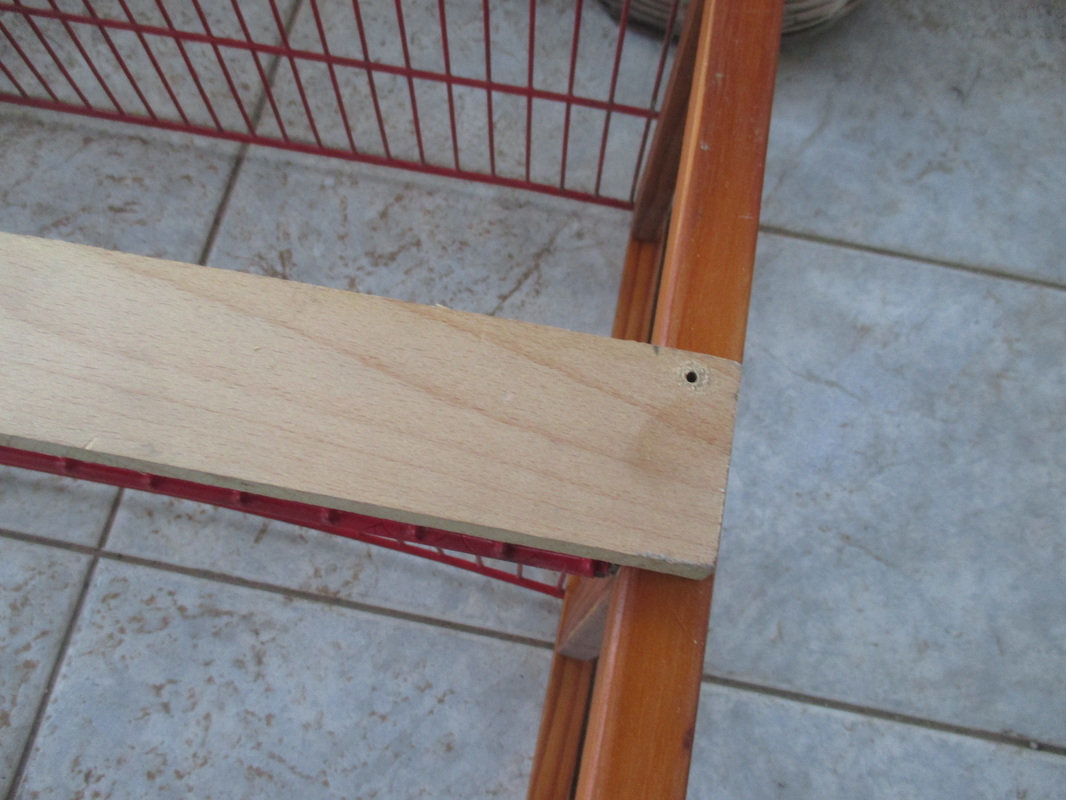
Βρήκα μερικά κομμάτια ξύλου, και είχε το σύζυγος να τα κόψει στο σωστό μέγεθος. Τότε τα βίδωσε στο πίσω μέρος της μονάδας. Θα παρέχουν την αναγκαία δομή για το κομμάτι.

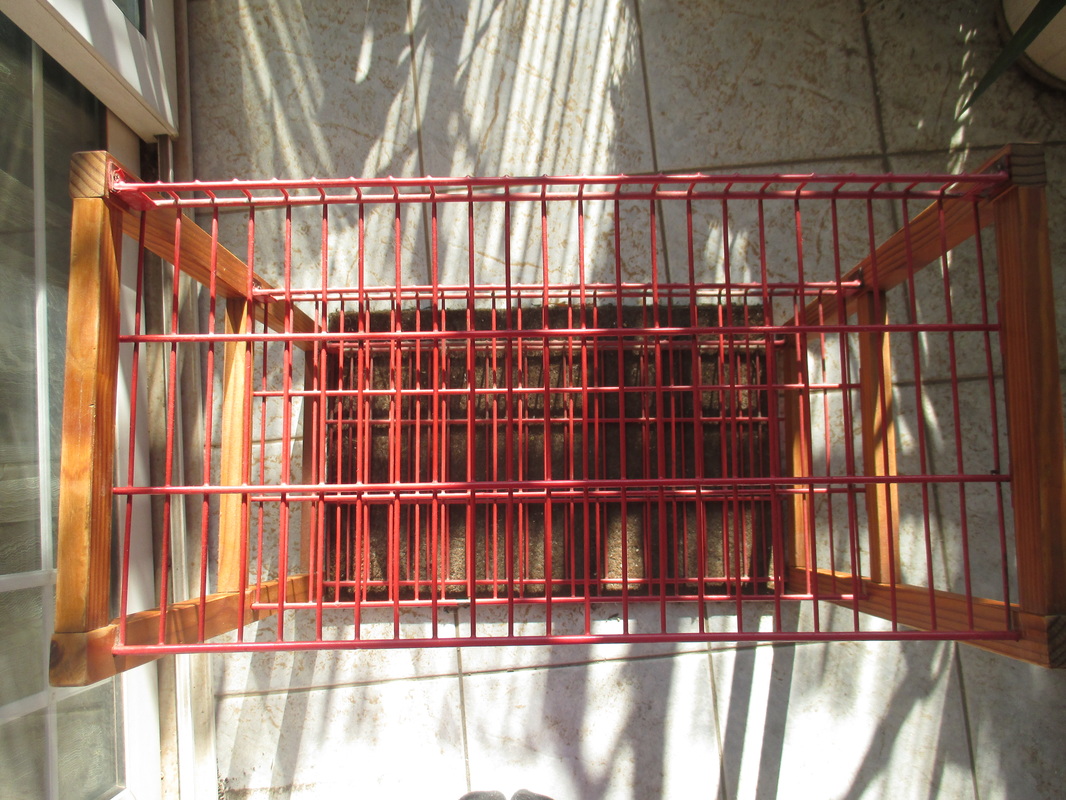
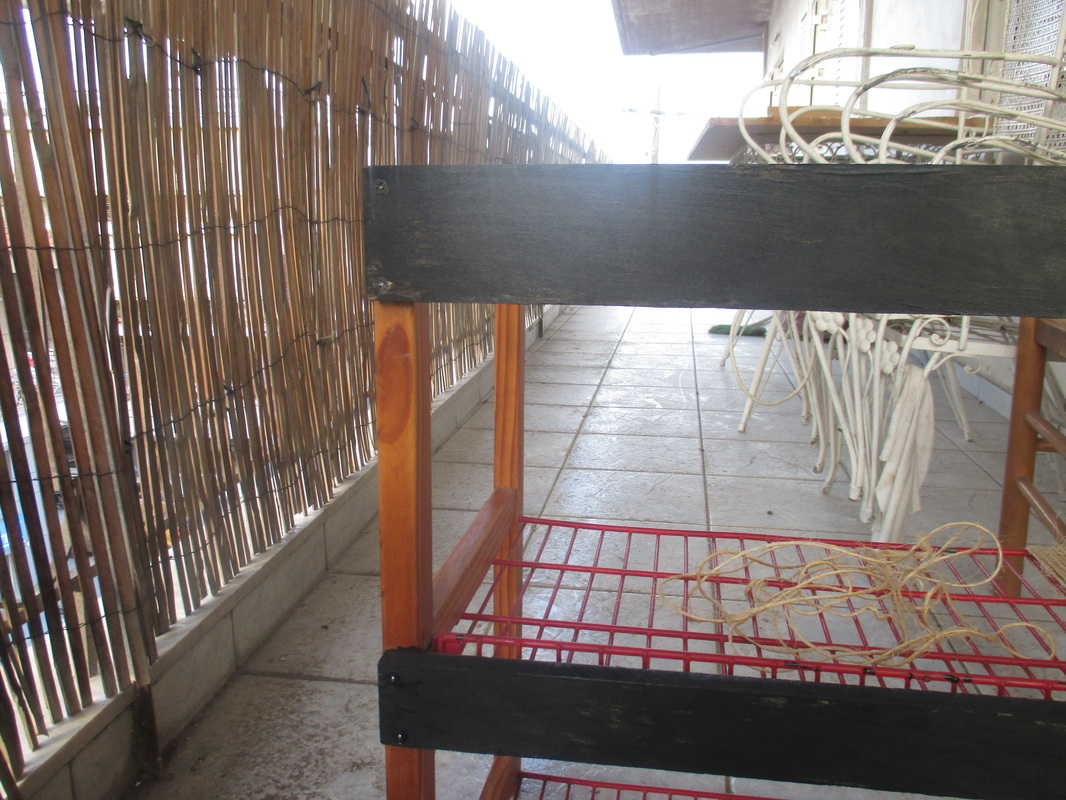
Στη συνέχεια αφαιρέθηκε το πάνω ράφι. Έτσι έμοιαζε μέχρι στιγμής.
Στη συνέχεια ζωγράφισα το ξύλο μαύρο χρώμα, για να ταιριάζει με το επιθυμητό σχήμα μου.

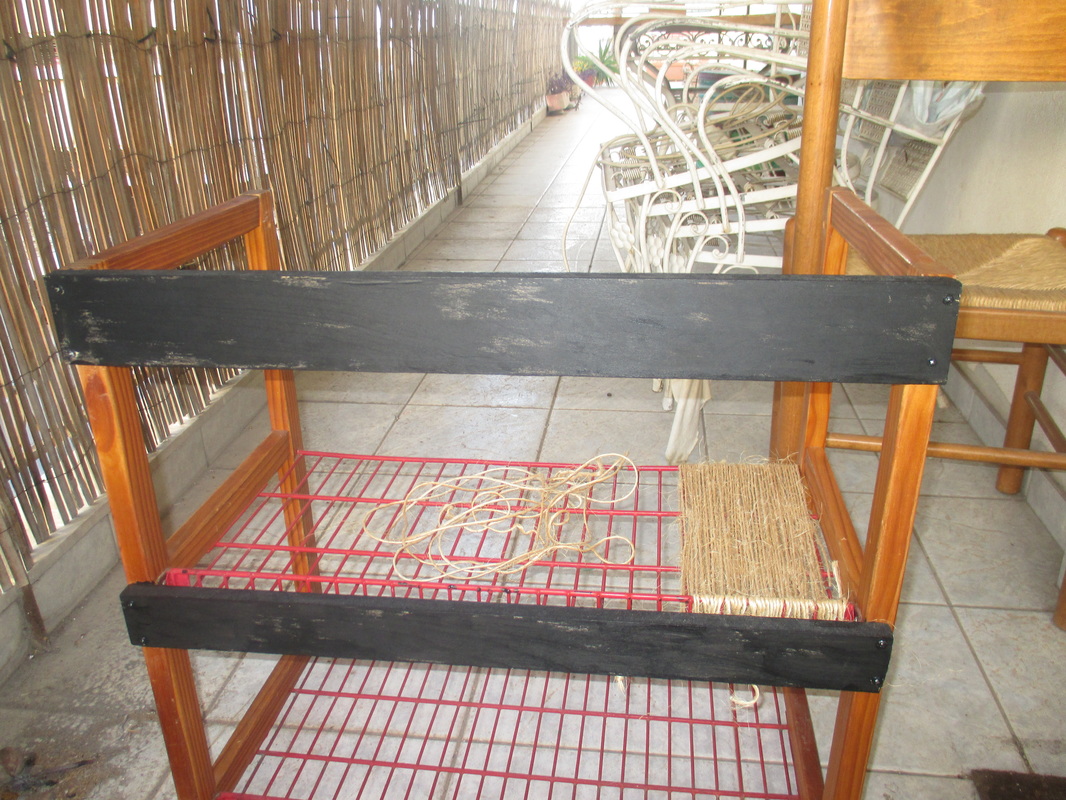
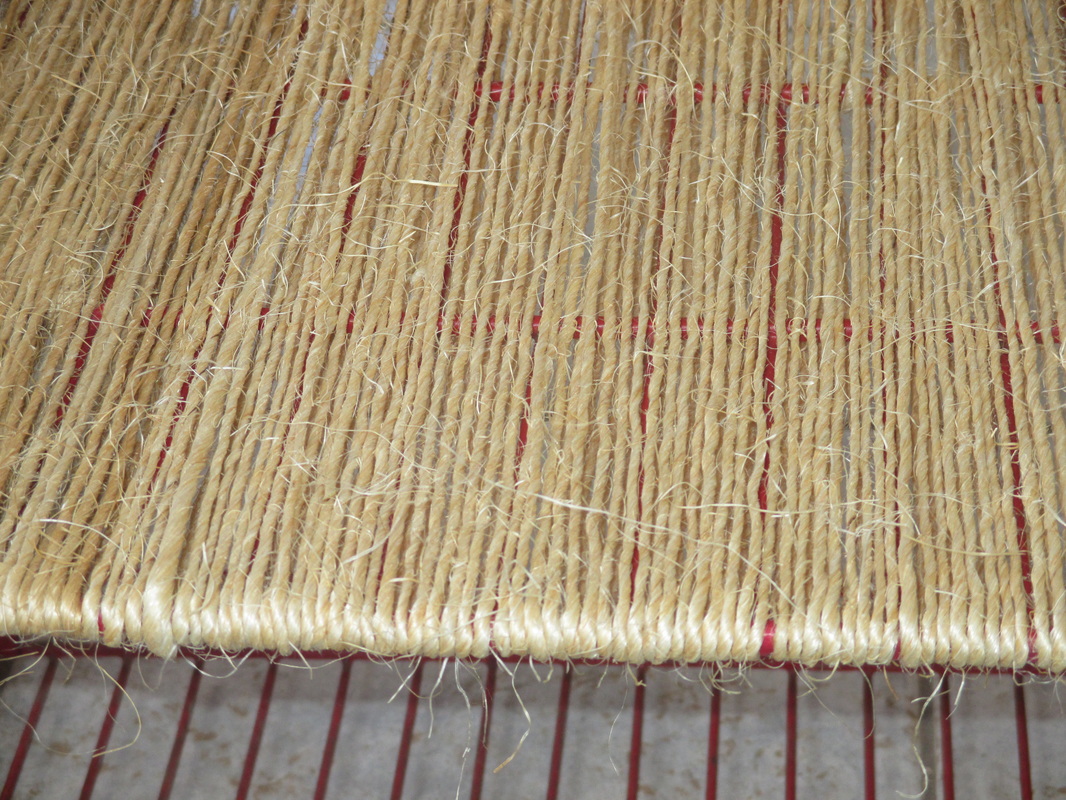
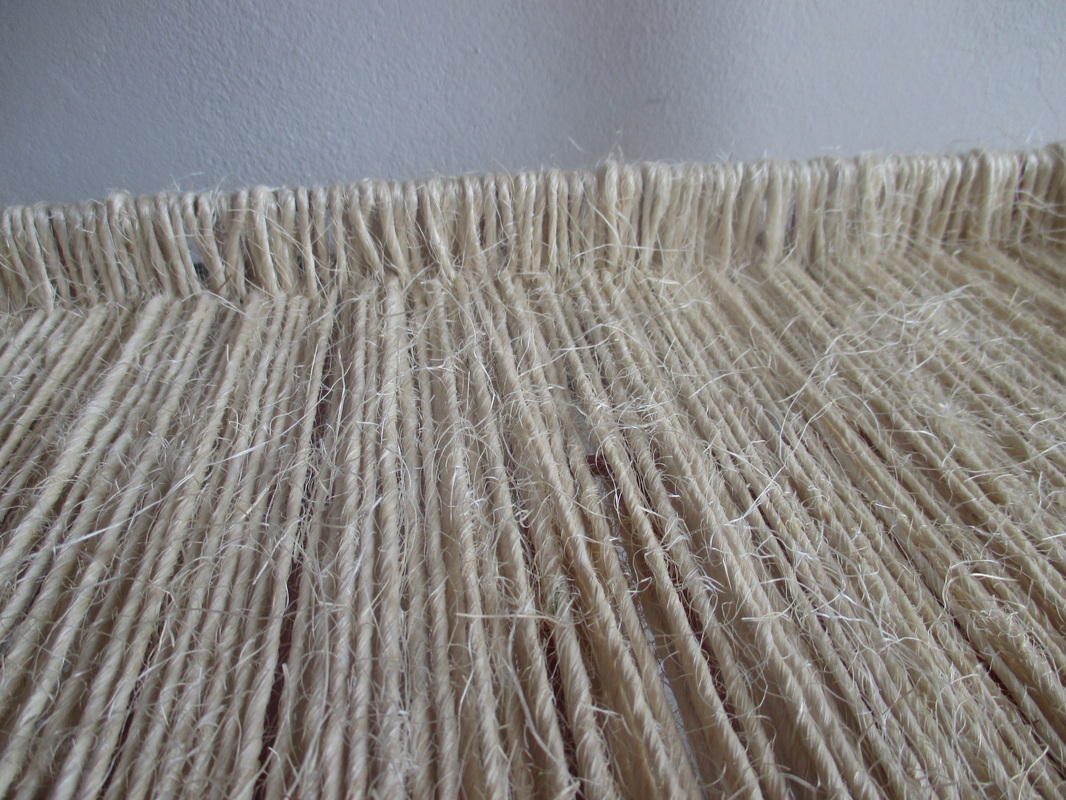
Σε αυτό το σημείο ήξερα ότι θα πρέπει να κάνω κάτι με αυτό το κόκκινο πλαστικό. Έχω τυλίξει τα πάντα με σπάγκο τον τελευταίο καιρό και σκέφτηκα ας το δοκιμάσω. Μπορεί να είναι τρελό, αλλά αυτό ακριβώς θα μπορούσε να λειτουργήσει. Έτσι, σιγά-σιγά, και πολύ αργά άρχισα να τυλίγω τα ράφια με σπάγγο.
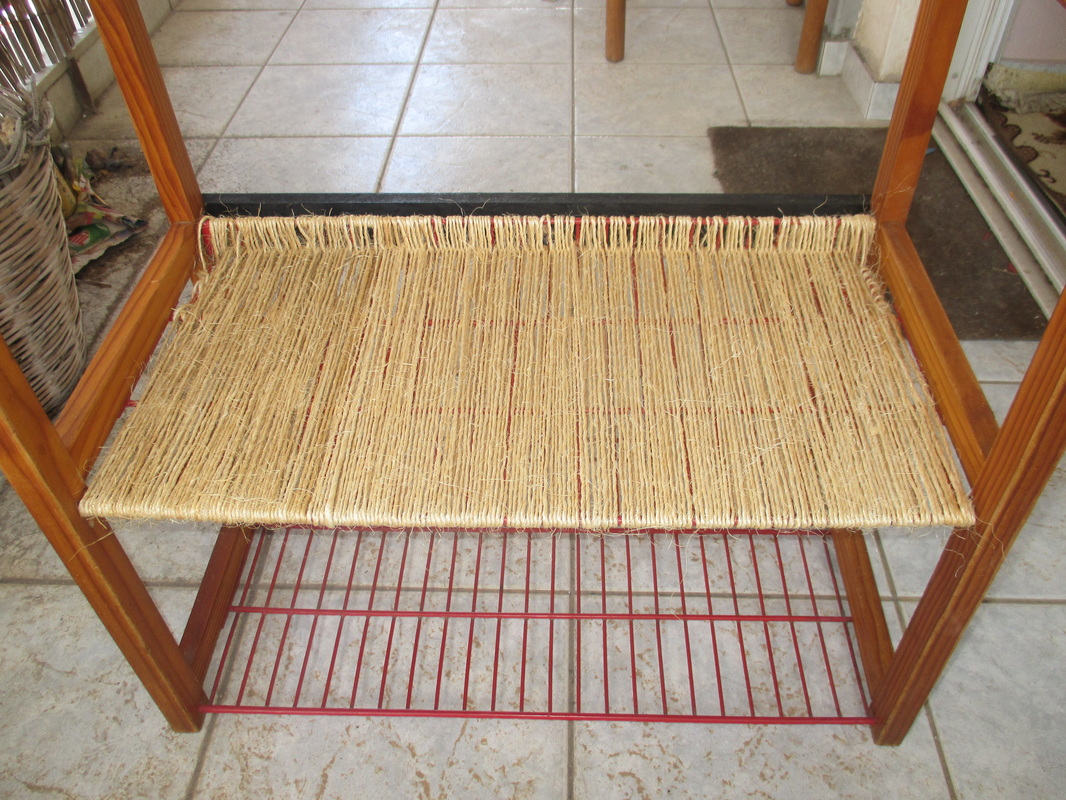
Περιττό να πω, ήταν ένα χρονοβόρο και κουραστικό έργο. Και μου πήρε αρκετό χρόνο για να βρω κάποιο σύστημα ώστε να φαίνεται ομοιόμορφο.

Αυτό συνεχίστηκε για αρκετό διάστημα, μέχρι που έμεινα από σπάγκο … Μια βόλτα στο κατάστημα, και πίσω στη δουλειά ….
I figured I would take many pictures of this, because it was not going to happen again any time soon!!
Σκέφτηκα να τραβήξω πολλές φωτογραφίες, γιατί δεν επρόκειτο να συμβεί και πάλι σύντομα !!
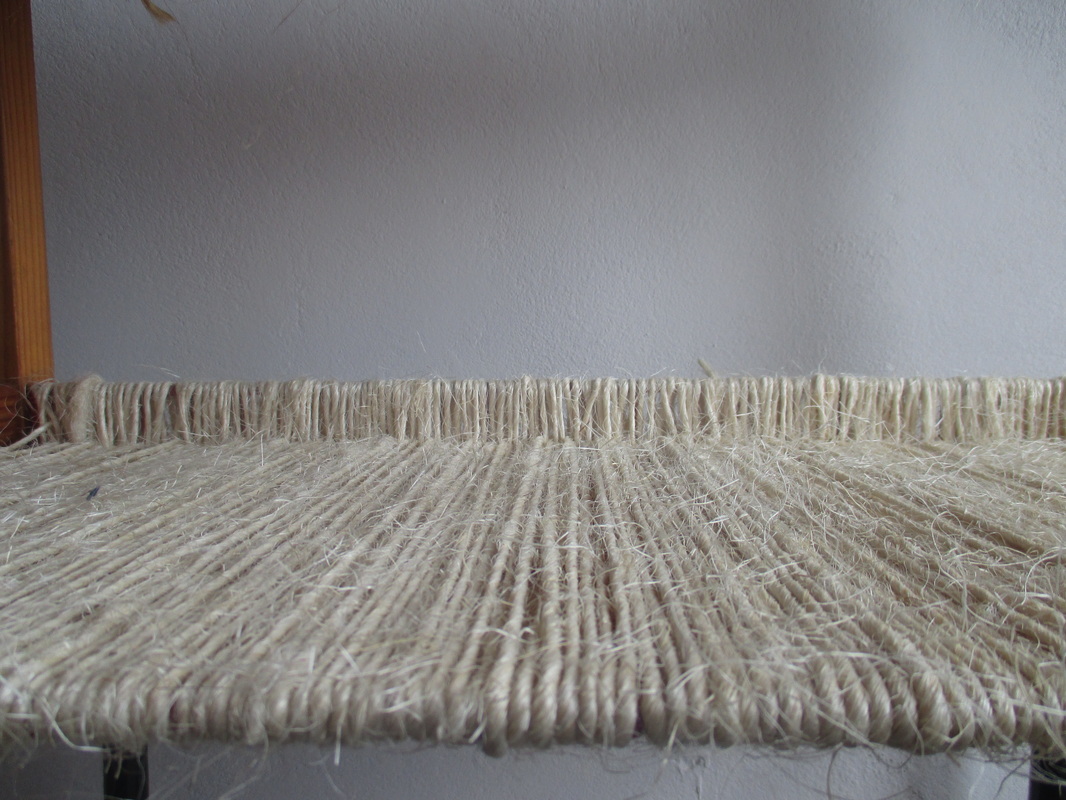
And then one day …. I finally finished!!
Και μια μέρα …. τελείωσε!!
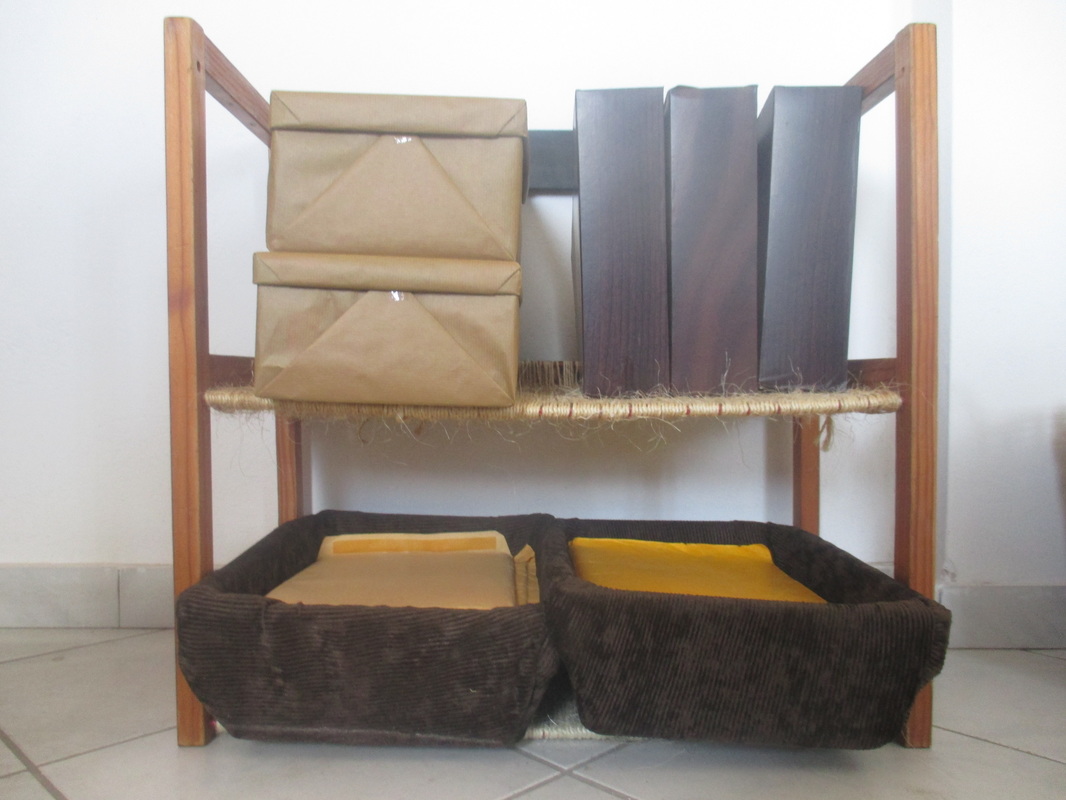
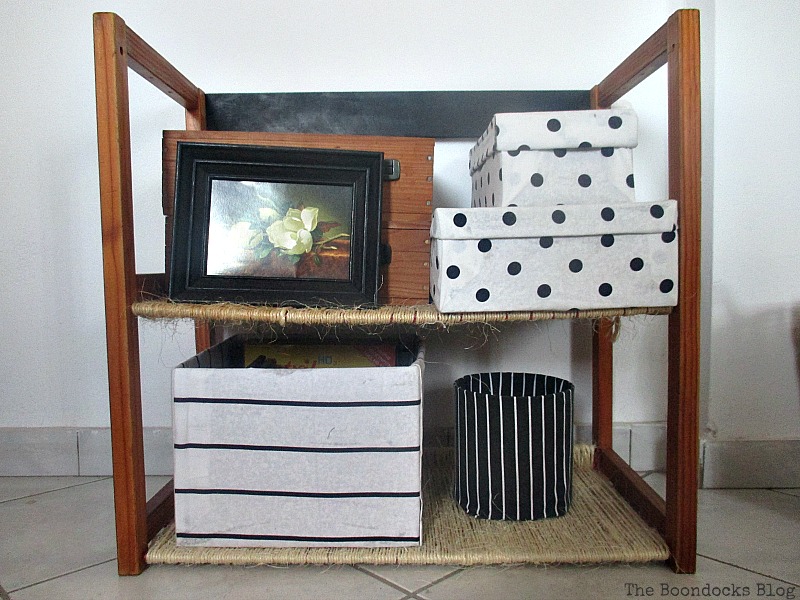
Είμαι σίγουρη ότι μέχρι το τέλος αυτού του post δεν θα θυμάστε το φρικτό κόκκινο πλαστικό. Νομίζω ότι φαίνεται πολύ πιο ρουστίκ και κομψό ταυτόχρονα. Τώρα δεν θα είναι μια ντροπή αν επιλέξω να το βάλω στο σαλόνι. Τι πιστεύετε? Άξιζε όλη αυτή η εργασία; Εγώ νομίζω πώς ναι!!

If you like what you see, share it with your friends, or save it on Pinterest. If you really like what you see subscribe to my blog and get my adventures twice a week in your mailbox.
Αν σας αρέσει αυτό που βλέπετε, να το μοιραστείτε με τους φίλους σας, ή να το αποθηκεύσετε στο Pinterest. Επισεις μπορείτε να εγγραφείτε στο blog μου και να λαμβάνετε τις περιπέτειες μου δύο φορές την εβδομάδα στο e-mail σας.

Επίσης θα σας αρέσει:
This blog is for entertainment purposes only; my DIY tutorials are not professional advice. Read my full disclaimer here.
I love it when I get your comments and I will reply to each and every one of them.
Μ ‘αρέσει όταν παίρνω τα σχόλιά σας και θα απαντήσω σε καθένα από αυτά.

An excellent result. Using twine is time consuming. And, much twine is needed, too. But, look at the final shelf. It is a beautiful texture.
Yes Debbie and it looks like a new piece entirely. I really hated the red and wanted to tone it down.
This turned out really neat! 🙂
Thanks for joining Cooking and Crafting with J & J!
Thank you for stopping by Jess. Your visits are always appreciated!
What a fabulous idea. I love that you used the string to make the shelf look amazing! great job!
Thanks Suzie, it took forever to make because I didn’t want to burn out on twine wrapping but it was so worth it. Thanks for your sweet comment.
What a cute and creative way to give new life to an old piece of furniture! I love the twine!
Celest this thing took me two months because I did it a little at a time. It was a lot of work, but well worth it in the end to get rid of that red plastic which I hated. Thanks for the visit.
Another interesting project for our #tiptuesday.
Thanks a lot for sharing it, Mary!
Always happy to visit you Debbie.
What a great project. You’ve taken something, shall I say, not that pretty and made it into something really quite nice looking. Well worth your hard work.
Thanks for linking up to #LifeLovingLinkie I’m sure other will love having a look at the before and after photos.
Sally @ Life Loving
Sally thanks so much for your truthful words. It was a mess before and one that I had for many years. It was time to bring it into the 21st century!
Great project! Turned out really nice. Love turning old into new and useable items 🙂
Maria nothing makes me happier than to restore something old and useless. So much more satisfying than spending money at the mall. We speak the same language.
Mary, what you do with that twine of yours! Great stuff! I love the idea, it looks awesome like this. And the different black and white boxes just complete the look! Great re~use and I’m amazed that you kept the piece for such a long time!!!
Katrin it is always fun when you visit. Yes, I kept it because with 4 kids I needed all the storage I could get. Anyway it was solid just ugly.Now it’s so much better.
Great job as always! I admire how you come up with ideas 🙂 Thank you for sharing with Thursday Favorite Things! Have a great weekend!
Jas, I am always happy to have you visit. Thanks for yourkind words.
Hi Mary,
This creation is great! I just love it. You actually gave me ideas for my next storage.
Anne.
Anne, I love it when I can inspire someone. I’ll be looking for twine on your blog.
Mary! Yes Please! I want you as my teenage mom. This project is so simple yet has a great transformation. Thanks so much for some much needed DIY Inspiration. I’m so glad you joined us over at #LFEO yesterday! I hope you have a great weekend and a Happy Halloween!
Amanda thanks for your sweet words. I am always happy to dispense inspiration and recieve also. You have a great Halloween too.
Mary, you really transformed this unit & I really like how you used the twine! Thanks so much for sharing @Vintage Charm! Blessings, Cecilia
Thanks so much Cecilia. I love this piece so much after all I spend so much time on it, we have become inseparable.
Mary, you amaze me! A few pieces of wood and twine, well a lot of twine! LOL And this is a beautiful rustic piece to add to your decor! And added storage? Priceless! I love the look of the twine and although it took quite a bit of time, you did it beautifully!!!
Nikki, back then I was young and ambitious 😉 A babe in the blogger woods. Now I know better than to work for so long on a project. Now, I could easily make it 3 or 4 posts… you know, wrapping, and wrapping and … well, you get the idea lol!
Its a great transformation !
many greetings
Uwe
Thanks Uwe, And I still have lots more twine left over.
This came out awesome!
Kate | The Organized Dream
If nothing else Kate, it has to be original. I don’t think anyone else would spend so much time wrapping twine. Thanks for dropping by.
Wow.. That is amazaing! It is barely recognizable! Thanks for sharing on You’re Gonna Love It!
Kim it better be unrecognizable after all that wrapping. Thanks for droppping by.
You do a great job of turning something people would over look into something pretty and useful! Thanks for sharing at Your Inspired Design.
Holly thanks for such a lovely compliment. I always try to salvage something before giving up on it. I see it as a challenge. Thanks for stopping by.
Wow! Talk about patience! Looks great! Thanks for linking up at Your Inspired Design Link Party!
Christine, that’s exactly what it took. But well worth it in the end. I figured it can’t get any worst.
You certainly did a great job transforming it. As I went through the photos, I began to think, Yikes, that’s a lot of twine. And then you ran out. It’s very creative and wonderfully useful. I saw your link at Friday’s Furniture Fix.
That’s exactly what happened. I ran out of twine, but not out of patience. It turned out to be very useful and looks much better than before.
Thank you for sharing with us at #JoyHopeLive!
Mary thanks so much for visiting.
Totally worth it Mary! Your ingenuity astounds me! Thanks for sharing at Five Star Frou-Frou last week. Mimi xxx
Thanks sweet Mimi. It is proudly sitting in my dining room full to the top with papers and boxes.
Μαίρη μου μπράβο για τη μεταμόρφωση και χαράς το κουράγιο σου με το σπάγκο!! Είναι πολύ ωραίο να χρησιμοποιούμε τα παλιά έπιπλα!! Εσύ το κατάφερες μία χαρά! Καλό Σαββατοκύριακο!
Ευχαριστω Ελεανα μου. Ήταν πριν καιρό αλλά ακόμα αντέχει!
That’s a great furniture flip, Mary! Wrapping the shelves in twine was a smart idea, and it looks lovely… life is better with twine!
Yes it is Pili. I love adding twine to just about everything.
It was totally worth it, Mary! It is beautiful! I never ever would have known what it was or looked like in its previous life. This was a very creative upcycle. #OverTheMoon
Thanks Regina. It was one of my first projects. Little did I know what I was getting into when I started this one! I w on’t be repeating this any time soon. But I have developed a habit of wrapping different objects.
Your shelf turned out great Mary. Love the twine on it, bet that did take a long time. But it was worth it because it turned out really nice. It always fun to reuse something and give it a new use or look.
Linda it took way too long, but that was by choice as I didn’t want to wear myself out by doing it qickly. However I have really come to appreciate the beauty of twine and all the ways to use it.
What a great idea & makeover~ Thanks for linking up to Merry Monday! Sharing on G+! Have a great week!
Kim
Thank you Kim. It better last forever because I won’t be doing it again any time soon!
Mary, Great makeover for that old storage unit! You can’t even tell it is the same piece! Love the twine on the shelves. I can imagine that took some time! Thanks for sharing with us at Brag About It!
~Laurie
Thanks Laurie. That thing is over 20 years old but it still had life in it, it just needed some new clothes.
Holy cow Mary…that’s fantastic! Your patience surely paid off because it looks flat out perfect and I know you are loving your new storage solution. I love how you repurposed that old shelf and made it fit the decor in your office.
Well done!
Hugs, LYnn
Lynn, it was still sturdy it just needed a new look. And I really liked the twine look. Thank you.
Wow, that’s a wonderful transformation. It must have taken forever to wrap all of that twine, but it was definitely worth it. You turned a kids’ wired storage into a piece of furniture. It’s beautiful!
Rebecca it took about a month, because it was tedious work. But it looks so much better now and it is surprisingly strong. Thanks for your sweet compliment
All the hard work paid off! The twine wrapped shelves turned out lovely. I admire all the hard work and time you put into this project.
And the best part Audra is that it is so sturdy. I don’t think I could take it apart now even if I tried!
This is so cool! I would have never have thought of doing this!
It looks great and is so functional too.
Thank you for sharing this amazing DIY with us at Thoughts Of Home On Thursday!
Jemma
Thank you Jemma. It took a while but it was worth it.
Great upcycle! Would’ve never thought of adding twine to make a whole new piece of furniture. Great vision! Visiting from Morning Cup of Joe party.
Thank you Victoria. It was definitly a strange thing to do. Glad I did it when I had the time.. because now I’m in SM all day…lol
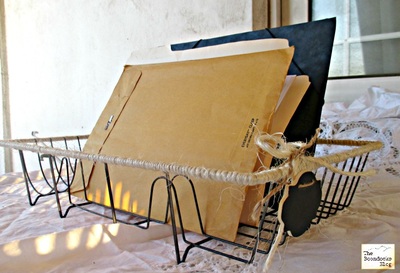
It’s always nice when we can repurpose an item. I also like the repurpose of the dish rack, so neat.
Celeste I have nicknamesd myself “the twine Lady” lol. I love working with twine, it adds a special touch instantly.
Great idea for cute storage! I’ve been in the mist of a craft room cleanup so I feel your pain! Thank you for linking up at Funtastic Friday!
This room clean up idea is never ending Lacie! Thank you for dropping by.
I love your upcycle project. You certainly did have a great finished shelf. Thanks for sharing your post at the Over the Moon Link Party.
Sandy It’s actually stood up and I am so happy for that.
Wow, what a creative repurposing idea! Great idea to use the twine to cover the red platic, it was well worth all your effort. Thanks so much for sharing with us at Talk of the Town.
Thank you Betsy for your sweet words!
This looks like a completely different piece entirely! I cant believe how much more expensive it looks now, too!
This was one of my earliest attempts. I spent so much time on this and the truth is it has held up remarkably well.
Mary, you’re a genius! This was such a smart way to upcycle this piece! I like your use of the twine to cover the shelves. Your covered containers are also very pretty with their color coordination.
It took me quite a while to do this but I wanted a unique piece that would hide the red plastic. It was so worth it in the end.
Hey, I like it! Love the addition of the twine, but I can imagine how tedious that was. It does look very chic now! The twine will keep objects from dipping & falling through cracks.
Florence it was time consuming but I had a vision and I just had to follow thru with it. I’m so glad I did. It is still standing and looking great!
It’s completely unrecognizable Mary. Wow what a transformation and a labour of entwined love.
Haha! Michelle you have such a way with words. That is exactly what it was “a labour of entwined love.”
Great repurpose. The twine was worth the time!
So worth it Trudy. It was an economical solution even if it took a while.
I love the way you have wrapped the shelves in twine. Very clever.
I was going for that warm, rustic look .
A total transformation – I love the use of twine. In my mind I thought you were going to spray the metal but the twine takes the project to a whole new level. Visiting from #handmademonday
Vicky it was metal coated with plastic. I wanted a warmer look than just paint and this was the way to go.
That is quite an improvement! I like twine too, it is so useful for so many things, especially in the garden.
You can see how I am so rebellious I use it for weird things like this, because I like to torture myself. Haha!
You’d never realise it was the same piece, it’s a total transformation.
I love how you too all the twine wrapping photos as it won’t be happening again. Is it like childbirth, when you say never again straight away but then after some time has passed you might reconsider and go for it again!?
Julie you are right! Time has passed and I’ve done a few twine projects but certainly not to the extent of this one. This one is for the books. Of course twine is still my favorite way to dress anything up. (I even have a category just for twine.)
Oh, I love this shelf so much Mary! The twine-wrapped detail is so beautiful. You’ve given me some great ideas to try at home.
What a creative use for the storage rack! I love the look of the twine! You completely changed the appearance of the storage rack. I’m sure it will look lovely wherever you put it! And the decorative boxes make it that much better!
Wow thats a great job! Never would have thought of that!
Great transformation, Mary! A great way to repurpose!
What a great upcycle! I love what you did with the twine wrap.
I know it took a lot of time to create this but it did turn out so great. Like you I am a sucker for anything with twine.
Twine is so special to me. The feel and the texture and those colors!
Oh my gosh, Mary. What a great use for the twine! I would have never guessed it was the same piece! Definitely something worthy of display now. 🙂
The twine added a very nice touch.
What a great upcycle to use twine and to add the wood. I love reusing things. Thanks for sharing at Merry Monday
Hi Mary, you’d never know it was the same piece! It was well worth the trouble to transform it… I did just have a funny thought… Did you move back to the US because you were all upcycled here? A bit like starting with a new canvas?… When we moved here we had some bits bought over and one was an old draw/ shelf unit I had as a child. My husband tunred it into separate drawers and a book shelp for what was going to be the childrens room. The shelves are still going strong over 40 years later, but the drawers sort of past the point of no return.
xx
You are so funny Debbie. I think that we could have upcycled forever. There was a great big metal gate that we had and I wanted to turn it into a foyer ornament and a table attached to it. I still wish I could have done it but no time. You see how even your husband has the right idea!