It is that time of the month again when I join my friends and we bring to you our unique projects from all over the world. Yes I am talking about the International Bloggers Club. Last month we started a new theme that involves using the Anniversary years as our guideline. We featured projects with paper last month and this month we are going to show you ideas with cotton.
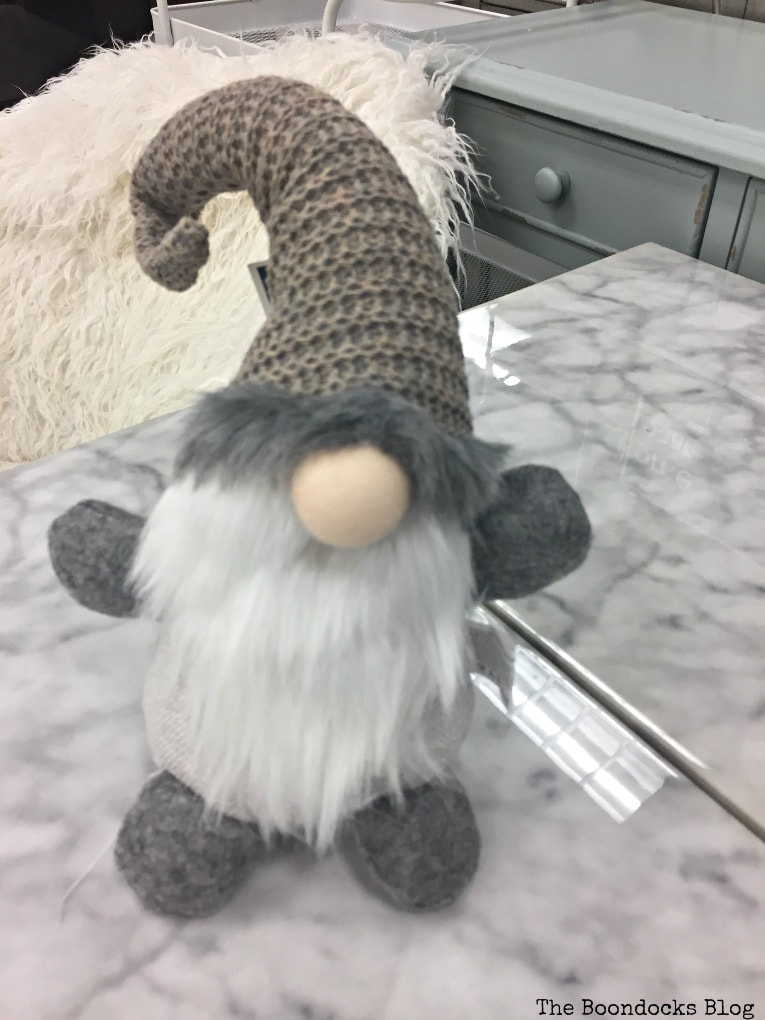
I had gone shopping at a Marshall’s and seen this gnome. And I was going to buy it too since it was so cute. But then I thought “what sort of self-respecting DIYer am I to buy one when I can make it.” And since I knew this month we should be working on cotton with the IBC I decided that should be my project.But did I succeed? You will have to decide. And so I share with you how to fail miserably at gnome making.
I was so excited I got my fabric ready and even a piece of plastic to serve as the base or butt of the gnome. But unfortunately for me, I could not figure out a way to put the body together with the base. So after half an hour of frustration and Grey’s Anatomy binge watching, I gave up!
In fact I was so dejected I thought of doing another post all together on how I saved money by buying cheap cotton curtains and making a valance for my kitchen.
But instead something else happened. While browsing the internet I was bombarded with pumpkins. And that is when I got the idea! I said “self, why not make your gnome have a pumpkin body?” Why not indeed? And that is how my pumpkin became a gnome.
Disclosure: The items below are affiliate links. If you purchase any of these products through the links, I receive a small commission, that way I can continue to provide you with lovely content. There is no extra charge to you for purchasing through my affiliate links.
What I Used:
The How To:
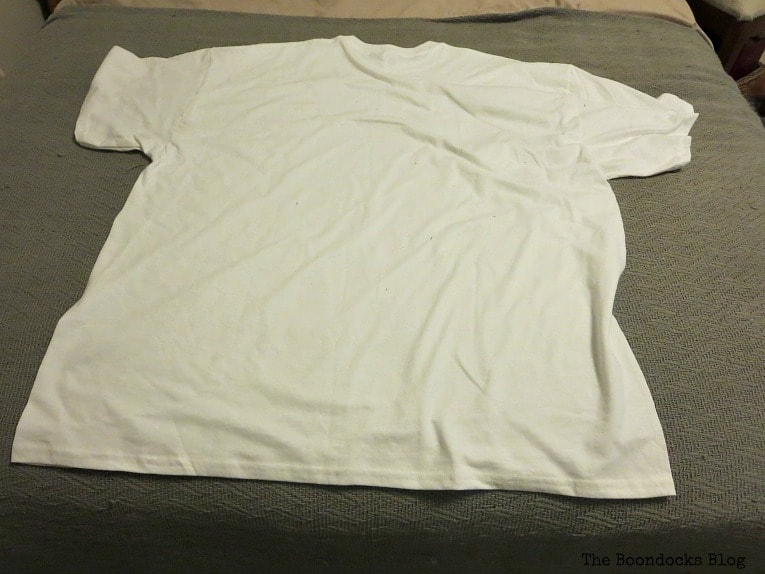
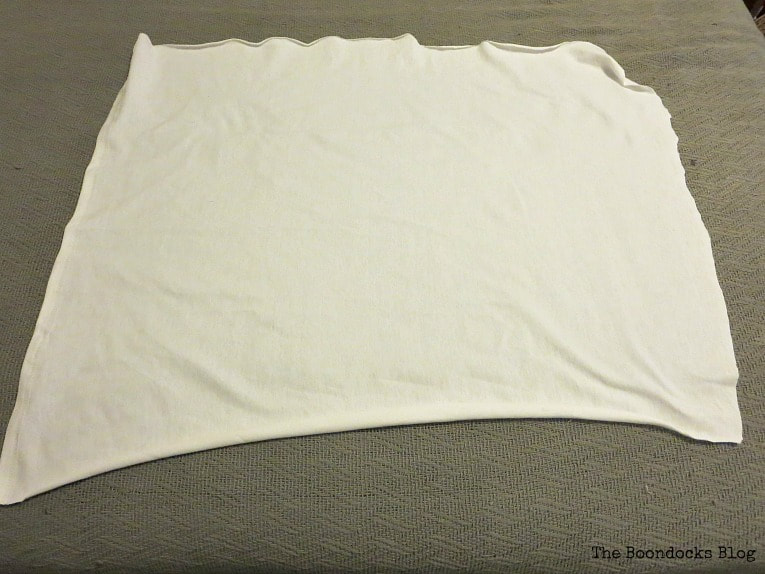
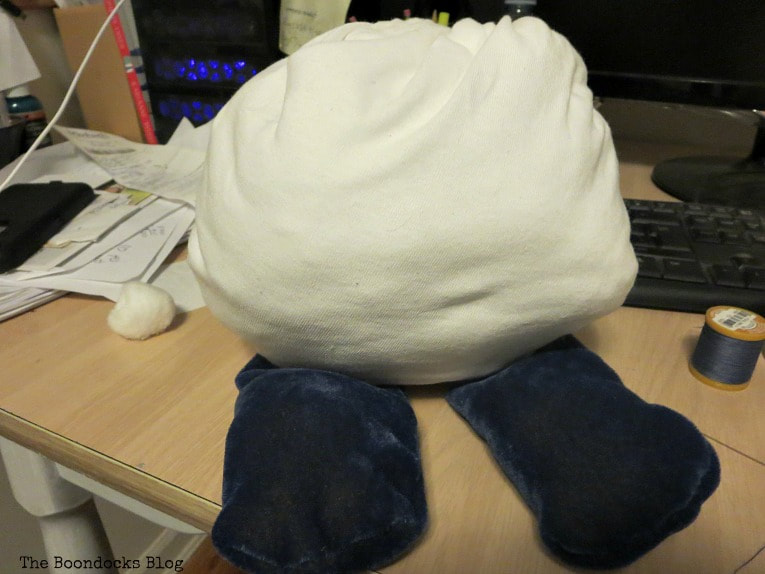
I wanted to use cotton but since my pumpkin, er, gnome would be a round shape I chose to use cotton jersey which is more elastic than a regular piece of fabric. Well for the life of me I did not know where to get this so I when I went to Micheal’s to get the beard, I also spotted their gigantic T-shirts in white cotton. It would be perfect for my project.
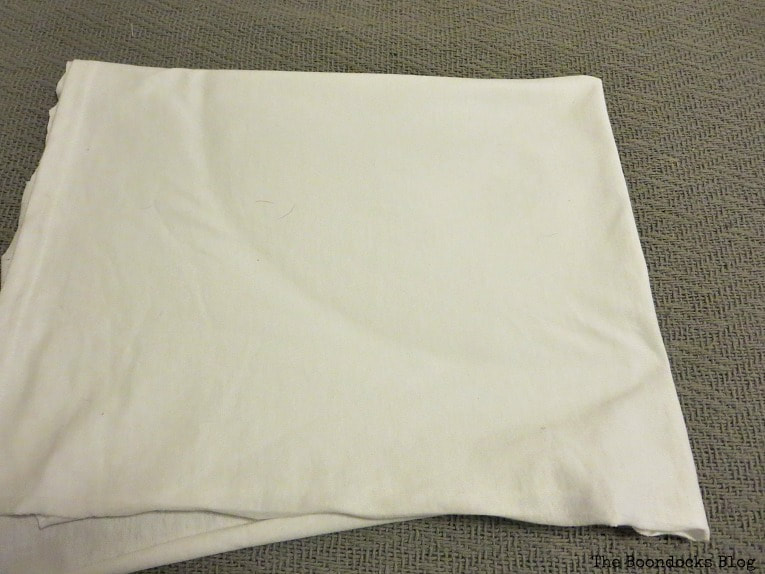
Since I didn’t need the whole T-shirt I cut up the back half into a square shape.
I then folded it up twice so I had four sections.
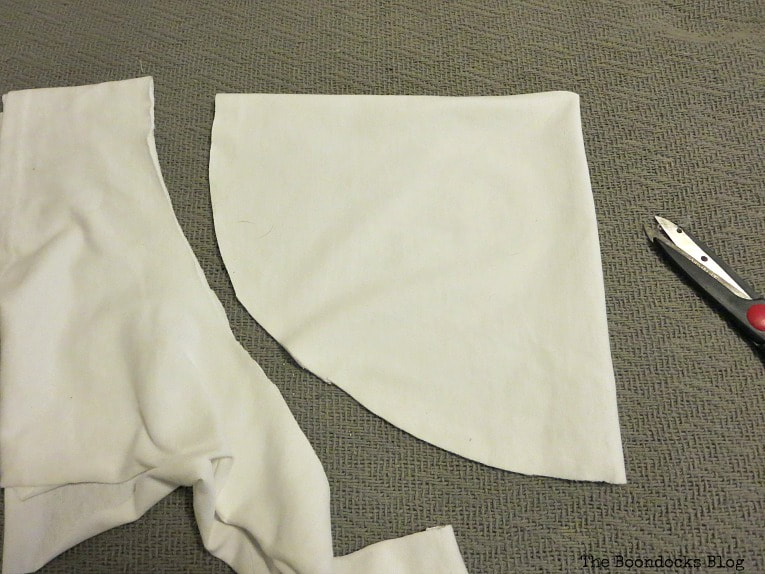
Next, I loosely cut out a quarter of a circle.
A circle, not perfect but for my purposes it didn’t have to be.
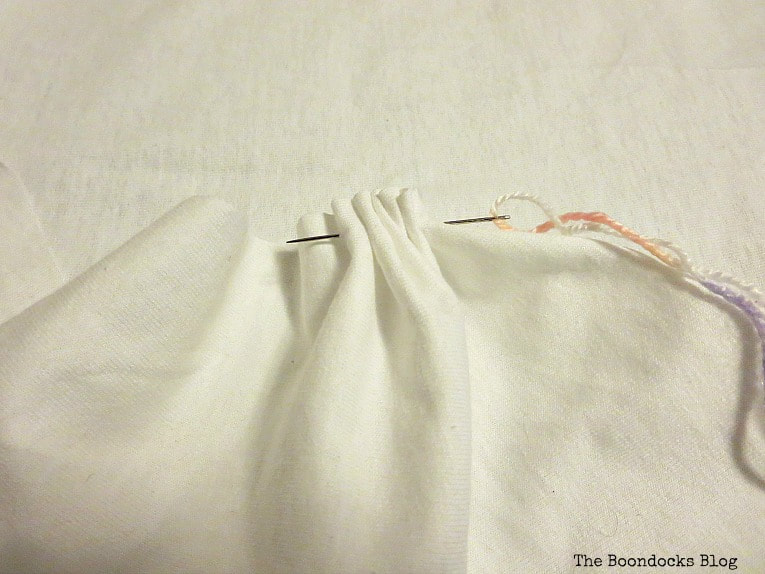
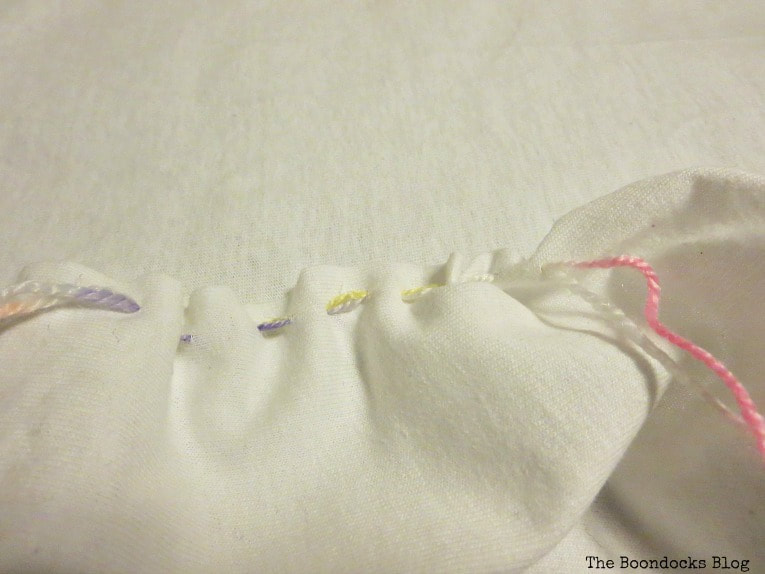
Using a thick needle and yarn, I sewed a loose stitch all around the edge of the circle.
It would be my drawstring.
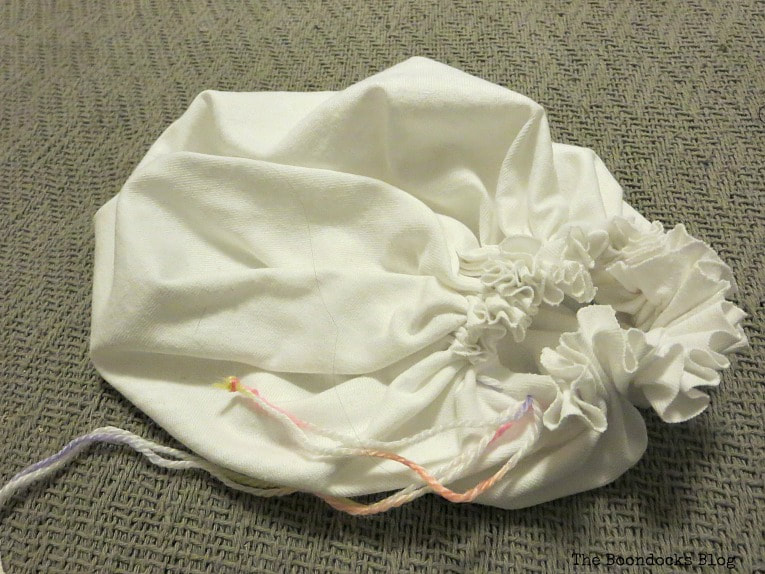
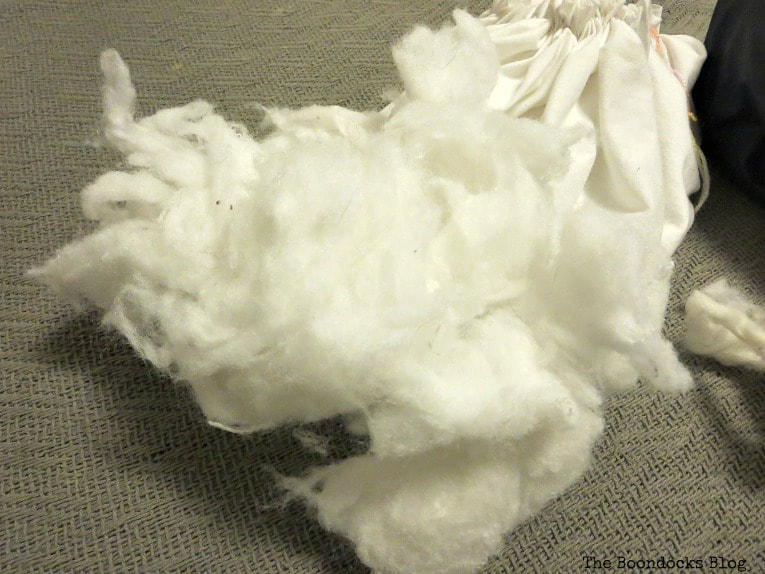
The next step was to add the stuffing. My sweet pup has destroyed quite a few pillows since we got him, and I, being the ever diligent recycler, had saved the stuffing cause you just know it would come in handy! Lo and behold I needed it for this project. You will be happy to know that I have since made new pillows and he has not bit them once. Good boy!
The hands and feet were both made the same way. By folding rectangular pieces of fabric, and then sewing the two sides, I had pockets which I then stuffed with poly stuffing.
The legs were made longer than the hands. They were sewn onto the bottom of the pumpkin shape. But by now we should not be thinking of pumpkins, we should definitely see a gnome in all of this! Right?
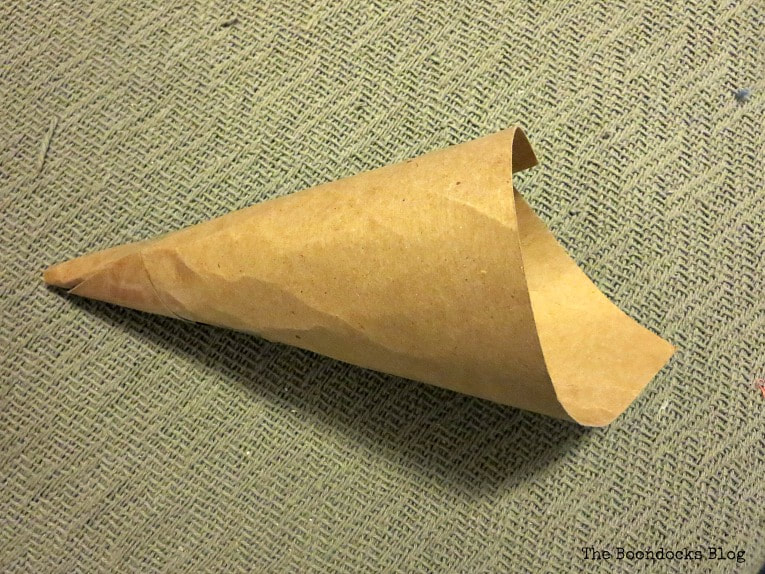
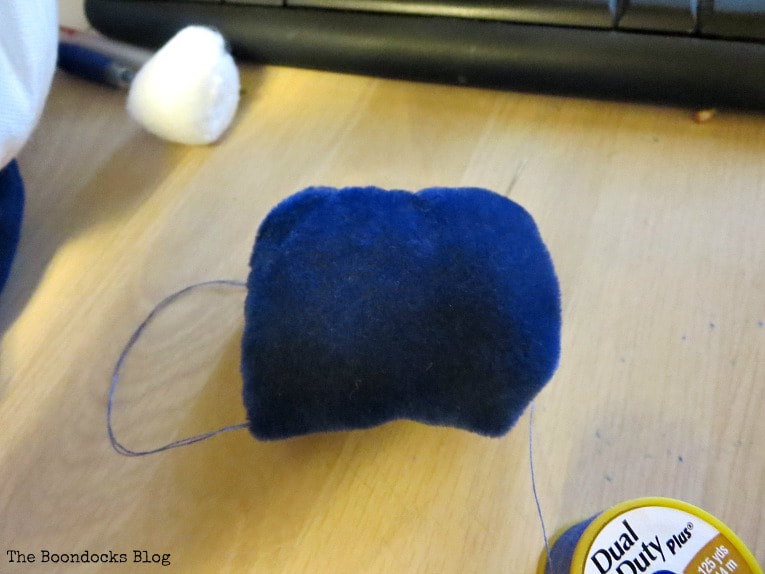
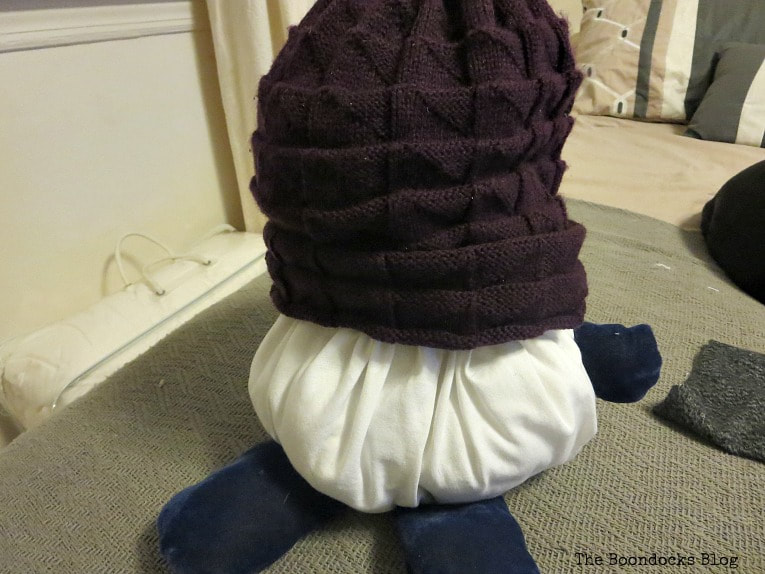
Finally it was time for the hat. Now I was not going to go out of my way to make a new hat. Let’s say that by this point I was thoroughly fed up with this project and was not feeling the gnome vibe!What did I do? I said to myself, “self didn’t your girl buy a new hat the other day? Maybe she no longer wants that old purple beanie?” But in order to put the beanie on top of the pumpkin, er gnome, I had to have substance under the hat. So I came up with this clever solution (because I was feeling less than clever throughout this whole project so far).
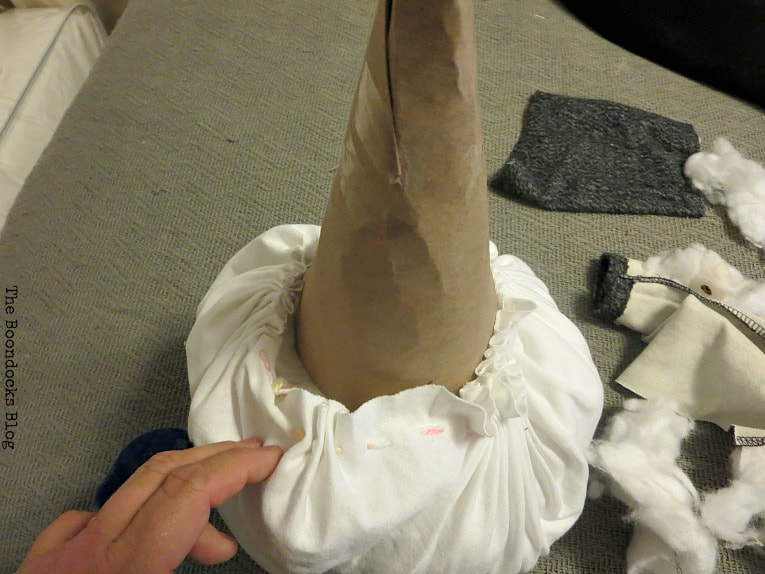
Using a piece of cardboard, I twisted it into a cone shape as you can see below.
|
I secured the cone inside the drawstring just by placing it inside and pulling the thread tight. I then added a bunch of more stuffing inside the beanie and placed it on top of the pumpkin body.
Here is the embarrassing result so far.
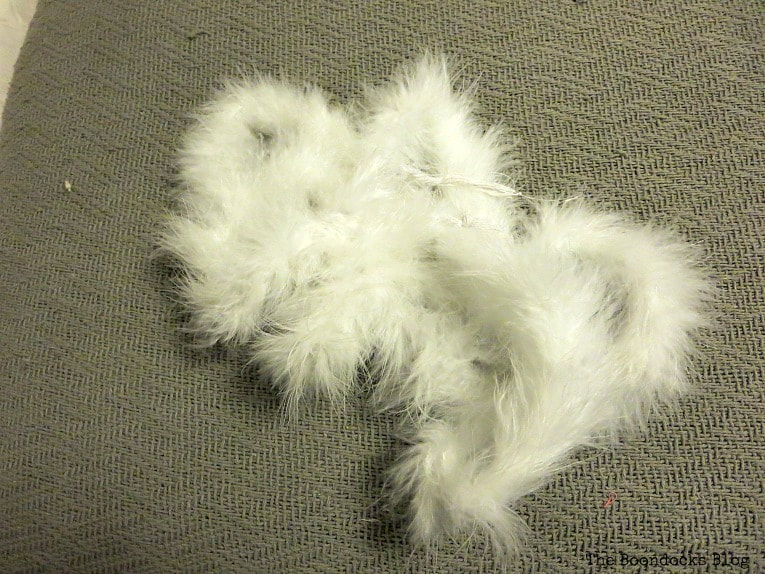
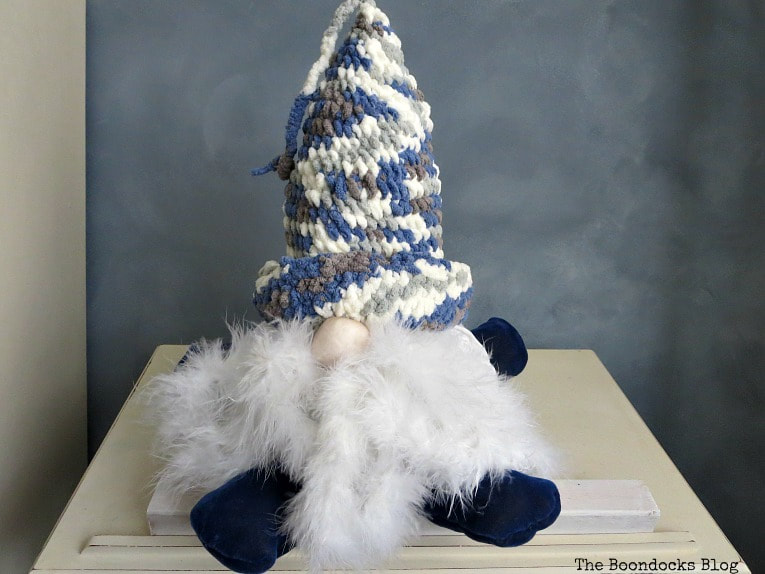
The beard was made using a feather boa. I folded the boa four times to the length I wanted and sewed the top end together.
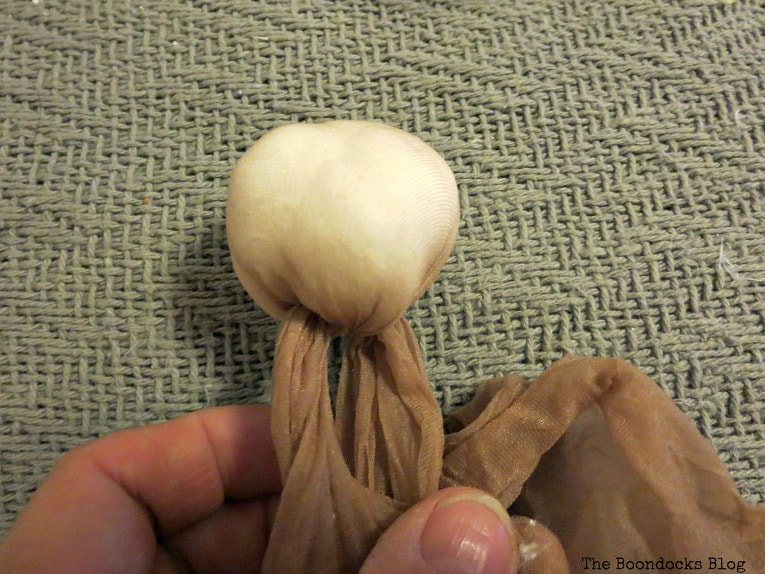
And lastly I made the nose by stuffing 6 cotton balls into a knee high stocking and tying the ends together. I shoved the ends into the drawstring and the nose has stayed put ever since.
This is how it looked yesterday. Not bad but I was not feeling the gnome vibe.So what did I do? I said “self, you have already eaten the donkey; all that is left is the tail now!” That happens to be a Greek expression meaning you might as go all the way since you’ve gotten this far.
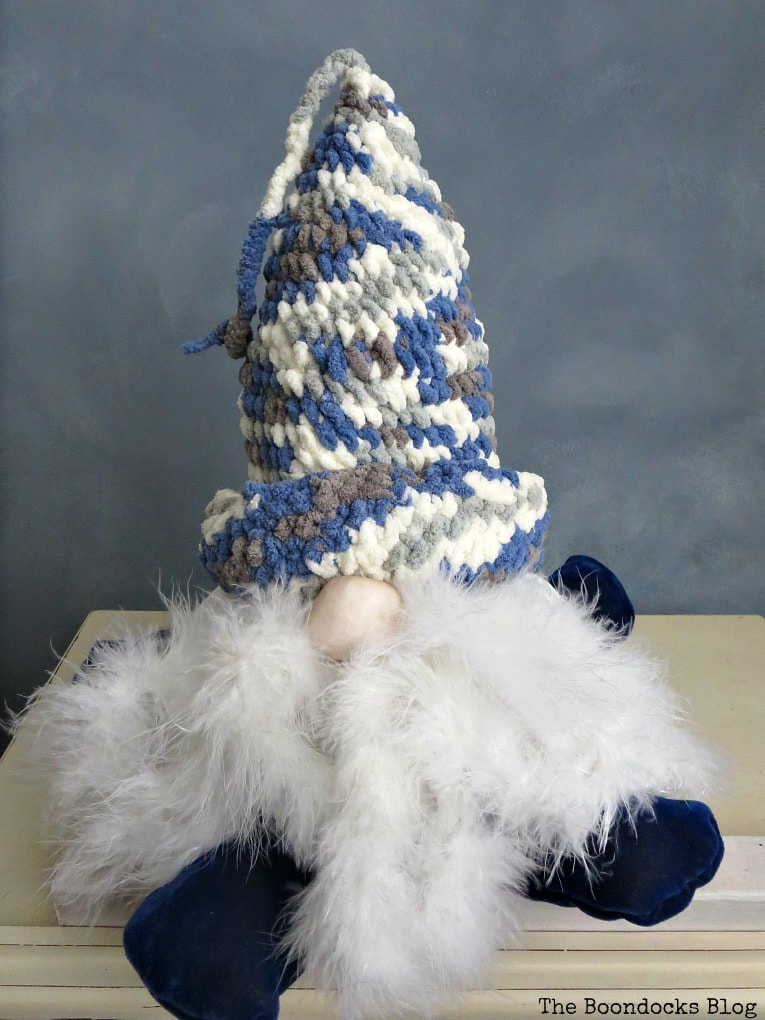
And go all the way I did! I took up crocheting after not having picked up a needle since my teen years.
It took me the better part of a day but I persisted and made this little hat for my gnome. You may have seen this yarn in my blanket project from last year. Finally my gnome was complete! And that hat matches the hands and legs and gives it a much more polished look!
If we compare him to the inspiration well, let’s say that my fella gained a few pounds in the process but it’s all hidden behind his massive beard!
What have I learned from this fiasco?
- Sometimes it really is better to buy than to DIY?
- Was I really so cheap that I couldn’t fork over $7?
- Am I so obsessed with a good challenge that I will risk failure?
- My pup Tatoo, really chewed into a lot of my pillows, cause I had a lot of stuffing!
- I bet all of my friends at the IBC had much simpler projects.
- Some things are better left to the experts?
- Am I a glutton for punishment?
- After this project, I’m really starting to hate pumpkin shapes?
- The world is better off without gnomes?
All that and more, but in the end I actually remembered how to crochet!
Now as you can see it took me forever to make this gnome and truthfully I actually found a much easier way here. But that was after I had finished my project. I hope you enjoyed this post and learn from my mistakes so you don’t have to fail miserably at gnome making.Questions of the day: Was it really worth all the work I put into it? How does it compare to my inspiration?
And now scroll below to see what my pals from the International Bloggers Club are up to. If you’d like to see more past challenges click here.
If you really like what you see subscribe to my blog and get my adventures in your mailbox. The form is on the sidebar and on top. To see my privacy policy click here.
I love it when I get your comments and I will try to reply to every one of them.
|
|


Your gnome is adorable, Mary! When I saw your inspiration one I had no doubt you would have succeeded with your own version and I was right.
Love his hat and his chunky nose, just be careful with the puppy this time 😉
Pili it was such a struggle for me. I’m glad the beard is huge so it hides the pumpkin shape of the body. As for my pup, he has come a long was from those days when he would rip everything apart!
I think he’s adorable Mary. Your little gnome looks like something you can cuddle up with on a rainy afternoon and just dream about fairies and far away places. And knowing that it was handmade always makes it so much more special. You better save this little guy for your first grandbaby, because he’ll be a hit. And no Tatou doesn’t qualify 😉 he has pillows to play with.
Haha Michelle, you are too funny. Thankfully Tatou has grown out of his pillow grabbing habit. But we like to keep the gnome up high, just in case! 😉
I think he’s adorable and just perfect, Mary! It’s amazing what you can create if you just try!!!
Gail this is so true, especially about this project! I was having such a hard time, but I just pushed on through!!
I’ve never tried making a gnome before but I think yours came out adorable! Pumpkin shape and all. Great job on his sock hat as well.
Thanks so much Linda. This was my first attempt and the hat was something I crocheted at the last minute, because I like to make my life difficult! 😉
I think I love you Mary! You made me laugh so much with this one !
With all your questions at the end I think the answer is probably yes – but where is the fun in that?
Your gnome turned out cute, so I guess all’s well that ends well.
Someone has got to ask the hard questions right Julie? Especially for such a torturous craft! I bet you would have come up with an easier way to do this! 😀
Its super cute, but you made me laugh! Your dog situations with those pillows is typical but it made me smile.Thinking of all my stuff my dog chewed up.
Maria
Typical indeed Maria. Thank goodness I was able to break him out of that habit otherwise I’d have no pillows at all! But I’m keeping the gnome up high just to be sure! 😉
Love the Gnome! Now I need to hurry off and make one, they have such personality, enjoyed the post 😀
Lori Jo – 50 With Flair
http://www.50withflair.com
Thank you so much Lori. Sometimes you need to make lots of mistakes before it works out.
I love it! He’s so cute! I love that he’s blue too! Great job Mary!
Jeannee
Blue has become my favorite color lately Jeannee! And it looks so good against that white beard!
This made me giggle… thanks for being transparent, Mary! 😉
Gotta keep it real Julie! I’m just a regular crafter with no super talents.
Mary, you made me laugh with this post.. Most of my projects start with a great idea and then somewhere along the line something always goes wrong… BUT I don’t think you failed at all.. I absolutely adore your little gnome.. yes you could have bought one in a shop, but this one is super special because no one else will have it!! One of a kind 😉
Thank you Evija. I really had a tough time with this but in the end it all work out, even if he is a little tubby!
Mary he’s so cute! You are so funny, I had to laugh with all the questions at the end.. sometimes things don’t work out the way we envision them and it happens to me all the time too.
Katrin you always make all of your projects look so effortless I cannot believe you ever make mistakes! 😉
I don’t think your gnome is a failure at all, Mary. In fact I think he’s a friendly looking, well dressed guy with an adorable nose and beard. I also think he probably has a great sense of humor like his maker. And you got to relearn crochet, what’s not to love about that!
Marie I think he better have a sense of humor after all the cussing I did just to get him done! And yes, that was the prize for me to be able to relearn my crocheting.
You make me laugh and your gnome is adorable.
🙂 gwingal
Thanks so much Nikki. I had to keep my sense of humor with this one otherwise I would have blown a fuse!
Oh my gosh Mary, I love your narrative. There has to be something in the wind. I got the same thing going on with trying to stain something, you’d think I’d never done it before.
Your little gnome is wonderful and one of a kind, the way he was meant to be. Great job even if painful.
Mary!! I know this gnome! I put him in my own cart at Marshall’s and left the store without him, as well. He was so adorable, but I thought the same thing…I could make that. Well, after reading your post I may go back!! Your gnome is absolutely adorable…better than the store bought version, but I don’t think I have it in me to wrestle with one. And I cannot crochet!! You get major points for sticking it out!!
The gnome is so adorable. You had a few set backs but nothing you couldn’t conquer.
I’m not usually a gnome person but he’s cute.
Cath
Oh Mary your post made me giggle! Boy have we all been there where we start off with one thing in mind and end up somewhere else lol!! Thats all part of the fun. But I think your Gnome turned out super cute! All the other Gnomes will be happy to have a new friend!
What a clever idea, this is so cute! Love the idea of an international bloggers club!
I think it’s cute and that you did a good job, but sometimes it does seem like it’s easier to buy then DIY!
Oh my goodness, Mary. It turned out so adorable, one would never know the frustration that it took to get there. It’s so frustrating when projects that you assume are going to be a breeze, end up being a total headache. BUT, you got a super cute little gnome in the end. Brava! And I love the crocheted hat!
I had to see how you made your cute gnome, Mary–you did a wonderful job! I love his fluffy body and the hat you crocheted for him came out great!
Hugs, Pat
Brilliant~~ using a pumpkin body — I’ve made some pumpkins this year in the exact same way as you made the gnome body. Easy. Quick. Love this so much. Pinned. Linda @Crafts a la mode
for Thursday Favorite Things Party
I think your gnome looks great. He has more character than the shop one. Homemade is always better anyway.
He has such personality! Thanks for sharing at Vintage Charm!
Your gnome Mary is surer cute!!! You know crocheting???? Wow! Well sometimes we are so sick with the DIY… I mean that perhaps you we want to make is cheaper to buy it than buy the materials to make it. But noooo we are DIYers and we must prove to ourselves that we can do it! My hubby always says to me “why don’t you buy it”? He cannot feel the satisfaction we take of making our desired item!
Your post sounds a lot like how many of my recipes go! Change this, fix that, redo the other! Lol! Your gnome is cute as can be! Thank you for sharing at Celebrate It!
Mary, I love how your gnome turned out. You are one persistent gal to make this happen!
Hi Mary, I think you should be very proud of your little gnome, he’s a cutie. I reckon if you did him in red he would look like a Santa Gnome.
xx
Now, that’s what called Perfection. Keep up!!