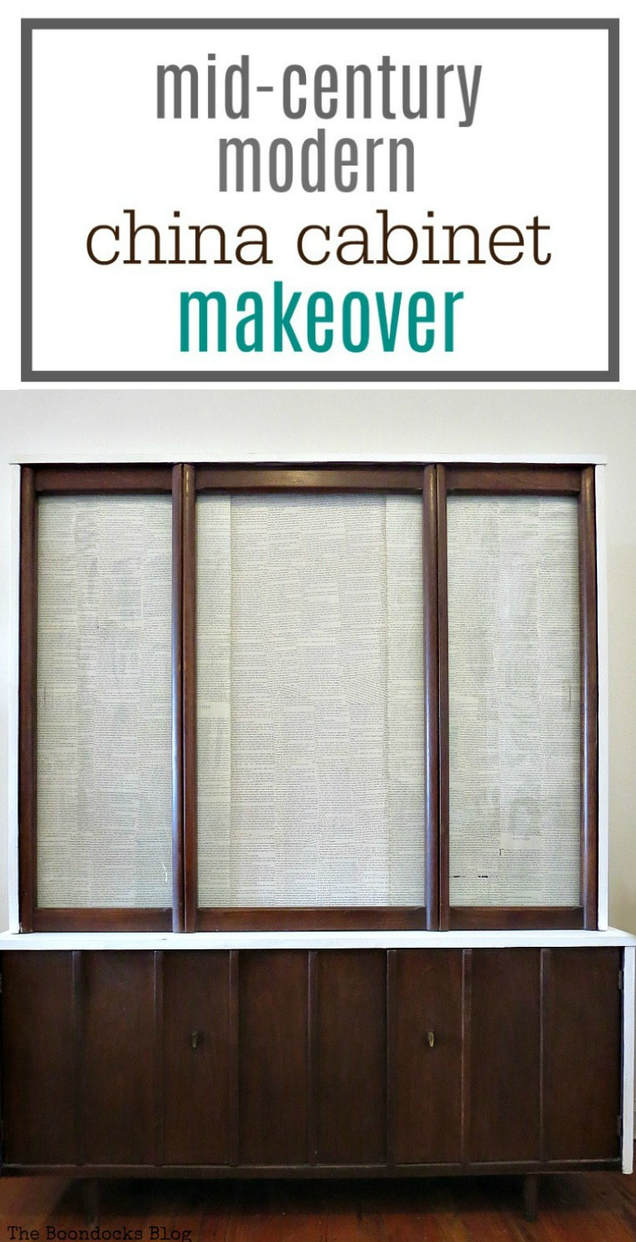
How to Makeover A Mid-Century Modern China Cabinet
Keep a classic piece of furniture in the family! Learn how to makeover a mid century modern china cabinet with just a few materials.
Keep a classic piece of furniture in the family! Learn how to makeover a mid century modern china cabinet with just a few materials.
This project has been in the works for months. I believe I started on it in October of last year. And what I thought would be an easy job quickly spiraled into a disaster. But we shall take it from the top. This is the story of a mid-century modern china cabinet that has been in my family since the 1960’s. I know because I was there.
I had to give this china cabinet a makeover not because I wanted to but because I had to!
Disclosure: I was compensated for doing this post with product. However, all the opinions stated here are my own. I only use products I love and would recommend to my viewers.
Materials Needed To Update This Mid Century Modern China Cabinet
Disclosure: This post contains affiliate links for your shopping convenience. If you purchase any of these products through the links, we receive a small commission at no extra charge to you. You can find our full disclosure here.
- Hope’s 100% Pure Tung Oil, Moisture Resistant Wood Finish for All Fine Woods, Furniture and Antiques
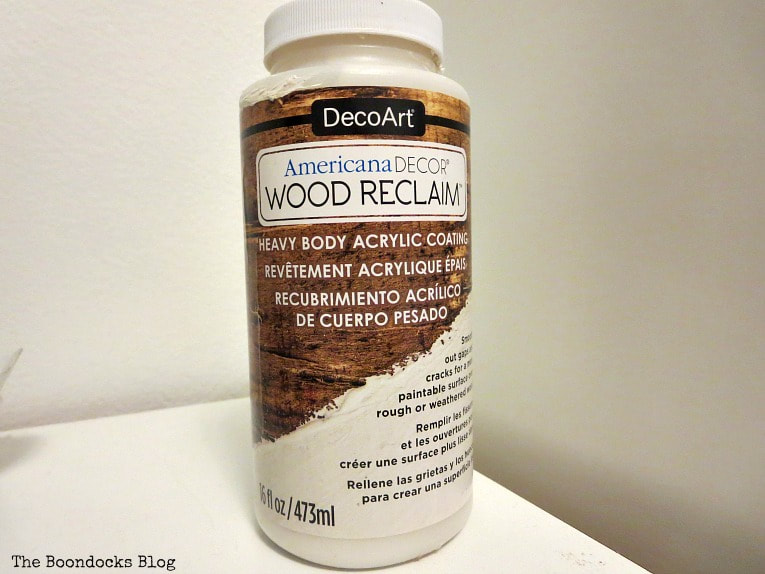
- DecoArt Americana Decor Wood Reclaim 16oz
- DecoArt ADC-01 Americana Chalky Finish Paint in Everlasting
- Mod Podge Waterbase Sealer, Glue and Finish in Matte Finish
- DecoArt Varnish in Ultra Matte
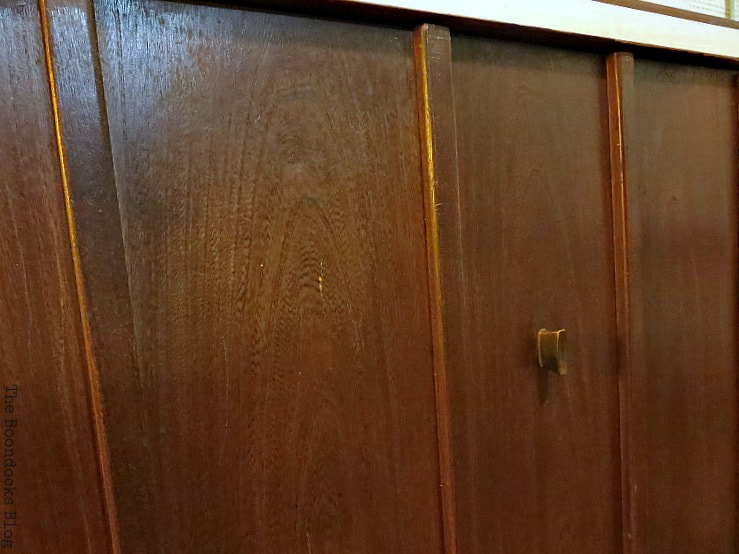
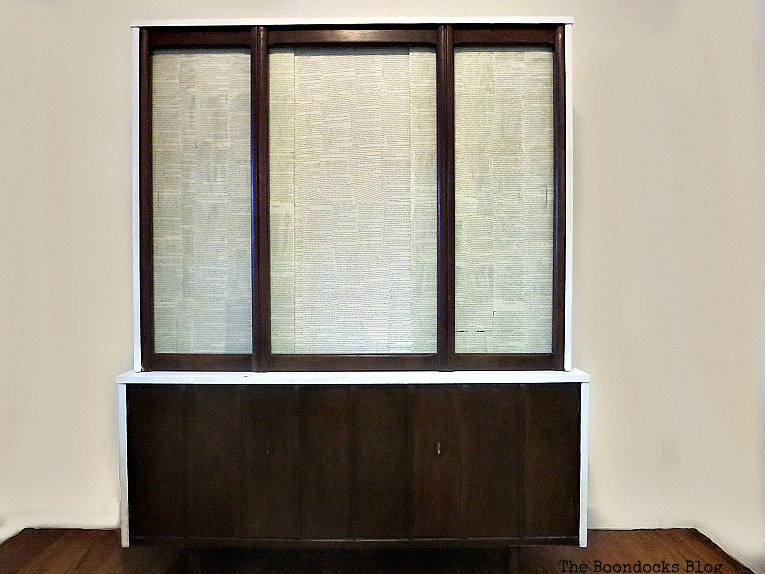
We had this beautiful piece from the time I was a little girl and we had first moved to the USA. I remember looking at it as a kid, and being very indifferent to it! But as I got older and married I came to appreciate those smooth clean lines. It came with heavy glass sliding doors too.
So when I came back to New York this past fall it was definitely on my list of things to upcycle. I wanted to keep the beautiful wood tones and just add a bit of shine to it.
The How To:
I started by applying Tung oil to the whole piece. Using a clean rag I just rubbed it on, waited an hour and wiped it off – twice.
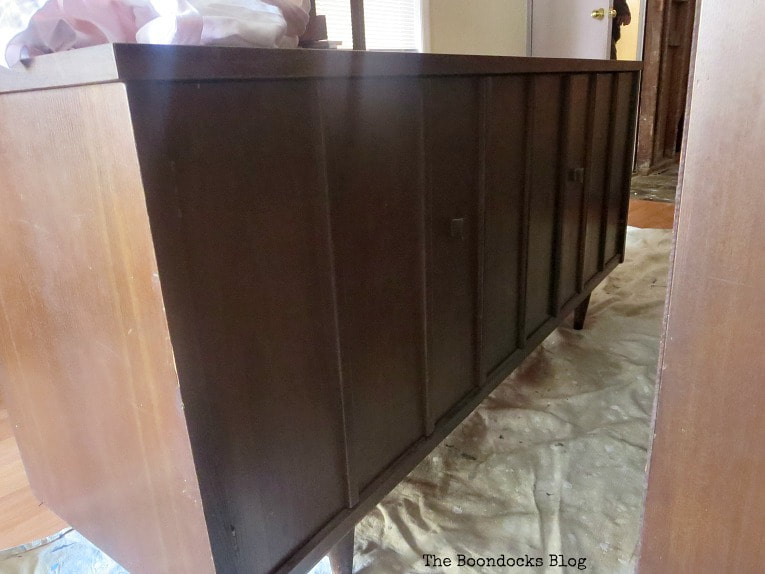
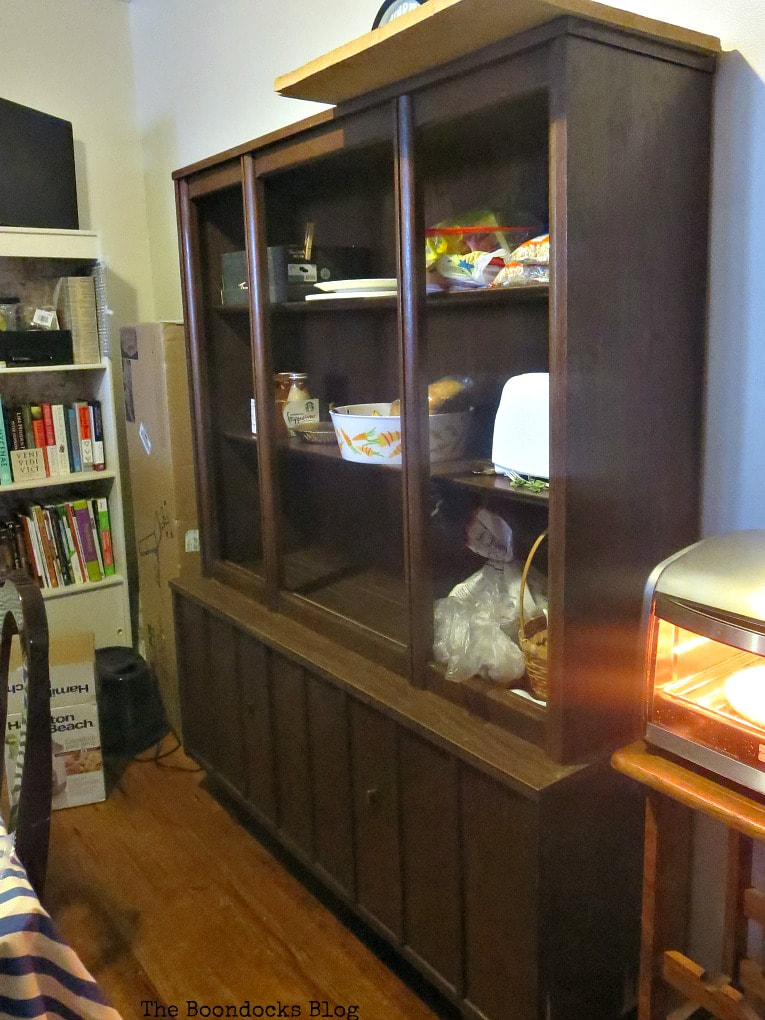
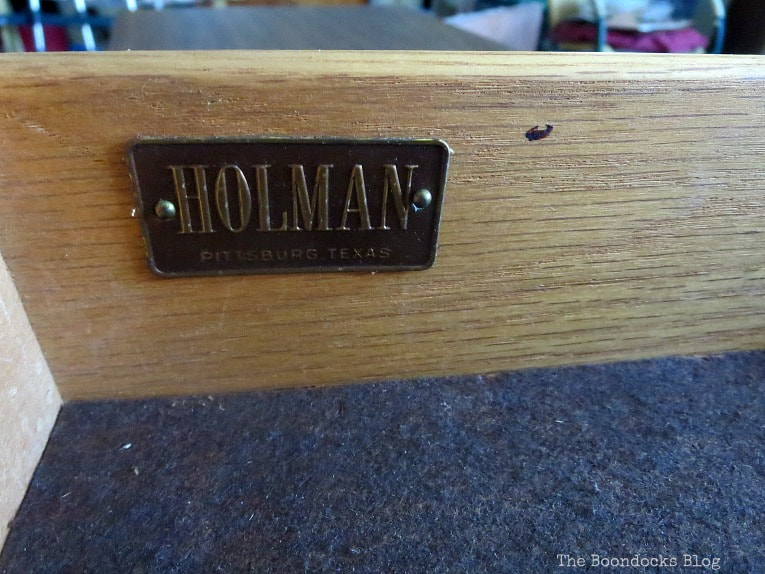
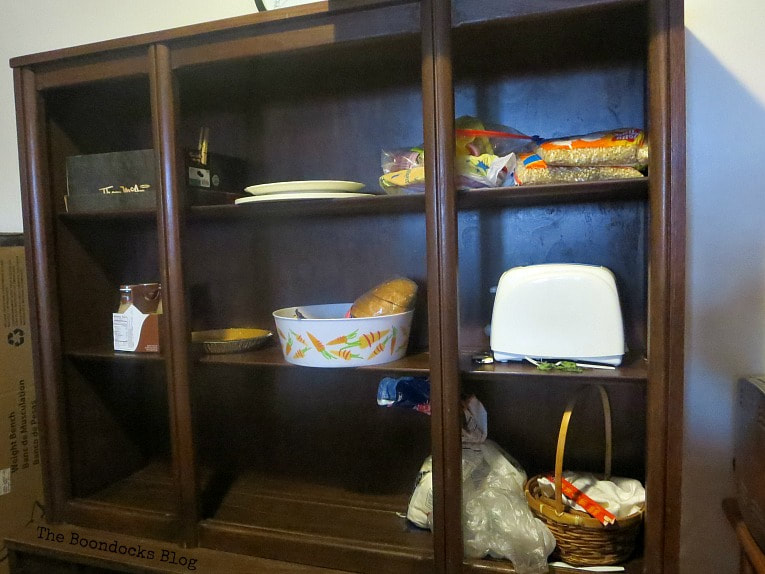
Once you open the bottom doors, there is a utensil drawer and I found the manufacturer, Holman furniture from Pittsburg Texas. I looked all over the internet but couldn’t find another piece like this. Hmmm…
Lucky for me I have a knowledgeable friend Ann Marie of the blog Iris Abbey told me that was a ” family-owned business, believed to be founded by Danish immigrants, Holman Manufacturing existed from the early 1900’s to sometime in the 1990’s. They sold their furniture to higher-end department stores.” This got me to thinking about the value of the piece.
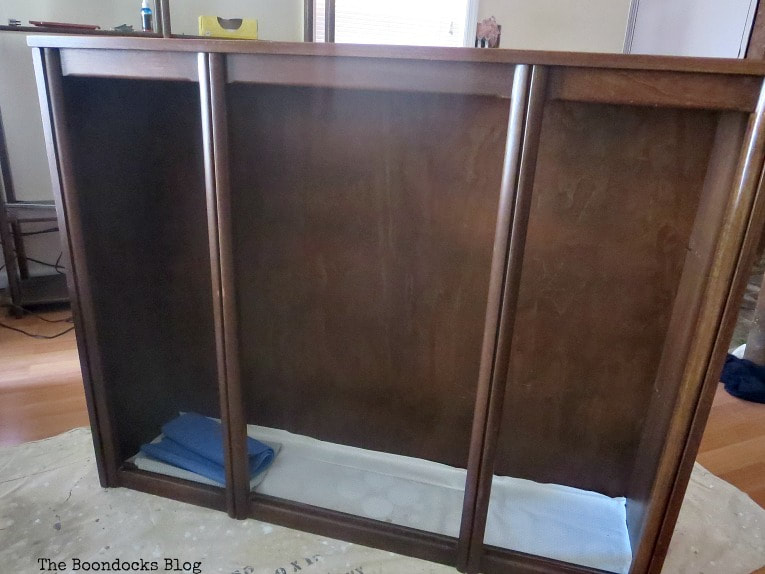
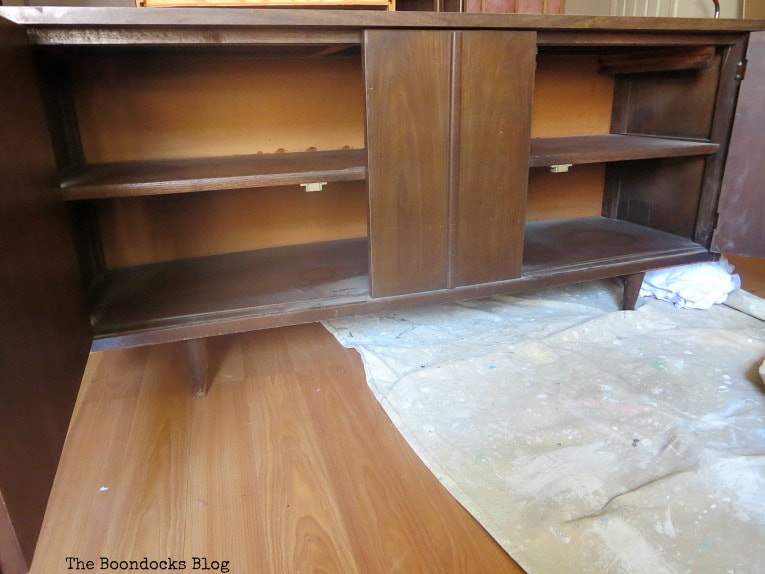
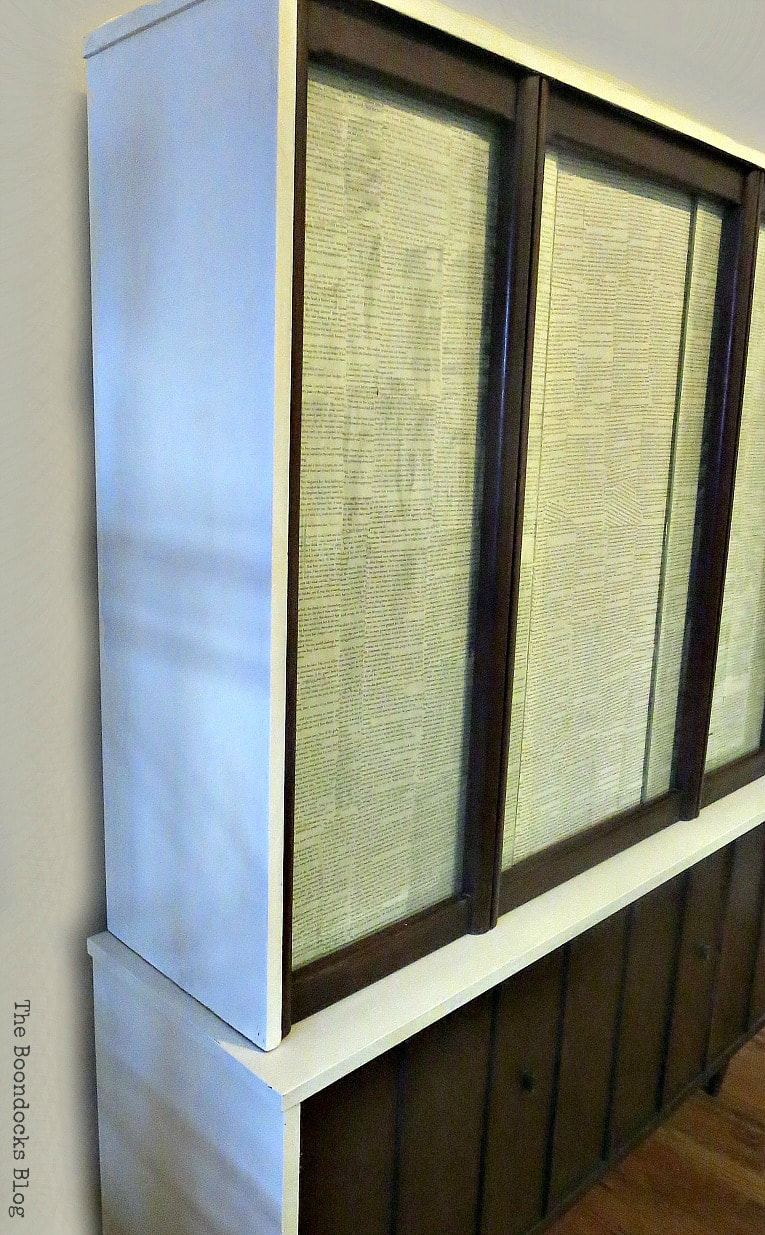
Here we see the inside. Excuse the dust. The utensil drawer goes on the upper left hand side. I rubbed it down with Tung oil and was so proud of myself! But I speak too soon!
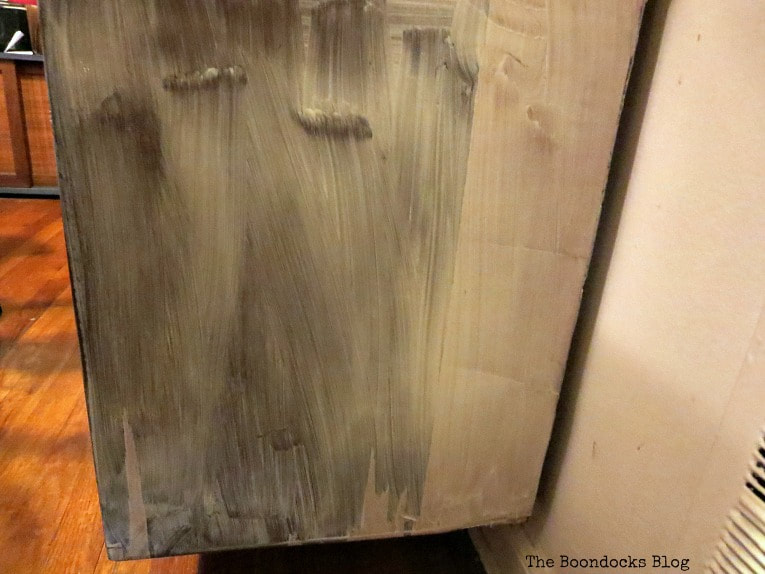
Till I came to this. It is the bottom left hand side and as you can see the veneer was damaged and peeling. I tried to nail down the pieces but that was not working at all!
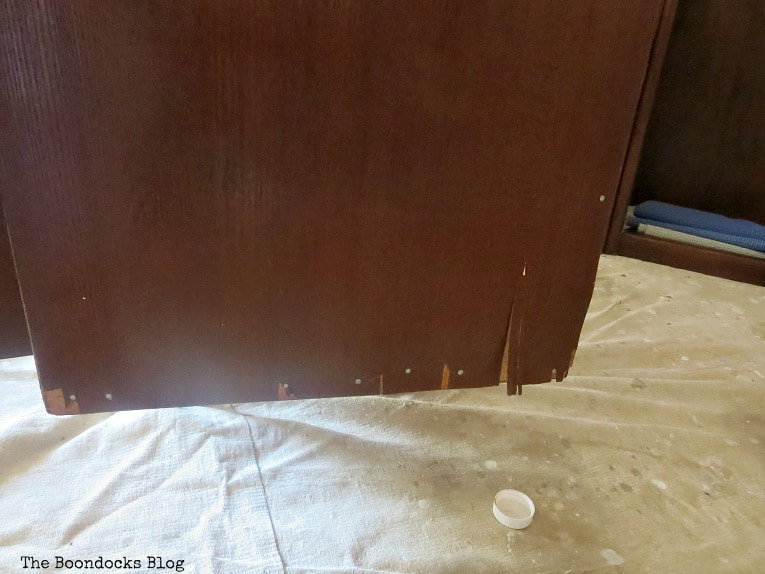
In fact more and more pieces came off.
I was heartbroken to say the least.
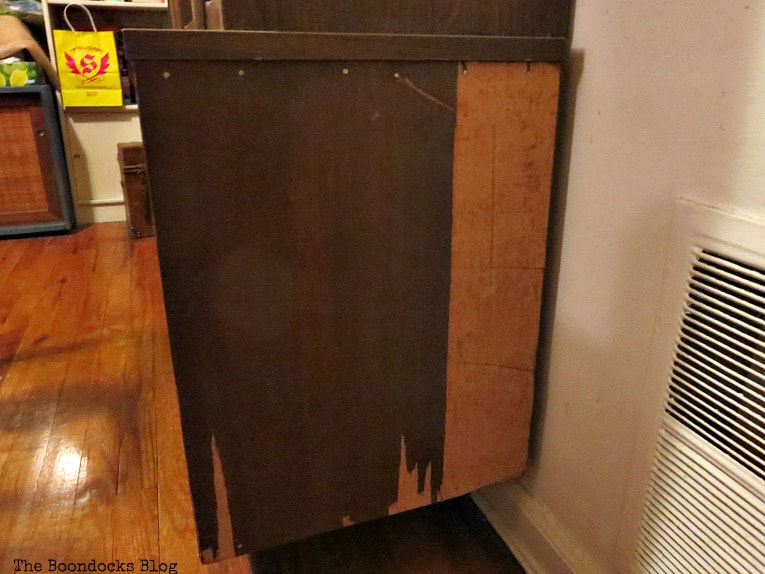
And so I let it sit there for the better part of three months not knowing what to do and feeling disheartened. I looked all over the internet and found a great post on how to save it from The Navage Patch. But unfortunately my skills are not as good as Greg’s so I opted to try another method.
I used a wood reclaim to even out the side of the cabinet as best as I could. This took about five coats of the product. I think wood filler would probably work too.
And then of course I couldn’t leave it like that so I had to paint it to hide the unevenness of the side.
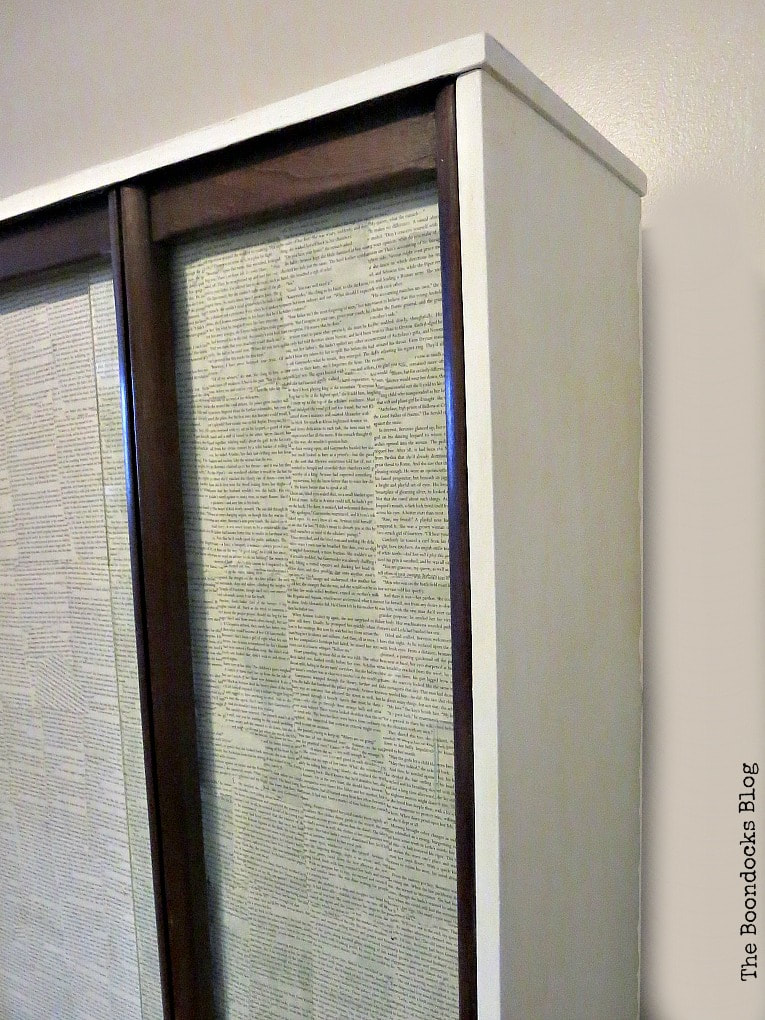
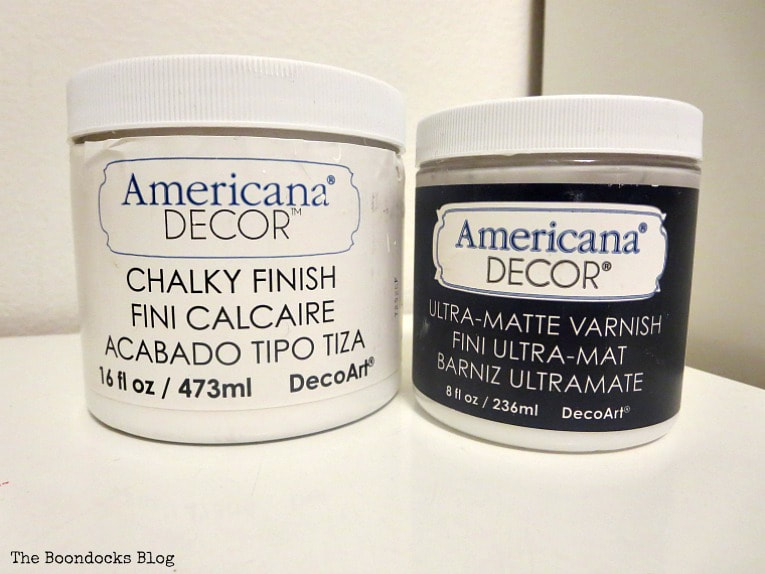
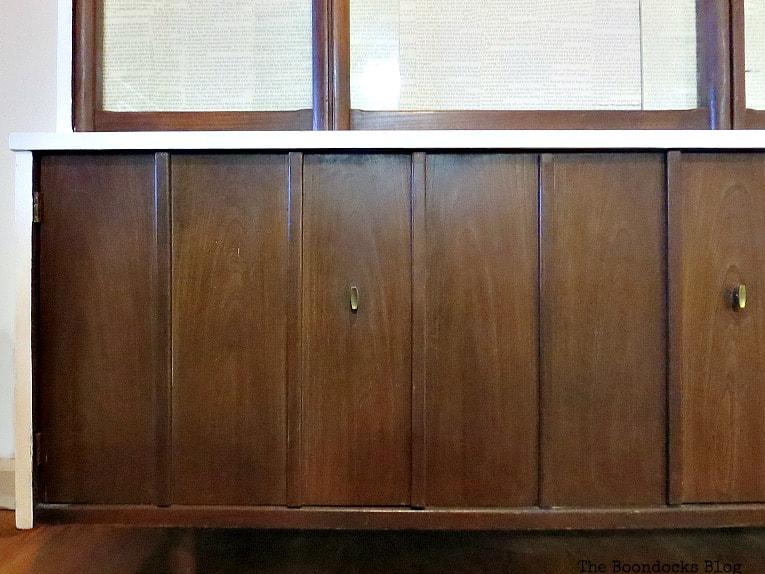
But still wanting to preserve as much of the wood as I could, I painted just the sides and the top. I used Americana Chalky type paint in Everlasting, which is my go to color – basically a white.
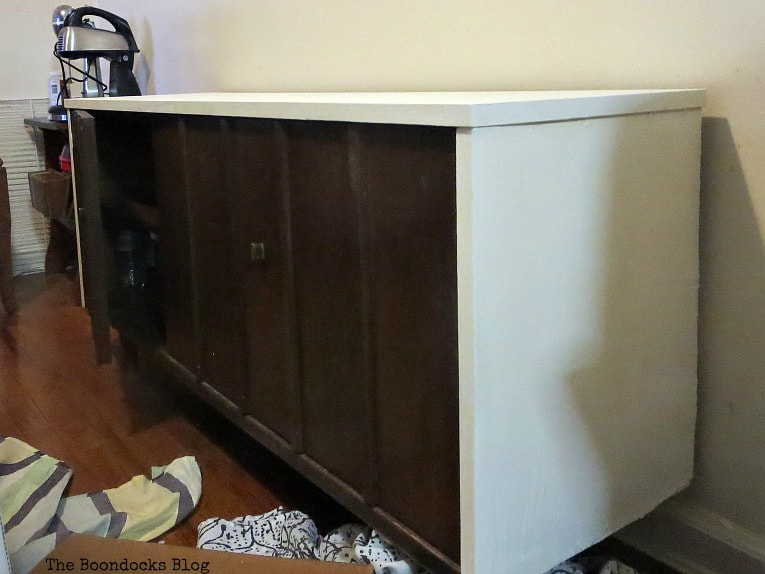
I mean it was bad enough I was painting the sides, but I certainly wasn’t going to paint the front with it’s lovely walnut grain patterns.
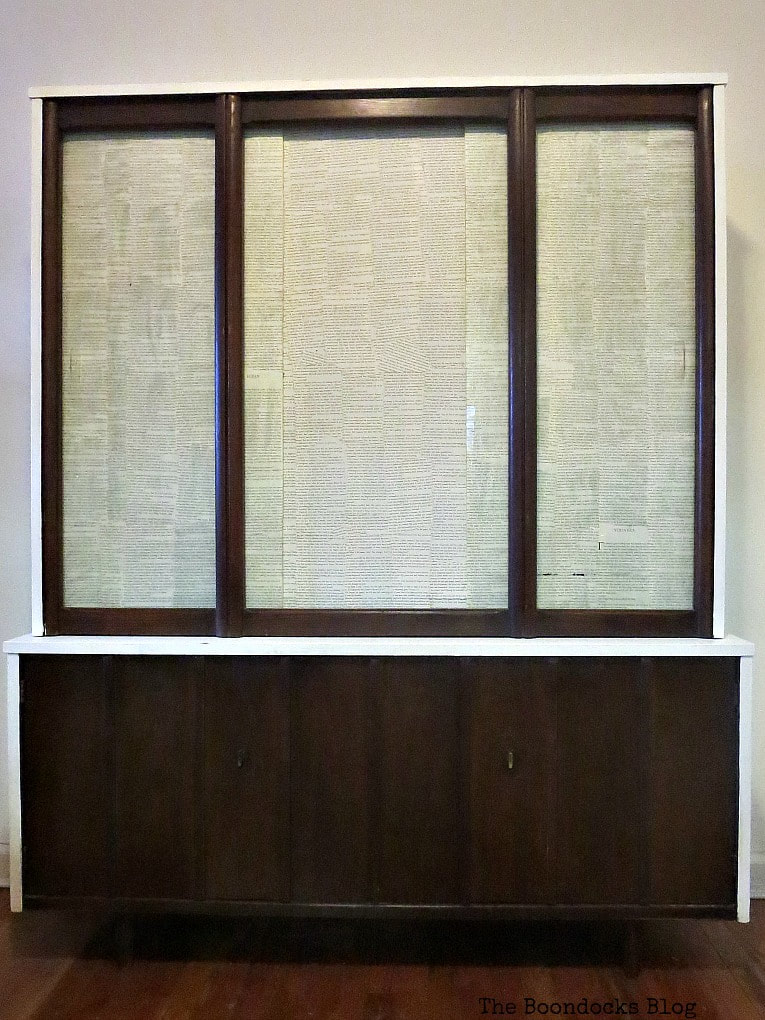
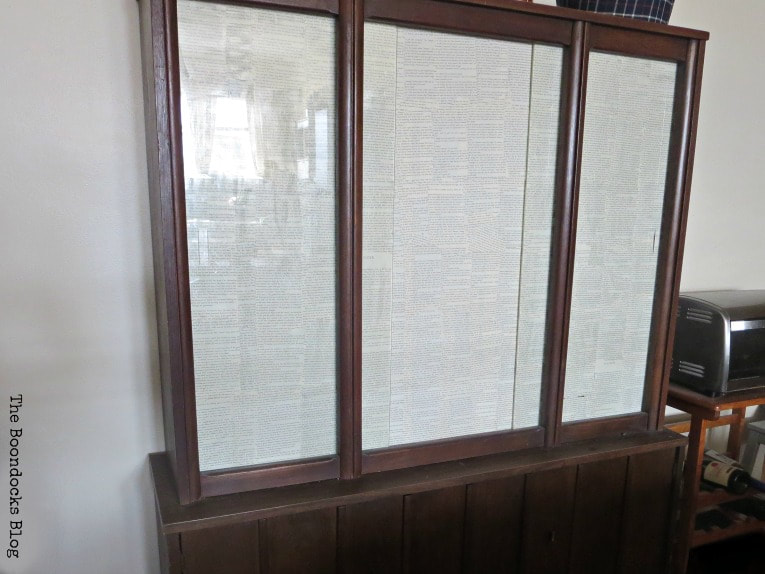
As for the top half? I did something really strange to it. Because I use the china cabinet to store things and not as a display I needed to hide my mess. And believe me I have a lot more stuff than in this photo. My daughter is a baker and you would not believe the gadgets that exist for bakers. But as I said before, the sliding doors were made of glass. I thought of adding fabric but there was no place to hang it.
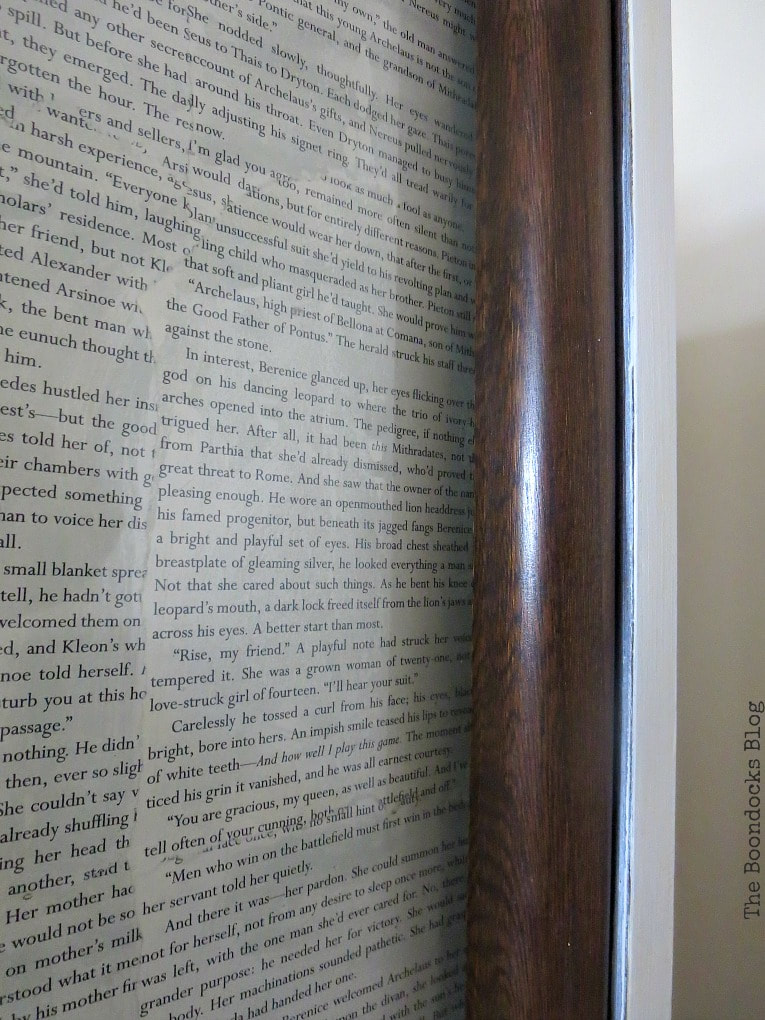
My solution was to use book pages and decoupage them onto the glass. This way I could hide all my stuff and have a nice neutral look for the doors. I used Mod Podge to glue the book pages onto the glass.
I also made the tough decision to paint the sides of the mid century modern china cabinet and top as well so it would look like a unified piece.
After painting it with the chalky finish paint, I finished it off with Ultra Matte Varnish. I did about 3 coats in a few hours. And you’re supposed to let it cure for a while, but I put the upper part on the bottom cabinet because I couldn’t stand my messy dining room any more. The matte is really matte, no shine at all. And it kept my white color white, no yellowing!
Mind you, this wall all done in one day after the initial procrastination period of three months.
And here it is finished and looking a lot better than before.
I think if you didn’t know the full story you might get mad at me for painting it but now that you know I’m sure you understand and forgive me! “wink”
Although I was reluctant to paint it I find that it makes a world of difference to the room. The dining room has no windows at all hence these bad pics you are seeing.
I’ve managed to preserve enough of the wood so you can see the walnut grain.
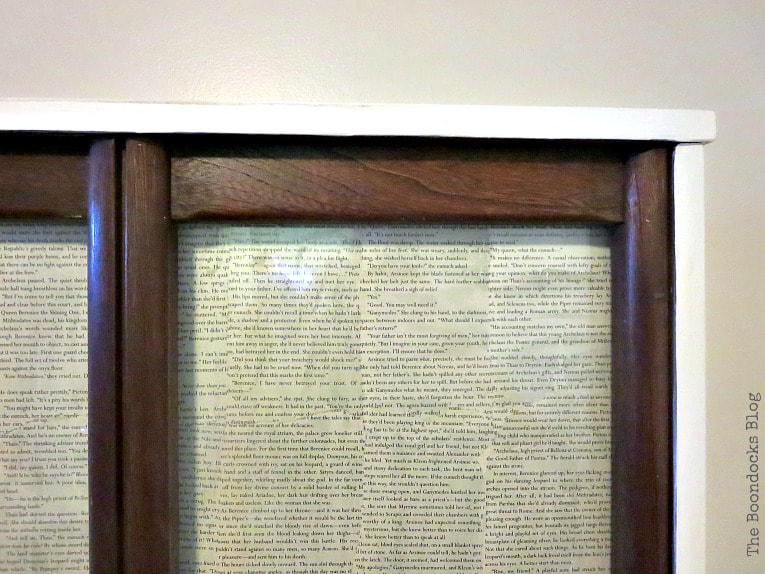
A close up of the decoupage which was done on the inside of the glass to allow me to have access to the glass handles in order to pull the doors.
It took me a very long time to finish this mid century modern modern china cabinet project but not because it was a labor intensive job. It was my indecisiveness at what I should do with this lovely piece. In the end, I feel that I was able to preserve the integrity of the piece while at the same time hiding it’s imperfections with the paint. And as a bonus it really helps to make the room look larger now with the white paint.
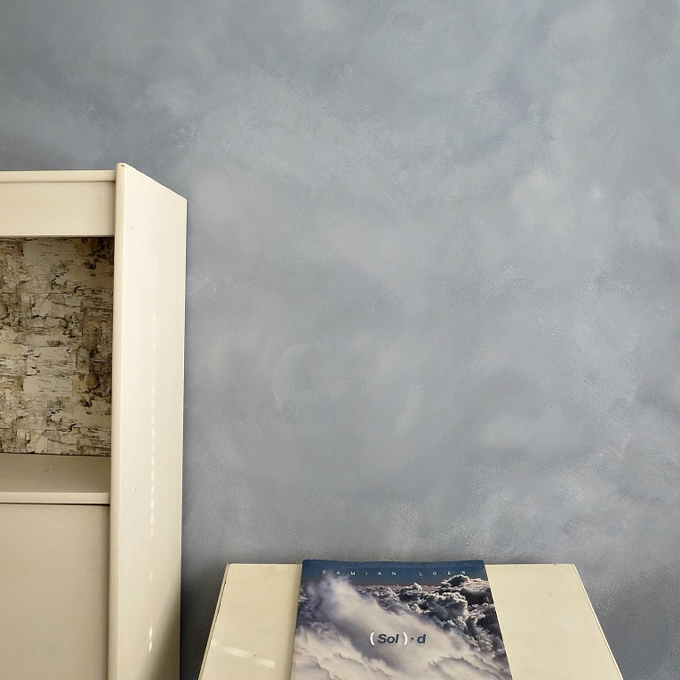
This is the same room which previously housed these bookcases.
In the end I was happy to be able to save this cabinet from my childhood days, even if I didn’t appreciate it back then. It would have been horrible if it had ended up in the basement. I still have a few years till I get that good – or maybe I never will, but at least I know my limitations.
If you like mid century modern china cabinet and other modern furniture make sure to go and visit Iris Abbey. Their blog is a wealth of information on these sorts of pieces.
Now that this mid century modern china cabinet has been saved from the basement I can honestly say that all that procrastination on my part was worth it. I desperately needed a cabinet to store all the baking stuff and this was the best solution for it. What do you think?

More Furniture Projects:
Sometimes you just have to paint something to save it Mary. I kinda think it’s like makeup for furniture. I hardly ever wear makeup but on those days where I’ve had a rough night and I look like Medusa with shopping bags under her eyes, I’ll paint my face and slap on a hat or scarf. It doesn’t take away from who I am inside, I just don’t run the risk of frightening the children. I think you did an awesome job of rescuing your China cabinet. Now it can be re-loved and used for another 50 years at least.
Michelle you are too funny! I agree with the analogy thought. The poor cabinet was falling apart and I guess after all these years of wear and tear it needed to have a refresh. After I had put the tung oil on it it was as if I had given it a much needed face lift.
Fantastic job Mary! It’s really hard letting go of beautiful wood but sometimes you have to due to damage. Great restoration – pinned and shared.
Thank you Carol it would have pained me to no end to have to get rid of this one.
Repairing veneer is definitely NOT for sissies, and sometimes you just have to bite the bullet and grab your paintbrush. This piece was worth hanging on to. Lots of storage!
Have you considered frosting the glass? That’s a look that one sees fairly often with mid century modern furniture and it’s super easy and inexpensive to do. We did it on a couple of kitchen cabinets at the cabin and it looked better than I had imagined.
Doreen this house is so small I wanted to have just this piece in the dining room and the table set because we have a closet for a kitchen so it is very easy to accumulate clutter. In fact I moved furniture out of here to give it a bit of an airy feel.
I really like your idea about the frosting, I’ll have to look into that once things settle down.
This is a huge project Mary. What a great transformation! The idea with the decoupage is very clever!
Katerina I was desperate one day and needed a super fast solution. That is what I came up with because I was reading this book and really hating it so I gave it another purpose Haha!!
You did a great job on it Mary! The mix of white paint and the natural wood look really nice together, so I don’t think your fears were founded. I’m struggling with a piece here right now trying to decide whether to paint it all, paint some of it, or leave it alone. You’ll see more about it when finished.
I agree Florence white seems to make everything better, at least that is my current motto! Good luck on your piece I’m sure it will turn out great.
Nice job on the furniture piece! Glad you salvaged this piece!
I couldn’t part with it Maria, especially since it’s been with us since I was yay high!
Great job as usual. We missed the whole family
Thanks Thalia. This one was definitely a keeper! Hope you are well!
Even though I would have ended up paintig the compete cabinet (remembering the dark “walnut” furniture my parents used to have when I was a child, makes my flesh crawl), I must admit you did a marvellous job!
Marjan after I added the tung oil to it, it was as if I fell in love with it all over again. This oil gave it a nice shine and really made the wood grain show through. In fact I had no intention of painting it at all. But the damage made me do it!
It’s a beautiful piece of furniture, even before Mary. I love these mid century cabinets and would love to have one in my home. I like the two tone look as well and good job on saving the veneer!
Katrin I cannot speak highly enough about the tung oil, it gave a new life to the wood. The only thing I regret is not being able to save the whole piece but my skills are not there yet.
I have a cabinet something like this one and I used table runners inside the glass. Just a drop of a glue gun and stick them on. When you get the rest of the room done you might want to add some color instead of the white to make it pop in the room. Coupled with the fabric runners it makes a nice look. Just a suggestion. When the room is done you will know what you need and this is a very great start.
Diane that is such an original idea and I really like it. And you are right, I am still in the process of figuring out my style in this house. Not that I had a particular style in the old house but it is good to explore different options. We are always changing and evolving.
I’m glad that you were able to save the piece! I think it turned out really pretty! I have come to like the dark wood with a paint color, and with the white I bet it brightens up the room as well. Very clever way to hide what’s inside of the cabinet. All your struggles turned out a beautiful piece!
Linda it really brightens up this small room. When we sit at the table, because our kitchen it tiny, the whole room fills up so we don’t need anything dark in there. In fact I’m thinking of tackling the table set in the future.
You had to get creative with it Mary, it’s a shame when you can’t save all the wood or veneer, but at least you saved the doors and you can keep using it
Pili I desperately need all the storage I can get. It seems every time we go to Ikea we come back with a whole lot of baking and kitchenware stuff. This was the best solution.
Mary, I’m so glad you shared your experience. I have a mid century piece that I would love to paint, but would also love to leave some of the original wood. Thanks for the inspiration.
Laurie I’ve been looking at these pieces for months now trying to come up with the right way to paint it. When done right and not distressed they look spectacular and some are done in these beautiful dramatic colors that make the lines pop! Good luck and I’m looking forward to seeing your MCM.
Quite a challenge here plus the emotional attachment to this piece of furniture from your childhood. In some ways you were quite brave to give it a go. But I agree it was a much better choice than banishing this cabinet and drawer combo to the basement hardly ever to be seen. Your solution makes sense in the context you explained. Nice to see older walnut wood surfaces “come back to life.”
It really came to life with the tung oil Deborah and I was determined to make it work because it works for us as a great piece of storage without being in your face.
What a beautiful transformation. I love your china cabinet. It’s got a whole new life now!
Thank goodness Carol because space is really valuable around here. The house is tiny and the kitchen is practically non existent! So everything has to fit in that cabinet.
Ooooh, Mary! I love how your cabinet redo turned out!! It’s fun with the newspaper decoupaged inside the glass. 🙂 Pinned to my Decorating board.
Have a great rest of the week,
Barb 🙂
Yes Barbara, it was originally going to be a temporary solution but it seems to have grown on me. We will see what the future brings.
I hate that the project began on such a disastrous note, but it turned out pretty darn fabulous. Obsessed with those clean lines!
Erica, I too have a love for MCM and was thrilled to be able to keep this piece. Besides it has tons of storage.
Mary, what a great job. I love the creative thought you put into the transformation and the way it turned it! You must love looking at it. 🙂
I hope we have it for another 50 years Kim!
Hey Mary, that walnut wood is fabulous so glad you were able to leave some of it with out painting it. The white looks fresh and up to date. The side of the piece, was it sitting next to the air vent all these years? That might why the veneer failed.
Lorin this piece was in another room and no where near a vent. I think it was just so many years of wear and tear that did it in. It has to be about 60 years old and was not cared for properly I think. Maybe if we had applied polish or oil all these years it would not have dried out so much.
I’m glad you were able to save some of the wood on this piece. Mid-century modern furniture has such beautiful wood tones. More important I’m glad you are able to save the piece at all. Thanks for sharing the link to other site as well.
Thank you Donna. I was so relieved when I patched it up and it didn’t look so bad. All that white plaint was the perfect camouflage. Ann Marie’s blog is a treasure and so is the Navage Patch.
Really nice job Mary! I just love Mod Podge too and have been wanting to create something with book pages too. Great job and thanks for sharing on To Grandma’s House We Go!
Thank you Chas you can never go wrong with book pages in my book.
This is a lovely save Mary, the paint lightens the piece but you’ve saved the beautiful wood grain too, it’s a lovely balance. Well done.
I am so relieved to hear you say that Julie. I really wanted to retain as much of the wood as possible.
I am usually not a fan of mid century furniture. But this piece is very elegant, I love it. I can only imagine how many items you can tuck away behind those covered glass panels. It looks great Mary, and so nice to still have family pieces.
Leanna this one is just about as simple as you can get. I am so glad I was able to renew it and still retain some of the original wood. Now that we have so much storage my daughter will go out and buy more baking items. Haha!
Ann Marie is practically a furniture historian…lol love her blog! I also love the two tone effect Mary it’s just perfect for MCM… thanks for sharing your project at #fridaysfurniturefix, always a pleasure!
Thank you Brenda. Ann Marie is certainly very special and I am glad I discovered her blog years ago. And I’m also relieved to have been able to save this old thing that I love so dearly.
Well in the end it turned out nicely! You have really been busy. Thanks for sharing with SYC.
hugs,
Jann
Thank you Jann it took long enough but now all is well and the dining room looks so much better.
Mary, I think you did a wonderful job with the cabinet. It’s too bad about the veneer on the side but at least you were able to come up with a solution and it looks great. I like the white and wood combo and the book pages are a great idea.
Keri now that the dark wood is gone from the exterior the room looks twice as big as before. And because my house is small that really helps.
I just picked this up in PERFECT CONDITION at goodwill for $28! I love it so much…its nice to have an idea of something to do with it if someday it becomes…well…not so perfect. I’m in love with this piece…and $28! They had no idea how special this buffet and hutch is!!! I literally squealed with delight when I saw it there!
I have this exact piece from my grandmother! I’ve searched for information about it with no luck until now. Must be very rare. Thank you so much for sharing!