
Easy DIY Jewelry Organizer for Earrings
This easy DIY earring organizer can be made with materials you already have in your home. Display your favorite jewelry pieces in one pretty place.
This easy DIY earring holder can be made with materials you already have in your home. Display your favorite jewelry pieces and keep your earrings organized in one pretty place.

It’s September and that means it’s my turn to contribute a gift to the Handmade Christmas Gift blog hop. For those of you who are new here, I have gotten together with some blogger friends and we are making one gift per month (or at least we are trying). In this way, we will have 12 handmade gifts by the time December rolls around. In previous months I have made a pillow and a wooden heart.
As I mentioned, this month I get to make a gift and my blogger friends, and of course you all, are invited to copy it or make a variation.
What am I making? Well, because I’ve been working so hard all year I am going to make a gift for myself. After all a happy blogger is a productive blogger! I’m making an earring organizer. I originally got this idea from my friend Lauren at Bless’er House. I liked the idea of having all the jewelry hanging so that I could find the pieces, instead of having to search in a box.
Supplies Needed for this Earring Holder Idea
- wood photo frame (you can find tons of these at the thrift store)
- cardboard cut to fit in the frame
- white paint (chalk or acrylic)
- paint brush
- fabric (upcycle a piece of clothing or use scrap fabric from your sewing projects)
- large doily or lace fabric
- scissors
- hot glue gun with clear craft glue
How to Make a DIY Earring Organizer
We start out with a simple frame. I wiped it down with soap and water and let it dry.
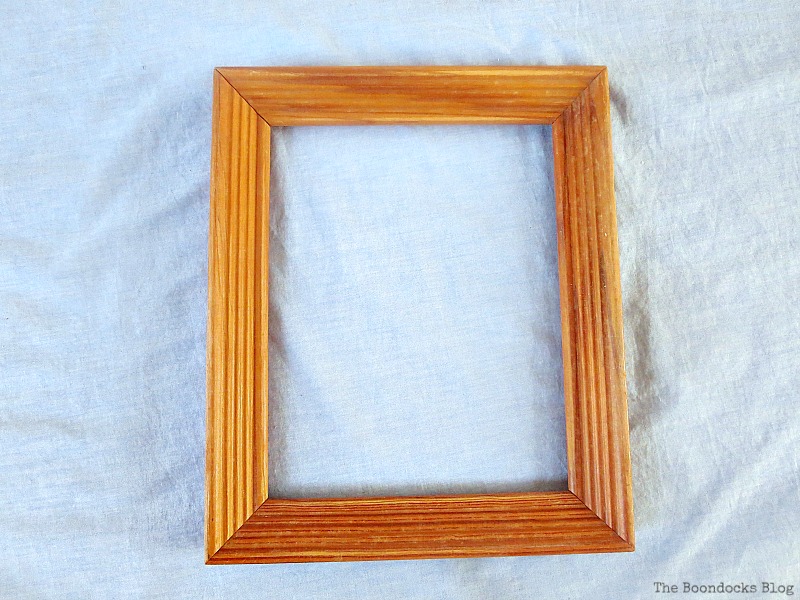
Then I took a thick piece of cardboard and cut it down so that it fit into the frame.

I painted the frame using an acrylic craft paint. When I poured the paint into a pallet, it was very thick, probably because I neglected to close the bottle properly. I could have added a bit of water to thin it out but I opted to just put it on as it was. It went on nice and thick and gave the frame instant texture. One coat was all I needed.

The next step was to repurpose this lovely satiny blouse. It was a beauty but I was lucky if I could fit one arm into it. I cut it up and glued it onto the cardboard.
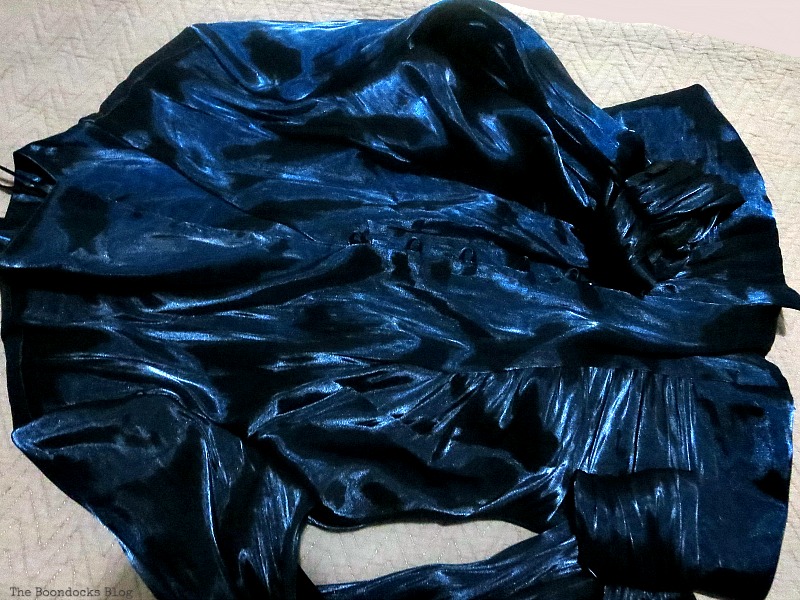
Here is where I took Lauren’s idea of the chicken wire and turned it upside down. I wanted the same idea of holes to place my earrings thru but I was not going to run to the farm anytime soon. Anyway, the chicken wire at the farm is very rusty and full of well…chicken.
Instead, I placed an old doily on top of the cardboard which was covered with the satin fabric. As you can see, this doily was not exactly symmetrical, but I liked this off center look.

Here is what the back of the cardboard looks like. I have glued the doily onto the satin but you can also sew it on.

This doily and fabric covered cardboard fits snuggly into the frame. And that is pretty much it for my DIY earring holder. I could have added some paper to cover the back, but I might decide to change out the fabric later on so I left it like that.

I hung earrings on the doily and I was done.

And here is my earring organizer in action. I can always add a staple in the back and hang it later on but for now it will sit on my dresser.


Doesn’t the frame look rustic and worn out? So much better than that orange!

I don’t have that many earrings, so I’m displaying my girls’… but now that I have a place to hang and organize my earrings I’ll have the perfect excuse to buy more.


And that is my handmade Christmas gift to myself! A DIY earring organizer. I spent no money on this storage idea and it was such an easy project to make. I think that most of us have a frame sitting around at home. And of course, if you want a more rustic look you can check out Lauren’s Rustic Industrial Jewelry Organizer with chicken wire.

As I mentioned before this is a great way to take care of many of your Christmas gifts early on. No last minute rushing, no fighting with the crowds in the store. Does that sound like a great idea or what?
What do you all thing? Is this not the best gift for anyone who is organization challenged? at least in the earring department? I think I deserve this gift, and now I can even start to look into buying some more earrings. A win-win!!
Like it? Pin it for later!
Other Jewelry Organization Projects you May Enjoy


Mary-you are so clever! I love the idea of a doily. It looks so beautiful and interesting, and is so practical for just what you need. Very fun project!
Thank you Nicki. I am so happy to be able to find the earrings now. Before I couldn’t find them to save my life.
Beautiful! I have something similar that I love. It’s a great way to store jewelry especially on an unused closet wall.
Andi it is making a world of difference to this disorganized blogger. I am slowly getting my act together and documenting it for all of you.
Excellent way to display jewelry!
Oh and the headaches it is saving me Maya!
This is so beautiful! Such a smart way to display your jewels and I love that you’ve gifted it to yourself as well :o) It’s nice to give to yourself occasionally.
I really had no other choice Stella. I like to wear earrings but cannot do that if they are always hiding.
Hello Mary,
that is a great gift for christmas!
many greetings to you
Uwe
Thank you Uwe, especially for myself.
I saw this on Facebbok and it looks great! It’s such a smart and pretty idea!
That’s why I gave it to myself! 😉
This is such a pretty way to store jewelry. I will be looking out for some lace to make one.
Excellent idea Eilis. I am really getting a lot of use out of mine.
Hi Mary: Steal your daughters earring, live a little lol. Having them displayed like that I would remember to actually wearing earrings. Lace is away’s such a beautiful feminine touch. As always you made a useful treasure out of what was on hand. Very nice.
Leanna, haha, that is exactly what I will do. And yes it does serve to remind me to wear them. But more importantly it helps me to find them without having to turn the house upside down.
This is beautiful, and I love how simple it is to do! Making it nonsymmetrical is what really gives it character – love it, and will definitely be trying it!
It is very simple it was actually a half an hour with drying time. And if you use chalk paint it should be even faster.
I love the pop of color through the doily! Wonderfully frugal idea! Thanks for sharing with us at Funtastic Friday!
Always frugal Angie, we need to get thru this crisis! If it ever ends.
This is an excellent gift and a bonus that it is so easy to put together! With Christmas being right around the corner, you my friend, will be smiling while the rest of us are scrambling! Thanks for sharing and for the inspiration!
~Laurie
I am going to wrap it up and put it under the tree (no, it’s not up yet) and then I can relax! Thank you Laurie for the feature, it is always an honor to be featured at a friend’s party.
Lovely jewelry organizer – really like the look. How can you beat the doily and white frame?
It really makes the earrings pop and thank goodness for that otherwise I’d have a hard time finding them.
Mary, what a perfect gift to yourself. I love handmade Xmas gifts it shows the love that is put into them which makes them even more special. xo
I felt it was time after all that hard work to give a gift to myself. Something that I would appreciate and use.
Good for you for treating yourself. I love when someone gives me a handmade gift. It has so much more meaning and heart.
I too love handmade gifts, there is nothing like them, just full of love.
Mary,
Great jewelry organizer! You are so creative to use what you have.
Judith
I just read somewhere today where it said what we do may sat as a necessity but turn into a labor of love.
Mary, first off, great idea, I need to start working on my Christmas gift list. It will be here before we know it. I cannot believe how quickly the year is moving! Too fast.
I really like this project, the frame looks great with the rustic paint job, but the doily steals the show! Love how it looks against the dark blue fabric. Really great background for the earrings!
It’s now a piece of art!
This year has gone by very fast. It was just yesterday that I heard about this crazy idea of making Christmas gifts for December from early on. It turns out it was a very bright idea.
Aww, thanks Nikki, I wouldn’t go as far as calling it art, but it sure keeps those earrings organized and in front of me so I don’t have to scramble.
I’ve been trying to figure out a way to organize my jewelry in a way that doesn’t mess up the look we’re going for in the bedroom – this is perfect! I can’t wait to try it. I’ve pinned this and will be featuring it on this week’s Awesome Life Friday.
Lynda thank you. I just saw this message. Thank you for the feature!
Τέλειο!!!
Ευχαριστω Ιωαννα!
A fun and handy project! 🙂
And so good for not losing my earrings! Thank you!
What a lovely idea, Mary! I adore the lace. You also have some very pretty earrings.
I’m visiting from Sew It Cook It Craft It.
~ Megin of VMG206
Thanks Megin. I really needed an easy solution to my disappearing earring problem.