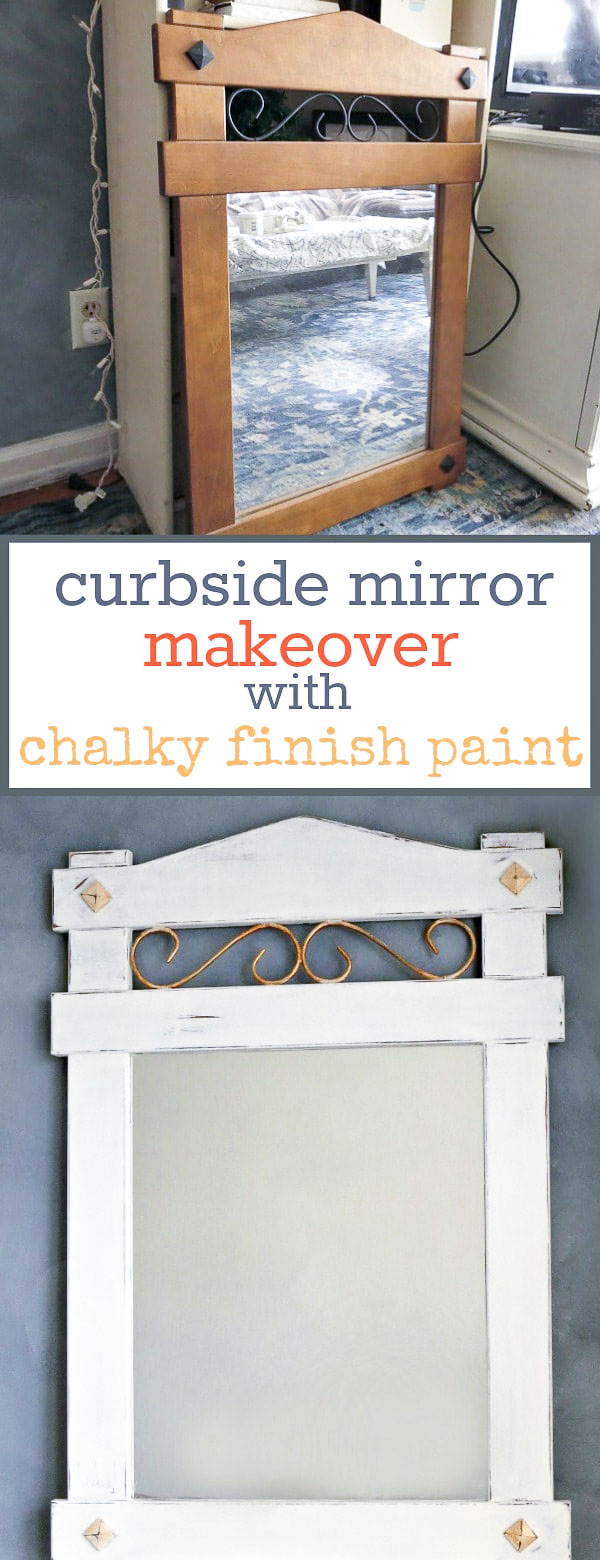
Curbside Mirror Makeover the Lazy Way
This lazy-girl’s guide to a curbside mirror makeover will leave you on the hunt for a vintage wood mirror on garbage day!

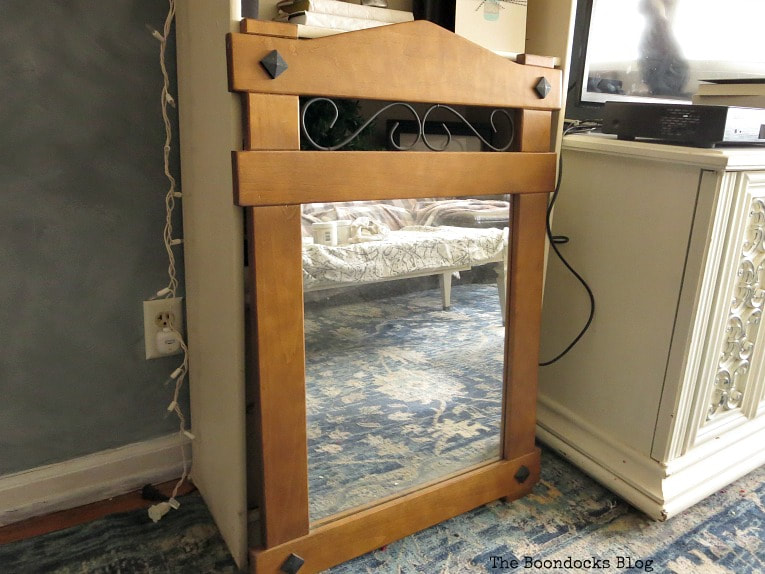
You can never have enough mirrors, right? That’s exactly what I thought when I spotted this on the curb last fall. Today I am sharing this super easy wood mirror makeover.
I thought I could paint it grey or silver and give it to my son. The one who so very kindly found another old mirror and bought it home to me. But when I asked him he said he already had a mirror and no room. But I kept it around with no idea what to do with it, even though I had no takers. I was so indecisive about what to do I just kept on shuffling it around from room to room.
And then one day while I was in the bedroom I looked at my mirror and realized just how small it was. Oh it was very pretty since the makeover, but it really was not all that great for mirroring! Is that a new verb? That was when I came to the decision to makeover the mirror for me! After all do I not deserve to have a mirror that does a proper job of mirroring?
What I Used for this Mirror Makeover:
- DecoArt Americana Chalky Finish Paint in Everlasting
- DecoArt Americana Creme Wax Finish
- Sandpaper
- Brushes
- Clean white rag for for waxing or brushes
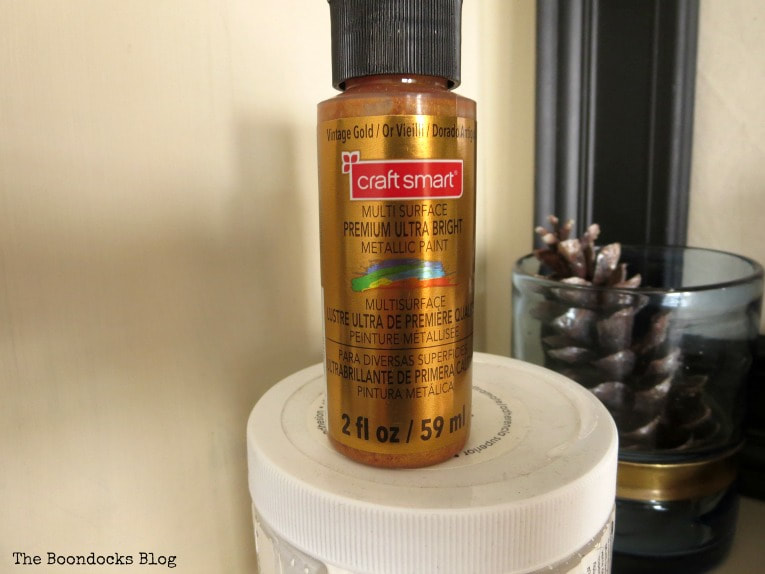
- Gold metallic paint
How To Paint a Vintage Wood Mirror:
I started off by painting it with chalky finish paint. You can use any paint that you like best. I used this one. I never make mistakes with chalky paint. It is very forgiving! Well, even if I do make mistakes it is still forgiving!
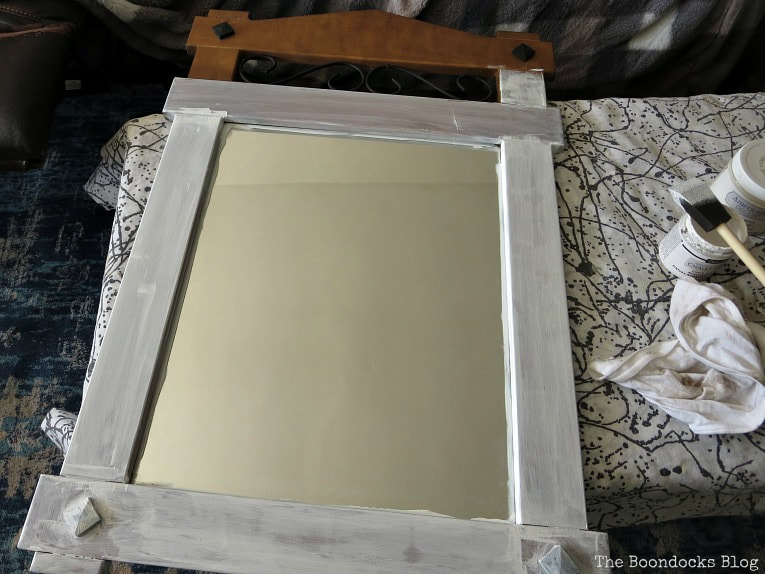
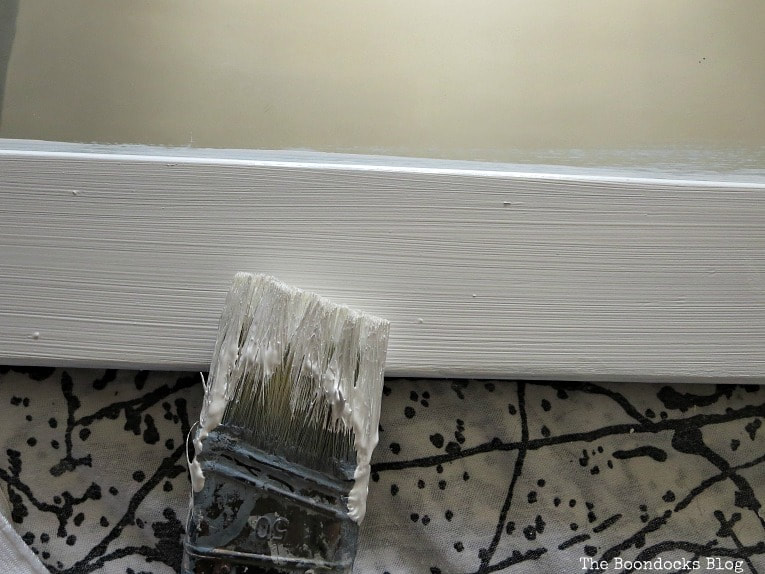
I made the mistake of using a sponge brush for my mirror makeover which left all these really awful streaks on the wood. Actually, if you want streaks then this is the way to go, but I prefer a more uniform look.
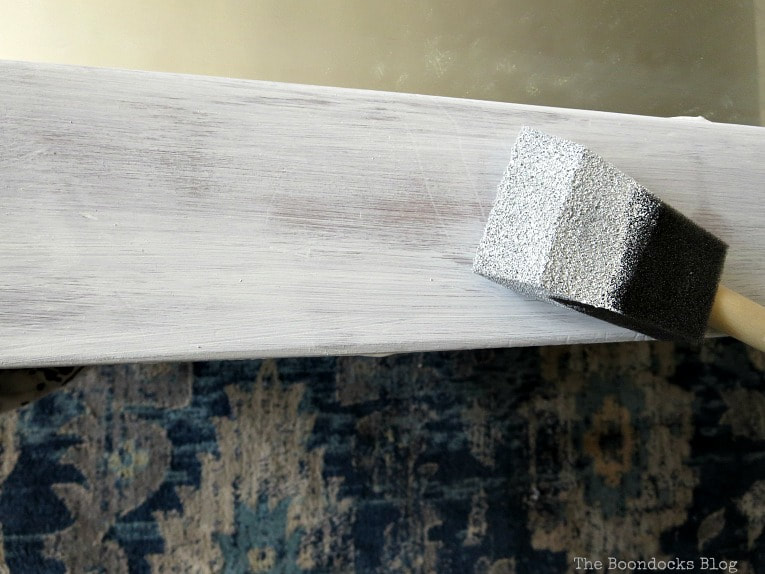
For the second coat I switched to a bristle brush which had a much nicer look. Learn from my mistakes! Once it is dry you can always sand back any excess paint.
You can see what a sloppy painter I am by the fact that I didn’t use masking tape on the edges to protect the mirror. I honestly feel that it is a waste of time. You can easily remove the paint with a razor or in my case a spatula. Lazy I tell you! I grab the first thing I see in front of me!
While painting the wood, some of the chalky finish paint went on the metal piece so I just left it. I then went over the metal using a metallic gold acrylic multi surface color that I had gotten at Michael’s Craft Store – did I mention it is my favorite store? The color is so rich, it honestly looks like brass to me.
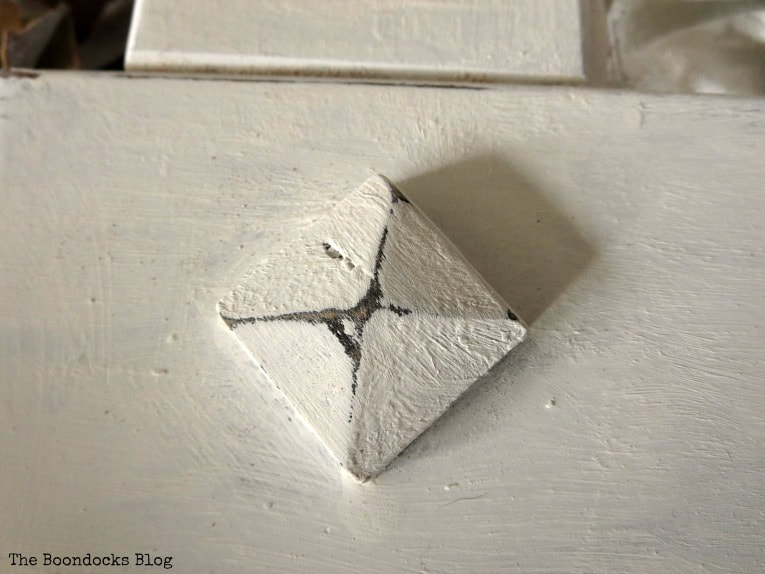
Below you can see what it looked like after a light coat of the gold paint on top of the white chalky paint. You can add as many layers as you want to get a deeper color.

These little wood embellishments were also painted and sanded over to give them a distressed look, as was the rest of the mirror.
At this point, I figured, I would try to match the mirror with the dresser already in the bedroom. Not a perfect match because the styles are different but something to make them friends.
I went back with the gold paint and lightly added some color to the embellishments.
The final step was to add wax to all the white paint to seal in all that chalky finish paint goodness. You can use one of these fancy brushes to add the wax, but as I was feeling super lazy, I used a clean white cloth.

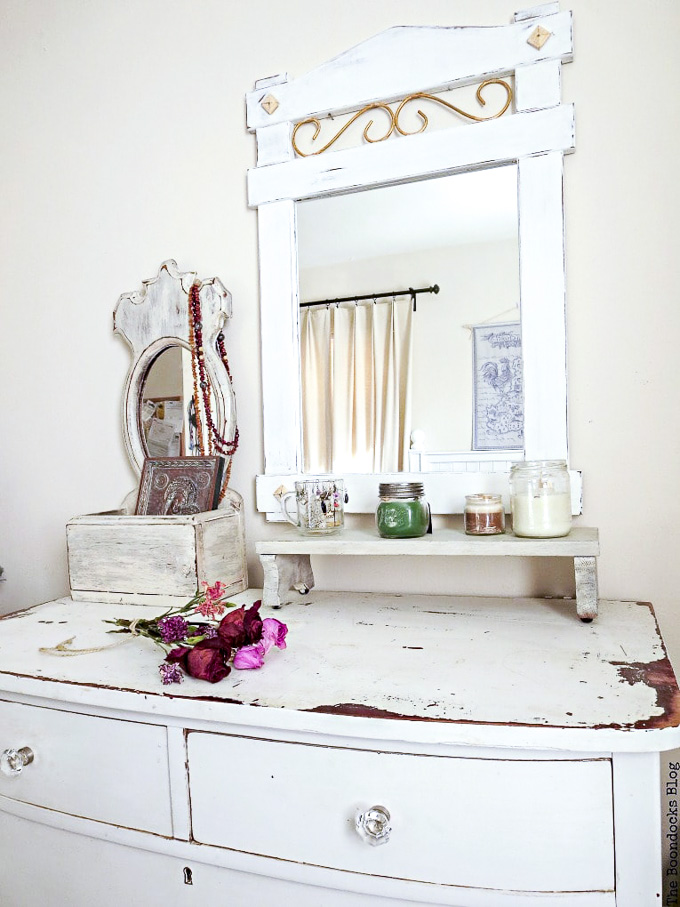
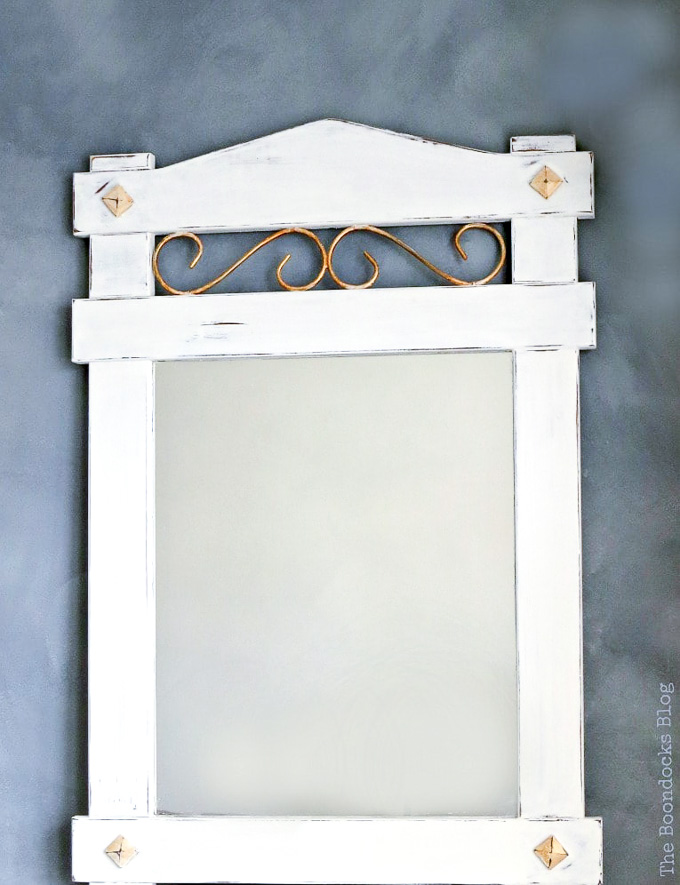
And my wood mirror makeover was done! It had just the right amount of color and white softness that I so love!
And the best part? It looks great on top of that old dresser of mine!

I may have dragged this old curbside find home with me last fall and let it sit for a spell, but it was worth the wait. I now have a mirror which actually does its job of mirroring. It has way loads more character, and it looks perfect above the farmhouse vintage dresser.
That is how you makeover a curbside find the lazy way, because let’s face it we have more important things to do. Even if I procrastinate a bit. “wink”
Do you think it was a good idea for me to replace the old oval mirror with this one?

If you really like what you see subscribe to my blog and get my adventures in your mailbox. The form is on the sidebar and on top. To see my privacy policy click here.
This blog is for entertainment purposes only; my DIY tutorials are not professional advice. Read my full disclaimer here.
I love it when I get your comments and I will try to reply to every one of them.


Lovely makeover Mary! I would have grabbed that mirror as well you did a great job on it. It looks so pretty hanging over your dresser.
We are so lucky that we can do makeovers Linda. There was absolutely nothing wrong with that mirror before and they still threw it out.
I love it Mary! It looks fabulous and you did a great job picking out just the right colors :).
I am slowly adding a bit of metallic gold into the room as an accent color and I love it.
You did such a nice job on this piece, Mary. I really like the soft gold accents. And, yes, you definitely deserve to have a good mirror for yourself!
Julie I could barely see myself in the other one, as pretty as it was! Haha!
I think I do like it more than the oval one. It adds another level of character and interest on the dresser. And the antique gold and off white work really well together. It’s showy without being a “show-off”
I had to laugh when you said grab whatever is close. I do that all the time too. Nothing frustrates me more than spending forever trying to find the “right” tool for the job. If something else works and it’s close, it’s going to be used
A DIY sister indeed. The objective is to get the job done right? Not worry about the little details.
I loved it before, but love it so much more after! What a great job you did! Just goes to show how people throw out good stuff & I’m glad you were the one to rescue it. I never thought of using a spatula to get paint off a mirror…gonna have to remember that one.
Florence you would not believe the things I see in my neighborhood. I saw a perfectly good chair the other day and didn’t take it because it was snowing. Also if I took everything in there would be no room for us. I used those spatulas that are used to apply plaster and compound on the walls.
I think that looks very nice and goes with your dresser well. Your room is shaping up very nicely, Mary.
Thank you Cath. I like to think that it is an ongoing process and a room is never really complete.
That looks great! I love giving new life to something old that would usually be thrown away.
I was so surprised when I saw it out in the street. It looked perfectly fine the way it was and made me sad to think someone would actually throw it out. But lucky for me!!
I looooove mirrors!!! I want to have as much as I can… your mirror looks gorgeous now and you know why??? Because of the golden details 🙂 Kali Sarakosti Mary mou! Hugs & kisses
Thank you so much filenada!! Kali Sarakosti kai se sena!!
I agree that you can never have enough mirrors. I think I have at least one in every room in this house. Funny considering I don’t like looking in them. Your curbside mirror is perfect above your dresser and I like how you breathed new life into it! I’m curious where you’re going to put the oval one now?
The oval one is on the floor in the living room leaning up against a piece of furniture. Tatou likes to go look at himself so for now it stays there. I am actually thinking of moving it to the foyer once I give that a makeover. It never ends!!
This is a great tutorial, not every project goes smoothly!
Amazing what a touch of glam will do for a project. Your results look perfect for their use!
That is so true, and I always like to share my mistakes with you.
Great makeover! The touches of gold really stand out against the white. Thanks for sharing!!
Thanks so much Cindy!
I really like the look of this mirror — it’s shape and just the minimal amount of metal but color and texture. You did a magnificent job!
Thank you Jeanie, I really wanted to keep things simple with just a bit of interest.
Very beautiful Mary. It’s a perfect match with the dresser and very well deserved for you and your mirroring problems!
Thank you Katerina, as much as I loved the old one this one is such a better fit.
This turned out so nice. It looks fabulous and I love it! Thank you for sharing at Celebrate It!
Thank you Cook!!
Your DIY turned out really great. I am a huge fan of reusing and keeping our waste to a minimum. You have given the mirror a new lease of life and it looks better than ever! #handmademonday
Louisa you are a kindred spirit I am so looking forward to the yard sale season starting up soon so I can go and find more stuff to give a new life to.
Beautiful redo….I love recycling items or upcycling them. I also totally LOVE roadside shopping. Great job.
Thank you Pamela. I was lucky to spot this one.
It´s look amazing! I like the combination with gold metallic. Congratulation!
Thanks Simona, I knew it needed a little something extra besides the white.
This turned out so well, Mary. It looks so lovely with your dresser. I always enjoy your tutorials and learn so much. I, also, have many projects that I drug home months ago that are still sitting in my garage waiting for their turn. 😉
I am actually almost done with my waiting to be done projects but now that yard sale season is upon us I might just go crazy again. Haha!
Great job, Mary! I think it’s a good replacement of mirror as the size of the rectangular mirror is more proportionate with your dresser and there is a bigger mirror for your use. #seniorsalon
Exactly Natalie, I can’t believe it took me so long to figure that out.
Mary, it’s just beautiful! And I love any craft with the word lazy attached. That’s just my speed!!
Haha Kim. I am becoming a convert too!
This mirror looks marvelous with the two other pieces you’ve organized it with. What a nice arrangement of makeover pieces.
Thank you Leanna. I’ve never had such a bright and light feeling bedroom before. It really makes a difference in my mood when I go in there.
It turned out so pretty Mary, what a change! I love the brass look on it too, paired with the bright white, just gorgeous! Looks great above the dresser too.
I am really happy with that brass to Katrin, it makes all the difference.
Mary,
Thanks so much for stopping by and for commenting on my latest post about blogging!! I will continue to blog but at my own pace but I now have more time since i am no longer working and awaiting my knee replacement surgery at the end of April!! I LOVE what you did to this mirror!! It looks fantastic and i also love the piece of furniture that you hung it above!! Great transformation!!
Hugs,
Deb
Thank you so much Debbie. I wish you lots of luck and quick recovery from your surgery.
Mary, I just joined your site this morning and I love, love, love your ideas! Your mirror turned out beautifully. As I was looking at some past posts, you gave me some great ideas about what to do with a couple of dressers in my bedroom. Can’t wait for better weather to go outside and start “re-doing” them!! I could go on and on about your site…I really love your frugal ideas…most often things are right in front of us, just need the imagination!
Karolyn I am so happy you have joined us here. Thank you for all your sweet words. It makes me feel happy to inspire and to continue to post projects.
Hi Mary! I know I’ve pinned your mirror before but hadn’t come over and actually read your post; I am remedying (?) that now! 😉 I like how your mirror turned out and it does look good with your distressed dresser. Perfect!
Happily pinning again for you, <3
Happy spring hugs,
Barb 🙂
Thank you so much Barbara. I only wish I had done this sooner. I can actually see myself in that mirror now.
I absolutely love mirrors AND roadside rescues so what could be more glorious than both of those combined. Mary your mirror turned out so beautifully! One again I’m amazed with your creativity.
Thank you Rachel, if only I didn’t procrastinate so much my life would be so much easier.